1
LAVATORY SHELVES
BEFORE YOU BEGIN
All information in this manual is based on the latest
product information available at the time of publication.
Kohler Co. reserves the right to make changes in product
characteristics, packaging, or availability at any time
without notice.
HOW TO USE THESE INSTRUCTIONS
Please read these instructions carefully to familiarize
yourself with the required tools, materials, and installation
sequences. Follow the sections that pertain to your
particular installation. This will aid you in avoiding the
unnecessary expense associated with improper
installation. In addition to proper installation, read all
operating and safety instructions.
INSTALLER HAZARD NOTIFICATION
ORDERING INFORMATION
Pillow Talk Lavatory Shelf . . . . . . . . . . . K-7957-AA
Portrait Lavatory Shelf . . . . . . . . . . . . . . K-2229-AA
WARNING: Risk of injury or product damage.
These products are not designed or intended for
use as a grab bar or support bar. Do not install
products in any critical support area.
WARNING: Risk of injury or product damage.
Use extreme care while working with vitreous china
products. Vitreous china can break or chip if you
overtighten screws or roughly handle the product.
TOOLS REQUIRED
MATERIALS REQUIRED
Tape measure
1/8” drill bit
1/2” drill bit
Electric drill
Pencil
Spirit level
Screwdriver
5/16” open end wrench
Latex-silicone caulk (not supplied)
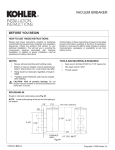
ROUGHING–IN DIMENSIONS
4-7/8”
6”
27-1/2”
K-7957–AA
2”
21-5/8”
K-2229–AA
3-3/4”
Fig. #1
112022-2-AA (A)
Copyright 1997 Kohler Co.
INSTALLATION
MARK DESIRED LOCATION
Position shelf on wall at desired location. Place spirit level
on top surface and level the shelf. See Fig. #2 .
Fig. #2
With shelf in place, mark the location of the mounting
holes with a pencil. Remove shelf from wall. See
Fig. #3 .
Fig. #3
DRILL PILOT HOLES
Drill 1/8” pilot hole at each marked location. If wall stud
is drilled, use screw and washer in place of toggle anchor
for mounting. If wall stud is not drilled, a 1/2” hole for
installation of toggle anchor is needed.
INSTALL TOGGLE ANCHOR
Fold back metal toggle flat alongside the plastic straps.
Insert metal toggle anchor into the hole. See Fig. #4 .
Metal
Toggle
Toggle Anchor
Fig. #4
Pull ring and push cap to wall and snap off straps. See
Fig. #5 .
Cap
Fig. #5
112022-2-AA (A)
2
Kohler Co., Kohler, WI
INSTALL SHELF
Place shelf over toggle anchors in desired location. Insert
bolts and washers and tighten until snug against shelf.
Discard screws. See Fig. #6 .
If toggle anchors are not used, place shelf over 1/8” pilot
holes in desired location. Insert screws and washers and
tighten until snug against shelf. Discard bolts.
Bolt
Washer
Fig. #6
SEAL SHELF TO WALL
Seal border between shelf and wall with latex-silicone
caulk. See Fig. #7 . Allow sufficient caulk drying time
before using shelf.
caulk
Fig. #7
Kohler Co., Kohler, WI
3
112022-2-AA (A)
SERVICE PARTS
6
1
2
7
3
8
5
2
7
10
4
3
8
5
4
9
K-7957–AA
9
10
K-2229–AA
SERVICE PARTS
SERVICE KITS
ITEM PART NO.
DESCRIPTION
PART NO. ITEM QTY.
DESCRIPTION
Pillow Talk Lavatory Shelf
Toggle Anchor
Flat Washer
#10-10 Slotted Hex Head Screw
.25-20 Slotted Hex Head Bolt
Portrait Lavatory Shelf
Toggle Anchor
Flat Washer
#10-24 Slotted Hex Head Screw
#10–24 Slotted Hex Head Bolt
54650
Mounting Hardware Pack
Toggle Anchor
Flat Washer
#14-10 Slotted Hex Head Screw
.25-20 Slotted Hex Head Bolt
Mounting Hardware Pack
Toggle Anchor
Flat Washer
#10-24 Slotted Hex Head Screw
#10-24 Slotted Hex Head Bolt
1
2
3
4
5
6
7
8
9
10
82558
54601
81541
81542
46027
83231
81457
81460
81458
81459
2
3
4
5
2 ea.
2 ea.
2 ea.
2 ea.
7
8
9
10
2 ea.
2 ea.
2 ea.
2 ea.
81456
Fig. #8
112022-2-AA (A)
4
Kohler Co., Kohler, WI