1
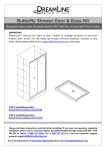
BUTTERFLY
SHOWER DOOR INSTALLATION INSTRUCTIONS
IMPORTANT
DreamLineTM reserves the right to alter, modify or redesign products at any time without
prior notice. For the latest up-to-date technical drawings, manuals or any other details
please refer to the support.BathAuthority.com web page.
Please read these instructions carefully before installing. If you have any questions
regarding installation, please call our technical support specialists Monday through Friday
9:00 AM – 5:00 PM EST at Phone: 1-866-731-2244, Fax: 1-866-227-1533 or e-mail our
technical support group at [email protected].
For more information on DreamLineTM Shower Doors please visit www.BathAuthority.com
Preparation
1. After opening all boxes and packages, read this introduction carefully. Check that all of the
needed parts are included in the package by marking all the components on the “Detailed
Diagram of Shower Door Components”. Examine boxes and packages for shipping damage. If
the unit has been damaged, has a finishing defect, or has missing parts, please contact our
customer support department within 5 business days of the delivery date. Please note that
DreamLineTM will not replace any damaged products or missing parts free of charge
after 5 business days or if the product has been installed. Feel free to contact DreamLineTM
if you have any questions.
2. Please note that you should consult your local building codes with questions on
installation compliance standards. Building and plumbing codes may vary by location,
and DreamLine is not responsible for code compliance standards for your project and
will not accept any returns.
3. Prior to the installation, please ensure that the installation surface is level and solid and will be
able to support the total weight of the unit. Also make sure that the walls are plumb.
Depending on the type of unit you are installing, some adjustments in leveling may be possible.
However, irregular installation, surface level or out of square conditions can result in serious
problems for your installation. Please note that some adjustments and drilling may be
necessary. Please protect all primary surfaces of the product during installation. Never set your
glass down directly onto a tile floor. Always use a piece of wood or cardboard to protect the
bottom edge and corners of the glass.
4. Please, NOTE! This door has 3/4” width or out-of-plumb adjustment in wall profile on
each side.
Tools Required
Caulk
Tape
Measure
Caulk
Gun
Level
“BUTTERFLY” Rev.2 Ver.1
Pencil
04/2013
Phillips
Screwdriver
Electric
Drill
Drill bit
(Ø=5/16")
Hammer
Drill bit
(Ø=1/8")
Knife
2
Detailed Diagrams of Shower Door Components
8
11
1
2
10
9
12
3
7
3
4
13
5
6
14
15
A
B
16
B
17
A
18
19
Packing List
01
02
03
04
05
06
07
08
09
10
Wall profile
Glass profile
Guide rail
Glass door A
Glass door B
Wall anchor
Round head screw ST4.2×10
Big flat head screw ST4.2×12
Big flat head screw ST4.2×40
Decorative cover
2pc
2pc
2pc
2pcs
2pcs
8pcs
4pcs
8pcs
16pcs
4pcs
11
12
13
14
15
16
17
18
19
Middle hinge
Roller(top & bottom)
Hinge(top & bottom)
Seal strip (pre-installed on part # 3)
Side anti-water strip
Roller stopper
Handle
Hex wrench(3mm/4mm)
Magnetic strip
4pcs
2set
2set
2pcs
2pc
4pcs
2set
1set
2pcs
NOTE: Unpack your unit carefully and inspect it. Lay it out and identify all parts using parts
diagram and part list in your manual as a reference. Before discarding the carton, check for small
hardware bags that tend to fall to the bottom of the box. If any parts are damaged or missing,
please contact DreamLineTM for replacement.
NOTE: Retain these installation instructions for future reference.
“BUTTERFLY” Rev.2 Ver.1
04/2013
3
Shower Door Installation
1.
Place the Glass door A (04) and the Glass door B (05) on a
flat surface. The distances from the glass edge to the paired
holes on both sides of the glass doors are different. The side of
each Glass door where the paired holes are closer to the edges
should be facing each other.
See Fig. 1 for details.
Fig. 1
2. Attach the top and the bottom Hinges (13) to the left edge
of the Glass door A (04). Mind the position of the Hinges
on the glass.
3/4”
1
See Fig. 2 and Fig. 5 for details.
2
Fig. 2
“BUTTERFLY” Rev.2 Ver.1
04/2013
4
3.
Attach the top and the bottom Rollers (12) to the right edge of
the Glass door B (05). Mind the position of the Rollers on the
glass.
3/4”
1
See Fig. 3 and Fig. 5 for details.
2
Fig. 3
4.
Connect the Glass door A (04) to the Glass
door B (05) using the top and the bottom
Middle hinges (11). Mind the position of the
Middle hinges on the glass.
1
3
2
4
See Fig. 4 and Fig. 5 for details.
Fig. 4
“BUTTERFLY” Rev.2 Ver.1
04/2013
5
Door assembly 1
Fig. 5
5.
Place another Glass door B (05) and another Glass door A
(04) on a flat surface. The distances from the glass edge to the
paired holes on both sides of the Glass door are different. The
side of each Glass door where the paired holes are closer to
the edges should be facing each other.
See Fig. 6 for details.
Fig. 6
“BUTTERFLY” Rev.2 Ver.1
04/2013
6
6.
Attach the top and the bottom Rollers (12) to the left
edge of another Glass door B (05). Mind the position of
the rollers on the glass.
3/4”
1
See Fig. 7 and Fig. 10 for details.
2
Fig. 7
7.
Attach the top and the bottom Hinges (13) to the right
edge of another Glass door A (04). Mind the position of the
rollers on the glass.
3/4”
1
See Fig. 8 and Fig. 10 for details.
2
Fig. 8
“BUTTERFLY” Rev.2 Ver.1
04/2013
7
8.
Connect another Glass door B (05) to another
Glass door A (04) using the top and the bottom
Middle hinges (11). Mind the position of the
Middle hinges on the glass.
1
3
2
4
See Fig. 9 and Fig. 10 for details.
Fig. 9
Door assembly 2
Fig. 10
“BUTTERFLY” Rev.2 Ver.1
04/2013
8
9.
Locate the Guide rails (03) and the Glass profile (02).
Connect the left end of the Guide rails to the Glass profile
using the Big flat head screws ST4.2×40 (09).
See Fig. 11 for details.
NOTICE:
Make sure that the Seal strip flange on the Glass profile,
pointing inside the Shower.
1
2
Fig. 11
10. Slide the pre-installed Door assembly 1 (that
showing on Fig. 5) into the channel of the Guide rails
(03) from the right side.
1
3
See Fig. 12 and Fig. 13 for details.
2
4
Fig. 12
“BUTTERFLY” Rev.2 Ver.1
04/2013
9
11. Secure the Hinges (13) inside the Guide rails (03)
using the Big flat head screw ST4.2×12(08).
See Fig. 13 for details.
1
2
Fig. 13
12. Slide the pre-installed Door assembly 2 (that
showing on Fig. 10) into the channel of the Guide
rails (03) from the right side.
1
3
See Fig. 14 and Fig. 15 for details.
2
4
Fig. 14
“BUTTERFLY” Rev.2 Ver.1
04/2013
10
Fig. 15
13. Attach another Glass profile (02) at the right side of the door
unit and fasten it to the Guide rails (03) with the Big flat head
screw ST4.2×40 (09).
1
See Fig. 16 and Fig. 18 for details.
NOTIC:
Make sure that the Seal strip flange on the Glass profile is
pointing inside the Shower.
2
Fig. 16
“BUTTERFLY” Rev.2 Ver.1
04/2013
11
14. Secure the right Hinges (13) inside the Guide rails (03) using
the Big flat head screw ST4.2×12 (08).
1
See Fig. 17 and Fig. 18 for details.
2
Fig. 17
Fig. 18
“BUTTERFLY” Rev.2 Ver.1
04/2013
12
15. Attach the Roller stoppers (16) inside the top
and the bottom Guide rails (03) with the Big
flat head screw ST4.2×12 (08).
1
3
2
4
See Fig. 19 for details.
Fig. 19
16. Install the Shower base according to the Shower base
installation manual.
See Fig. 20 for details.
Fig. 20
“BUTTERFLY” Rev.2 Ver.1
04/2013
13
17. Push the Wall profiles (01) over the Glass profiles (02) on both
sides. Be sure to keep the flanges with predrilled holes inside the
shower.
1
See Fig. 21 and Fig. 22 for details.
2
Fig. 21
Fig. 22
“BUTTERFLY” Rev.2 Ver.1
04/2013
14
18. Move the assembled Door unit on the Shower base
and butt up the Wall profiles (01) against the walls.
Level the Door unit vertically. You can adjust position
of the Door unit by slightly pulling the Glass profiles
(02) out of the Wall profiles.
See Fig. 23 for details.
Fig. 23
19. Trace the drilling holes on the wall through the predrilled
hole in the Wall profiles (01).
Move the Door unit aside. Drill the holes on the wall using
Ø 5/16 drill bit and insert the Wall anchors (06).
Apply a bead of silicone on the wall along the drilled holes
and around the holes.
Apply a bead of silicone on the shower base along the
bottom Guide rail (03).
Place the assembled Door unit back to the designated
position on the Shower base.
Fasten the Wall profiles to the wall with the Big flat head
screw ST4.2×40 (09).
See Fig. 24 for details.
1
4
2
5
3
6
Ø 5/16”
Fig. 24
“BUTTERFLY” Rev.2 Ver.1
04/2013
15
20. Make final adjustment if required. Drill the
holes through the first layer into the Wall
profiles (01) and the Glass profiles (02) using
Ø 1/8 drill bit.
Secure the Wall profiles and the Glass profiles
with the Round head screws ST4.2×10 (07).
Cover the screw heads with the Decorative
Covers (10).
See Fig. 25 for details.
1
3
2
4
Ø 1/8”
Fig. 25
1
21. Adjust the Rollers (12) by tighten the bolts to make the
door slide smoothly.
See Fig. 26 for details.
2
Fig. 26
“BUTTERFLY” Rev.2 Ver.1
04/2013
16
22. Mount the Handles (17) onto the both Glass doors B (05).
Cover the screw holes on the Handles with the provided
decorative caps.
1
See Fig. 27 for details.
2
Fig. 27
23. Open the door and attach Side anti-water strips
(15) to both vertical edges of the Glass doors. The
strip flange should point away from the shower
faucet.
Attach Magnetic strips (19) to both vertical edges
of the Glass doors B (05).
See Fig. 28 for details.
1
3
2
4
Fig. 28
“BUTTERFLY” Rev.2 Ver.1
04/2013
17
24. Apply the silicone along the Wall profiles (01), as
well as along the Guide rail (03).
See Fig. 29 for details.
Caulk
Fig. 29
Maintenance
To insure long lasting life for your acrylic back walls, wipe them off after each use with a
soft cloth. To clean the acrylic back walls use non-abrasive sprays or cream based cleaners.
Never use abrasive cleansers, metal brushes or scrapers that could scratch or dull the
surface.
To insure long lasting life for your glass shower products, wipe them off after each use with
a soft cloth. Rinse and wipe of the glass using either soft cloth or squeegee to prevent soap
buildup. Never use abrasive cleaners and cleaning products that contain scoring agent
because this may scratch the surface. Never use bristle brushes or abrasive sponges.
To assure a long lasting finish wipe off the metal parts after each use with a soft cloth. Do
not use abrasive cleaners or cleaning products containing ammonia, bleach or acid. If
accidentally used, rinse the surface as soon as possible to prevent finish peeling or
corrosion. After cleaning the shiny finishes, rinse thoroughly and wipe dry with soft
cloth. Clean stainless steel surfaces at least once a week. When applying stainless steel
cleaner or polish, work with (not across) the grain. Never use abrasive sponge or cloth,
steel wool or wired brushes.
“BUTTERFLY” Rev.2 Ver.1
04/2013
18
DREAMLINE™ EXCLUSIVE LIMITED WARRANTY AS OF MAY 6, 2013 This warranty extends only to the original owner/end‐user for household use only and is not transferable to a subsequent owner. This warranty extends for a designated period of time, so long as it remains in use in its original place of installation. This warranty applies only to DreamLine products purchased from an authorized dealer in United States or Canada. Proof of purchase (original sales receipt) from the original consumer purchase must be provided with all warranty claims. IN NO EVENT SHALL THE LIABILITY OF DREAMLINE EXCEED THE PURCHASE PRICE OF THE UNIT. DreamLine products must be installed by a fully insured and licensed professional. Installation of DreamLine product by anyone other than fully insured licensed professionals shall VOID THE WARRANTY. DreamLine recommends that such licensed professionals have experience in the installation of bathroom products. Installation of certain products, including, without limitation, glass products (i.e., shower and tub doors) by an inexperienced installer may result in glass breakage and, consequently, cause personal injury or death. PARTS ONLY WARRANTY This warranty is extensive in that it covers replacement of all defects. LABOR CHARGES AND/OR DAMAGE INCURRED IN INSTALLATION, REPAIR, OR REPLACEMENT, AS WELL AS ANY OTHER KIND OF LOSS OR DAMAGE ARE EXCLUDED COMMERCIAL USE AND OTHER EXCLUSIONS This warranty excludes all industrial, commercial and business usage, whose purchasers are hereby extended a one (1) year limited warranty from the date of purchase for shower and tub doors, a three (3) month limited warranty from the date of purchase for vanities and sinks, with all other terms of this warranty applying except the duration of the warranty. DREAMLINE JETTED AND STEAM SHOWER CABINS, DREAMLINE SHOWER COLUMNS AND DREAMLINE SHOWER SEATS ARE NOT INTENDED FOR COMMERCIAL USE AND THERE IS NO WARRANTY EXTENDED FOR THESE PRODUCTS FOR COMMERCIAL USE. DreamLine hereby disclaims all warranties for products sold as dealer or store displays. DreamLine hereby disclaims all warranties for products used outside of the United States or Canada whether expressed or implied, including but not limited to the implied warranties of merchantability and fitness for a particular purpose. WARRANTY TERMS DreamLine will, at its election, repair or replace the product found by DreamLine in its sole judgment, to be defective within the warranty period under normal residential use and maintenance. The replacement of a product is limited to supplying a replacement product or part (same as existing or if not available, comparable product). DreamLine warranty obligation shall be discharged upon tender of parts, replacement or repair of the product. Purchaser’s refusal to accept the tender terminates all warranty obligations and VOIDS THE WARRANTY. Cost of freight for returning products to DreamLine for repairs or replacement under this limited warranty are the responsibility of the customer. Cost of freight associated with shipping of replacement product or parts to the customer may be charged to customer. Any product replaced or repaired during the warranty period will be covered only for the remaining period of the original warranty. In no event will DreamLine be liable for costs of repair or replacement of any installation material, including but not limited to tiles, marble, etc. DREAMLINE IS NOT RESPONSIBLE FOR INSTALLATION, REMOVAL OR REINSTALLATION COSTS OF ANY PRODUCT REQUIRING WARRANTY SERVICES. Any modification or alteration of any DreamLine products will void the warranty. DreamLine product installations and repairs must be performed by either a DreamLine authorized agent or a licensed, insured and experienced professional contractor ‐ installation or repairs performed by any other party shall void the warranty. This warranty shall not apply to breakage or damages caused by normal wear and tear, fault, carelessness, abuse, misuse, misapplication, improper maintenance, alteration or modification of the unit, as well as chemical or natural corrosion, accident, fire, flood, act of God or any other casualty. Improper care and cleaning will void the warranty. Use of cleaners containing abrasive cleansers, ammonia, bleach, acids, waxes, alcohol, solvents or other products not recommended for chrome or similar finish, glass or acrylic will void the warranty. For additional product maintenance instructions please refer to product installation manual. DreamLine is not responsible for any issues arising in connection with errors or omissions in information provided on DreamLine’s websites. The warranty does not extend to any non‐DreamLine plumbing or components installed by installers, end users or by any party other than DreamLine. THE FOREGOING WARRANTIES ARE IN LIEU OF ALL OTHER WARRANTIES, EXPRESSED OR IMPLIED, INCLUDING BUT NOT LIMITED TO THE IMPLIED WARRANTIES OF MERCHANTABILITY AND FITNESS FOR A PARTICULAR PURPOSE. BATH AUTHORITY LLC (“DREAMLINE”) AND/OR SELLER DISCLAIMS ALL LIABILITY FOR SPECIAL, INCIDENTAL OR CONSEQUENTIAL DAMAGES. DREAMLINE IS NOT LIABLE FOR PERSONAL INJURIES OR DEATH TO ANY PERSON OR FOR ANY DIRECT, SPECIAL, INCIDENTAL OR CONSEQUENTIAL DAMAGE, LOSS OF USE, LOSS OF TIME, LOSS OF PROFITS, INCONVENIENCE, INCIDENTAL EXPENSES, LABOR OR MATERIAL CHARGES, OR ANY OTHER COSTS RESULTING FROM THE USE OF ITS PRODUCTS OR PERTAINING TO THE APPLICATION OF THE PRESENT WARRANTY, OR RESULTING FROM THE REMOVAL OR REPLACEMENT OF ANY PRODUCT OR ELEMENT OR PART COVERED BY THIS WARRANTY. PRODUCT WARRANTY PERIODS DreamLine is not responsible for product code compliance or for verifying building code restrictions on installation or use and any such compliance is excluded from this warranty. DreamLine reserves the right to modify this warranty at any time ‐ such warranty modifications will not alter the warranty applicable at the time of sale of the products in question. The warranty terms for specific products for consumer (non‐industrial, non‐commercial, non‐business use only) are: SHOWER BACKWALL, SHOWER CABINS (JETTED & STEAM) DreamLine warrants shower backwalls and shower cabins to be free from defects in workmanship for a period of one (1) year from initial date of purchase by the owner/end‐user, contractor or builder from an authorized dealer. SHOWER & TUB DOORS, SHOWER ENCLOSURES DreamLine warrants shower doors, tub doors and shower enclosures to be free from defects in workmanship and materials under normal residential use for a period of five (5) years from the initial date of purchase by the owner/end‐user, contractor or builder from an authorized dealer. Warranty for plastic strips shall be limited to one (1) year. Warranty for any part in Oil Rubbed Bronze finish shall be limited to one (1) year. SHOWER BASES DreamLine warrants shower bases to be free from defects in workmanship and materials under normal residential use for as long as the original consumer purchaser owns their home in which their product is installed. SHOWER COLUMNS DreamLine warrants shower columns to be free from defects in workmanship and materials under normal residential use for a period of one (1) year from the initial date of purchase by the owner/end‐user, contractor or builder from an authorized dealer. SHOWER SEATS DreamLine warrants shower seats to be free from defects in workmanship and materials under normal residential use for a period of one (1) year from the initial date of purchase by the owner/end‐user, contractor or builder from an authorized dealer. Warranty shall be VOID if the shower seat is not professionally installed on a properly reinforced wall. VANITIES AND VESSEL SINKS DreamLine warrants bathroom vanities and vessel sinks to be free from defects in workmanship and materials under normal residential use for a period of one (1) year from the initial date of purchase by the owner/end‐user, contractor or builder from an authorized dealer. STATE LAWS AND THIS WARRANTY Some states/provinces do not allow limitations on how long an implied warranty lasts, or the exclusion or limitation of special, incidental or consequential damages, so these limitations and exclusions may not apply to you. This warranty gives you specific legal rights. You may also have other rights, which vary from state/province to state/province. WARRANTY SERVICE The following information will be required for you to file a Warranty claim: 1. Your name, address and telephone number 2. Product model number 3. Brief description of problem (please note that additional information such a photos may be required to fully process your warranty claim) 4. Proof of purchase You may submit this information by e‐mail, mail or fax to: DreamLine Warranty Service Center 75 Hawk Road Warminster, PA 18974 F:1‐866‐857‐3638 T:1‐866‐731‐2244 [email protected] TEL: 866-731-2244
FAX: 866-227-1533
WWW.BATHAUTHORITY.COM
For more information on DreamLineTM Shower Doors please visit www.BathAuthority.com