1
FAUCET SPECIFICATIONS
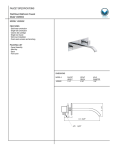
Vessel Bathroom Faucet
Model VG03025
MODEL VG03025
FEATURES
Solid brass construction
Single hole construction
Ceramic disk cartridge
Single lever faucet
Standard plumbing connections
Finish resist corrosion and tarnishing
PACKING LIST
Faucet Assembly
Brass ring
Rubber washer
Two Metal braided hoses
Nut
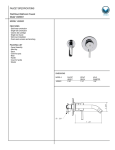
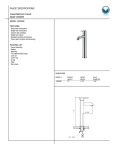
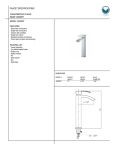
DIMENSIONS
VG03025
FAUCET
HEIGHT
12 1/2"
SPOUT
REACH
5"
12 1/2"
MODEL #
HOLE
DIAMETER
1 3/8"
5"
4 1/8"
9 1/2"
12 1/2"
5"
1 3/4"
2"
FRONT VIEW
1 1/4"
SIDE VIEW
6 5/8"
TOP VIEW
VG03025
THE MEASUREMENTS IN INCHES ARE ROUNDED TO THE NEAREST 1/8"
2
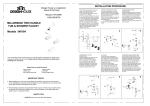
PACKAGE CONTENTS
ASSEMBLY
METAL WASHER
RUBBER WASHER
NUT
TWO
FLEXIBLE
HOSE
1
1. SHUT OFF WATER SUPPLY.
REMOVE OLD FAUCET AND
FLEXIBLE HOSES. CLEAN
SINK SURFACE IN
PREPARATION FOR THE NEW
FAUCET. FLUSH WATER
CONNECTION AT HOME TO
MAKE SURE NO DEBRIS IS
STUCK IN THE LINE.
FAUCET
MAINTENANCE
Your new faucet is designed for years of trouble-free performance.
Keep it looking new by cleaning it periodically with a soft cloth. Avoid abrasive
cleaners, steel wool and harsh chemicals as these will scratch, dull, and/or damage
the finish and/or product void your warranty.
2. CONNECT FLEXIBLE
HOSES TO THE BRASS PIPES.
2
REQUIRED TOOLS
Adjustable wrench
Groove joint pliers
Plumber's putty
Pipe tape
Flat screwdriver
SAFETY TIPS
Be sure to shut off water supply prior to installation.
Protect your eyes with safety glasses when cutting or soldering water
supply lines
Cover your drain to avoid losing parts.
3. PLACE NEW FAUCET IN
THE POSITION ON THE SINK.
FROM UNDER THE SINK, PUT
RUBBER WASHER, METAL
WASHER AND THREAD NUT
ONTO THE PIN. TIGHTEN NUT.
IMPORTANT POINTS
Prior to beginning installation, turn off the cold and hot water lines and open the hot
and cold knobs on the old faucet to release build-up pressure.
When installing your new faucet, turn the connector nuts finger-tight, then use one
wrench to anchor the fitting and a second wrench to tighten the nut one additional
turn. Connections that are too tight will reduce the integrity of the system.
Wrap all threaded connections with Teflon tape available at your local hardware or
plumbing supply store. Always wrap in a clockwise direction.
All installations can vary depending on how your previous faucet was installed. Not
all necessary supplies to install your faucet are included, however, they are
available wherever plumbing supplies are sold.
3
4. CONNECT FLEXIBLE
HOSES TO THE COLD AND
HOT WATER SUPPLY.
4
INSTALLATION
Installation must be done by a qualified licensed plumber.
Prior to installation please read the instructions thoroughly, confirm that all
parts are included and visually inspect the unit for any defects.
If you have any questions please contact the Vigo Technical Support
Department before proceeding with installation.
5. AFTER INSTALLATION IS COMPLETE TURN ON
THE WATER SUPPLY VALVES AND ALLOW BOTH
HOT AND COLD WATER TO RUN AT LEAST ONE
MINUTE EACH. WHILE WATER IS RUNNING,
CHECK FOR LEAKS, ESPECIALLY AT HOOK-UPS
TO SUPPLY LINES. TIGHTENING NUTS SLIGHTLY
WILL STOP ANY MINOR LEAKS.
3
TROUBLESHOOTING
PROBLEM
POTENTIAL CAUSE
1 - Leaks from handle
2 - Insufficient flow rate
1.B - Contact Vigo Technical Support for replacement.
2.A - Dirty aerator
2.B - Clog in supply hose / line
2.C - Clog in copper supply pins
3 - Leak at connection points
4 - Loose faucet body
5 - Loose handle
CORRECTIVE ACTION
1.A - Remove cartridge from housing, wash thoroughly with hot
water and reseat in housing.
1.A - Cartridge unseated
1.B - Cartridge defective
2.A - Remove aerator and soak / clean with a non abrasive
agent (i.e. half hot water and half vinegar).
2.B - Remove supply lines and flush lines.
3.A - Flexible hose leaking at connection point
3.B - Washer defective
4. - Mounting hardware became loose
5. - Set screw has become loose
2.C - Remove copper pins and flush/clean out.
3.A - Tighten hoses. If this does not resolve the issue, remove
the flexible hose and rethread, checking to make sure the
connection is secure. Make sure to use pipe tape.
3.B - Remove supply line and check the status of the washer. If
torn, washer must be replaced for a secure, non-leaking
connection.
4. - From under the counter, use an adjustable wrench and
tighten the mounting hardware. Make sure the faucet is
perpendicular to the counter.
5. - Take off hot/cold cover on handle. This will give you access
to the screw that connects the handle to the cartridge. Using
either an allen key or a flat head screw driver, tighten the screw
so handle has firm connection to cartridge.
PARTS LIST - For any parts needed but not shown, please contact Vigo Technical Support
PART
PART #
FINISH
Handle
Handle Set Screw
Handle Escusion
Cartridge
Cartridge Nut
Metal Ring
Nut
Supply Hose
68086
68031W
68047W
64002W
68048W
64015W
68045W
74020
CH, BN, ARB
CH, BN, ARB
-
SUPPLY DATE INDICATOR (INTERNAL USE ONLY)
W
W
W
W
W
W
W
W
TOLL FREE: (866) 591 - 7792
E-Mail: [email protected]
www.vigoindustries.com
NSF / ANSI 61
4
VIGO INDUSTRIES, LLC ("VIGO")
FAUCET LIMITED LIFETIME WARRANTY
EFFECTIVE APRIL 1, 2013
VIGO offers the following limited warranty on each of its Faucet products (the "Product") and the components thereof. This warranty extends only to the original owner
for personal household use. For commercial uses, additional limitations apply.
VIGO warrants the structure of the Product to be free from defects in workmanship and materials under normal use and service for the period commencing from the
initial date of purchase by the owner, contractor, or builder, from VIGO or an authorized VIGO dealer, through the lifetime of the original owner or end-user.
VIGO warrants the cartridge component of the Product to be free from defects in workmanship and materials under normal use and service for a period of five (5) years
from the initial date of purchase by the owner, contractor, or builder, from VIGO or an authorized VIGO dealer.
VIGO warrants the spray assembly and other mechanical components of the Product to be free from defects in workmanship and materials under normal use and
service for a period of one (1) year from the initial date of purchase by the owner, contractor, or builder, from VIGO or an authorized VIGO dealer.
Subject to the Warranty Service provision below, any product reported to the authorized dealer or to VIGO as being defective within the warranty period will be repaired
or replaced (with a product of equal value) at the option of VIGO. This warranty extends to the original owner and is not transferable to a subsequent owner.
Neither the distributor, authorized VIGO dealer, nor any other person has been authorized to make any affirmation, representation, or warranty other than those
contained in this warranty. Any affirmation, representation, or warranty other than those contained in this warranty shall not be enforceable against VIGO or any other
person.
VIGO reserves the right to modify this warranty at any time, it being understood that such modifications will not alter the warranty conditions applicable at the time of
sale of the products in question.
Limitations
This warranty shall not apply to instances of incorrect operating procedures, breakages, or damages caused by fault through improper installation, carelessness, abuse,
misuse, misapplication, improper maintenance, or alteration of the Product, as well as chemical or natural corrosion, accident, fire, flood, an act of God, or any other
casualty. Avoid abrasive cleaners, steel wools, and harsh chemicals as these will scratch, damage, and / or dull the product and / or finish and void this warranty. The
owner of the Product covered by the present warranty is entirely responsible for its proper installation and any applicable plumbing or electrical wiring. VIGO neither
installs nor supervises the installation nor hires a contractor for this purpose; consequently, VIGO cannot be held responsible for any default, breakage, or damages
caused thereby or resulting thereof, either directly or indirectly.
The owner must provide access to the components of the Product as described in the installation guide so that VIGO can execute the warranty specified herein. If such
access is not available, all expenses to provide said access will be the responsibility of the owner.
This warranty does not apply to Products that have not been installed or operated in accordance with instructions supplied by VIGO and all applicable rules, regulations,
and legislation pertaining to such installations.
This warranty does not apply unless the VIGO Product is installed by fully insured licensed professionals. Vigo strongly recommends that such licensed professionals
have experience in the installation of bathroom and kitchen products. [Installation of certain products, including without limitation glass products (i.e., shower doors and
glass sinks) by an inexperienced person may result in product failure including, but not limited to, glass breakage which could result in personal injury or death.]
VIGO is not liable for personal injuries or deaths to any persons or for any direct, special, incidental, or consequential damage, loss of time, loss of profits,
inconvenience, incidental expenses, labor or material charges, or any other costs resulting from the use of the product or equipment or pertaining to the application of
the present warranty, or resulting from the removal or replacement of any product or element or part covered by this warranty.
EXCEPT AS OTHERWISE PROVIDED ABOVE, VIGO MAKES NO WARRANTIES, EXPRESSED OR IMPLIED, INCLUDING WARRANTIES OF MERCHANTABILITY
AND FITNESS FOR A PARTICULAR PURPOSE OR COMPLIANCE WITH ANY CODE.
In any case, VIGO cannot be held liable for any amount over and above the purchase price paid for the Product by the owner/end-user, contractor, or builder.
Commercial Limitations
In addition to the above conditions and limitations, the warranty period for products installed for commercial applications or used in commercial ventures is one (1) year
from the initial date of purchase by the owner, contractor, or builder from an authorized dealer. VIGO is not responsible for loss of use or profit under any circumstances.
If the product is used as a display, the warranty period begins from the date of purchase. This warranty gives the owner specific legal rights. The owner may also have
other rights which can vary from one state or province to another.
Warranty Service
In order to obtain service provided under this warranty during regular business hours, contact the dealer or distributor who sold the unit, or contact VIGO directly. VIGO
will provide the warranty service described above when the following conditions have been met: the failure is of the nature or type covered by the warranty; the user has
informed an authorized VIGO Agent or VIGO's warranty service department representative of the nature of the problem during the warranty period; conclusive evidence
(e.g., proof of purchase or installation) is provided to the foregoing by the user proving that the failure occurred or was discovered within the warranty period; an
authorized independent service person or company representative has been permitted to inspect the product during regular business hours within a reasonable time
after the problem was reported by the user. Vigo's warranty obligation shall be discharged upon tender of replacement or repair. The customer's refusal to accept the
tender terminates VIGO's warranty obligations.
Certification may be ended by VIGO or certification agencies without notice.
5
Robinet de salle de bain pour vasque
Raccords de plomberie standard
LISTE DES ARTICLES
Ensemble de robinet
Anneau en laiton
Rondelle en caoutchouc
DIMENSIONS
12 5/8"
VG03025
HAUTEUR
DU ROBINET
12 1/2"
DU JET
5"
DE L'ORIFICE
1 3/8"
5"
4 1/8"
9 1/2"
12 1/2"
5"
1 3/4"
1 1/4"
2"
VUE DE FACE
6 5/8"
VUE DE DESSUS
VG03025
2
CONTENU DE L'EMBALLAGE
ASSEMBLAGE
1
RONDELLE EN
CAOUTCHOUC
DEUX
FLEXIBLES
ROBINET
RETIREZ L'ANCIEN ROBINET
ET LES ANCIENS FLEXIBLES.
NETTOYEZ LA SURFACE DU
LAVABO EN VUE DE
L'INSTALLATION DU
NOUVEAU ROBINET. RINCEZ
AVEC DE L'EAU POUR VOUS
ENTRETIEN
CONDUIT.
nettoyants abrasifs, la laine d'acier et les produits chimiques puissants peuvent
2
2. BRANCHEZ LES FLEXIBLES
SUR LES TUYAUX EN LAITON.
Pince multiple
Mastic de plombier
Ruban pour tuyau
3. POSITIONNEZ LE NOUVEAU
ROBINET SUR LE LAVABO.
DEPUIS LE DESSOUS DU
LAVABO, PLACEZ UNE
RONDELLE EN
CAOUTCHOUC, UNE
POINTS IMPORTANTS
3
4. BRANCHEZ LES FLEXIBLES
CHAUDE ET D'EAU FROIDE.
raccords dans le sens des aiguilles d'une montre.
4
sont pas tous inclus. Cependant, ils sont disponibles dans tout magasin de
plomberie.
INSTALLATION
FROIDE PENDANT AU MOINS UNE MINUTE. PENDANT QUE L'EAU
Si vous avez des questions, appelez le service de soutien technique de
MINEURES.
3
MESURE CORRECTIVE
l'eau chaude et replacez la cartouche dans son logement.
1.B - Contactez le service de soutien technique de Vigo pour remplacer
la cartouche.
3 - Fuites au niveau des points de raccordement
3.A - Fuite du flexible au niveau du point de raccordement
2.C - Retirez les axes en cuivre et rincez/nettoyez-les.
pas de fuites.
perpendiculaire au comptoir.
cartouche.
FINI
Cartouche
Tuyau d'alimentation
68086
68031
68047
64002
68048
68015
68045
74020
CH, ST, ARB
CH, ST, ARB
-
W
W
W
W
W
W
W
W
www.vigoindustries.com
NSF / ANSI 61
4
VIGO INDUSTRIES, LLC ("VIGO")
usage personnel domestique. D'autres limitations s'appliquent en cas d'usage commercial.
constructeur.
constructeur.
un tiers.
Limitations
directement ou indirectement.
produit, notamment, mais sans s'y limiter, de les briser et de provoquer des blessures, voire la mort.]
SAUF DISPOSITION CONTRAIRE CI-DESSUS, VIGO NE FAIT AUCUNE GARANTIE, EXPRESSE OU IMPLICITE, Y COMPRIS DE VALEUR MARCHANDE,
constructeur.
Limitations commerciales
Service de garantie
5
ESPECIFICACIONES DEL GRIFO
Grifo para lavabo
Modelo VG03025
MODELO VG03025
CONTENIDOS DEL PAQUETE
Juego de grifo
Anillo de bronce
Arandela de caucho
Dos mangueras de metal con refuerzo trenzado
Tuerca
DIMENSIONES
GRIFO
ALTURA
12 1/2"
12 5/8"
MODEL
NRO.
VG03025
BOCA
ORIFICIO
5"
1 3/8"
5"
4 1/8"
9 1/2"
12 1/2"
5"
1 3/4"
VISTA LATERAL
1 1/4"
2"
VISTA FRONTAL
6 5/8"
VISTA SUPERIOR
VG03025
2
CONTENIDO DEL PAQUETE
MONTAJE
ARANDELA DE METAL
ARANDELA DE
CAUCHO
TUERCA
GRIFO
DOS
MANGUERAS
FLEXIBLES
1
1. CIERRE EL SUMINISTRO
DEL AGUA. QUITE EL GRIFO
VIEJO Y LAS MANGUERAS
FLEXIBLES. LIMPIE LA
SUPERFICIE DEL LAVABO
PARA PREPARARLO PARA EL
NUEVO GRIFO. ENJUAGUE
ASEGURARSE DE QUE NO
QUEDEN TRABADOS
MANTENIMIENTO
inconvenientes.
2. CONECTE LAS
MANGUERAS FLEXIBLES A
2
HERRAMIENTAS NECESARIAS
Llave inglesa
Pinzas pico de loro
Destornillador para tornillos de cabeza plana
3. COLOQUE EL NUEVO
CONSEJOS DE SEGURIDAD
SOBRE EL LAVABO.
DESDE DEBAJO DEL LAVABO,
COLOQUE LA ARANDELA DE
CAUCHO, LA ARANDELA DE
METAL E INSERTE LA
con gafas de seguridad.
AJUSTE LA TUERCA.
PUNTOS IMPORTANTES
3
4. CONECTE LAS
MANGUERAS FLEXIBLES AL
AGUA CALIENTE.
sistema.
las agujas del reloj.
4
grifo anterior. Si bien no se incluyen todos los recursos necesarios para instalar su
DE SUMINISTRO. EL AJUSTE SUAVE DE LAS TUERCAS DETIENE
3
PROBLEMA
CAUSA POTENCIAL
MEDIDA CORRECTIVA
1.A - Cartucho no ajustado
1.B - Cartucho defectuoso
2 - Caudal insuficiente
2.A - Aireadores sucios
4 - Afloje el cuerpo del grifo
no abrasivo (es decir, mitad agua caliente, mitad vinagre).
5 - Afloje la llave
3.B - Arandela defectuosa
completo.
4. - Los dispositivos de ensamblaje se aflojaron
3.A - Ajuste las mangueras. Si eso no resuelve el problema,
4. - Desde debajo de la encimera, utilice una llave inglesa para
al tornillo que conecta la llave con el cartucho. Con una llave Allen o
un destornillador de cabeza gruesa, ajuste el tornillo para que la
LISTA DE PIEZAS PIEZA
NRO. DE PIEZA
ACABADO
Llave
Tornillo sujetador de la llave
68086
68031
68047
64002
68048
64015
68045
74020
CH, BN, ARB
CH, BN, ARB
-
Cartucho
Tuerca del cartucho
Anillo de metal
Tuerca
Manguera de suministro
W
W
W
W
W
W
W
W
[email protected]
www.vigoindustries.com
NSF / ANSI 61
4
VIGO INDUSTRIES, LLC ("VIGO")
comienza en la fecha de compra inicial por parte del propietario, contratista o constructor a VIGO o a un distribuidor autorizado de VIGO y durante toda la vida del propietario o
usuario final originales.
VIGO.
Limitaciones
aplicables sobre dichas instalaciones.
otros, productos de vidrio (es decir, puertas de duchas y lavabos de vidrio) por parte de personas sin experiencia puede provocar fallos en el producto incluidos, entre otros,
el Producto.
Limitaciones comerciales
5