1
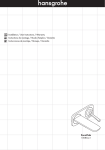
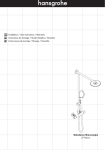
EN Installation / User Instructions / Warranty FR Instructions de montage / Mode d'emploi / Garantie ES Instrucciones de montaje / Manejo / Garantía Starck Organic 12425001 English 2¾" 2¾" 4⅜" 2¾" 4⅜" 3⅞" 3¼" 2½" 2½" 6" 7⅝" 12¼" Technical Information 2¾" 4⅜" 7½" Recommended water pressure Max. water pressure Recommended hot water temp. Max. hot water temp Flow rate - handshower Flow rate - tub spout 15 - 75 PSI 145 PSI 120° - 140° F* 176°F* 2.5 GPM 4.8 GPM @ 44 PSI *Please know and follow all applicable local plumbing codes when setting the temperature on the water heater. Installation Considerations • For best results, Hansgrohe recommends that this unit be installed by a licensed, professional plumber. • Please read over these instructions thoroughly before beginning installation. Make sure that you have all tools and supplies needed to complete the installation. • This trim kit requires rough valve 15460181 (not included). • Protection against backflow is provided by a check valve in the handshower hose and by an automatically resetting diverter. • This showerpipe is for use with shower heads rated at 2.5 GPM (9.5 l/min) or higher. Tools Required / Outiles Utiles / Herramientas Útiles 3 mm 24 mm 2 19 mm • Keep this booklet and the receipt (or other proof of date and place of purchase) for this product in a safe place. The receipt is required should it be necessary to request warranty parts. Français Español Données techniques Datos tecnicos Pression d’eau recommandée 15 - 75 PSI Pression d’eau maximum 145 PSI Température recommandée 120° - 140° F* d'eau chaude Température maximum d'eau chaude 176°F* Capacité nominale - douchette 2.5 GPM Capacité nominale - bec 4.8 GPM @ 44 PSI Presión recomendada en servicio 15 - 75 PSI Presión en servicio max. 145 PSI Temperatura recomendada del 120� - 140� F* agua caliente Temperatura del agua caliente max. 176�F* Caudal máximo - teleducha 2.5 GPM Caudal máximo - surtidor 4.8 GPM @44 PSI * Vous devez connaître et respecter tous les codes de plomberie locaux applicables pour le réglage de la température du chauffe-eau. *Debe conocer y cumplir todos los códigos locales aplicables para ajustar la temperatura del calentador de agua. À prendre en considération pour l’installation Consideraciones para la instalación • Pour de meilleurs résultats, Hansgrohe recommande que ce produit soit installé par un plombier professionnel licencié. • Para obtener mejores resultados, la instalación debe estar a cargo de un plomero profesional matriculado. • Veuillez lire attentivement ces instructions avant de procéder à l’installation. Assurez-vous de disposer de tous les outils et du matériel nécessaires pour l’installation. • Antes de comenzar la instalación, lea estas instrucciones detenidamente. Asegúrese de tener las herramientas y los insumos necesarios para completar la instalación. • L'ensembles de robinetterie requière l’utilisation de la pièce de surface 15460181 (non comprise). • El juego de pieza exterior requiere la pieza interior 15460181 (no incluida). • La protection contre le retour d’eau est assurée par un clapet anti-retour et un dispositif de dérivation à réenclenchement automatique. • Ce produit devrait être seulement utilisé avec les pommes de douche évaluées à 2,5 GPM (9,5 l/ min) ou plus. • Conservez ce livret et le reçu (ou une autre preuve sur laquelle figurent la date et l’endroit de l’achat) pour ce produit dans un endroit sûr. Le reçu est requis si vous commandez des pièces sous garantie. • Una válvula antirretorno en el codo de la teleducha y un distribuidor que se reajusta automáticamente brindan protección contra el contraflujo. • Este producto debe ser utilizado sólo con alcachofas de la ducha valoradas en 2,5 GPM (9,5 L/min) o más. • Mantenga este folleto y el recibo (u otro comprobante del lugar y fecha de compra) de este producto en lugar seguro. El recibo se requiere en caso de ser necesario solicitar piezas bajo garantía. 3 English Installation 1 Turn the water off at the main. Remove the plastic tubes. Remove the safety set. 2 3 24 mm 2 1 4 Turn the diverter to the off position. Remove the nut. Français Español Installation Instalación Fermez l'eau à la valve principale. Cierre el paso del agua en la entrada del suministro. Retirez les tubes en plastique. Retire los tubos plásticos. Retirez l’ensemble de sécurité. Retire el equipo de seguridad. Tournez le dispositif de dérivation à sa position d'arrêt. Gire el distribuidor a la posición cerrada. Retire la tuerca. Retirez l'écrou. 5 English Install the thermostatic cartridge and the handle adapter. 4 2 24 mm 1 5 Install the safety set with the notch oriented as shown in the diagram. ! Grease the threads lightly with white plumbers' grease. 6 Install the escutcheons. 2 Install the volume control handle. 3 1 6 tt nfe ature Arm rease G 20 4762 Nr. 10 Français Español Installez la cartouche thermostatique et l'adapteur pour poignée. Instale el cartucho termostático y el adaptador mando. Installez l’ensemble de sécurité de façon à ce que l'encoche soit orientée comme indiqué sur le schéma. Instale el equipo de seguridad con la ranura orientada como se muestra en el dibujo. Lubrifiez légèrement les filets en utilisant de la graisse de plomberie blanche. Lubrique las roscas levemente con grasa blanca para plomería. Installez les écussons. Instale los escudos. Installez la poignée du robinet d'ârret. Instale la manija del llave de paso. 7 English 7 Install the thermostatic handle. 8 Remove the plaster shield and seal from the diverter housing. 9 Lightly grease the o-rings on the diverter with white plumbers' grease. 19 mm Install the diverter. Do not over-tighten the diverter. tt nfe ature Arm rease G 8 20 4762 Nr. 10 Français Español Installez la poignée thermostatique. Instale la manija del mezclador termostático. Retirez le protecteur et le joint du compartiment du dispositif de dérivation. Retire el protector de yeso y el sello del alojamiento del distribuidor. Lubrifiez légèrement les joints toriques sur le dispositif de dérivation en utilisant de la graisse de plomberie blanche. Lubrique levemente los retenes anulares del distribuidor con grasa blanca para plomería. Installez le dispositif de dérivation. Ne serrez pas trop l'inverseur! Instale el distribuidor. No ajuste demasiado el distribuidor. 9 English Lightly lubricate the threads on the diverter housing using white plumbers' grease. 10 Install the spout escutcheon. 2 Install the spout. 1 Install the diverter rod. 11 Tighten the spout screw. Pull the Secuflex hose away from the rough. 1 Remove the plaster shield. 3 2 3 mm Remove the Secuflex hose from the rough. 12 Disconnect the Secuflex hose from the high pressure hose by loosening the white plastic nut. 1 2 10 Français Español Lubrifiez légèrement les filets sur le compartiment du dispositif de dérivation en utilisant de la graisse de plomberie blanche. Lubrique levemente las roscas del alojamiento del distribuidor con grasa blanca para plomería. Installez la rosace du bec. Instale el escudo del surtidor. Instale el surtidor. Installez le bec. Installez la tige de l'inverseur. Instale la varilla del distribuidor. Serrez la vis du bec. Apriete el tornillo del surtidor. Tirez le tuyau Secuflex hors de la pièce intérieure. Tire la manguera Secuflex hacia afuera de la pieza interior. Retirez le protecteur. Retire el protector de yeso. Retirez le tuyau Secuflex de la pièce intérieure. Débranchez le tuyau Secuflex du tuyau à haute pression en dévissant l'écrou de plastique blanc. Retire la manguera Secuflex hacia afuera de la pieza interior. Desconecte la manguera Secuflex de la manguera de alta presión desenroscando la tuerca blanca de plástico. 11 English 13 Remove the plug from the high pressure hose. 14 Install the check valve. 15 Install the handshower holder escutcheon. 12 The arrow on the check valve indicates the direction of the water flow. Français Español Retirez le bouchon du tuyau à haute pression. Retire el tapón de la manguera de alta presión. Installez le clapet anti-retour. Instale la válvula de retención. La flèche sur le clapet anti-retour indique le sens de l'écoulement de l'eau. La flecha en la válvula de retención indica la dirección del caudal de agua. Installez l’écusson du support de douchette Instale el escudo del soporte de ducha de mano. 13 English Lubricate the handshower hose and the Secuflex hose using silicon spray and a dry, soft cloth. 16 Si li ko ns p r a y Feed the handshower hose down through the Secuflex hose. 17 1 3 2 Connect the Secuflex hose to the handshower holder. 18 2 Connect the handshower hose to the high pressure hose. Tighten the plastic nut. 1 14 Français Español Lubrifiez le tuyau de douchette et le tuyau Secuflex en utilisant un jet en silicone et un chiffon doux et sec. Lubrique la manguera de la ducha de mano y la manguera Secuflex usando un rociador de silicona y un paño suave y seco. Faites passer le tuyau de douchette à travers le tuyau Secuflex. Empuje la manguera de la ducha de mano hacia abajo por la manguera Secuflex. Raccordez le tuyau Secuflex au support de douchette. Conecte la manguera Secuflex al soporte de ducha de mano. Raccordez le tuyau de la douchette au tuyau à haute pression. Conecte la manguera de la ducha de mano a la manguera de alta presión. Serrez l’écrou en plastique. Apriete la tuerca de plástico. 15 English Connect the handshower to the handshower hose. 19 2 1 Cut the o-rings on the end of the Secuflex hose. 20 Lubricate the handshower holder using the Silicone spray. 3 Push the Secuflex hose down into the rough. 4 1 2 21 16 Remove the aerator from the spout. Français Español Raccordez la douchette au tuyau de la douchette. Conecte la ducha de mano a la manguera. Coupez les joints toriques sur l’extrémité du tuyau Secuflex. Corte los retenes anulares del extremo de la manguera Secuflex. Lubrifiez le support de douchette à l’aide d’un jet en silicone. Lubrique el soporte de ducha de mano utilizando un rociador de silicona. Poussez le tuyau Secuflex dans la pièce intérieure. Tire la manguera Secuflex hacia abajo de la pieza interior. Retirez l’aérateur du bec. Retire el aireador del orificio del surtidor. 17 English 22 Turn the water on. Allow the spout to flush for at least two minutes. 23 Install the aerator. 18 Français Español Ouvrez l'eau. Rincez le bec pendant au moins deux minutes. Abra el suministro de agua. Deje que el surtidor se enjuague durante dos minutos como mínimo. Installez l'aérateur. Instale el aireador. 19 Set the high temperature limit stop / Réglez la butée limite d'eau chaude / Fije el tope de límite de alta temperatura 1 2 < 120° F* 3 12 > 120° F 2 4 20 5 Set the high temperature limit stop / Réglez la butée limite d'eau chaude / Fije el tope de límite de alta temperatura 7 6 2 * 1 *Follow all applicable local plumbing codes regarding the maximum allowable high temperature. 8 * Suivez tous les locaux applicables les codes de plomberie concernant le maximum admissible haute température. 1 * Siga todos los códigos locales de plomería el límite máximo de temperatura alta. 2 9 10 ! 21 11 Justify the handle / Réglez la poignée / Ajuste el mando 13 12 2 2 1 1 14 22 Replacement Parts / Pièces détachées / Repuestos 28509001 98450000 94246000 95754000 97660000 (M6x6) 97584000 98312000 96942000 92120001 98337000 95158000 96236000 97409000 98427000 94282000 (29x2.5) 98146000 (25x1.5) 98398000 (23x2) 95037000 96777000 98219000 (21x1.5) 98131000 (15x2.5) 98183000 (23x2.5) 92602000 (20x2.5) 98139000 (18x2.5) 95753000 98198000 (38x2.5) 95996000 98656000 94148000 94074000 98127000 (11x2) 98194000 (28x2) 23 User Instructions / Instructions de service / Manejo close / fermé / cerrar open / ouvert / abierto 2 2 1 1 cold / froid / frío hot / chaud / caliente 2 2 1 > 100° F 1 24 1 2 " 3 4 x. ma 3 4 1 2 25 Cleaning / Nettoyage / Limpieza 1 26 2 Maintenance / Entretien / Mantenimiento 1 DIN-DVGW 2 3 1. 2. 4 5 5. 2. 1. 3. 4. 27 Maintenance / Entretien / Mantenimiento 6 7 2 4 2 1 3 1 8 9 1 1 2 3 3 2 4 10 11 2 3 1 2 1 3 4 28 Cleaning Recommendation for Hansgrohe Products Modern bathroom faucets, kitchen faucets and shower products are made from different materials to comply with the needs of the market with regard to design and functionality. To avoid damage to the product, it is necessary to take proper care of it. For best results: • Prevent the buildup of mineral scale and /or soap residue by cleaning your Hansgrohe product(s) when needed. • Select a cleaning agent specifically intended for the type of product. • Do not use these types of cleaners as they will cause damage to your Hansgrohe product: Any cleaning agent containing hydrochloric acid, formic acid, lye, or acetic acid. Abrasive cleaning powders, pads, or brushes. Steam cleaners. “No rinse” cleaning agents. • Always follow the instructions provided by the manufacturer of the cleaning agent. • Do not mix cleaning agents, unless directed by the manufacturer. • Do not spray cleaners directly onto the product as drops could enter openings and gaps and cause damage. When using spray cleaners, spray the cleaner onto a soft cloth or sponge. • Always rinse your Hansgrohe product thoroughly with clear water and polish dry with a soft cloth after cleaning. Important • Residue from soaps and shampoos can cause damage. Rinse the product with clean water after each use. • Residue from basin/tub/tile cleaner can cause damage to faucets and fittings. Immediately rinse any overspray from the Hansgrohe product. • Damage to the product caused by improper care or the use of improper cleaning agents is not covered by the warranty. • If a component of the product is damaged, replace it, as there is risk of injury. Conseil de nettoyage pour les produits Hansgrohe De nos jours le sanitaire moderne, la robinetterie et les douchettes se composent de matériaux très différents pour satisfaire à la demande concernant le design et la fonctionnalité. Pour éviter les détériorations et les réclamations, aussi bien pour l’utilisation que pour le nettoyage prochain, certains critères seront à prendre en considération. A prendre en considération lors de l’entretien de la robinetterie et de douchettes: • On doit seulement utiliser les produits de nettoyage qui sont formellement prévus pour ce domaine. • Aucun contact avec l’application de nettoyants contenant de l’acide chlorhydrique, de l’acide formique ou de l’acide acétique qui peuvent causer de considérables détériorations. • Les nettoyants à base d’acide phosphorique, aussi, ne sont pas à utiliser sans réserves. • Le mélange de nettoyants en général n’est pas autorisé. • L’utilisation de produits de nettoyage récurants et des ustensiles comme des frottoirs, des éponges à récurer et des torchons microfibres est exclue. • Les conseils d’entretien des producteurs de nettoyants sont à suivre obligatoirement. • Le nettoyage est à faire correspondre avec le dosage, le temps d’action, spécifique à l’objet et à la nécessité. • Le dépôt de calcaire est évité par un nettoyage régulier. • Pour le nettoyage avec produit vaporisé liquide, en aucun cas sur la robinetterie, mais au contraire aspergé sur le chiffon (torchon, éponge) et effectuer comme cela le nettoyage, car les aérosols peuvent pénétrer dans les ouvertures et fentes de la robinetterie et peuvent provoquer des détériorations. 29 • Après le nettoyage rincez avec suffisamment d’eau claire pour éliminer les restes de produits attachés. • L’utilisation d’appareil de nettoyage à vapeur n’est pas autorisée, car les températures importantes peuvent détériorer les produits. Indications importantes • Les produits pour le corps comme les savons liquides, les shampooings ou les gels de douche peuvent causer des détériorations. • Ici aussi on doit: Après l’utilisation rincer soigneusement les restes avec de l’eau. Conseil de nettoyage • Les deteriorations imputables à un mauvais entretien ne peuvent être pris en considération par notre garantie. • Par l’action d’un nettoyant sur les revêtements déjà endommagé il se produit une aggravation des dégâts. Recomendación de limpieza para los productos de Hansgrohe Hoy en día, las griferías de baño y de cocina así como duchas modernas se componen de materiales muy distintos para satisfacer las exigencias del mercado respecto al diseño y la funcionalidad. Para evitar daños y reclamaciones hay que tener en cuenta ciertos aspectos tanto en el uso como en su limpieza. Para el cuidado de las griferías y las duchas en principio hay que seguir lo siguiente: • Usar sólo detergentes previstos específicamente para este campo de aplicación. • No aplicar detergentes que contengan ácido clorhídrico, fórmico o acético porque pueden causar daños importantes. • Detergentes que contienen ácido fosfórico tampoco pueden ser aplicados ilimitadamente. Por regla general no se deben mezclar detergentes. • Tampoco se deben utilizar utensilios abrasivos, como son polvos abrasivos, esponjas o paños de microfibra. • Se tienen que seguir siempre las sugerencias de empleo de los fabricantes de los detergentes. • La limpieza tiene que ser realizada según la dosificación y el tiempo de actuación, en función del objeto y ajustada a las necesidades específicas del mismo. • Gracias a una limpieza periódica se pueden evitar los depósitos de cal. • No conviene rociar el detergente en ningún caso sobre la grifería sino sobre los textiles y ejecutar la limpieza así, porque el líquido puede entrar en aperturas o hendiduras de la grifería y causar daños. • Después de la limpieza hay que aclarar con suficiente agua para eliminar completamente el resto de detergente. • La utilización de limpiadores a vapor no está permitida, las altas temperaturas pueden dañar los productos. Indicaciones importantes • Los residuos de productos de aseo como jabón líquido, champús y gel de ducha pueden dañar también los materiales. • Por lo que también se deberá prestar atención a lo siguiente: aclarar con abundante agua después del uso. • Con materiales ya dañados la acción de detergents incrementará el desgaste de estos. • Los componentes con superficies dañadas deberán cambiarse, en otro caso se corre el peligro de lesionarse. • Los daños que resulten de un uso inadecuado no están incluidos en nuestra garantía. 30 Limited Consumer Warranty This product has been manufactured and tested to the highest quality standards by Hansgrohe, Inc. (“Hansgrohe”). This warranty is limited to Hansgrohe products that are purchased by a consumer in the United States or Canada after March 1, 1996, and installed in either in the United States or in Canada. WHO IS COVERED BY THE WARRANTY This warranty extends to the original purchaser only. This warranty is non-transferable. WHAT IS COVERED BY THE WARRANTY The warranty covers only your Hansgrohe manufactured product. Hansgrohe warrants this product against defects in material or workmanship as follows: Hansgrohe will replace at no charge for parts only or, at its option, replace any product or part of the product that proves defective because of improper workmanship and/or material, under normal installation, use, service and maintenance. If Hansgrohe is unable to provide a replacement and repair is not practical or cannot be made in timely fashion, Hansgrohe may elect to refund the purchase price in exchange for the return of the product. LENGTH OF WARRANTY Replacement or repaired parts of products will be covered for the term of this warranty, as stated in the following two sentences. If you are a consumer who purchased the product for use primarily for personal, family or household purposes, this warranty extends for as long as you own the product and the home in which the product is originally installed. If you purchased the product for use primarily for any other purpose, including, without limitation, a commercial purpose, this warranty extends only (i) for 1 year, with respect to Hansgrohe & Commercial products, and (ii) for 5 years, with respect to Axor products. THIS WARRANTY DOES NOT COVER, AND HANSGROHE WILL NOT PAY FOR: A. Conditions, malfunctions or damage not resulting from defects in material or workmanship. B. Conditions, malfunctions or damage resulting from (1) normal wear and tear, improper installation, improper maintenance, misuse, abuse, negligence, accident or alteration; (2) the use of abrasive or caustic cleaning agents or “norinse” cleaning products, or the use of the product in any manner contrary to the product instructions; or (3) conditions in the home such as excessive water pressure or corrosion. C.Labor and other expenses for disconnection, deinstallation, or return of the product for warranty service (including but not limited to proper packaging and shipping costs), or for installation or reinstallation of the product. D. Accessories, connected materials and products, or related products not manufactured by Hansgrohe. E. Any Hansgrohe or Axor product sold for display purposes. F. Rubbed Bronze finish is subject to a 3-year limited warranty. Chrome and all PVD finishes are covered by the limited lifetime warranty. G.Hansgrohe Water Filtration System is subject to a 1-year limited warranty. Warranty does not include replacement filters. TO OBTAIN WARRANTY PARTS OR INFORMATION Contact your Hansgrohe retailer, or contact Technical Service at: Hansgrohe, Inc. 1492 Bluegrass Lakes Parkway Alpharetta, GA 30004 Toll-free 800-334-0455 In requesting warranty service, you will need to provide: 1. The sales receipt or other evidence of the date and place of purchase. 2. A description of the problem. 3. Delivery of the product or the defective part, postage prepaid and carefully packed and insured, to: Hansgrohe, Inc. 1492 Bluegrass Lakes Parkway Alpharetta, GA 30004 Toll-free 800-334-0455 When warranty service is completed, any repaired or replacement product or part will be returned to you postage prepaid. 31 EXCLUSIONS AND LIMITATIONS REPAIR OR REPLACEMENT (OR, IN LIMITED CIRCUMSTANCES, REFUND OF THE PURCHASE PRICE) AS PROVIDED UNDER THIS WARRANTY IS THE EXCLUSIVE REMEDY OF THE PURCHASER. HANSGROHE NEITHER ASSUMES NOR AUTHORIZES ANY PERSON TO CREATE FOR IT ANY OTHER OBLIGATION OR LIABILITY IN CONNECTION WITH THIS PRODUCT. HANSGROHE SHALL NOT BE LIABLE TO PURCHASER OR ANY OTHER PERSON FOR ANY INCIDENTAL, SPECIAL OR CONSEQUENTIAL DAMAGES, ARISING OUT OF BREACH OF THIS WARRANTY OR ANY IMPLIED WARRANTY (INCLUDING BUT NOT LIMITED TO ANY IMPLIED WARRANTY OF MERCHANTABILITY). Some States do not allow the exclusion or limitation of incidental or consequential damages, so the above limitation or exclusion may not apply to you. This warranty gives you specific legal rights, and you may also have other rights that vary from state to state. TO THE EXTENT PERMITTED BY LAW, ANY IMPLIED WARRANTIES OF MERCHANTABILITY AND FITNESS FOR A PARTICULAR PURPOSE, ARE LIMITED TO THE DURATION OF THE EXPRESS WARRANTY. Some states do not allow limitations on how long an implied warranty may last, so the above limitations may not apply to you. You may be required by law to give us a reasonable opportunity to correct or cure any failure to comply before you can bring any action in court against us under the Magnuson-Moss Warranty Act. Hansgrohe, Inc. • 1490 Bluegrass Lakes Parkway • Alpharetta, GA 30004 Tel. 800-334-0455 • Fax 770-360-9887 www.hansgrohe-usa.com US - Installation Instructions • Part No. 90204621 • Revised 03/2013 PRODUCT INSTRUCTIONS AND QUESTIONS Upon purchase or prior to installation, please carefully inspect your Hansgrohe product for any damage or visible defect. Prior to installing, always carefully study the enclosed instructions on the proper installation and the care and maintenance of this product. If you have questions at any time about the use, installation or performance of your Hansgrohe product, or this warranty, please write us or call us toll-free at 800-334-0455.