1
Model #461-5001
461-5004
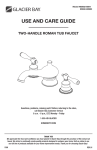
USE AND CARE GUIDE
TWO-HANDLE ROMAN TUB FAUCET
Questions, problems, missing parts? Before returning to the store,
call Glacier Bay Customer Service
8 a.m. - 6 p.m., EST, Monday - Friday
1-855-HD-GLACIER
HOMEDEPOT.COM
THANK YOU
We appreciate the trust and confidence you have placed in Glacier Bay through the purchase of this roman tub
faucet. We strive to continually create quality products designed to enhance your home. Visit us online to see
our full line of products available for your home improvement needs. Thank you for choosing Glacier Bay!
Table of Contents
Safety Information ....................................2
Warranty ...................................................2
Pre-Installation .........................................3
Planning Installation ..............................3
Tools Required .......................................3
Hardware Included.................................3
Package Contents ..................................4
Installation ................................................5
Operation...................................................8
Care and Cleaning ....................................8
Service Parts ...........................................9
Safety Information
Please read and understand this entire manual before
attempting to assemble, operate, or install the product.
CAUTION: Always turn off the water supply before
removing an existing faucet or replacing any part of a
faucet. Open the faucet handle to relieve water pressure
and ensure that the water is completely shut off.
Warranty
LIMITED LIFETIME WARRANTY
Glacier Bay products are manufactured with superior quality standards and workmanship and are backed by our
limited lifetime warranty. Glacier Bay products are warranted to the original consumer purchaser to be free of
defects in materials or workmanship. We will replace FREE OF CHARGE any product or parts that proves defective.
Simply, return the product / part to any of The Home Depot retail locations or call 1-855-HD-GLACIER (1-855-4345224) to receive the replacement item. Proof of purchase (original sales receipt) from the original consumer
purchaser must be made available for all Glacier Bay warranty claims.
This warranty excludes incidental/inconsequential damages and failures due to misuse, abuse or normal wear and
tear. This warranty excludes all industrial, commercial & business usage, whose purchasers are hereby, extended
duration of warranty.
Some states and provinces do not allow the exclusion or limitation of incidental or consequential damages, so the
above limitations may not apply to you. This warranty gives you specific legal rights and you may also have other
rights that vary from state to state and province to province. Please see a store or contact 1-855-HD-GLACIER for
more details.
2
Pre-Installation
PLANNING INSTALLATION
Before beginning the installation of this product, ensure all parts are present. Compare parts with the Package
Contents and Hardware Included list. If any part is missing or damaged, do not attempt to install the product.
TOOLS REQUIRED
Safety
goggles
Adjustable
wrench
Flashlight
Phillips
screwdriver
Basin wrench
HARDWARE INCLUDED
NOTE: Hardware not shown to actual size.
AA
Part
Description
Quantity
AA
Hex wrench
1
3
HOMEDEPOT.COM
Please contact 1-855-HD-GLACIER for further assistance.
Pre-Installation (continued)
PACKAGE CONTENTS
E
F
G
H
I
A
J
K
L
M
N
O
P
B
C
D
Q
R
S
Part
Quantity
Part
A
Spout assembly
Description
1
K
Flange
2
B
Rubber washer
1
L
Hot end valve
1
C
Metal washer
1
M
Cold end valve
1
D
Nut
1
N
Rubber washer
2
E
Handle
2
O
Metal washer
2
F
Set screw
2
P
Mounting nut
2
G
Index
2
Q
T-tube
1
H
Screw
2
R
Clip
1
S
Hose
2
I
Inverter
2
J
Handle flange
2
4
Description
Quantity
Installation
1 Preparing for installation
2 Installing the spout assembly
CAUTION: Always turn off the water supply before
removing an existing faucet or replacing any part of a
faucet. Open the faucet handle to relieve water pressure
and ensure that the water is completely shut off.
□
Drill 1-3/8 in. holes in the finished deck as
shown in the diagram below.
□
Place the spout assembly (A) through the middle
mounting hole in the deck.
□
Secure the spout assembly (A) with the rubber
washer (B), metal washer (C), and nut (D). Use
the basin wrench to tighten the nut (D).
NOTE: This kit allows up to 1-1/4 in. deck thickness.
A
5 in. min.
1-1
/4
in.
3 in. min.
16
MA
XD
ECK
B
C
D
1-3/8 in.
8~
TH
in.
ICK
1-1/8 in.
NE
SS
5
HOMEDEPOT.COM
Please contact 1-855-HD-GLACIER for further assistance.
Installation (continued)
the hot and cold
3 Installing
valves
□
the handle
4 Installing
assemblies
From underneath the deck, insert the cold end
valve (M) with the rubber washer (N), metal
washer (O), and mounting nut (P) through the
hole on the right (cold) side.
□
From above, thread the flange (K) onto the
valve stem.
□
Tighten the mounting nut (P) using a basin
wrench, so that the flange (K) sits flush against
the finished deck surface.
□
Repeat this procedure for the hot end valve
(L) on the left (hot) side.
□
Thread the handle flanges (J) onto the valve
stems.
□
Place the inverters (I) onto the valve stems (1),
and secure them with the screws (H). Use a
Phillips screwdriver to tighten the screws (H).
□
Place the handles (E) onto the inverters (I), and
tighten the set screws (F) with the Hex wrench
(AA). Insert the indexes (G).
E
J
1
K
L
M
F
H
I
N
O
P
6
G
Installation (continued)
5
□
the waterline
6 Making
connections
Installing the T-tube
□ Connect the water supply lines (1) to the faucet
inlets (2). (Supply lines are not included.)
From below the deck, push the T-tube (Q) onto
the spout shank (1) until it is completely seated.
Place the clip (R) through the slots (2).
2
1
R
2
1
Q
2
1
7 Connecting the hoses
□
Connect the hoses (S) to the bottom of the hot and
cold end valves (L & M), as shown.
□
Align the T-tube (Q) in a position that will allow
maximum clearance to connect the hoses.
□
Carefully bend the hoses (S) to fit in the available
space, and carefully thread the hose (S) couplings
onto the sides of the T-tube (Q). Tighten all
connections with a wrench.
L
S
7
Q
M
HOMEDEPOT.COM
Please contact 1-855-HD-GLACIER for further assistance.
Operation
1 Flushing and checking for leaks
□
After installation is completed, turn on the water
supply and allow both hot and cold water to
run for at least one minute each. This flushes
away any debris that could cause damage to
internal parts.
□
While the water is running, check for leaks.
Care and Cleaning
□
□
□
Do not use abrasive cleaners when cleaning this faucet.
8
Service Parts
*Specify Finish
1
5
2
3
4
6
7
8
9
10
11
12
13
14
15
16
17
18
19
20
21
22
Part
Description
23
Part Number
Part
1
Handle
RP13141*
13
Description
Rubber washer
Part Number
RP64023
2
Set screw
RP50002
14
Metal washer
RP64024
3
Index (R)
RP10004
15
Mounting nut
RP56014
4
Index (B)
RP10005
16
Rubber washer
RP64032
5
Set screw
RP50103
17
Metal washer
RP64033
6
Screw
RP70116
18
Nut
RP56015
7
Inverter
RP64044
19
O-ring
RP60047
8
Flange
RP80175*
20
T-tube
RP70124
9
Bonnet
RP70001
21
Clip
RP70123
10
Flange
RP70324
22
Hose
RP70042
11
Cartridge (H)
RP20013
23
Hex wrench
RP70221
12
Cartridge (C)
RP20014
9
HOMEDEPOT.COM
Please contact 1-855-HD-GLACIER for further assistance.
Questions, problems, missing parts? Before returning to the store,
call Glacier Bay Customer Service
8 a.m. - 6 p.m., EST, Monday - Friday
1-855-HD-GLACIER
HOMEDEPOT.COM
Retain this manual for future use.
Modelo Núm.: 461-5001
461-5004
GUÍA DE USO Y MANTENIMIENTO
GRIFO DE DOS LLAVES PARA BAÑERA ROMANA
¿Problemas, preguntas o piezas faltantes? Antes de regresar a la tienda,
llama al servicio al cliente de Glacier Bay
de lunes a viernes de 8 a.m. a 6 p.m., hora estándar del este
1-855-HD-GLACIER
HOMEDEPOT.COM
GRACIAS
Agradecemos la confianza que has depositado en Glacier Bay al comprar este grifo para bañera romana. Nos esforzamos por
crear continuamente productos de calidad diseñados para mejorar tu hogar. Visítanos en Internet para ver nuestra línea
completa de productos disponibles para las necesidades de mejoras de tu hogar. ¡Gracias por elegir a Glacier Bay!
Tabla de contenido
Información de seguridad ......................12
Garantía...................................................12
Pre-instalación .......................................13
Planificación de la instalación .............13
Herramientas necesarias ....................13
Herrajes incluidos ................................13
Contenido del paquete .........................14
Instalación ..............................................15
Funcionamiento ......................................18
Cuidado y limpieza ................................18
Piezas de repuesto ................................19
Información de seguridad
Lee y comprende este manual completo antes de
intentar ensamblar, operar o instalar el producto.
PRECAUCIÓN: Cierra siempre el suministro de agua
antes de quitar un grifo existente o reemplazar cualquier
pieza de un grifo. Abre la llave del grifo para liberar la
presión de agua y asegúrate de que el suministro de agua
esté completamente cerrado.
Garantía
GARANTÍA LIMITADA DE POR VIDA
Los productos de Glacier Bay están fabricados con normas y mano de obra de calidad superior y están respaldados
por nuestra garantía de por vida limitada. Glacier Bay garantiza al comprador consumidor original que sus productos
no presentan defectos materiales o de fabricación. Simplemente, devuelva el producto o pieza a
cualquiera de las tiendas minoristas de The Home Depot o llame al 1-855-HD-GLACIER (1-855-434-5224)
para recibir el artículo de reemplazo. El comprobante de compra (recibo de venta original) del comprador consumidor
original debe estar disponible para todos los reclamos de garantía de Glacier Bay.
Esta garantía excluye daños y fallos incidentales/consecuenciales debido al mal uso, abuso o desgaste normal por
el uso. Esta garantía excluye todos los usos industriales, comerciales y de negocios, a cuyos compradores se les
extiende en la presente una garantía limitada de cinco años a partir de la fecha de compra, con todos los otros
artículos de esta garantía que aplican excepto la duración de la garantía.
Algunos estados y provincias no permiten la exclusión o la limitación de los daños incidentales o consecuentes,
por lo tanto, las limitaciones y exclusiones anteriores podrían no aplicarse a su caso. Esta garantía le otorga derechos
tienda o llame al 1-855-HD-GLACIER para obtener más detalles.
12
Pre-instalación
PLANIFICACIÓN DE LA INSTALACIÓN
Antes de comenzar la instalación de este producto, asegúrate de que no falta ninguna pieza. Compara las piezas
con la lista de contenido del paquete y herrajes incluidos. Si falta alguna pieza o está dañada, no intentes instalar
el producto.
HERRAMIENTAS NECESARIAS
Gafas de
seguridad
Llave ajustable
Linterna
Destornillador
Phillips
Llave para grifería
HERRAJE INCLUIDOS
NOTA: No se muestra el tamaño real de los herrajes.
AA
Pieza
AA
Descripción
Llave hexagonal
Cantidad
1
13
HOMEDEPOT.COM
Para obtener asistencia, llama al 1-855-HD-GLACIER.
Pre-instalación (continuación)
CONTENIDO DEL PAQUETE
E
F
G
H
I
A
J
K
L
M
N
O
P
B
C
D
Q
R
S
Pieza
Descripción
Cantidad
A
Ensamblaje del caño
1
B
Arandela de goma
1
C
Arandela metálica
1
D
Tuerca
1
E
Llave
Pieza
Descripción
Cantidad
L
Válvula de extremo
para agua caliente
1
M
Válvula de extremo
para agua fría
1
2
N
Arandela de goma
2
F
Tornillo de fijación
2
O
Arandela metálica
2
G
Índice
2
P
Tuerca de montaje
2
H
Tornillo
2
Q
Tubo en T
1
I
Convertidor
2
R
Sujetador
1
J
Brida de la llave
2
S
Manguera
2
K
Brida
2
14
Instalación
prepararse para la
1 Cómo
instalación
instalar el ensamblaje
2 Cómo
del caño
PRECAUCIÓN: Cierra siempre el suministro de agua
antes de quitar un grifo existente o reemplazar cualquier
pieza de un grifo. Abre la llave del grifo para liberar la
presión de agua y asegúrate de que el suministro de agua
esté completamente cerrado.
□
Taladra orificios de 1-3/8 plg en la plataforma
acabada, como se muestra en el diagrama a
continuación.
□
Coloca el ensamblaje del caño (A) a través del
orificio central de montaje en la plataforma.
□
Asegura el ensamblaje del caño (A) con la
arandela de goma (B), la arandela metálica (C)
y la tuerca (D). Usa una llave para grifería para
apretar la tuerca (D).
NOTA: Este kit permite un grosor de plataforma de hasta
1-1/4" (3,17 cm).
A
5 plg (12,7 cm) 3 plg (7,62
mín.
cm) mín.
GR
OS
OR
1 3/8 plg
8p
(3,49 cm)
a 1 lg (20
6 p ,32
lg (
MÁ
c
m
40,6 ) 1 1/8 plg
XIM
OD
4c
m) (2,85 cm)
EL
AP
LAT
AFO
RM
AD
E1
1/4
PLG
B
C
D
(3,1
7C
M)
15
HOMEDEPOT.COM
Para obtener asistencia, llama al 1-855-HD-GLACIER.
Instalación (continuación)
3
Cómo instalar el ensamblaje
de las válvulas de agua fría
y caliente
□
Desde la parte inferior de la plataforma, inserta
el cuerpo de la válvula con la arandela (M) de
goma (N), la arandela metálica (O) y el tornillo
de montaje (P) por los orificios del lado derecho
(agua fría).
□
Desde arriba, enrosca la brida (K) en el vástago
de la válvula.
□
Aprieta la tuerca de montaje (P) con la llave de
grifería, de modo que la brida (K) quede a ras
con la superficie de la plataforma con acabado.
□
Repite este procedimiento para la válvula de
extremo para agua caliente (L) del lado
izquierdo (caliente).
instalar el ensamblaje de
4 Cómo
la llave
□
Enrosca las bridas de la llave (J) en los vástagos
de la válvula.
□
Coloca el invertidor (I) en el vástago de la
válvula (1) y asegura con un tornillos (H). Usa
un destornillador Phillips para apretar los
tornillos (H).
□
Coloca las llaves (E) en los invertidores (I) y
aprieta los tornillos de ajuste (F) con la Llave
hexagonal (AA). Inserta los índices (G).
E
F
H
I
J
1
K
L
M
N
O
P
16
G
Instalación (continuación)
5
□
Cómo instalar el tubo en T
hacer las conexiones de
6 Cómo
las tuberías de agua
□ Conecta las líneas del suministro de agua (1) a las
entradas del grifo (2). (Las líneas de suministro no
están incluidas).
Desde abajo de la plataforma, empuja el tubo
en forma de T (Q) en el vástago del caño (1)
hasta que esté completamente asentado.
Coloca el sujetador (R) dentro de las ranuras (2).
2
1
R
2
1
2
Q
1
7 Cómo conectar la mangueras
□
Conecta las mangueras (S) a la parte inferior
de las válvulas de extremo de agua caliente y
fría (L & M) como se muestra.
□
Alinea el tubo en T (Q) en una posición que
permita una separación máxima para conectar
las mangueras.
□
Dobla cuidadosamente las mangueras (S) para
que quepan en el espacio disponible y enrosca
cuidadosamente los acoplamientos de la
manguera a los lados de el tubo en T (Q).
Aprieta todas las conexiones con una llave.
L
S
17
Q
M
HOMEDEPOT.COM
Para obtener asistencia, llama al 1-855-HD-GLACIER.
Funcionamiento
purgar las tuberías y
1 Cómo
comprobar que no haya fugas
□
Después de finalizar la instalación, abre el
suministro de agua y deja que corran el agua
fría y caliente, cada una durante un minuto
como mínimo. Esto enjuaga cualquier suciedad
que podría dañar las piezas internas.
□
Con el chorro abierto, verifica que no haya
fugas.
Cuidado y limpieza
□
Conserva el acabado del grifo aplicando cera no abrasiva.
□
Cuando uses limpiadores no abrasivos, enjuaga de inmediato cuando termines de limpiar el grifo.
□
No uses limpiadores abrasivos para limpiar este grifo.
18
Piezas de repuesto
*Especificar acabado
1
5
2
3
4
6
7
8
9
10
11
12
13
14
15
16
17
18
19
20
21
22
Pieza
Descripción
23
Número de pieza
Pieza
1
Llave
RP13141*
13
Arandela de goma
RP64023
2
Tornillo de fijación
RP50002
14
Arandela metálica
RP64024
3
Índice (R)
RP10004
15
Tuerca de montaje
RP56014
4
Índice (B)
RP10005
16
Arandela de goma
RP64032
5
Tornillo de fijación
RP50103
17
Arandela metálica
RP64033
6
Tornillo
RP70116
18
Tuerca
RP56015
7
Invertidor
RP64044
19
Aro tórico
RP60047
8
Brida
RP80175*
20
Tubo en T
RP70124
9
Bonete
RP70001
21
Sujetador
RP70123
10
Brida
RP70324
22
Manguera
RP70042
11
Cartucho (H)
RP20013
23
Llave hexagonal
RP70221
12
Cartucho (C)
RP20014
19
Descripción
Número de pieza
HOMEDEPOT.COM
Para obtener asistencia, llama al 1-855-HD-GLACIER.
¿Problemas, preguntas o piezas faltantes? Antes de regresar a la tienda,
llama a servicio al cliente de Glacier Bay
de lunes a viernes de 8 a.m. a 6 p.m., hora estándar del este
1-855-HD-GLACIER
HOMEDEPOT.COM
Conserva este manual para uso futuro.