1
Installation Instructions / Warranty
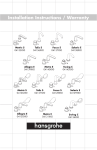
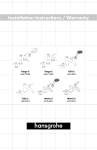
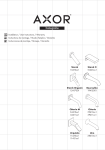
Metris S
31436XX1
Metris S
31446XX1
Metris S
31438XX1
Metris S
31448XX1
Talis S
32313XX1
Talis S
32314XX1
Focus S
31732XX1
Focus S
31733XX1
31436XX1
31438XX1
32313XX1
31732XX1
31446XX1
31448XX1
32314XX1
31733XX1
Installation Considerations
• For best results, Hansgrohe recommends that
this unit be installed by a licensed, professional
plumber.
• Please read over these instructions thoroughly
before beginning installation. Make sure that
you have all tools and supplies needed to com�
plete the installation.
• The 4-Hole Roman Tub Set trim kits require rough
06646000 (not included). Rough 06646000
is listed by IAPMO.
• The flow rate of the handshower is 2.5 gpm.
• Four-hole models only: Protection against
backflow is provided by a check valve in the
handshower elbow and by an automatically
resetting diverter.
• The 3-Hole trim kits require rough 06607000
(not included). Rough 06607000 is listed by
IAPMO.
• This unit is not anti-scald. In Massachusetts, or
if required by local plumbing code, install an
approved remote pressure balance valve or
other approved anti-scald device.
• Keep this booklet and the receipt (or other proof
of date and place of purchase) for this product
in a safe place. The receipt is required should it
be necessary to request warranty parts.
À prendre en considération pour l’installation
• Pour de meilleurs résultats, Hansgrohe recom�
mande que ce produit soit installé par un plom�
bier professionnel licencié.
• Veuillez lire attentivement ces instructions avant
de procéder à l’installation.�� ����������������
Assurez-vous de
disposer de tous les outils et du matériel néces�
saires pour l’installation.��
• Les ensembles de robinetterie à 4 ouvertures
requièrent l’utilisation de la pièce de surface
06646000 (non comprise). La pièce de surface
06646000 est homologuée par l’IAPMO.
• Le débit de la douchette est de 2,5 gal/min.
• Pour les modèles à quatre ouvertures seule�
ment : La protection contre le retour d’eau est
assurée par un clapet anti-retour dans le coude
de la douchette et un dispositif de dérivation à
réenclenchement automatique.
• Les ensembles de robinetterie à 3 ouvertures
requièrent l’utilisation de la pièce de surface
06607000 (non comprise). La pièce de surface
06607000 est homologuée par l’IAPMO.
• Ce produit ne possède pas de dispositif antibrûlure. Installez une vanne à pression autorégu�
larisée externe approuvée ou tout autre dispositif
anti-brûlure approuvé, tel que requis par le code
de plomberie local.
• Conservez ce livret et le reçu (ou une autre
preuve sur laquelle figurent la date et l’endroit
de l’achat) pour ce produit dans un endroit sûr.
Le reçu est requis si vous commandez des pièces
sous garantie.
Consideraciones para la instalación
• Para obtener mejores resultados, la instalación
debe estar a cargo de un plomero profesional
matriculado.
• Antes de comenzar la instalación, lea estas in�
strucciones detenidamente. Asegúrese de tener
las herramientas y los insumos necesarios para
completar la instalación.
• Los juegos de pieza exterior de 4 orificios requi�
eren la pieza interior 06646000 (no incluida).
La pieza interior 06646000 se encuentra en la
lista de IAPMO.
• El caudal de la teleducha es de 2,5 galones por
minuto.
• Los juegos de pieza exterior de 3 orificios requi�
eren la pieza interior 06607000 (no incluida).
La pieza interior 06607000 se encuentra en la
lista de IAPMO.
• Esta unidad no es anti-escaldadura. Instale una
válvula remota de balance de presiones aproba�
da u otro dispositivo anti-escaldadura aprobado
si el código de plomería local lo requiere.
• Mantenga este folleto y el recibo (u otro com�
probante del lugar y fecha de compra) de este
producto en lugar seguro. El recibo se requiere
en caso de ser necesario solicitar piezas bajo
garantía.
• Modelos de cuatro orificios únicamente: Una
válvula antirretorno en el codo de la teleducha y
un distribuidor que se reajusta automáticamente
brindan protección contra el contraflujo.
English
Installation
Remove the plaster shields from the hot and cold
valves and the spout tee.
Install the handle escutcheons.
Install the white plastic snap connectors and the
screws.
Push the handle down firmly over the snap connectors.
Inspect the alignment of the handles.
Français
Español
Installation
Instalación
Retirez les protecteurs.
Retire los protectores de yeso.
Installez les écussons.
Instale los floróns.
Installez les connecteurs de poignée à encliqueter.
Instale los conectores a presión del mando.
Poussez les poignées sur les connecteurs à encli�
queter.
Presione los mandos en los conectores a presión.
Vérifiez l’alignement des poignées.
Inspeccione la alineación de los mandos.
English
2
If it is not satisfactory, remove the handle (1), turn it
slightly (2), and reinstall (3).
1
3
3-Hole Trim Kits only
Remove the brass plug from the tee.
Lightly lubricate the o-rings on the sealing ring using
white grease (not included).
Push the spout sealing ring firmly into the spout tee.
Français
Español
Si l’alignement n’est pas satisfaisant, retirez la poignée Si la alineación no es satisfactoria, retire el mando
(1), tournez-la légèrement (2), puis réinstallez-la (3).
(1), gírelo levemente (2) y reinstálelo (3).
Pour les ensembles de robinetterie à 3 ouvertures seulement :
Juegos de pieza exterior de 3
orificios únicamente:
Retirez le bouchon du raccord en T.
Retire el tapón del tubo en “T”.
Lubrifiez les joints toriques sur la bague d’étanchéité
à l’aide de graisse de plomberie blanche (non com�
prise).
Lubrique los retenes anulares en el anillo de sellado
con grasa blanca para plomería (no incluida).
Appuyez fermement sur la bague d’étanchéité pour
l’insérer dans le raccord en T.
Presione el anillo de sellado firmemente en el tubo en
“T”.
English
3 mm
Install the spout escutcheon.
Press the spout over the spout tee. Install and tighten
the set screw with a 3 mm Allen wrench.
Do not overtighten the set screw
or the o-rings on the sealing ring
will deform, which will cause a
leak.
Turn on the water and check all connections for leaks.
4-Hole Trim Kits only
Remove the brass plug from the tee.
Lightly lubricate the diverter o-rings using white grease
(not included).
Press the diverter assembly firmly into the spout tee
until it is fully seated.
Turn the guide bushing so that the slot faces the rear
of the spout.
10
Français
Español
Installez l’écusson.
Instale el florón.
Poussez le robinet sur la bague d’étanchéité.
Presione el surtidor sobre el anillo de sellado.
Serrez la vis de pression à l’aide d’une clé hexago�
nale de 3 mm.
Apriete el tornillo de fijación con una llave Allen de
3 mm.
Ne serrez pas excessivement la vis
de pression ou les joints toriques
sur la bague d’étanchéité pour
éviter de la déformer et de causer
une fuite.
No sobreapriete el tornillo de
fijación, o los retenes anulares en
el anillo de sellado se deformarán,
lo que provocará una pérdida.
Pour les ensembles de robinetterie à 4 ouvertures seulement :
Juegos de pieza exterior de 4
orificios únicamente:
Retirez le bouchon du raccord en T.
Retire el tapón del tubo en “T”.
Lubrifiez les joints toriques du dispositif de dériva�
tion à l’aide de graisse de plomberie blanche (non
comprise).
Lubrique los retenes anulares del distribuidor con
grasa blanca para plomería (no incluida).
Appuyez fermement sur l’assemblage du dispositif de
dérivation pour l’insérer dans le raccord en T.
Tournez la douille de guidage de façon à ce que la
fente soit orientée vers l’arrière du robinet.
Presione el conjunto del distribuidor firmemente en el
tubo en “T”.
Gire el casquillo guía de forma tal que la ranura mire
hacia la parte posterior del surtidor.
11
English
3 mm
Install the spout escutcheon.
Firmly press the spout over the tee and diverter.
Tighten the set screw with the included 3 mm Allen
wrench.
Do not overtighten the set screw
or the o-rings on the diverter will
deform, which will cause a leak.
Install the pull rod. The threaded end of the pull rod
must go into the hole in the pin.
Install the check valve in the elbow, with the arrow
pointing in the direction of the water flow.
Remove the plaster shield from the handshower
holder. Pull out on the handshower hose.
Screw the handshower holder escutcheon into place.
Install the elbow.
12
Français
Español
Installez l’écusson.
Instale el florón.
Poussez le robinet sur le dispositif de dérivation.
Serrez la vis de pression à l’aide d’une clé hexago�
nale de 3 mm.
Presione el surtidor sobre el distribuidor. Apriete el
tornillo de fijación con una llave Allen de 3 mm.
Ne serrez pas excessivement la vis
de pression ou les joints toriques
sur le dispositif de dérivation pour
éviter de le déformer et de causer
une fuite.
No sobreapriete el tornillo de fijación, o los retenes anulares en el
distribuidor se deformarán, lo que
provocará una pérdida.
Instale el tirador. El extremo roscado del tirador debe
entrar en la ranura del casquillo guía.
Installez la tige d’entraînement. L’extrémité filetée de
la tige d’entraînement doit être insérée dans la fente
de la douille de guidage.
Installez le clapet anti-retour dans le coude de la
douchette. La flèche doit pointer en direction de
l’écoulement d’eau.
Instale la válvula antirretorno en el codo de la
teleducha. La flecha debe apuntar en la dirección del
caudal de agua.
Retirez le protecteur du support de douchette.
Retire el protector de yeso del soporte de la teledu�
cha.
Tirez sur l’extrémité du tuyau pour l’éloigner du sup�
port.
Installez l’écusson.
Installez le coude.
Tire el extremo de la manguera hacia afuera del
soporte.
Instale el florón.
Instale el codo.
13
English
Place the screen washer in the elbow. Screw the
handshower into the elbow.
Guide the handshower into the holder.
14
Français
Español
Installez le tamis dans le coude.
Instale la arandela de filtro en el codo.
Installez la douchette.
Instale la teleducha.
Guidez la douchette dans le support.
Guíe la teleducha en el soporte.
15
Replacement Parts / Pièces détachées / Repuestos
11
17
17
1
2
2
3
12
3
4
18, 19
13
4
14
14
Metris S
Talis S
21
17
1
2
3
4
14
Focus S
16
15
6
17
1
16
7
2
12
10
18,19
8
9
13
4
14x2.5
23x2.5
22x2
5
14
Metris S
9x2.5
20
6
6
1
17
17
2
2
4
4
14
5
Talis S
14x2.5
23x2.5
22x2
9x2.5
14
5
Focus S
14x2.5
23x2.5
22x2
9x2.5
17
1
aerator
aérateur
aireador
13956XX0
2
spout escutcheon
écusson
florón
97779XX0
3
sealing ring
joint
anillo de sellado
88512000
4
snap connector
entraineur + vis
anclaje para mando
94184000
5
diverter
inerseur
inversor
96775000
6
diverter knob
bouton d'inverseur
tirador inversor
98707XX0
7
handshower
douchette
teleducha
28504XX1
8
check valve
clapet anti-retour
válvula antirretorno
94074000
9
handshower escutcheon
écusson
florón
97159XX0
10
elbow
coude
codo
28071XX0
11
spout
bec
caño
31095XX0
12
hot handle
poignée pour l'eau chaude
mando para agua
caliente
31096XX0
13
cold handle
poignée pour l'eau froide
mando para agua fría
31097XX0
14
handle escutcheon
écusson
florón
31098XX0
15
spout
bec
caño
98956XX0
16
screen washer
filtre
filtro
94246000
17
screw
vis
tornillo
97660000
18
hot handle
poignée pour l'eau chaude
mando para agua
caliente
31105XX0
19
cold handle
poignée pour l'eau froide
mando para agua fría
31106XX0
20
Focus spout
bec Focus
caño Focus
95460XX0
21
Focus spout
bec Focus
caño Focus
95459XX0
XX = finish / couleurs / acabados
00 = chrome
82 = brushed nickel
83 = polished nickel
18
Cleaning Recommendation for Hansgrohe Products
Modern lavatory faucets, kitchen faucets, and showers consist of very different materials to comply with the needs of the market with regard to
design and functionality. To avoid damage and returns, it is necessary to consider certain criteria when cleaning.
Cleaning Materials for Faucets and Showers
Acids are a necessary ingredient of cleaning materials for removing lime, however please pay attention to the following points when cleaning
faucets and showers:
•
Only use cleaning materials which are explicitly intended for this type of application.
•
Never use cleaning materials which contain hydrochloric, formic, phosphoric, or acetic acid, as they cause considerable damage.
•
Never mix one cleaning material with another.
•
Never use cleaning materials or appliances with an abrasive effect, such as unsuitable cleaning powders, sponge pads, or micro fiber
cloths.
Cleaning Instructions for Faucets and Showers
Please follow the cleaning material manufacturer’s instructions. In addition, pay attention to the following points:
•
Clean the faucets and showers as and when required
•
Use the amount of cleaning product and the amount of time recommended by the manufacturer. Do not leave the cleaner on the fixture
longer than necessary.
•
Regular cleaning can prevent calcification.
•
When using spray cleaners, spray first onto a soft cloth or sponge. Never spray directly onto the faucet as droplets can enter openings
and gaps and cause damage.
•
After cleaning, rinse thoroughly with clean water to remove any cleaner residue.
Important
Residues of liquid soaps, shampoos, and shower foams can also cause damage, so rinse with clean water after using.
Please note: if the surface is already damaged, the effect of cleaning materials will cause further damage.
Components with damaged surfaces must be replaced or injury could result.
Damage caused by improper treatment is not covered under the warranty.
19
Recommandations pour le nettoyage des produits Hansgrohe
Les robinetteries modernes de lavabo, de cuisine et de douche utilisent des matériaux très différents pour répondre aux besoins du marché en
termes de conception et de fonctionnalité.������������������������������������������������������������������������������������������������������
Certaines règles de base doivent être respectées lors du nettoyage de ces produits afin d’éviter de
����������������������������������������������������������������������������������������������������
les endommager ou d’avoir à les retourner.
Produits de nettoyage pour robinetteries et douches
Les acides sont une partie intégrante nécessaire de tous les produits de détartrage; il faut cependant prendre les précautions suivantes lors du
nettoyage des robinets et des douches :
•
N’utilisez que des produits/articles de nettoyage conçus spécifiquement pour les articles de robinetterie et de douche.
•
N’utilisez jamais de produits/articles de nettoyage contenant de l’acide chlorhydrique, formique, phosphorique ou acétique car ils
pourraient causer des dommages considérables.
•
Ne mélangez jamais deux produits de nettoyage.
•
N’utilisez jamais de produits/articles de nettoyage de nature abrasive tels que poudres de nettoyage, tampons-éponge ou chiffons
microfibre non appropriés.
Instructions de nettoyage pour robinetteries et douches
Veuillez suivre les instructions du fabricant de produits/articles de nettoyage.�����������������������������������������������
De plus, tenez compte des conseils suivants :
���������������������������������������������
Nettoyez vos produits de robinetterie et de douche aussi souvent que nécessaire.
•
Utilisez la quantité de produit nettoyant et respectez la durée recommandée par le fabricant.������������������������������������������������
Ne laissez pas le produit sur les articles de
����������������������������������������������
robinetterie plus longtemps que nécessaire.�
•
Un nettoyage régulier peut prévenir la formation de dépôts calcaires.
•
Si vous utilisez des nettoyants en vaporisateur, vaporisez d’abord sur une éponge ou un chiffon.�����������������������������������������
Ne vaporisez jamais directement sur un
���������������������������������������
robinet : des gouttelettes pourraient s’infiltrer dans les ouvertures et les interstices et endommager celui-ci.
•
Après le nettoyage, rincez abondamment avec de l’eau propre pour éliminer tout résidu de produit nettoyant.
Important
Les résidus de savon liquide, de shampoing et de mousse pour la douche peuvent également endommager la robinetterie; rincez donc avec
de l’eau propre après utilisation de ces produits.
Veuillez noter : �����������������������������������������������������������������������������������������
si la surface est déjà endommagée, les produits de nettoyage l’endommageront encore plus.
Les composants dont la surface est endommagée devraient être remplacés sous peine d’entraîner des blessures.�
Les dommages dus à un mauvais traitement ne sont pas couverts par la garantie.
20
Recomendación de limpieza para los productos de Hansgrohe
Hoy en día, las griferías de baño y de cocina así como duchas modernas se componen de materiales muy distintos para satisfacer las exigen�
cias del mercado respecto al diseño y la funcionalidad. Para evitar daños reclamaciones hay que tener en cuenta ciertos aspectos tanto en el
uso como en su limpieza posterior.
Para elucidado de las griferías y las duchas en principio hay que seguir lo siguiente:
•
Usar sólo detergentes previstos específicamente para este campo de aplicación.
•
No aplicar detergentes que contengan hipoclorito sódico, ácido clorhídrico, fórmico o acético porque pueden causar daños impor�
tantes.
•
Detergentes que contienen ácido fosfórico tampoco pueden ser aplicados ilimitadamente.
•
Por regla general no se deben mezclar detergentes.
•
Tampoco se deben utilizar utensilios abrasivos, como son polvos abrasivos, esponjas o paños de microfibra.
•
Si tienen que seguir siempre las instrucciones de uso de los fabricantes de los detergentes.
•
La limpieza tiene que ser realizada según la dosificación y el tiempo de actuación, en función del objeto y ajustada a las necesidades
específicas del mismo.
•
Gracias a una limpieza periódica se pueden evitar las incrustaciones de cal.
•
No conviene rociar el detergente en ningún caso sobre la grifería sino sobre los textiles y ejecutar la limpieza así porque el líquido
puede entra en aperturas o hendiduras de la grifería y causar daños.
•
Después de la limpieza hay que aclarar con suficiente agua para eliminar completamente el resto de detergente.
•
La utilización de limpiadores a vapor no está permitida, las altas temperaturas pueden dañar los productos.
Indicaciones importantes
Los residuos de productos de aseo como jabón líquido, champús y gel de ducha pueden dañar también los materiales.
Por lo que también se deberá prestar atención a lo siguiente: aclarar con abundante agua después del uso.
Con materiales ya dañados la acción de detergentes incrementará el desgaste de estos.
Los componentes con superficies dañadas deberán cambiarse, en otro caso se corre el peligro de lesionarse.
Los daños que resulten de un uso inadecuado no están incluidos en nuestra garantía.
21
Limited Lifetime Consumer Warranty
This product has been manufactured and tested to the highest quality standards by Hansgrohe, Inc. (“Hansgrohe”). This warranty is limited to
Hansgrohe products which are purchased by a consumer in the United States after March 1, 1996, and installed in either the United States or
Canada.
WHO IS COVERED BY THE WARRANTY
This warranty extends to the original consumer purchaser only. This warranty is non-transferable.
WHAT IS COVERED BY THE WARRANTY
This warranty covers only your Hansgrohe manufactured product. Hansgrohe warrants this product against defects in material or workman�
ship as follows: Hansgrohe will repair at no charge for parts only or, at its option, replace any product or part of the product that proves
defective because of improper workmanship and/or material, under normal installation, use, service and maintenance. If Hansgrohe is unable
to provide a replacement and repair is not practical or cannot be timely made, Hansgrohe may elect to refund the purchase price in exchange
for the return of the product.
LENGTH OF WARRANTY
Replacement or repaired parts of products will be covered for the term of this warranty as stated in the following two sentences. If you are a
consumer who purchased the product for use primarily for personal, family, or household purposes, this warranty extends for as long as you
own the product and the home in which the product is originally installed. If you purchased the product for use primarily for any other pur�
pose, including, without limitation, a commercial purpose, this warranty extends only (i) for 1 year, with respect to Hansgrohe and Commercial
products, and (ii) for 5 years, with respect to AXOR products.
THIS WARRANTY DOES NOT COVER, AND HANSGROHE WILL NOT PAY FOR:
A. Conditions, malfunctions or damage not resulting from defects in material or workmanship.
B.
Conditions, malfunctions or damage resulting from (1) normal wear and tear, improper installation, improper maintenance, misuse, abuse,
negligence, accident or alteration, or (2) the use of abrasive or caustic cleaning agents or “no-rinse” cleaning products, or the use of the
product in any manner contrary to the product instructions. (3) Conditions in the home such as excessive water pressure or corrosion.
C. Labor or other expenses for the disconnection, deinstallation, or return of the product for warranty service, or for installation or reinstalla�
tion of the product (including but not limited to proper packaging and shipping costs), or for installation or reinstallation of the product.
D.Accessories, connected materials and products, or related products not manufactured by Hansgrohe.
TO OBTAIN WARRANTY PARTS OR INFORMATION
Contact your Hansgrohe retailer, or contact Technical Service at:
Hansgrohe Inc.
1492 Bluegrass Lakes Parkway
Alpharetta GA 30004
Toll-free (800) 334-0455.
In requesting warranty service, you will need to provide
1.
The sales receipt or other evidence of the date and place of purchase.
2.A description of the problem.
3. Delivery of the product or the defective part, postage prepaid and carefully packed and insured, to Hansgrohe Inc. 1492 Bluegrass
Lakes Parkway, Alpharetta, Georgia 30004, Attention: Technical Service, if required by Hansgrohe.
When warranty service is completed, any repaired or replacement product or part will be returned to you postage prepaid.
EXCLUSIONS AND LIMITATIONS
REPAIR OR REPLACEMENT (OR, IN LIMITED CIRCUMSTANCES, REFUND OF THE PURCHASE PRICE) AS PROVIDED UNDER THIS WAR�
RANTY IS THE EXCLUSIVE REMEDY OF THE PURCHASER. HANSGROHE NEITHER ASSUMES NOR AUTHORIZES ANY PERSON TO
CREATE FOR IT ANY OBLIGATION OR LIABILITY IN CONNECTION WITH THIS PRODUCT.
HANSGROHE SHALL NOT BE LIABLE TO PURCHASER OR ANY PERSON FOR ANY INCIDENTAL, SPECIAL, OR CONSEQUENTIAL DAM�
AGES, ARISING OUT OF BREACH OF THIS WARRANTY OR ANY IMPLIED WARRANTY (INCLUDING MERCHANTABILITY).
22
Some States do not allow the exclusion or limitation of incidental or consequential damages, so the above limitation or exclusion may not
apply to you. This warranty gives you specific legal rights, and you may have other rights which vary from State to State. You may be required
by law to give us a reasonable opportunity to correct or cure any failure to comply before you can bring any action in court against us under
the Magnuson-Moss Warranty Act.
PRODUCT INSTRUCTIONS AND QUESTIONS
Upon purchase or prior to installation, please carefully inspect your Hansgrohe product for any damage or visible defect. Prior to installing,
always carefully study the enclosed instructions on the proper installation and the care and maintenance of the product. If you have questions
at any time about the use, installation, or performance of your Hansgrohe product, or this warranty, please call or write to us or call us toll-free
at 800 334 0455.
23
www.hansgrohe-usa.com
US - Installation Instructions • Part No. 90597501 • Revised 11/2009
Hansgrohe, Inc. • 1490 Bluegrass Lakes Parkway • Alpharetta, GA 30004
Tel. 770-360-9880 • Fax 770-360-9887