1
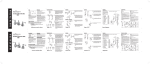
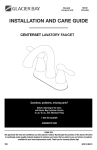
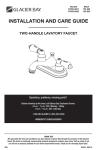
Model#
F51A1032CP
SKU#
478-234
INSTALLATION AND CARE GUIDE
CENTERSET LAVATORY FAUCET
Questions, problems, missing parts?
Before returning to the store,
call Glacier Bay Customer Service
8 a.m.-6 p.m., EST, Monday-Friday
1-855-HD-GLACIER
HOMEDEPOT.COM
THANK YOU
We appreciate the trust and confidence you have placed in Glacier Bay through the purchase of this faucet. We strive
to continually create quality products designed to enhance your home. Visit us online to see our full line of products
available for your home improvement needs. Thank you for choosing Glacier Bay!
THD
9/2014 REV.01
Table of Contents
Important Information...............................2
Warranty....................................................2
Pre-Installation..........................................2
Planning Installation..............................2
Tools and Hardware Required...............2
Package Contents.................................3
Installation ................................................4
Care & Cleaning.........................................7
Troubleshooting.........................................7
Service Parts..............................................8
Important Information
Observe all local plumbing and building codes.
Cover the drain in your sink to avoid losing parts.
Review the care and cleaning section included in this guide.
Warranty
LIMITED LIFETIME WARRANTY
Glacier Bay products are manufactured with superior quality standards and workmanship and are backed by our
limited lifetime warranty. Glacier Bay products are warranted to the original consumer purchaser to be free of
defects in materials or workmanship. We will replace FREE OF CHARGE any product or parts that proves defective.
Simply, return the product / part to any of The Home Depot retail locations or call 1-855-HD Glacier (1-855-4345224) to receive the replacement item. Proof of purchase (original sales receipt) from the original consumer
purchaser must be made available for all Glacier Bay warranty claims.
This warranty excludes incidental/inconsequential damages and failures due to misuse, abuse or normal wear and
tear. This warranty excludes all industrial, commercial & business usage, whose purchasers are hereby, extended
a five year limited warranty from the date of purchase, with all other terms of this warranty applying except the
duration of warranty.
Some states and provinces do not allow the exclusion or limitation of incidental or consequential damages, so the
above limitations may not apply to you. This warranty gives you specific legal rights and you may also have other
rights that vary from state to state and province to province. Please see a store or contact 1-855-HDGlacier for
more details.
Pre-Installation
PLANNING INSTALLATION
Before you begin to install this product, ensure that all parts are present. Compare parts with the package
contents list. If any part is missing or damaged, do not attempt to install the product. Contact customer service for
replacement parts.
TOOLS AND HARDWARE REQUIRED
Adjustable
wrench
Channellock
pliers
2
Safety
goggles
Silicone
Sealant
(2)
Supply
lines
Pre-Installation (continued)
PACKAGE CONTENTS
Drain Assembly
Faucet Assembly
J
A
D
E
K
B
L
F
M
C
G
O
N
P
H
Part
Description
Quantity
A
Faucet
1
B
Aerator
1
C
Lock nut
2
E
Drain flange (Preassembled to Drain body (H))
1
F
Rubber washer (Preassembled to Drain body (H))
1
G
Lock nut (Preassembled to Drain body (H))
1
H
Drain body
1
D
Plunger (Preassembled to Drain body (H))
1
J
Lift rod
1
K
Thumb screw (Preassembled to Lift rod strap (L))
1
L
Lift rod strap
1
M
Spring clip (Preassembled to Ball rod (N))
1
N
Ball rod
1
O
Bushing (Preassembled to Ball rod (N))
1
P
Ball nut (Preassembled to Ball rod (N))
1
3HOMEDEPOT.com/GLACIERBAY
Please contact 1-855-434-5224 for further assistance.
Installation
1 Installing the faucet assembly 2 Preparing the pop-up assembly
CAUTION : Always turn off the water supply before
removing an existing faucet or replacing any part of a
faucet. Open the faucet handle to relieve water pressure
and ensure that the water is completely shut off.
Shut off the water supply.
Remove the plunger (I) and drain flange (E) from
the drain body (H).
Screw the lock nut (C) all the way down, and
push the rubber washer (F) down.
Clean off the installation surface.
Place the faucet (A) through the mountingholes in the sink.
Secure the faucet (A) to the sink using the
mounting nuts (C) provided .
I
NOTE: If the sink is uneven, use silicone under the
putty plate.
E
A
F
G
C
4
Installation (continued)
the plunger and ball
4 Installing
rod
3 Installing the drain body
Apply silicone caulk (not included) under the
drain flange (E) and place the drain flange (E)
over the drain hole in the sink.
Insert the plunger (I) into the drain hole in the
sink.
Remove the lift rod strap (L) and spring clip (M)
from the ball rod (N).
From underneath the sink, screw the drain
body (H) onto the drain flange (E). Ensure that
the opening (1) for the ball rod on the drain
body (H) faces towards the rear of the sink.
Remove the ball nut (P). Insert the ball rod (N)
into the drain body (H) and through the hole of
the plunger (I).
For easier removal and cleaning, rotate the
plunger (I) 90 degrees so that the ball rod (N)
does not go through the hole in the plunger (I).
Tighten the rubber washer (F) and lock nut (F)
on the drain body (H).
Push the bushing (O) and ball nut (P) against
the hole in the drain body (H) and tighten the
ball nut (P) onto the threaded end.
E
I
H
1
M
1
F
G
N
1
P
2
O
1
H
3
L
1
5
HOMEDEPOT.com/ GLACIERBAY
Please contact 1-855-434-5224 for further assistance.
Installation (continued)
5 Installing the lift rod
6 Attaching the ball rod and strap
Adjust the ball rod (N) to the down position.
Insert the lift rod (J) through the faucet (A) and
down into the strap (L). Tighten the thumb
screw (K).
Attach the ball rod (N) to the strap (L) using
the clip (M).
L
J
J
M
N
A
K
L
K
7 Adjusting the lift rod
J
K
Loosen the thumb screw (K) on the lift rod
strap (L).
Adjust the lift rod (J) to the down position and
re-tighten the thumb screw (K).
K
6
Installation (continued)
the water supply
8 Connecting
lines
9 Checking for leaks
Turn on the water supply to the faucet.
Use 1/2 in. I.P.S. faucet connections (2), or use
supply line coupling nuts (3) (not included) with
a 3/8 in. O.D. ball-nose riser (1).
Use the aerator wrench to remove the aerator
(B) from the faucet (A).
Turn the handles on the faucet (A) and allow
the hot and cold water to run for at least 1
minute to flush out any debris and identify any
possible leaks.
Use wrenches to tighten the connections. Do
not overtighten.
When finished, turn the water off and replace
the aerator (B) with the aerator wrench.
A
B
1
2
3
Care and Cleaning
This faucet is designed for years of trouble-free performance. Keep it looking new by doing the following:
Clean periodically with a soft cloth.
Avoid abrasive cleaners, steel wool, and harsh chemicals as these will dull the finish and void your warranty.
Troubleshooting
NOTE: Refer to the service parts section in this manual for
a detailed drawing showing the location of the parts listed
below.
Problem
Possible Cause
There are leaks underneath the
handle.
The retainer nut has come loose
and the O-ring on the cartridge
is dirty or damaged.
Solution
Tighten the retainer nut.
Clear or replace the O-ring
The aerator leaks or has an
inconsistent water flow pattern.
The aerator is dirty or mis-fitted.
Remove the aerator and check for
debris in the aerator screens.
Confirm that the rubber washer is
properly installed.
The water will not shut off
completely.
The rubber seat and spring is
dirty or broken.
Remove the handle and cartridge to
check the rubber seat and spring.
Clean or replace.
7HOMEDEPOT.com/GLACIERBAY
Please contact 1-855-434-5224 for further assistance.
Service Parts
1.1
1.2
6.
7.
Faucet ID Tags can
be found by removing
the hot water handle
2.
DO
NO
T
RE
MO
VE
3.1
3.2
4.
8.
9.
Part
Quantity
Part
Description
Quantity
1
Metal handle assembly (cold)
A66E498C
5
Lock nut set
A504023
1.2
Metal handle assembly (hot)
A66E498H
6
Aerator
2
Description
5.
A603389
7
Lift rod
A025502
3.1
Ceramic disc cartridge (cold)
A507072W
8
Pop-up assembly
A556012
3.2
Ceramic disc cartridge (hot)
A507071W
9
Hex wrench
4
Retainer nut and washer
A500107N-50
Putty plate
Many replacement cartridges, aerators, and drain
assemblies can be purchased at your local The
Home Depot store or online at HOMEDEPOT.COM
A011389NF
8
A031000NI
Questions, problems, missing parts?
Before returning to the store,
call Glacier Bay Customer Service
8 a.m.-6 p.m., EST, Monday-Friday
1-855-434-5224
HOMEDEPOT.COM
Retain this manual for future use.
Núm. de modelo
F51A1032CP
Núm. de sku
478-234
GUÍA DE INSTALACIÓN Y CUIDADO
GRIFO MEZCLADOR PARA LAVABO
¿Tiene preguntas, problemas, o faltan piezas?
Antes de regresar a la tienda,
llame a Servicio al Cliente de Glacier Bay
de lunes a viernes de 8 a.m. a 6 p.m., hora local del Este
1-855-434-5224
HOMEDEPOT.COM
GRACIAS
Apreciamos la confianza que ha depositado en Glacier Bay por la compra de este grifo. Nos esforzamos por crear
continuamente productos de calidad diseñados para mejorar su hogar. Visítenos en internet para ver nuestra línea
completa de productos disponibles para sus necesidades de mejorar su hogar. ¡Gracias por elegir a Glacier Bay!
Tabla de contenido
Información Importante............................2
GARANTÍA..................................................2
Pre-instalación..........................................2
planificación de la instalación.............2
herramientas requeridas.....................2
Contenido del paquete.........................3
Instalación...................................................4
Cuidado y limpieza......................................7
Resolución de fallas....................................7
Piezas de repuesto......................................8
Información Importante
Cumpla con todos los códigos locales de plomería y de construcción.
Tape el desagüe del lavabo para evitar que se pierdan piezas.
Lea el apartado Cuidado y Limpieza de esta guía
GARANTÍA
GARANTÍA DE POR VIDA LIMITADA
Los productos de Glacier Bay están fabricados con normas y mano de obra de calidad superior y están respaldados por nuestra
garantía de por vida limitada. Los productos de Glacier Bay están garantizados al comprador consumidor original de estar libres
de defectos en materiales o mano de obra. Reemplazaremos LIBRE DE CARGOS cualquier producto o pieza que se demuestre está
defectuosa. Símplemente, devuelva el producto a cualquiera de las ubicaciones de venta al detalle de The Home Depot o llame
al 1-855-HD Glacier (1-855-434-5224) para recibir el artículo de reemplazo. La prueba de compra (recibo de venta original) del
comprador consumidor original debe estar disponible para todos los reclamos de garantía de Glacier Bay.
Esta garantía excluye daños y fallos incidentales/consecuenciales debido al mal uso, abuso o desgaste normal por el uso. Esta
garantía excluye todos los usos industriales, comerciales y de negocios, a cuyos compradores por la presente, se les ha ampliado
una garantía limitada de cinco años a partir de la fecha de compra, con todos los otros artículos de esta garantía que aplican
excepto la duración de la garantía.
Algunos estados y provincias no permiten la exclusión o la limitación de los daños incidentales o consecuenciales, por lo tanto, las
limitaciones y exclusiones anteriores podrían no aplicar a usted. Esta garantía le otorga derechos legales específicos y también
puede tener otros derechos que varían de un estado a otro. Por favor, vaya a una tienda o llame al 1-855-HD Glacier para más
detalles.
Pre-instalación
PLANIFICACIÓN DE LA INSTALACIÓN
Antes de comenzar a instalar este producto, asegúrese de que todas las partes estén presentes. Compare las partes con la lista de
contenido del paquete. Si hace falta alguna parte o se encuentra dañada, no intente instalar el producto. Póngase en contacto con
servicio al cliente para las partes de reemplazo.
HERAMIENTAS REQUERIDAS
Llave
ajustable
Llave
adjustable
estriada
2
Gafas de
seguridad
Sellador
de
silicona
(2) Líneas
de suministro
Pre-instalación (continuación)
CONTENIDO DEL PA QUETE
Tubo de desagüe
Ensamblaje del grifo
J
A
D
E
K
B
L
F
M
C
G
O
N
P
H
Pieza
Descripción
Cantidad
A
Grifo
1
B
Aireador
1
C
Tuerca de seguridad
2
E
Brida del desagüe (Preensamblada al cuerpo del desagüe (H))
1
F
Arandela de goma (Preensamblada al cuerpo del desagüe (H))
1
G
Tuerca de seguridad (Preensamblada al cuerpo del desagüe
(H))
1
H
Cuerpo del desagüe
1
D
Émbolo (Preensamblada al cuerpo del desagüe (H))
1
J
Varilla de levantamiento
1
K
Tornillo de pulgar (Preensamblado a correa de varilla de
levantamiento (L))
1
L
Correa de varilla de levantamiento
1
M
Gancho de resorte (Preensamblado a varilla de bola (N))
1
N
Varilla de bola
1
O
Buje (Preensamblado a varilla de bola (N))
1
P
Tuerca de bola (Preensamblada a varilla de bola (N))
1
HOMEDEPOT.com/GLACIERBAY
Para obtener asistencia, póngase en contacto llamando al 1-855-434-5224.
Instalación
instalar el ensamblaje
1 Cómo
del grifo
preparar el ensamblaje
2 Cómo
emergente
Retira el tapón (D) y la brida (E).
CAUTION : Cierra siempre el suministro de agua
antes de quitar un grifo existente o reemplazar cualquier
pieza de un grifo. Abre la llave del grifo para liberar la
presión de agua y asegúrate de que el suministro de agua
esté completamente cerrado.
Enrosca la tuerca (C) hasta el límite. Presiona
la junta (F) hacia abajo.
Cierre el suministro de agua.
Si es necesario, retire el grifo viejo y limpie la
superficie de instalación.
Coloca el ensamblaje del grifo (A) en los ori cios
de montaje del lavamanos.
D
Asegura el ensamblaje del grifo (A) al
lavamanoscon las tuercas de montaje (C)
incluidas.
NOTE: Si el lavamanos es irregular, usa silicona
debajode la junta .
E
A
F
G
C
4
Instalación (continuación)
del cuerpo del
3 Instalación
desagüe
□
Aplique masilla de silicona (no incluida) bajo
la brida del desagüe (E) y coloque la brida del
desagüe (E) sobre el agujero del desagüe en el
lavabo.
□
Desde abajo del lavabo, atornille el cuerpo del
desagüe (H) sobre la brida del desagüe (E).
Asegúrese de que la abertura (1) para la varilla
de bola en el cuerpo del desagüe (H) quede
mirando hacia la parte trasera del lavabo.
□
Apriete la arandela de goma (F) y la tuerca de
seguridad (G) en el cuerpo del desagüe (H).
del émbolo y la
4 Instalación
varilla de bola
□
Inserte el émbolo (I) en el agujero del desagüe en el
lavabo.
□
Retire la correa de la varilla de levantamiento (L) y el
gancho de resorte (M) de la varilla de bola (N).
□
Retire la tuerca esférica (O). Introduzca la varilla de
rótula (M) en el cuerpo del desagüe (G) y a través del
orificio del dispositivo de cierre (H).
□
Para facilitar la retirada y limpieza, gire 90 grados el
dispositivo de cierre (H) de manera que la varilla de
rótula (M) no pase por el orificio del dispositivo de
cierre (H).
□
Presione el buje (O) y la tuerca de bola (P) contra
el agujero en el cuerpo del desagüe (H) y apriete la
tuerca de bola (P) sobre el extremo roscado.
E
I
1
H
F
G
L
I
N
N
M
P
1
O
1
H
1
HOMEDEPOT.com/GLACIERBAY
Para obtener asistencia, póngase en contacto llamando al 1-855-434-5224.
Instalación (continuación)
de la varilla de bola y
6 Conexión
la correa
de la varilla de
5 Instalación
levantamiento
Ajuste la varilla de bola (N) a la posición de abajo.
Inserte la varilla de levantamiento (J) a través del grifo
(A) y abajo dentro de la correa (L). Apriete el tornillo
de pulgar (K).
Conecte la varilla de bola (N) a la correa (L) usando
el gancho (M).
L
J
J
M
N
A
K
L
K
de la varilla de
7 Ajuste
levantamiento
J
K
Afloje el tornillo de pulgar (K) en la correa de la varilla
de levantamiento (L).
Ajuste la varilla de levantamiento (J) a la posición de
abajo y apriete de nuevo el tornillo pulgar (K).
K
6
Instalación (continuación)
de las líneas de
8 Conexión
suministro de agua
9 Comprobación de fugas
Conecte las líneas de suministro de agua con las
tuercas de acoplamiento (1) (no incluidas). Apriete
bien las tuercas de acoplamiento, pero no en exceso.
Cierre el suministro de agua al grifo.
Use la llave del aireador para retirar el aireador(B)
del grifo (A).
Gire las manecillas en el grifo (A) y deje que corra
el agua caliente y el agua fría durante al menos 1
minuto para desalojar cualquier desecho e identificar
cualquier fuga posible.
Cuando haya terminado, cierre el agua y vuelva a
colocar el aireador (B) con la llave del aireador.
A
B
1
2
3
Cuidado y limpieza
Este grifo está diseñado para muchos años de trabajo libre de problemas. Manténgalo como nuevo haciendo lo siguiente:
Límpielo periódicamente con un paño suave.
Evite usar limpiadores abrasivos, lana de acero y químicos fuertes ya que opacarán el acabado y anularán su garantía.
Resolución de fallas
NOTA: Consulte en el apartado de piezas de repuesto de este
manual el dibujo detallado que muestra la ubicación de las
piezas enumeradas.
Problema
Posible causa
Hay fugas debajo de la manecilla.
La tuerca retenedora se ha aflojado y
el anillo O en el cartucho está sucio
o dañado.
Apriete la tuerca retenedora.
El aireador está sucio o no está
ajustado correctamente.
Retire el aireador y revise en busca de
desechos en las mallas del aireador.
El aireador tiene fugas o tiene un
patrón inconsistente de flujo de agua.
Solución
Limpie o reemplace el anillo O.
Confirme que la arandela de goma está
instalada adecuadamente.
El suministro de agua no se corta por
completo.
El asiento de goma y el resorte están
sucios o rotos.
Retire la manecilla y el cartucho para
revisar el asiento de goma y el resorte.
Límpielos o reemplácelos.
HOMEDEPOT.com/GLACIERBAY
Para obtener asistencia, póngase en contacto llamando al 1-855-434-5224.
Piezas de servicio
TIPO DE MODELO
1.1
1.2
6.
7.
Las etiquetas de identificación
del grifo se encontrarán al
retirar la manija del agua caliente
2.
DO
NO
T
RE
MO
VE
3.1
3.2
4.
8.
9.
Pieza
5.
Descripción
Pieza No.
Pieza
1
Ensamblaje de manija
metálicas (frío)
A66E498C
1.2
Ensamblaje de manija
metálicas (caliente)
Tuerca retenedora y arandela
2
Descripción
Pieza No.
5
Juego de tuercas de
seguridad
A504023
A66E498H
6
Aireador
A603389
7
Varilla de levantamiento
A025502
A556012
3.1
Cartucho de disco de cerámica
(frío)
A507072W
8
Ensamblaje del elevador
del tapón del desagüe
3.2
Cartucho de disco de cerámica
(caliente)
A507071W
9
Llave hexagonal
4
Placa de masilla
A011389NF
Muchos cartuchos, aireadores y conjuntos de desagüe de
repuesto se pueden adquirir en la tienda Home Depot más
próxima o en línea en HOMEDEPOT.COM.
8
A500107N-50
A031000NI
¿Tiene preguntas, problemas, o faltan piezas?
Antes de regresar a la tienda,
llame a Servicio al Cliente de Glacier Bay
de lunes a viernes de 8 a.m. a 6 p.m., hora local del Este
1-855-434-5224
HOMEDEPOT.COM
Conserve este manual para uso futuro.