1
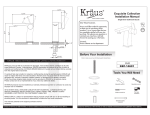
7.2’’
4.1’’
Exquisite Collection
Installation Manual
10.7’’
11.7’’
Extended single-lever bathroom faucet
AB1953
O 1.4’’
Before Your Installation
Check to make sure you have the following parts indicated below:
KRAUS Brand Bathroom Faucets Limited Lifetime Warranty
KRAUS is proud to offer its customers the strongest, most durable ceramic cartridges in all solid
brass Bathroom Faucets it manufactures. KRAUS guarantees all products to be free of defect in
materials and craftsmanship. All KRAUS BRAND Bathroom Faucets carry a limited lifetime warranty
from the original date of purchase.
If a product fails due to defect in material or craftsmanship during the warranty period, KRAUS will
repair or replace the items at its sole discretion. Warranty does not apply when the item has been
tampered with, misused, improperly installed, altered, or damaged due to abuse or accident.
Proof of purchase (original sales receipt) must be provided to KRAUS for all warranty claims.
Please contact one of our representatives if you need any additional details.
All KRAUS products must be installed by a licensed professional plumber or contractor to avoid any
improper use or installation.
IN NO EVENT SHALL KRAUS BE LIABLE FOR ANY INCIDENTAL, CONSEQUENTIAL OR
SPECIAL DAMAGES, INSTALLATION COST, LABOR, TRAVEL TIME, FREIGHT COSTS
INCURRED, LOST PROFITS, OR CONTINGENT LIABILITIES.
KEF-15100
Tools You Will Need
Adjustable wrench
Phillips screwdriver
Adjustable wrench
Plpe tape
(supplied)
KRAUS USA Inc. makes no representation that its products comply with any or all local building or
plumbing codes. It is the consumer’s responsibility to determine local code compliance.
Spanner for body
(supplied)
This warranty extends to the original purchaser and first
consumer.
Contact Us Toll-Free at 1-800-775-0703; or visit our website at www.kraususa.com
2008-2011 Kraus USA Inc.
Contact Us Toll-Free at 1-800-775-0703; or visit our website at www.kraususa.com
2008-2011 Kraus USA Inc.
Replacement Parts
Installation
Keep this manual for ordering replacement parts.
1
1.
2.
3.
4.
5.
6.
7.
8.
Faucet body
Threaded pipe
Waterlines
O-ring
Rubber washer
Brass washer
Fixing ring
Mounting screw
1
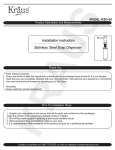
Screw waterlines 3 into the corresponding
screw-hole of faucet body 1. Fit O-ring 4
into the bottom groove of faucet body 1 .
O1 3/8’’
2
2
3
4
3
5
6
7
Insert waterline 3 and threaded pipe 2 through
the drilled hole 1 3/8’’ of the countertop.
Put rubber washer 5 and brass washer 6 onto
the threaded pipe, screwing in fixing ring 7.
Then place faucet body 1 correctly and
fix with mounting screw 8 tightly.
8
Trouble - Shooting
Problem
Cause
Action
Leaks underneath handle
Adjusting ring or cap has come loose.
Tighten the adjusting ring or cap.
Aerator leaks or has an inconsistent
water flow pattern.
Aerator is dirty or misfitted.
Unscrew the aerator to check rubber packing
or replace the aerator.
Water will not shut off completely.
Dirty or worn out plastic washer in the
cartridge.
Remove handle and cartridge to check if ceramic
disk is damage permanently or dirty.
Re-install cartridge.
Contact Us Toll-Free at 1-800-775-0703; or visit our website at www.kraususa.com
2008-2011 Kraus USA Inc.
4
Contact Us Toll-Free at 1-800-775-0703; or visit our website at www.kraususa.com
2008-2011 Kraus USA Inc.