1
INSTALLATION INSTRUCTIONS
CARE AND MAINTENANCE
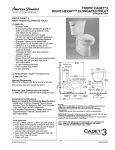
Studio® Dual Flush Concealed Trapway
Right Height®, Elongated Model 2794
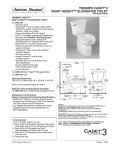
Right Height®, Round Front Model 2795
Thank you for selecting American Standard - the benchmark of fine quality for over 100 years. To ensure this
product is installed properly, please read these instructions carefully before you begin. (Certain installations
may require professional help.) Also be sure your installation conforms to local codes.
Certified by
IAPMO R&T
! CAUTION: PRODUCT IS FRAGILE. TO AVOID BREAKAGE AND POSSIBLE INJURY HANDLE WITH CARE!
NOTE: Pictures may not exactly define contour of china and components.
RECOMMENDED TOOLS AND MATERIALS
Putty Knife
Hacksaw
Regular Screwdriver
Wax Ring/Gasket
Adjustable Wrench
Flexible Supply Tube
Sealant
Closet Bolts
Tape Measure
Carpenters Level
Close toilet supply valve and flush tank completely. Towel or sponge remaining water from tank and bowl.
Disconnect and remove supply line. NOTE: If replacing valve, first shut off main water supply!
Remove old mounting hardware, remove toilet and plug floor waste opening to prevent escaping sewer gases.
Remove closet bolts from flange and clean away old wax, putty, etc. from base area.
NOTE: Mounting surface must be clean and level before new toilet is installed!
2
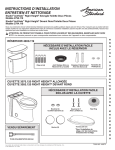
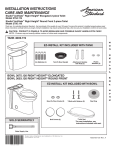
RIGHT HEIGHT ELONGATED 2-PIECE TOILET
F U T U R E
a.
b.
c.
d.
U S E
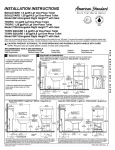
1 REMOVE OLD TOILET
FINISHED
WALL
8-3/4"
(221mm)
1-1/8"
(29mm)
ROUGHING-IN
DIMENSIONS:
NOTE: Distance from wall to
closet flange centerline must
be as listed below:
15-3/4"
(399mm)
30-1/4"
(768mm)
C/L OF SEAT POST
HOLES 5-1/2"
(140mm) CENTERS
14"
(356mm)
SUPPLY
AS
REQUIRED
(position 1 or
position 2)
on the wall is required at
First suggested position is
hidden behind the toilet. The
7-1/2"
(191mm)
BACK VIEW
(for reference)
6"
(152mm)
12-3/16"
(309mm)
FINISHED
between
wall and toilet is limited to 4-1/2". In this case, check your supply and hose dimensions.
WALL
28-1/4"
15-3/4"
(717mm)
(399mm)
8-3/4"
(221mm)
1-1/8"
(29mm)
C/L OF SEAT POST
HOLES 5-1/2"
(140mm) CENTERS
positions, the space for the
14"
(356mm)
16-1/2"
(419mm)
supply between wall and
SUPPLY
AS
REQUIRED
(position 1
or
position 2)
2-5/8"
(67mm)
this case, check your supply
FINISHED
FLOOR
2-1/4"
(57mm)
IMPORTANT: Water supply on the wall is required at 2-1/4" or 8" from centerline of the toilet (see rough-in).
The second suggested
toilet is limited to 4-1/2". In
13-11/16"
(347mm)
8"
(204mm)
First suggested
position ROUND
is hidden behind
the toilet. The
geometry of TOILET
the toilet gives space for this installation.
RIGHT
HEIGHT
FRONT
2-PIECE
The second suggested position is next to the toilet. Between these two positions, the space for the supply
space for this installation.
Between these two
5-1/2"
(140mm)
12"
(305mm)
geometry of the toilet gives
position is next to the toilet.
16-1/2"
(419mm)
3-1/8"
(81mm)
of the toilet (see rough-in).
4-1/2"
(114mm)
2-1/4" or 8" from centerline
30-7/8"
(784mm)
F O R
IMPORTANT: Water supply
S A V E
2-5/8"
(67mm)
18-1/2"
(470mm)
and hose dimensions.
4-1/2"
(114mm)
3-1/8"
(81mm)
16-1/2"
(419mm)
5-1/2"
(140mm)
7-1/2"
(191mm)
12"
(305mm)
12-7/8"
(328mm)
FINISHED
FLOOR
30-7/8"
(784mm)
8"
(204mm)
2-1/4"
(57mm)
12-3/16"
(309mm)
6"
(152mm)
BACK VIEW
(for reference)
IMPORTANT: Water supply on the wall is required at 2-1/4" or 8" from centerline of the toilet (see rough-in).
P r o d u c t n a m e s l i s tFirst
e d hsuggested
e r e i n a r eposition
tradem
r k s o fbehind
AS Am
e rtoilet.
i c a , The
I n c . geometry of the toilet gives space for this installation.
isahidden
the
© A S A m e r i c a , I n c .The
2 01
2
second
suggested position is next to the toilet. Between these two positions, the space for the supply
between wall and toilet is limited to 4-1/2". In this case, check your supply and hose dimensions.
7 3 016 9 2 - 10 0 Rev. C
3
4
5
Press firmly.
TIP: Place 2 pieces of masking
tape on floor (as shown) to help
with alignment in step 6.
6
7
!
Apply weight evenly. Do not move after
placement. Water tight seal may break.
9
Thread, then
hand tighten
water supply.
8
10
Hand Tighten Only.
Do Not Overtighten.
Tighten handles alternately
until tank contacts bowl.
HAND TIGHTEN ONLY!
installation,
* Forseeseat
instructions
included with seat.
!
WARNING:
Overtightening of water supply
line nuts could result in breakage
and potential flooding. If the
connection leaks after hand
tightening, replace the supply line.
Do not use any type of sealant on
the water supply connection.
!
- 2 -
Use of plumber’s putty,
pipe dope, or any other
type of sealant will void
the warranty.
7 3 016 9 2 - 10 0 Rev. C
11
12
SEE STEP 12
Rod Adjustment
SEE STEP 13
REFILL NIPPLE
IMPORTANT:
Refill Float Adjustment
If short flush does not refill
the bowl, turn thumbscrew
CCW 1 turn, flush, repeat
if necessary.
REFILL
TUBE
FLOAT
CUP
HALF
16
14
Install and adjust push
button rods for about
1/16" (1-1/2mm)
clearance between rod
end and valve button.
SEE STEP 13 - TIPS
12
10
8
6
4
2
FILL
VALVE
VALVE
BODY
WATER LEVEL
ADJUSTMENT
ROD
ADJUSTABLE
HEIGHT
Turn on water supply. Submerge
the FLOAT CUP under the water
for 30 seconds. Adjust the water
to desired level by turning WATER
LEVEL ADJUSTMENT ROD and
moving FLOAT CUP up or down.
SHANK
WASHER
LOCK NUT
13
THREADED
SHANK
Diagram 1
FLUSH PUSH BUTTONS
• The large flush button should line up over the
white actuator on the flush tower in the tank.
• The small flush button should line up over the
gray actuator on the flush tower in the tank.
LARGE FLUSH BUTTON
FOR SOLID WASTE
1.6 gal/flush
6 Liter/flush
SMALL FLUSH BUTTON
FOR LIQUID WASTE
1.1 gal/flush
4.1 Liter/flush
• Pressing both buttons at once will result in a
short flush.
TIPS:
With the lid removed, directly press the flush button in
the tank to confirm that the toilet is working properly.
If not, follow troubleshooting guide.
1. Install Threaded Rods into holes in bottom of push
buttons approximately 1/2" (12mm).
2. Lightly snug Locking Nut.
3. Place Lid on Tank.
Locknuts
4. Push Button to test flush. If more stroke is
needed, loosen Locknut and turn Threaded Rod
counterclockwise one (1) turn.
5. Replace Lid. Repeat until flush action is achieved.
Threaded Rods
6. If Valve stays open, turn Threaded Rod clockwise
one (1) turn and lightly snug Locknut.
14
CARE AND CLEANING
When cleaning your toilet, wash it with mild, soapy water, rinse thoroughly with clear water and dry with a soft cloth. Avoid detergents,
disinfectants, or cleaning products in aerosol cans. NEVER use abrasive scouring powders or abrasive pads on your toilet seat. Some
bathroom chemicals and cosmetics may damage the seat's finish.
!
WARNING: Do not use in-tank cleaners. Products containing chlorine (calcium hypochlorite) can seriously damage fittings in the
tank. This damage can cause leakage and property damage.
American Standard shall not be responsible or liable for any tank fitting damage caused by the use of cleaners containing
chlorine (calcium hypochlorite).
- 3 -
7 3 016 9 2 - 10 0 Rev. C
15
NOTE: Pictures are representative and may not
exactly depict the flush valve.
TROUBLESHOOTING
IF FILL VALVE SHUTS OFF BUT CONTINUES TO LEAK
SLOWLY, repeat Step 15.
IF FILL VALVE TURNS OFF AND ON DURING PERIODS OF
NON-USE, it is a signal you are wasting water because:
• The end of the refill tube is inserted into overflow pipe, below
water level in tank. Attach refill tube to overflow pipe using "S"
clip provided.
LIFT ARM
FIRST
• The flush valve is leaking because it's worn, dirty or misaligned
with tank ball or flapper (replace with a new flapper).
IF FILL VALVE WON'T TURN ON OR SHUT OFF or REFILL
OF TANK WATER IS SLOW after valve has been in use for
some time, Fluidmaster Model 242 Replacement Seal may be
needed.
IMPORTANT: Always
clear sand and rust from
system.
• Make sure water supply is off.
Remove valve TOP by lifting arm
and rotating top and arm 1/8 turn
counterclockwise, pressing down
slightly on cap.
• While holding a
container over the
uncapped VALVE to
prevent splashing, turn
water supply on and off
a few times. Leave
water supply off.
• Replace TOP by engaging lugs
and rotating 1/8 turn clockwise.
MAKE CERTAIN TIP IS TURNED
TO THE LOCKED POSITION.
VALVE MAY NOT TURN ON IF
TOP IS NOT FULLY TURNED TO
THE LOCKED POSITION.
Go to our website at www.fluidmaster.com for more
solutions to toilet problems.
For troubleshooting information please contact:
Always use quality Fluidmaster repair parts when maintaining your Fluidmaster products. Fluidmaster shall
not be responsible or liable for any damages caused by products used with Fluidmaster valves that were not
manufactured by Fluidmaster, Inc.
30800 Rancho Viejo Road
San Juan Capistrano, CA 92675
(949) 728-2000 (800) 631-2011
www.fluidmaster.com
© 2001 Fluidmaster, Inc.
® Registered trademark of Fluidmaster, Inc.
BOWL
NUMBER
REPAIR PARTS LIST
Repair parts are determined by toilet tank number which can be found marked inside tank.
NOTE: "XXX" represents color or trim finish options. Specify when ordering.
PART NUMBER
738168-XXX
7301540-200.XXX0A
738565-457.0070A
7381205-400.0070A
7381213-200.0070A
7381147-200.0070A
7381203-201.0070A
738570-1040A
5121.110.XXX
5218.110.XXX
DESCRIPTION
TANK COVER
BOLT CAP KIT
FLUIDMASTER INLET VALVE
DUAL FLUSH VALVE ASSEMBLY
FLUSH VALVE SEAL
EZ TANK COUPLING KIT
PUSH BUTTON ASSEMBLY
REFILL TUBE
SEAT ROUND FRONT
SEAT ELONGATED
3053
3075
✔
✔
✔
✔
✔
✔
✔
✔
✔
✔
✔
✔
✔
✔
✔
✔
✔
✔
TROUBLESHOOTING GUIDE
PROBLEM
POSSIBLE CAUSE
Does not flush
a. Water supply valve closed.
a. Open valve and allow water to fill tank.
b. Water supply line blocked.
b. Shut off water supply, disconnect supply line and inspect all gaskets and washers.
Reassemble.
c. Sand or debris lodged in water control.
c. See Fluidmaster maintenance. (see Step 15)
a. Tank water too low.
a. Check that the water level is set to the mark inside the tank.
b. Bowl water too low.
b. Check that the refill tube is connected to the water control and flush valve port.
Adjust refill float down until bowl water is restored. (see Step 11)
c. Water supply valve partly closed.
c. Open water supply valve fully. Be sure that proper supply tube size is used.
d. Partially clogged trapway and/or drain pipe and/or vent.
d. Remove obstruction. Consult a plumber if necessary.
e. Supply pressure too low.
e. Minimum water supply pressure - 20psi. Wait for tank to refill.
a. Poor supply line connection.
a. Review Step 9.
b. Poor bowl to floor connection.
b. Review Step 6.
a. Flush valve seal leaking or deformed.
a. Clean debris from seal surface. Replace flush valve seal as needed.
b. Sand or debris lodged in water control.
b. See Step 15 Fluidmaster maintenance.
c. Water level set too high.
c. Set water level to mark on back of tank.
Poor or sluggish flush
Toilet leaks
Toilet does not shut off
CORRECTIVE ACTION
In the United States:
American Standard Brands
P.O. Box 6820
Piscataway, New Jersey 08855
Attention: Director of Consumer Affairs
In Canada:
AS Canada ULC
5900 Avebury Rd.
Mississauga, Ontario
Canada L5R 3M3
For residents of the United States, warranty
information may also be obtained by calling
the following toll free number: (800) 442-1902
www.americanstandard.com
Toll Free: (800) 387-0369
www.americanstandard.ca
- 4 -
In Mexico:
American Standard B&K Mexico
S. de R.L. de C.
Via Morelos #330
Col. Santa Clara
Ecatepec 55540 Edo. Mexico
Toll Free: 01-800-839-1200
www.americanstandard.com.mx
73 016 9 2 - 10 0 Rev. C