1
Owner’s Manual
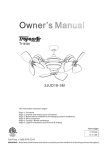
Mustang II
3MT18-2M
This instruction contains 6 pages:
Page 1: Foreword
Page 2: Unpack and inspect parts contained
Page 3: Notes before installation and Hanging system installation
Page 4: Wire connection
Page 5: Hanging base & Canopy installation / Set up m otor position
Page 6: Blade / L ight kit installation and Remote & Setting
Net weight
UL
10.0 KGS.
22.0 LBS.
R
Toll Free: 1-855-676-7247
WARNING : Read and follow these instructions carefully and be mindful of all warnings shown throughout.
READ AND SAVE THESE INSTRUCTIONS
WARNING : TO REDUCE THE RISK OF FIRE, ELECTRICAL SHOCK, OR INJURY
TO PERSONS, PLEASE OBSERVE THE FOLLOWING :
1 ] . To ensure the success of the installation, be sure to read the instructions and review the diagrams
thoroughly before beginning.
2]. To avoid possible electric shock, be sure electricity is TURNED OFF at the main power box before wiring.
All electrical connections must be made in accordance with local codes, ordinances and/or the
National Electric Code. If you are unfamiliar with the methods of installing electrical wiring and
products, secure the services of a qualified and licensed electrician as well as someone who can
check the strength of the supportive ceiling members and make the proper installations and
connections.
3]. Make sure that your installation site will not allow rotating fan blades to come in contact with any object.
Fan must be installed at least 7 feet from floor to prevent injury when fan is in operation.
4]. If possible, mount ceiling fan on a ceiling joist - the joist must be able to support the motion and weight
of the moving fan. If the fan will be mounted on a ceiling outlet box, a 4" x 2-1/8" deep METAL octagon
box is required ; one UL listed as " suitable for fan support ". The box and its supporting members must
not be able to twist or work loose. DO NOT USE PLASTIC BOXES. Installation on a concrete ceiling should
be performed by qualified personnel.
5]. Blades should be attached after motor housing is hung and in place. Fan motor housing should be
kept in carton until ready to be installed to protect its finish. If you are installing more than one ceiling
fan, make sure that you do not mix fan blade sets.
6]. After making electrical connections, spliced conductors should be turned upward. The wires should be
spread apart with the grounded conductor and the equipment-grounding conductor on one side and the
"HOT" wires on the other side.
7]. After fan is completely installed, check to make sure that all connections are secure to prevent fan from
falling and/or causing damage or injury.
8]. This fan is not suitable for slope ceiling.
9]. This fan is not reversible.
10]. This fan is suitable for damp location use.
P1
Unpack and inspect fan carefully to be certain
all contents are included.
Hardware Bag
For Mounting Plate:
Flat Washer x3
Spring Washer x3
Mounting Plate
Machine Screw x2 Wood Screw x3
Safety cable
& Wires
For Hanging Base :
Set Screw x 2
Hanging Base
(with receiver and
oscillating motor)
For Canopy:
Set Screw x 5
Canopy
(one spare screw included)
For Wire Connection:
Wire Nut x 4
Yoke Cover
Downrod
For Blade Installation:
Blade Screw x 13 (one spare screw included)
Paper Washer x 13 (one spare washer included)
Fan Assembly
CFL Bulb
(13W) x 2
Glass
Blade x6
Flywheel
Decorative Cap
Cap
Remote *Battery Included
c
os
Hardware Bag
Wood Screw x2
P2
WARNING: Fan should be at least 7 feet from the floor
Note 1:
Note 2:
Turn off power at breaker
box to avoid possible
electrical shock.
Use metal outlet box suitable
for fan support.
Outlet box must support 35 lbs min.
Note 3:
CAUTION:
Oscillating device located
at hanging base is fragile,
do not damage or bend
oscillating parts (cam/arm/motor)
during installation Hanging Base
OFF OFF OFF
motor
arm
cam
1. HANGING SYSTEM INSTALLATION
Installing mounting plate to ceiling outlet box
IMPORTANT: Align Mounting Plate to desired oscillator direction now.
1A.
Pull house wires from outlet
box through the center hole
of mounting plate
1B.
1C.
Direction marks are for finding the air
direction. Direction marks show the certerline
position between the motors. Motors will be
90 degrees to the left and right of the direction
mark. Adjust mounting plate to the desired
position by aligning 2 slots of mounting plate
with screw holes on outlet box.
Attach mounting plate to outlet box
by securing with screws included
with the outlet box and washers
from the hardware bag through 2
out of 6 slots on mounting plate.
Outlet Box
Outlet Box
Outlet Box
Screw hole
Direction Mark
Mounting slot
House Wires
Mounting
Plate
Ma
er
)
Mounting Plate
xim
um
swee
p area: 5
83 s qu are fe e t (5 4 .
2 sq
e
uar
m
et
( fig.1)
1D. Yoke & Downrod Assembly
1E. Hanging the fan
Remove cotter pin and cross pin secured on downrod
and pull out lead wires inside downrod slightly and
insert downrod into yoke (see fig. 2).
Attached cotter pin and cross pin back through yoke
and downrod securely (see fig. 3).
Lift the fan assembly and hang onto the J hook
through oval-shaped hole on mounting plate.
This will permit you to make the electrical
connections without having to hold the fan up as well.
Mounting Plate
Cotter Pin
Canopy
J Hook
Set Screw
Remote
Receiver
Cross Pin
Canopy
Cotter Pin
Yoke
( fig.2)
Hanging Base
Cross Pin
Fan Assembly
Downrod
( fig.3)
P3
2. WIRE CONNECTION
2A. Attaching safety cable to ceiling joist
Use wood screw, spring washer, and flat washer from hardware bag. Pass wood screw through closed loop of safety cable.
Secure wood screw to ceiling joist through any available slot on mounting plate. Make sure safety cable has been
tightened securely. CAUTION: THE WOOD SCREW AND ITS SUPPORT MUST BE ABLE TO FULLY SUPPORT
THE WEIGHT OF AT LEAST 100 LBS.
Outlet Box
Safety cable
Flat Washer
Spring Washer
Wood Screw
Mounting Plate
Safety cable
2B. Making electrical wire connection
Follow diagram below and make sure that all exposed wires are secured inside wire nuts.
Note: Wires from house may vary in color and may not include ground wire (green).
After wiring is completed, collect wires neatly inside hanging base.
*White wire from house to white wire from receiver
*Black wire from house to black wire from receiver
*Ground wire from house to green wire from hanging base and from mounting plate
*Secure with twist - lock wire nuts. (Included)
From Fan (Pre-wired in factory)
Outlet Box
Wire Form House
From House
From Receiver
Gray
Black
White
Black
OSC.
MOTOR
White / neutral
Safety Cable
White
White
( Neutral )
( Neutral )
Black
Hanging Base Black
( Hot )
( Hot )
Black / hot
Remote
Receiver
Blue
( Light )
White
Canopy
Capacitor
Red
Green
( Green )
( for ground wire )
( Green )
From Hanging Base
From Mounting Plate
2C. Setting code switches for transmitter
Remote controls are tuned to operate together using 4 switches for 16 possible code combinations.
1.Setting the code on the TRANSMITTER
1 Remove battery cover.
2 Slide code switch randomly using a small screwdriver or ball point pen to slide each switch firmly up or down.
3 Slide code switch for light ON/OFF (marked as X), or DIMMING (marked as D) function.
Important! This fan includes 2 CFL bulbs, so the code switch should be at X position (ON/OFF).
You may switch code at D position (DIMMING) once incandescent bulbs are installed.
4 Install 9V DC battery.(Included)
2
5 Install battery cover on transmitter.
O
N
D
1
2
3
Transmitter
Code Switches
4
X
3
D: for light dimming
(for incandescent bulbs )
X: for light ON/OFF
(for CFL bulbs)
15
4
! Warning! CFL bulbs are not applicable to the remote with dimming function.
P4
3. HANGING BASE AND CANOPY INSTALLATION
3A.
Carefully lift the fan assembly away from the hook on mounting plate.
1 Align direction marks on mounting plate with direction marks on hanging base. (see fig.1)
2 Push up hanging base until 2 set screws pre-installed on mounting plate are engaged with L type slots
on hanging base. (see fig.1)
3 Slightly rotate hanging base until two screw heads are in L type slots. (see fig.2)
4 Attach other 2 set screws from hardware bag to secure hanging base and mounting plate (these will be
the remaining 2 out of 4 set screws for securing hanging base to mounting plate). (see fig.2)
Note: Make sure all 4 set screws are firmly secured.
Screws on
Mounting Plate
Mounting Plate
21
2
3
4
Hanging Base
Hanging Base
( fig.1)
( fig.2)
3B. Push up canopy and secure to hanging base with 4 set screws from hardware bag.
Canopy
4. SET UP MOTOR POSITION
NOTE:
1.Fan motor is at 0 degree when taken out from the carton, no need to change motor angle if intend
to use the fan at 0 degree.
2. Both motor positions must be set at the same angle.
There is one indicating line on downrod yoke and three on motor yoke for aligning 0/45/90 degree motor
position (see fig. 1)
4A. Remove set screw and spring washer from motor yoke. (see fig. 2)
4B. Adjust motor angle by aligning one out of three indicating lines (0/45/90) on motor yoke with
indicating line on downrod yoke .(see fig. 2)
4C. Secure set screw and spring washer removed from step 4A back to motor yoke. Make sure set screw is
firmly tightened.(see fig. 2)
( fig.2)
( fig.1)
Set Screw
Set Screw
Set Screw
Set Screw
Indicating Line(1)
Downrod Yoke
Downrod Yoke
Motor Yoke
Downrod Yoke
For 0 degree
Motor Yoke
Downrod Yoke
Indicating Line(3)
P5
Motor Yoke
For 45 degree
Motor Yoke
For 90 degree
5. BLADE INSTALLATION
5A.
Attach blade to blade holder
with screws & washers provided
in hardware bag. Make sure that
all screws are firmly tightened.
5B.
Attach blade assembly to flywheel,
aligning beveled center hole on
flywheel with beveled motor shaft
before attachment .
5C.
Thread the cap counter-clockwise
to motor shaft until fully tightened.
(*This is reverse threaded.)
Blade
Beveled Motor
Shaft
Flywheel
Blade Assembly
Cap
6. LIGHT KIT INSTALLATION
6A.
Install the bulbs (included) to the
medium sockets (sockets) properly.
Light kit fitter
6B.
Align the hole on the glass with the
threaded tube from light fixture.
Attach the glass to light fixture.
Light kit fitter
6C.
Attach the nut to the threaded
tube tightly.
Light kit fitter
Glass
Bulb
Bulb
(13W CFL bulb)
Glass
(13W CFL bulb)
Nut
Medium Sockets
Turn on power at breaker box for remote setting.
7. REMOTE & SETTING
SETTING for light operation before starting fan
Pressing the button “OFF” for 3~5 seconds till the LIGHT BLINKS , which means this remote control
has done the setting. Now the remote is ready for operation.
2
D: for light dimming
(for incandescent bulbs)
O
N
LOW:Fan low speed
MED:Fan middle speed
OSC: Button for ON/OFF oscillation
(*this button only functions
when fan is in operation)
OFF: For SETTING /
Fan speed & Oscillation
2
3
HI:Fan high speed
D/L: ON/OFF button
for down light
D
1
osc
4
X
X: for light ON/OFF
(for CFL bulbs)
Note: You may switch Light switch code at D position
(DIMMING) when you change to incandescent bulbs
for Down light.
P6