1
HOME
DECORATORS
COLLECTION
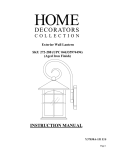
Exterior Flush Mount
SKU 296-466 (UPC 046335974593)
(Aged Iron Finish)
INSTRUCTION MANUAL
HB7045A-292 E/S
Page 1
Thank you for purchasing this Home Decorators Collection exterior
ceiling light fixture. This product has been manufactured with the
highest standards of safety and quality.
FEATURES:
1.
Exterior Flush Mount in Aged Iron Finish.
2.
Timeless elegant design.
3.
Easy to assemble and install.
4.
For energy savings this fixture has been engineered to safely use a
Self Ballasted Compact Fluorescent Lamp in place of an
incandescent lamp.
QUESTIONS, PROBLEMS, MISSING PARTS:
Before returning to your local Home Depot, please call our Customer
Service Team at 1-800-986-3460 or visit www.homedepot.com. Please
reference your SKU (296-466 Aged Iron Finish fixture) or UPC
(046335974593).
Page 2
CAUTION:
1.
Before starting installation of this fixture or removal of a previous
fixture, disconnect the power by turning off the circuit breaker or
by removing the fuse at the fuse box.
2.
CONSTULT A QUALIFIED ELECTRICIAN IF YOU HAVE ANY
ELECTRICAL QUESTIONS.
3.
If you have any non-electrical questions about this fixture, please
contact our Customer Service Team at 1-800-986-3460 or visit
www.homedepot.com. Please reference your SKU (296-466 Aged
Iron Finish fixture) or UPC (046335974593).
4.
Keep your receipt and these Instructions for Proof of Purchase.
TOOLS REQUIRED FOR ASSEMBLY & INSTALLATION
(not included):
2 Light Bulbs (60 W
Max. or CFL equivalent)
Wire Strippers
Phillips Screwdriver
Safety Glasses
Flathead Screwdriver
Electrical Tape
Wire Cutters
Exterior Silicon
Rubber Sealant
Page 3
PARTS INCLUDED (parts are not to scale):
(1) Fixture Pan
(2) Fixture
Mounting Screws
(1) Mounting Bracket
(1) Cage
(1) Finial
(2) Bracket
Mounting Screws
(2) Hex Nuts
(3) Wire Nuts
(2) Lock Nuts
Page 4
INSTALATION & ASSEMBLY:
1. Carefully unpack the fixture. Lay out all parts on a clean surface.
2. Thread the Fixture Mounting Screws (#6) into the provided holes of the
Mounting Bracket (#7) as shown. Thread the Hex Nuts (#9) onto the Fixture
Mounting Screws (#6), as shown. Do not tighten the Hex Nuts (#9) at this
time (Fig. 1).
3. Pull the power supply wires out from the Outlet Box (#4), and mount the
Mounting Bracket (#7) to the Outlet Box (#4), using the Bracket Mounting
Screws (#8) (Fig. 2).
4. Attach the Black Supply Wire (#5) to the Black Fixture Wire (#12) and the
White Supply Wire (#16) to the White Fixture Wire (#13) using Wire Nuts
(#14). Connect the Fixture Ground Wire (#11) and the Supply Ground Wire
(#15) together using a Wire Nut (#14). Wrap all wire connections with
electrical tape for a more secure connection. Note: If you have electrical
questions, consult your local electrical code for approved grounding methods.
7. Mounting
Bracket
6. Fixture
Mounting
Screw
4. Outlet Box
9. Hex Nut
Fig. 1
10. Ceiling
8. Bracket
Mounting Screw
Fig. 2
Page 5
INSTALLATION & ASSEMBLY (cont.):
5. Place the Fixture Pan (#1) over the Outlet Box (#4) and onto the Fixture
Mounting Screws (#6), and adjust the Fixture Mounting Screws (#6) until
they protrude out from the Fixture Pan (#1) 1/4". Remove the Fixture Pan
(#1) and secure the position of the Fixture Mounting Screws (#6) by
tightening the Hex Nuts (#9) against the Mounting Bracket (#7). Place the
Fixture Pan (#1) back onto the Fixture Mounting Screws (#6), and secure it
into place using the Lock Nuts (#3) provided (Fig. 3).
4. Outlet Box
10. Ceiling
7. Mounting Bracket
9. Hex Nut
6. Fixture Mounting Screw
15. Supply Ground Wire
16. White Supply Wire
5. Black Supply Wire
14. Wire Nut
11. Fixture Ground Wire
13. White Fixture Wire
12. Black Fixture Wire
1. Fixture Pan
3. Lock Nut
Fig. 3
Page 6
INSTALLATION & ASSEMBLY (cont.):
6. Install up to two 60 watt incandescent Light Bulbs in the sockets of the
Fixture Pan. Do not exceed a 60 watt incandescent light bulb or 13 watt
SBCFL.
7. Slide the Cage (#2)over the Fixture Pan (#1), making sure the Nipple (#18)
feeds through its center hole (Fig. 4).
8. Thread the Finial (#19) onto the Nipple (#18) to secure the Cage onto the
Fixture Pan (#1) (Fig. 4).
9. Installation is complete. Turn on power at the circuit breaker or fuse box.
Turn the light switch on to activate the fixture.
1. Fixture Pan
18. Nipple
2. Cage
19. Finial
Fig. 4
Page 7
TROUBLESHOOTING:
Symptom
Possible Cause
Corrective Action
Light will not turn on.
1. Power is off.
1. M ake sure power supply is on.
2. Faulty switch.
2. Test or replace switch.
3. Faulty wire connection.
3. Check wiring.
Fuse blows or circuit breaker
trips when light is turned on.
1. Crossed wires or power wire is grounding 1. Check wire connections.
out.
PRODUCT MAINTENANCE:
1.
To clean the outside of the fixture, use a dry or slightly dampened clean cloth (use
clean water, never a solvent) to wipe the glass and surface of the fixture.
2.
To clean the inside of the fixture, first disconnect power to the fixture by turning off
the circuit breaker or by removing the fuse at the fuse box. Next, use a dry or slightly
dampened clean cloth (use clean water, never a solvent) to wipe the inside glass and
interior surface of the fixture.
3.
Do not use any cleaners with chemicals, solvents or harsh abrasives. Use only a dry
soft cloth to dust or wipe carefully.
LIMITED WARRANTY
The manufacturer warrants this lighting fixture to be free from defects in materials and workmanship for a
period of three (3) years from date of purchase. This warranty applies only to the original consumer
purchaser and only to products used in normal use and service. If this product is found to be defective, the
manufacturer’s only obligation, and your exclusive remedy, is the repair or replacement for the product at
the manufacturer’s discretion, provided that the product ahs not been damaged through misuse, abuse,
accident, modifications, alterations, neglect, or mishandling. This warranty shall not apply to any product
that is found to have been improperly installed, set-up, or used in any way not in accordance with the
instructions supplied with the product. This warranty shall not apply to a failure of the product as a result of
an accident, misuse, abuse, negligence, alteration, or faulty installation, or any other failure not relating to
faculty material or workmanship. This warranty shall not apply to the finish on any portion of the product,
such as surface and/or weathering, as this is considered normal wear and tear.
The manufacturer does not warrant and specially disclaims any warranty, whether express or implied
of fitness for a particular purpose, other than the warranty contained herein. The manufacture
specifically disclaims any liability and shall not be liable for any consequential or incidental loss or
damage, including but not limited to any labor/expense cost involved in the replacement or repair of
said product.
Page 8
HOME
DECORATORS
COLLECTION
Lámpara de Exterior de Instalación al Ras
SKU 296-466 (UPC 046335974593)
(Acabado de Hierro Envejecido)
MANUAL DE INSTRUCCIONES
HB7045A-292 E/S
Page 9
Gracias por la compra de este luminario exterior de Home Decorators
Collection. Este producto ha sido fabricado con los más altos niveles de
seguridad y calidad.
CARACTERÍSTICAS:
1.
Lámpara de Exterior de Instalación al Ras en Acabado de Hierro
Envejecido.
2.
Diseño elegante.
3.
Fácil de montar e instalar.
4.
Para fines de ahorro de energía, este luminario ha sido diseñado
para usar de manera segura un Foco fluorescente compacto con
balasto integrado en lugar de un foco incandescente.
PRGUNTAS, PROBLEMAS, PIEZAS FALTANTES:
Antes de regresar a su tienda local de Home Depot, llame a nuestro
Servicio al Cliente al 1-800-986-3460 o visite www.homedepot.com.
Por favor, referir a SKU (296-466 Lámpara con Acabado de Hierro
Envejecido) o UPC (046335974593).
Page 10
PRECAUTIÓN:
1.
Antes de comenzar la instalación de esta lámpara o eliminación de
una lámpara instalada, desconecté la alimentación apagando el
interruptor o quitando el fusible en la caja de fusibles.
2.
CONSULTE CON UN ELECTRICISTA SI TIENE ALGUNA
PREGUNTA ELÉCTRICA.
3.
Si usted tiene cualquier pregunta no eléctrica de esta lámpara, por
favor póngase en contacto con nuestro Servicio al Cliente al 1-800986-3460 o visite www.homedepot.com. Por favor, referir a SKU
(296-466 Lámpara con Acabado de Hierro Envejecido) o UPC
(046335974593).
4.
Guarde su recibo y las instrucciones para la prueba de compra.
HERRAMIENTAS NECESSARIAS PARA EL MONTAJE E
INSTALACIÓN (no incluidos):
2 Bombillas (60 Vatios
Maximo o CFL equivalente)
Pelacables
Desarmador Phillips
Gafas de Seguridad
Desarmador
de Punta Plana
Cinta Aislante
Corta Alambres
Sellador Exterior
de Silicona
Page 11
PIEZAS INCLUIDAS (partes no están a escala):
(1) Base del Luminario
(2) Tornillos para
Montar el Luminario
(1) Ménsula de Montaje
(1) Jaula
(2) Tornillos del
Soporte de Montaje
(3) Tuerca para Cables
(1) Punta
Decorativa
(2) Tureca Hexagonales
(2) Tuercas de seguridad
Page 12
INSTALACIÓN Y ENSAMBLAJE:
1. Desempaque el luminario con cuidado. Coloque todas las superficies sobre
una superficie limpia.
2. Enrosque los tornillos para montar el luminario (#6) en los agujeros provistos
en la ménsula de montaje (#7), como se muestra. Enrosque las tuercas
hexagonales (#9) en los tornillos para montar el luminario (#6), como se
muestra. No apriete las tuercas hexagonales (#9) en este momento. (Fig. 1)
3. Saque los cables de alimentación de la caja de distribución (#4) y monte la
ménsula de montaje (#7) sobre la caja de distribución (#4), utilizando los
Tornillos del Soporte de Montaje (#8). (Fig. 2)
4. Conecte el cable negro de alimentación (#5) con el cable negro del luminario
(#12) y el cable blanco de alimentación (#16) con el cable blanco del
luminario (#13), utilizando las tuercas para cables (#14). Conecte el cable del
luminario a tierra (#11) con el cable de alimentación a tierra (#15), utilizando
una tuerca para cables (#14). Envuelva todas las conexiones de los cables con
cinta de aislar para una conexión más segura. Nota: Si tiene dudas con las
conexiones eléctricas, consulte el código eléctrico de su localidad para los
métodos aprobados para las conexiones a tierra.
7. Ménsula
de montaje
6. Tornillo
para montar
el luminario
9. Tuerca
hexagonal
4. Caja de
distribución
Fig. 1
10. Techo
8. Tornillos
del Soporte de
Montaje
Fig. 2
Page 13
INSTALACIÓN Y ENSAMBLAJE (cont.):
5. Coloque la base del luminario (#1) sobre la caja de distribución (#4) y en los
tornillos para montar el luminario (#6) y ajuste los tornillos para montar el
luminario (#6) hasta que sobresalgan ¼” de la base del luminario (#1). Quite
la base del luminario (#1) y asegure la posición de los tornillos para montar
el luminario (#6) al apretar las tuercas hexagonales (#9) contra la ménsula de
montaje (#7). Coloque la base del luminario (#1) otra vez sobre los tornillos
para montar el luminario (#6) y asegúrela con las tuercas de seguridad (#3)
que se incluyen. (Fig. 3)
4. Caja de distribución
10. Techo
7. Ménsula de montaje
9. Tuerca hexagonal
6. Tornillo para montar el luminario
15. Cable de alimentación a tierra
16. Cable blanco de alimentación
5. Cable negro de alimentación
14. Tuerca para cables
11. Cable del luminario a tierra
13. Cable blanco del luminario
12. Cable negro del luminario
1. Base del
luminario
3. Tuercas de seguridad
Fig. 3
Page 14
INSTALACIÓN Y ENSAMBLAJE (cont.):
6. Instale dos Focos incandescentes en el portafocos de la base del luminario.
No exceda 60 vatios en cada foco incandescent o 13 vatios en cada foco
fluorescente compacto con balastro integrado.
7. Deslice la jaula sobre la base del luminario (#1), asegurándose de que la
boquilla (#18) pase por el agujero del centro. ( Fig. 4)
8. Enrosque la punta decorativa (#19) en la boquilla (#18) para asegurar la jaula
(#2) en la base del luminario (#1). ( Fig. 4)
9. La instalación ha terminado. Encienda la energía eléctrica en el disyuntor de
circuitos o la caja de fusibles. Encienda el interruptor para activar el
luminario.
1. Base del
Luminario
18. Boquilla
2. Jaula
19. punta decorativa
Fig. 4
Page 15
SOLUCIÓN DE PROBLEMAS:
Síntoma
Causa posible
Acción correctiva
La luz no enciende.
1. La energía eléctrica está apagada.
1. Asegúrese de que la energía
eléctrica esté encendida.
2. Pruebe o cambie el interruptor.
2. Hay una falla en el interruptor.
3. Hay una falla en la conexión de los cables. 3. Verifique los cables.
El fusible se funde o el
1. Los cables están cruzados o el cable de
disyuntor de circuitos se
alimentación no está haciendo tierra.
dispara cuando se enciende la
luz.
1. Verifique las conexiones de los
cables.
MANTENIMIENTO DE PRODUCTOS:
1.
Para limpiar el exterior de la luminaria, utilice una tela seca o ligeramente húmeda (use
agua limpia, nuca un disolvente) para limpiar la superficie de la luminaria.
2.
Para limpiar el interior de la luminaria, primero desconecte la alimentación de la
luminaria de apagar el interruptor de circuito o quitando el fusible de la caja de
fusibles. Luego, utilice una tela seca o ligeramente húmeda (use agua limpia, nunca un
disolvente) para limpiar la superficie interior de la luminaria.
3.
No utilice limpiadores de con productos químicos, solventes, o abrasivos severos.
Utilice solo un paño suave y seco para el polvo o limpie con cuidado.
GARANTÍA LIMITADA
El fabricante garantiza que este accesorio de iluminación a estar libre de defectos en materiales y mano de
obra durante un periodo de tres (3) años a partir de la fecha de compra. Esta garantía se aplica solo al
comprador original y solo a los productos utilizados en condiciones normales de uso y servicio. Si encuentra
que este producto esta defectuoso, la única obligación del fabricante, y su solución exclusiva, es la
reparación o sustitución del producto, a discreción del fabricante. Siempre que el producto no ha sido dañado
por el mal uso, abuso, accidentes, modificaciones, alteraciones, negligencia, o mal manejo. Esta garantía no
se aplicara a cualquier producto que se demuestre que ha sido instalado incorrectamente, configurado o
utilizado en cualquier manera no conforme con las instrucciones suministradas con el producto. La garantía
no se aplicara a una falla del producto como consecuencia de un accidente, mal uso, abuso, negligencia,
alteración, instalación defectuosa, o cualquier otro fallo que no se refieran a los materiales o mano de obra
defectuosa. Esta garantía no se aplicara al acabado en cualquier parte del producto, tales como la superficie
y/o la intemperie, ya que se considera uso y desgaste normal.
El fabricante no garantiza y especialmente niega cualquier garantía, expresa o implícita, de aptitud
para un propósito particular, excepto la garantía contenida en este documento. El fabricante renuncia
específicamente cualquier responsabilidad y no será responsable por cualquier perdida consecuente,
incidental o danos, incluyendo pero no limitado a cualquier mano de obra / costos de gastos implica la
sustitución o reparación de dicho producto.
Page 16