Transcript
ASSEMBLY AND INSTALLATION (Continued)
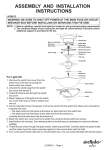
FLUSH MOUNT FIXTURE
INSTALLATION INSTRUCTIONS
Please read carefully and save these instructions, as you may need them at a later
date.
CAUTION
Turn off the main power at the circuit breaker before installing the fixture, in order to prevent
possible shock.
GENERAL
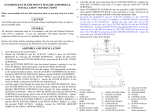
5. Carefully tuck all wiring back into the OUTLET BOX (1). Place the CANOPY (11) back onto
the #8-32 IPS FIXTURE SCREWS (4) and secure the CANOPY (11) into place using the
DECORATIVE NUTS (12) provided.
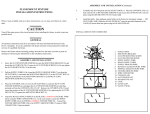
6. Thread the THREADED PIPE (19) onto the coupling. Feed the BOTTOM FOUNT (17) onto the
THREADED PIPE (19), Secure the FINIAL (18) onto the THREADED PIPE (19) .
7. Install the bulbs. (See markings and/or labels on the fixture for maximum wattage — DO NOT
OVER LAMP.).
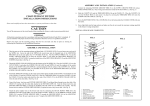
8. Install the CRYSTAL CHAIN (15) and CRYSTAL (14) as shown below.
INSTALLATION IS NOW COMPLETED
All electrical connections must be in accordance with local and National Electrical Code
(N.E.C.) standards. If you are unfamiliar with proper electrical wiring connections obtain the
services of a qualified electrician.
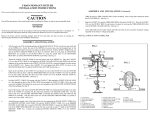
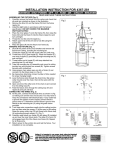
Remove the fixture and the mounting package from the box and make sure that no parts are
missing by referencing the illustrations on the installation instructions.
ASSEMBLY AND INSTALLATION
1.
Screw the #8-32 IPS FIXTURE SCREWS (4) onto the MOUNTING BRACKET (2), and
thread the #8-32 HEX NUTS (13) onto the #8-32 FIXTURE SCREWS (4). Do not tighten
the #8-32 IPS HEX NUTS (13) at this time.
2.
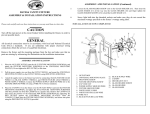
Pull the SUPPLY WIRES (5 & 6) and the SUPPLY GROUND WIRE (7) out from the
OUTLET BOX (1) and attach the MOUNTING BRACKET (2) to the OUTLET BOX (1)
using the slotted holes on the MOUNTING BRACKET (2) and the #8-32 IPS
MOUNTING SCREWS (3) provided.
3.
Place the CANOPY (11) over the OUTLET BOX (1) and onto the #8-32 IPS FIXTURE
SCREWS (4) and adjust the #8-32 IPS FIXTURE SCREWS (4) until they protrude out
from the CANOPY (11) 1/4". Remove the CANOPY (11) and secure the position of the
#8-32 IPS FIXTURE SCREWS (4) by tightening the #8-32 IPS HEX NUTS (13) against
the MOUNTING BRACKET (2).
4.
Attach the BLACK SUPPLY WIRE (6) to the BLACK FIXTURE WIRE (9) by using the
WIRE CONNECTOR (16). In the same manner, attach the WHITE SUPPLY WIRE (5)
to the WHITE FIXTURE WIRE (8). Connect the FIXTURE GROUND WIRE (10) to
the SUPPLY GROUND WIRE (7) using a WIRE CONNECTOR (16) (not included).
1.
2.
3.
4.
5.
6.
7.
8.
9.
10.
11.
12.
13.
14.
15.
16.
17.
18.
19.
OUTLET BOX
MOUNTING BRACKET
#8-32 IPS MOUNTING SCREW
#8-32 IPS FIXTURE SCREW
WHITE SUPPLY WIRE
BLACK SUPPLY WIRE
SUPPLY GROUND WIRE
WHITE FIXTURE WIRE
BLACK FIXTURE WIRE
FIXTURE GROUND WIRE
CANOPY
DECORATIVE NUT
#8-32 HEX NUT
CRYSTAL
CRYSTAL CHAIN
WIRE CONNECTOR
BOTTOM FOUNT
FINIAL
THREADED PIPE