1
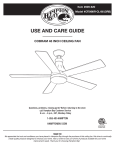
Victoria by Hampton Bay®
70 Victoria
Thank you for purchasing our ceiling fan. This product has been
manufactured with the highest standards of safety and quality.
Ceiling Fan by Hampton Bay
Date Purchased
Table of Contents
Store Purchased
Safety Rules . . . . . . . . . . . . . . . . . . . . 1
Unpacking Your Fan . . . . . . . . . . . . . . 2
ETL Model No. CF570ER-BRD
Installing Your Fan . . . . . . . . . . . . . . . 3
Installing the Light Kit. . . . . . . . . . . . . 7
Serial No.
Remote Control Functions . . . . . . . . . . . 8
Care of Your Fan . . . . . . . . . . . . . . . . 10
Vendor No.
82598
Trouble shooting . . . . . . . . . . . . . . . . . 10
Specifications . . . . . . . . . . . . . . . . . . 11
UPC
845952000346
Warranty Information . . . . . . . . . . . . 12
Safety Rules - Read and Save These Instructions
1. To reduce the risk of electric shock, ensure electricity has been
turned off at the circuit breaker or fuse box before beginning.
2. All wiring must be in accordance with the National Electrical
Code “ANSI/NFPA 70-1999” and local electrical codes. Electrical
installation should be performed by a qualified licensed
electrician.
3. WARNING: To reduce the risk of electrical shock or fire, do not
use this fan with any solid-state fan speed control device. It will
permanently damage the electronic circuitry.
4. CAUTION: To reduce the risk of personal injury, use only the
screws provided with the outlet box.
5. The outlet box and support structure must be securely mounted and
capable of reliably supporting a minimum of 35 pounds. Use only
UL Listed outlet boxes marked “FOR FAN SUPPORT”.
6. The fan must be mounted with a minimum of 7 feet clearance from
the trailing edge of the blades to the floor.
7. Avoid placing objects in path of the blades.
8. To avoid personal injury or damage to the fan and other items, be
cautious when working around or cleaning the fan.
9. Do not use water or detergents when cleaning the fan or fan blades.
A dry dust cloth or lightly dampened cloth will be suitable for most
cleaning.
1
10. After making electrical connections, spliced conductors should be
turned upward and pushed carefully up into outlet box. The wires
should be spread apart with the grounded conductor and the
equipment-grounding conductor on one side of the outlet box and
ungrounded conductor on the other side of the outlet box.
11. All set screws must be checked and retightened where necessary
before installation.
WARNING
TO REDUCE THE RISK OF PERSONAL INJURY, DO NOT BEND THE
BLADE ARMS (ALSO REFERRED TO AS FLANGES), WHEN
INSTALLING THE BRACKETS, BALANCING THE BLADES OR
CLEANING THE FAN. DO NOT INSERT FOREIGN OBJECTS IN –
BETWEEN ROTATING FAN BLADES.
WARNING
TO REDUCE THE RISK OF FIRE, ELECTRIC SHOCK OR PERSONAL
INJURY, MOUNT FAN TO OUTLET BOX MARKED ACCEPTABLE FOR
FAN SUPPORT WITH THE SCREWS PROVIDED WITH THE OUTLET
BOX.
Unpacking Your Fan
Unpack your fan and check the contents. You should have the following items:
3
12
8
4
5
13
A
B
9
2
1
FAN
OFF
LIGHT
6
3
4
5
10
6
14A
1
7
11
2
C
14B
15
1.
2.
3.
4.
5.
6.
7.
8.
9.
Fan blades (5)
Blade holders ( 5 )
Mounting bracket (1)
Downrod assembly (1)
Canopy (1)
Canopy cover (1)
Coupling cover (1)
Fan motor assembly (1)
Flywheel (1)
10.
11.
12.
13.
14A.
Light kit plate(1)
Glass shade (1)
Light kit (1)
Bulbs (3)
Transmitter with 12
volt battery (1)
14B. Transmitter holder with
2 mounting screws
and 3 wire nuts(1)
15. Loose parts bag containing:
A . Blade attachment hardware
(16 screws and fiber washers)
B. Blade holder attachment hardware
screws with lock washers (11)
& Motor screws with lock washers (5)
C. Balancing kit (1)
WARNING
DO NOT INSTALL OR USE FAN
IF ANY PART IS DAMAGED OR MISSING.
CALL TOLL FREE 1-877-262-7511
2
Installing Your Fan
Tools Required
Provide Strong
Support
Figures 1~3 are examples of different ways to
mount the outlet box.
Phillips screwdriver, straight slot
screwdriver, step ladder and wire cutters.
Recessed
Outlet Box
Mounting Options
Outlet Box
If there isn't an existing UL listed mounting
box, then read the following instructions.
Disconnect the power by removing fuses or
turning off circuit breakers.
Secure the outlet box directly to the building
structure. Use appropriate fasteners and
building materials. The outlet box and its
support must be able to fully support the
moving weight of the fan (at least 35 lbs). Do
not use plastic outlet boxes.
Figure 1
Ceiling
Mounting
Plate
Figure 3
Note: You may need a longer downrod to
maintain proper blade clearance when
installing on a steep, sloped ceiling. The
maximum angle allowable is 18°. If the
canopy touches downrod, remove the
decorative canopy bottom cover and turn the
canopy 180° before attaching the canopy to
the mounting plate.
WARNING
TO REDUCE THE RISK OF FIRE, ELECTRIC
SHOCK OR PERSONAL INJURY, MOUNT FAN
ONLY TO AN OUTLET BOX MARKED ACCEPTA B L E F O R FA N S U P P O RT A N D U S E T H E
MOUNTING SCREWS PROVIDED WITH THE
OUTLET BOX. OUTLET BOX COMMONLY USED
FOR THE SUPPORT OF LIGHTING FIXTURE MAY
NOT BE ACCEPTABLE FOR FAN SUPPORT AND
MAY NEED TO BE REPLACED. CONSULT A
QUALIFIED ELECTRICIAN IF IN DOUBT.
3
Outlet Box
Outlet Box
Figure 2
Figure 4
To hang your fan where there is an existing
fixture but no ceiling joist, you may need an
installation hanger bar as shown in Figure 4
(available at any Home Depot store).
6. Now lift motor assembly into position and place
hanger ball into mounting bracket. Rotate until the
check groove drops into the registration slot and
REMEMBER to turn off the power. Follow the seats firmly. (Figure 10) Downrod should not rotate
steps below to hang your fan properly:
if this is done correctly.
Hanging the Fan
1. Secure the mounting bracket to the
ceiling outlet box with the screws and
washers provided with your outlet box.
(Figure 5)
Outlet box
Set
screws
Lead Wires
Ball/downrod
Assembly
Canopy
Canopy cover
Tighten
Screws
Firmly
2. Loosen the two set screws from the
motor assembly. (Figure 6)
Couping cover
Lock Pin
Hitch Pin
3. Remove the hitch pin and lock pin from
the downrod assembly. Remove hanger ball
from downrod assembly by loosening set screw,
removing the cross pin, and sliding ball off rod.
(Figure 7)
4. Carefully feed fan wires up through the
downrod. (Figure 8) Thread the rod into the
coupling. Next, line up holes and replace lock
pin and hitch pin. Tighten set screws.
Mounting bracket
Figure 5
Figure 6
Figure 9
Cross pin
Hanger
ball
Set screw
5. Slip coupling cover, canopy cover and
canopy onto downrod. (Figure 9) Carefully
reinstall hanger ball onto downrod, make sure
that cross pin is in correct position, set screws
are tighten and wires are not twisted.
Downrod
Supply
wires
Downrod
Registration
slot
Hitch pin
Figure 7
Lock pin
Figure 8
Figure 10
4
Remember to shut off the power.
Follow the steps below to connect the fan to
your household wiring. Use the wire nuts
supplied with your fan. Secure the
connectors with electrical tape. Make sure
there are no loose strands or connections.
WHITE
BLACK
SUPPLY CIRCUIT
Ground
Conductor
1. Connect the fan supply (black) wire to the
black ceiling supply wire. (Figure 11)
GREEN
BLACK
Outlet Box
WHITE
Making the Electrical
Connections
Green
Ground
Lead
Ground to
Downrod
2. Connect the neutral fan (white) wire to
the white neutral wire from the ceiling .
(Figure 11)
3. Connect the fan ground wire (green) and
the mounting bracket ground wire (green) to
the ground wire from the ceiling . (Figure
11)
4. After connecting the wires, spread them
apart so that the green and white wires are
on one side of the outlet box and the black
wires is on the other side.
Finishing the Installation
1. Tuck connections neatly into ceiling outlet box.
2.Remove one screw from the mounting bracket
and loosen the other screw around 1/4″.
3. Align the canopy up to ceiling and over the
loose screw. Place the canopy into key hole and
rotate canopy clockwise. (Figure 12)
4. Secure the canopy by using previous removed
screw and loosened screws.
5. Place the canopy cover to the canopy and
rotate canopy cover clockwise until it is locked
into right position.(Figure 12)
WARNING
MAKE SURE TAB AT BOTTOM OF HANGER BRACKET
IS PROPERLY SEATED IN GROOVE OF HANGER BALL
BEFORE
ATTACHING CANOPY TO BRACKET. FAILURE TO
PROPERLY SEAT TAB IN GROOVE COULD CAUSE
DAMAGE TO ELECTRICAL WIRING.
BLACK
WHITE
BLACK
WHITE
Outlet box
Mounting
bracket
Ball/Downrod
Assembly
WARNING
TO REDUCE THE RISK OF FIRE, ELECTRIC
SHOCK, OR OTHER PERSONAL INJURY.
MOUNT FAN ONLY ON AN OUTLET BOX OR
SUPPORTING SYSTEM MARKED
ACCEPTABLE FOR FAN SUPPORT.
Diagram indicates optional light kit wiring.
Canopy
Figure 11
Screw
Figure 12
5
Lead Wires
Canopy
cover
Attaching the Fan
Blades
1. Attach the fan blades to the blade
holders by using three screws and fiber
washers as shown in Figure 13. Start a
screw into the blade holder, do not
tighten. Repeat for the 2 remaining
screws and washers.
2. Tighten each screw securely starting
with the center screw.
3. Fasten the blade assemblies to fly
wheel with the blade holder attachement
hardware(B) provided. (Figure 14)
4. Loose five PCS motor screws on the
motor, Place the slot holes of the fly
wheel over five screws previously
loosened and attach five motor screws
provided in Loose parts bag, tighten all
screws. (Figure 15)
Screws
Screws B
Figure 14
Flywheel
The following procedure should correct most
fan wobble issues. Check after each step.
1. Check that all blades and blade holder
screws are secure.
2. Most fan wobble problems are caused
when blade levels are unequal. Check this
level by selecting a point on the ceiling above
the tip of one of the blades. Measure this
distance as shown in Figure 16. Rotate the fan
until the next blade is positioned for
measurement. Repeat for each blade. The
distance should be equal within 1/8".
If all blade levels are not equal, you can
adjust the blade level with the following
procedure.
Figure 15
Screws B
Figure 13
Touching
ceiling
paper
Washer
3. Use the enclosed Blade Balancing Kit if the
blade wobble is still noticeable. (Please refer
to the introduction provide in the blade
balancing kit, which is individually packed.)
4. If the blade wobble is still noticeable,
interchanging two adjacent (side by side)
blades can redistribute the weight and
possibly result in smoother operation.
Blade
Blade holder
Figure 16
6
Installing the Light Kit
CAUTION To Reduce The Risk Of Electric
Shock, Disconnect The Electrical Supply
Circuit To The Fan Before Installing Light
Kit.
REMEMBER The fan blades must already
be attached to the fan.
Your fan and light kit though pre-wired have
been disassembled at the factory to ease in
shipping.
Please follow these steps to
complete the installation of your fan and
light. TO REDUCE THE RISK OF FIRE
DO NOT EXCEED MAXIMUM
WATTAGE RATING.
1. Remove 1 of 3 screws from the mounting
ring and loosen the other 2 screws(Do not
remove).(Figure 17)
2. Place key holes on the light kit plate over the
2 s crew s previous ly loos ened from the
mounting ring, turn light kit plate until it locks
in place at the narrow setion of the key holes.
Secure by tightening 2 screws previously
loosened and the one previously
removed.(Figure 17)
3. Remove 1 of 3 screws from the light kit plate
and loosened the other 2 screws(Do not
remove). Connect white wire from motor to
white wire from light kit. Connect black wire
from motor to black wire from light kit.(Figure
18)
4. Place key holes on the light kit over the 2
screws previously loosened from the light kit
plate, turn light kit until it locks in place at the
narrow setion of the key holes. Secure by
tightening 2 screws previously loosened and
the one previously removed.(Figure 18)
5. Place the 3 bulbs (60 Watt, included) into
the light kit.(Figure 19)
6. Remove the rubber washer, metal nut, metal
cap and finial from the light kit assembly.
Place glass shade over the light kit stem,
secure with the rubber washer, metal nut,
metal cap and finial previously removed. Do
not over tighten.(Figure 19)
Light kit
plate
White
wire
Light kit
Screw
7. Restore power and your light kit is
ready for operations.
Figure 18
Mounting ring
Light kit
Light kit plate
Glass shade
Bulb
Rubber Washer
Metal Nut
Metal Cap
Finial
Screw
Figure 17
7
Black
wire
Figure 19
Operation of your Ceiling Fan:
Step 1: Make sure power is restored to the fan
unit as during installation it was most likely
turned off at the wall switch or breaker box.
Note:
The fan is controlled by the remote system only.
No other wall control devices such as dimmers,
fan controls, etc. are compatible with this system.
If there is a switch that controls the power to this
unit make sure it is only an on/off toggle or rocker
switch.
Step 2: Install the 12volt battery into the hand
held transmitter (Figure 20) as shown in (Figure
21). Make sure the battery is secure with the
matching +/- terminals. The remote hand set will
have illumination lights that will come on once a
function is pressed. This light indicates the
remote has a good battery. If you do not see this
illumination please change out the battery.
Step 3: Begin testing the fan functions with the
remote control (Figure 20). See operation details
below.
• Fan Buttons 1-6: The higher the number the
faster the fan should turn. Press one time on each
button to the desired speed. #1 is the lowest speed
and #6 is the highest speed.
• Fan Off Button: Press once to turn fan off.
• Light Button: Press once to turn light on/off.
Hold button down for full range dimming and then
release when the desired light output is reached.
• Reverse Button: Is in the back of the hand
held by the battery compartment (Figure 21).
Press once to reverse the fan.
Special Notes:
2
• The remote system operates at a maximum
range of 20 feet. If distance is greater the
system may experience technical/functional
issues and must be reduced.
• The fan comes with a fully functional
remote control system. The system is
preprogrammed at the factory for operation.
However, if you experience any functional
issues it may be necessary to reprogram the
remote to the fan unit (see instructions below
for reprogramming steps).
3
1
6
4
5
Reprogramming Your Ceiling Fan:
Step1. Turn the power off to your ceiling fan.
Step2. Please use a small size tool to change the
frequency settings on the transmitter.
Step3. Return power to the unit.
Note: After the AC power is on, do not press any
other button on the transmitter before pressing the
“FAN OFF” button, doing so will cause the
procedure to fail.
Step4. Within 60 secounds of turning the fan’s AC
power ON. Press the transmitter’s “FAN OFF”
button and hold the “FAN OFF” button for 10
seconds.
Step5. Once the receiver has detected the set
frequency, the down light of your fan will blink
twice.
Step6. The receiver has now learn the frequency
which has been selected on the transmitter. After
completing the steps above, you should be able to
operate the ceiling fan and light. If the fan is not
responding to the transmitter. please turn the
power off to the receiver, and repeat the process.
Figure 20
Frequency settings
Reverse button
ON
1 2 3 4
Figure 21
8
Speed settings for warm or cool weather
depend on factors such as the room size,
ceiling height, number of fans, etc.
NOTE
TO OPERATE THE REVERSE FUNCTION ON
THIS FAN, PRESS THE REVERSE BUTTON
WHILE THE FAN IS RUNNING.
Figure 22
Warm weather - (Counter-Clockwise
direction) A downward air flow creates a
cooling effect.(Fig. 22) This allows you to
set your air conditioner on a higher setting
without affecting your comfort.
Cool weather - (Clockwise direction) An
upward airflow moves warm air off the
ceiling area. (Fig. 23) This allows you to set
your heating unit on a lower setting without
affecting your comfort.
Figure 23
9
Care of Your Fan Troubleshooting
Here are some suggestions to help you
maintain your fan.
PROBLEM
1. Because of the fan's natural movement, some Fan will not start
connections may become loose. Check the
support connections, brackets, and blade
attachments twice a year. Make sure they are
secure. (It is not necessary to remove fan from
ceiling.)
2. Clean your fan periodically to help maintain
its new appearance over the years. Do not use
water when cleaning. Use only a soft brush or
lint-free cloth to avoid scratching the finish.
Fan sounds noisy
The plating is sealed with a lacquer to
minimize discoloration or tarnishing. Do not
use water when cleaning. This could damage
the motor, or the wood, or possibly cause an
electrical shock.
3. You can apply a light coat of furniture polish
to the wood blades for additional protection
and enhanced beauty. Cover small scratches
with a light application of shoe polish.
4. There is no need to oil your fan. The motor has
permanently lubricated sealed ball
bearings.1.2.3.4.
For any additional information on your
Hampton Bay Ceiling Fan, please write to:
Summerwind International, LLC.
749 Port America Place, Suite 400
Grapevine, TX 76051
SOLUTION
1. Check main and branch circuit fuses or breakers.
2. Check line wire connections to the fan and switch wire
connections in the switch housing.
3. Turn power off at the wall for 20 seconds and then turn power
back on to reset system.
4. Battery replacement (See page 8).
5. Reprogram the Unit (See page 8).
1. Make sure all motor housing screws are snug.
2. Make sure the screws that attach the fan blade bracket to the
motor hub is tight.
3. Make sure wire nut connections are not rattling against each
other or the interior wall of the switch housing.
4. Allow a 24-hour "breaking-in" period. Most noises associated
with a new fan disappear during this time.
5. If using ceiling fan light kit, make sure the screws securing the
glassware are tight. Check that the light bulb is also secure.
Make
sure there is a short distance from the ceiling to the
6.
canopy. It should not touch the ceiling.
7. Make sure your ceiling box is secure and rubber isolator pads
are used between mounting bracket and outlet box.
WARNING
MAKE SURE THE POWER IS OFF AT THE ELECTRICAL PANEL BOX
BEFORE YOU ATTEMT ANY REPAIRS. REFER TO THE SECTION,
“MAKING ELECTRICAL CONNECTIONS”.
CALL TOLL FREE 1-877-262-7511
10
Specifications
FAN SIZE SPEED VOLTS
AMPS
WATTS
RPM
CFM
1
0.12
6
50
3665
2
0.18
8
61
4471
0.25
13
72
5277
3
120
70
4
0.30
18
83
6084
5
0.38
26
94
6890
6
0.55
36
105
7697
These are approximate measures. They do not include Amps and Wattage used by the light kit.
Distributed by
Home Depot U.S.A.,Inc.
2455 Paces Ferry Rd.,N.W.
Atlanta,GA30339
11
N.W.
G.W.
C.F.
10.71KGS/
23.61LBS
12.38KGS/
27.29LBS
2.76
Lifetime Limited Warranty
(lifetime warranty on motor)
The Hampton Bay warrants the fan motor to be free from defects in workmanship and material
present at time of shipment from the factory for a period of lifetime after the date of purchase by the
original purchaser. Hampton Bay also warrants that all other fan parts, excluding any glass or
acrylic blades, to be free from defects in workmanship and material at the time of shipment from the
factory for a period of one year after the date of purchase by the original purchaser. We agree to
correct such defects without charge or at our option replace with a comparable or superior model if
the product is returned to Hampton Bay. To obtain warranty service, you must present a copy of the
receipt as proof of purchase. All costs of removing and reinstalling the product are your
responsibility. Damage to any part such as by accident or misuse or improper installation or by
affixing any accessories, is not covered by this warranty. Because of varying climatic conditions
this warranty does not cover any changes in brass finish, including rusting, pitting, corroding,
tarnishing or peeling. Brass finishes of this type give their longest useful life when protected from
varying weather conditions. A certain amount of “wobble” is normal and should not be considered a
defect. Servicing performed by unauthorized persons shall render the warranty invalid. There is no
other express warranty. Hampton Bay hereby disclaims any and all warranties, including but not
limited to. Those of merchantability and fitness for a particular purpose to the extent permitted by
law. The duration of any implied warranty which cannot be disclaimed is limited to the time period
as specified in the express warranty. Some states do not allow limitation on how long an implied
warranty lasts, so the above limitation may not apply to you. The retailer shall not be liable for
incidental, consequential, or special damages arising out of or in connection with product use or
performance except as may otherwise be accorded by law. Some states do not allow the exclusion of
incidental or consequential damages, so the above exclusion or limitation may not apply to you.
This warranty gives specific legal rights, and you may also have other rights which vary from state
to state. This warranty supersedes all prior warranties. Shipping costs for any return of product as
part of a claim on the warranty must be paid by the customer.
You must present a copy of the original
purchase receipt to obtain warranty
service.
For any additional information on your
Hampton Bay Ceiling Fan, please write to:
Summerwind International, LLC.
749 Port America Place, Suite 400
Grapevine, TX 76051
Attach receipt here for easy
location
12
Victoria por Hampton Bay
®
70 Victoria
Gracias por comprar nuestro ventilador de techo. Este producto
ha sido fabricado con los estándares más altos de seguridad y
Ventilador por Hampton Bay
Fecha de compra
Tabla de Contenido
Lugar de compra
N de ETL modelo CF570ER-BRD
N de serie
N de vendedor
UPC
82598
845952000346
Normas de seguridad
1
Cómo desembalar el ventilador
2
Cómo instalar el ventilador
3
Instalación del kit de luz
7
Funciones del control remoto
8
Cómo cuidar delventilador
10
Resolución de problemas
10
Especificaciones
11
Información sobre la garantia
12
Normas de Seguridad - Leer y Guardar Todas las
Instrucciones
1. Para reducir el riesgo de eléctrocución, asegurarse de que la
eléctricidad se ha desactivado en el cortacircuitos o caja de
fusibles antes de comen-zar.
9. No usar agua o detergentes al limpiar el ventilador o las aspas del
ventilador. Para la mayoria de los prop sitos de limpieza, un paño
seco o ligeramente humedecido será apropiado.
2. Todos los cables deben cumplir con el Código Eléctrico Nacional 10. Tras realizar las conexiones eléctricas, los conductores empalmados
deberían girarse hacia arriba y meterse con cuidado en la toma de
“ANSI/NFPA 70-1999” y los códigos eléctricos locales. La
corriente.
instalación eléctrica debería realizarla un electricista profesional
cualificado.
11. Los cables deberían separarse con el conductor a tierra y el conductor
de tierra del equipo por un lado de la toma de corriente y el conductor
3. ADVERTENCIA: Para reducir el riesgo de descarga eléctrica o
no conectado a tierra en el otro lado de la toma de corriente.Todos los
fuego, no utilice este ventilador con dispositivos de control de
tornillos deberían ser comprobados y revisados antes de la
velocidad de ventilador de estado sólido. Eso dañaría de forma
instalación.
permanente el circuito electrónico.
4. PRECAUCIÓN: Para reducir el riesgo de lesiones personales,
utilice solamente los tornillos incluidos con la toma de corriente.
ADVERTENCIA
5. La caja de distribución y la estructura de soporte deben estar
montados de manera segura y deben ser capaces de soportar, de
manera confiable, unminimo de 35 libras (15,9 kilogramos). Usar
solamente cajas de distribución listadas por U.L. marcadas "PARA
SOPORTEDE VENTILADORES".
ADVERTENCIA
6. EL ventilador debe estar montado con un m nimo de 7 pies (213cm)
de espacio libre desde el borde posterior de las aspas hasta el piso.
7. Evitar colocar objetos qen interfiera el giro de las aspas.
8. Para evitar lesiones personales o da os al ventilador y otros
articulos, tener cuidado al trabajar cerca del ventilador o al
limpiarlo.
1
PARA REDUCIR EL RIESGO DE LESIONES PERSONALES, NO DOBLAR
LOS SOPORTES DE LAS ASPAS (TAMBIEN LLAMADOS "REBORDES"),
DURANTE EL MONTAJE O DESPUES DE LA INSTALACIÓN NO
INSERTAR OBJETOS EN LA TRAYECTORIA DE LAS ASPAS.
PARA REDUCIR EL RIESGO DE FUEGO, DESCARGA ELÉCTRICA O
LESIONES PERSONALES, MONTE EL VENTILADOR A UNA TOMA DE
CORRIENTE MARCADA COMO COMPATIBLE PARA SOPORTAR UN
VENTILADOR CON LOS TORNILLOS INCLUIDOS EN LA TOMA DE
CORRIENTE.
Desempacando su ventilador
3
12
8
4
5
Desempaque su ventilador y revise los contenidos.
Usted debe tener lo siguiente:
13
A
B
9
2
1
FAN
OFF
LIGHT
6
3
4
5
10
6
14A
1
7
11
2
C
14B
15
1.
2.
3.
4.
5.
6.
7.
8.
9.
Aspas del ventilador (5)
Abrazaderas de las aspas (5)
Abrazadera del montaje (1)
Kit de luz (1)
Dosel (1)
Cubierta de dosel (1)
Cubierta de la conexion (1)
Motor del ventilador (1)
Platillo volante (1)
10.
11.
12.
13.
14A.
Placa de juego de lámpara (1)
Difusorde vidrio (1)
L ámpara (1)
bombillas (3)
Transmisor con batería de
12 voltios (1)
14B. Transmisor de soporte con 2
tornillos de montaje y 3
tuercas de alambre(1)
15. El bolso de accesorios incluye :
A . Accesorios de hoja
(16 tornillo and arandelas de papel)
B. Accesorios para las abrazaderas
Hardware de soporte de aspa
11 tornillos con arandelas de cierre
& Tornillos del motor con arandelas
de seguridad (5)
C. Juego de balanceo (1)
2
Cómo Instalar el Ventilador
Herramienta
Necesarias
Brindar soporte fuerte
Las figuras 1~3 son ejemplos de diferentes
maneras de montar la caja de distribución.
Destornillador Phillips, destornillador norma,
escalera de tijera y cortadoras de alambre.
Recessed
Caja de
distribuciónembutida
Opciones de Instalación
Caja de
distribución
Si no hay una caja con UL registración de
montaje existente, sirvase leer las siguientes
instrucciones. Desconectar el suministro de
electricidad removiendo los fusibles o
desactivando los cortacircuitos. Asegurar la
caja de distribución directamente a la
estructura del edificio. Usar los sujetadores y
meteriales de construcción apropiados. La
caja de distribución y su soporte deben ser
capaces de soportar completamente el peso en
movimiento del ventilador (al menos 35
libras o 15,9 kgs.) No usar cajas de
distribución plásticas.
Figura1
3
Figura 3
NOTA: Puede que necesite una varilla más
larga para mantener una separación apropiada
de las palas al instalar en un techo con subida
o pendiente. El ángulo máximo permitido es
de 18°. Si la cubierta toca la varilla, quite la
tapa de la cubierta decorativa y gire la
cubierta 180° antes de colocar la cubierta a la
placa de montaje.
Caja de distribución
ADVERTENCIA
Para reducir el riesgo de daños personales, utilice
sólo los dos tornillos de acero (y arandelas de
bloqueo) suministrados en la caja del enchufe para
el montaje en ésta. la mayoría de cajas de enchufes
usadas comúnmente para instalaciones de luz no
sirven para soportar un ventilador y puede que
necesite cambiarlas; si tiene dudas, consulte con un
electricista cualificado.
La abertura del
soportede montaje
deberá estarorientada
hacia laparte superior
Caja de
distribución
Figura 2
Figura 4
Para suspender el ventilador donde ya existe
una lámpara pero no una viga en el techo, es
posible que se necesite una instalación de
barra de suspensión (Fig. 4). (Disponible en
cualquier tienda Home Depot.)
RECORDAR: Apagar la energia electrica en
el circuito principal o en la caja de fusibles.
1. (Fig. 5) Asegure la abrazadera a la caja de
distribucion del techo usando los tornillos
incluidos conla caja de distribucion y las
arandelas incluidas con elventilador.
6. Levante el ensamblaje del motor y coloque la
esfera de soporte dentro de la abrazadera de
motaje. Gire el ensamblaje del motor hasta que
la ranura de la esfera de soporte siente sobre la
estria de la abrazadera de montaje. (Fig. 10)
Caja de distribucion
Tornillos fijos
2. (Fig. 6) Quite la chaveta de seguridad y la
chaveta.
3. (Fig. 7) Afloje los tornillos fijos de la parte
superior de la conexion del ensamblaje del
motor. Afloje el tornillo fijo de la esfera de
soporte y saque el perno y la esfera de
soporte del tubo de montaje.
4. (Fig. 8) Meta cuidadosamente los almbres
del ventilador hacia arriva a traves del tubo
de montaje. Atonille el tubo de montaje sobre
la conexion hasta que los agujeros del tubo
de montaje y la conexion queden alineados.
Re-instale la chaveta y la chaveta de
seguridad. Apriete bien los tornillos fijos
conun desatmador de cruz.
5. (Fig. 9) Delize la cubierta de la conexion
sobre el tubo de Montaje seguida por el
anillo para la cubierta, la cubierta y la esfera
de soporte. Instale el perno y apriere el
tornillo fijo de la esfera de soporte.
Cables
Esfera de soporte
Cubierta
Anilllo para la
cubierta
Apretar los
tornillos
firmemente
Chaveta
Cubierta de
acoplamiento
Chaveta de
seguridad
Abrazadera de montaje
Figura 5
Figura 6
Figura 9
Perno
Tubo de montaje
Esfera de soporte
Tubo de
montaje
Cable delventilador
Ranura de
registro
Chaveta
Figura 7
Chaveta de
segurided
Figura 8
Figura 10
4
NEGRO
BLANCO
CIRCUITO DE SUMINISTRO
Conductor
de masa
1. Conecte el cable de alimentación
(negro)del ventilador con el cable de
alimentación de techo negro. (Figura 11)
VERDE
NEGRO
Caja de
salida
BLANCO
Haciendo la conexión eléctrica
Recuerda disconectar la alimentación
Siga los pasos siguientes para conectar el
ventilador a los alambres de su hogar.
Aprovecha los alambres conectando
tuercas suministradas con su
ventilador.asegúre que el conector está con
cinta aislante.confirma que no está suelto o
conectado.
Cable a
tierra
verde
Masa a
barra
2.Conecta el alambre del ventilador
neutral (Blanco) al alambre neutral blanco
de su hogar.
ADVERTENCIA
ASEGÚRESE DE ENTRAR EN LA PARTE INFERIOR
DEL SOPORTE El SOPORTE SE COLOCA
CORRECTAMENTE EN LA RANURA DE LA BOLA
ANTES DE VINCULAR EL DOSEL A SOPORTE. LA
FALTA DE SEDE ADECUADA EN LA RANURA
PODRÍA CAUSAR DAÑOS A LOS CABLES
ELÉCTRICOS.
3. Conecta el alambre (verde) de tierra del
ventilador al alambre de tierra del hogar.
4. Después de conectado los cables, los
extiende aparte para que los cables de
color verde y blanco encuentren en un
lado de caja de tomacorriente,y los
cables negros en otro lado de la misma.
Acaba la instalación
1. Hace conexión perfecta en la caja de salida del techo.
2. Quita un tornillo por el soporte colgante y suelta el
otro tornillo del lado.
3. Alinea el dosel hacia arriba al techo,y termina soltar
tornillo.asienta el dosel en el agujero clave y gira dosel
en sentido del horario. (Figura 12)
4. Asegúre que el dosel está usando con el tornillo
quitado anteriormente.
5. Asienta el dosel por el encima del dosel y girar la
cubierta del dosel en sentido del horario hasta
bloqueado en correcta posición. (Figura 12)
NEGRO
BLANCO
NEGRO
BLANCO
Caja de
distribucion
Abrazadera
del montaje
Conjunto de
bola/Vástago
ADVERTENCIA
PARA REDUCIR EL RIESGO DEL
INSENDIO,CHOQUE ELÉCTRICO O OTRO
PERSONAL DAÑO.MONTA SOLAMENTE EN
UNA CAJA DE SALIDA O APOYANDO POR EL
SISTEMA SEÑALIZADO ACEPTADO POR EL
SOPORTE DEL VENTILADOR.
Diagrama indica el cableado de juego
de luz opcional
Cubierta
Figura 11
Tornillo
Figura 12
5
Cables
Anilllo para
la cubierta
Sujetar las hojas de
ventilador
1. A fije las aspas del ventilador a las
abrazaderas de aspas usando los tres
tornillos y arandelas de fibra, como se
muestra en la Figura 13. Iniciar un
tornillo en el soporte de la hoja, no
apriete. Repita el procedimiento para los
2 tornillos restantes y arrandelas.
2. Apriete cada tornillo enpesando con el
tornillo central.
3. Fije los juegos de palas a la rueda
volante con el hardware de fijaci ó n de
portador de pala (B) siministrado.
(Figura 14)
4. Sueltese cinco tornillos del motor PCS
en el motor, ponga los agujeros de ranura
del rueda volante sobre los cinco tornillos
previamente aflojados y fije los tornillos
del motor cinco previstos en la bolsa de
piezas sueltas, apretese todos los
tornillos. (Figura 15)
Tornillos
Tornillos B
Platillo volante
Figura 14
1. Examina que todas hojas y los tornillos de
soporte colgante si estén seguro.
2. La mayoría de ventilador de tambalea
tienen los problemas cuando los niveles de
hoja son desiguales. Compruebe este nivel
seleccionado un punto en el techo por encima
de la punta de una de las palas. Medir esta
distancia como se muestra en la Figura 16.
Girar el ventilador hasta la próxima hoja para
la medición. Repita este procedimiento para
cada hoja. La distancia debe ser igual dentro
de 1 / 8 ".
Si todos los niveles de la hoja no son iguales,
puede ajustar la hoja con el siguiente
procedimiento.
Figura 15
Tornillos B
3. Utilizar el aparato de la hoja adjunta de
equilibrio si la hoja de tambalea sigue siendo
notable.
Figura 13
Techo de
contacto
Arandela
de fibra
Los siguientes procedimientos debe ser
correcto o ocurre el problema de tamblearse
por el ventilador,examina cada paso después
de instalar.
4.Si la hoja de tambalea sigue siendo notable,
intercambiar dos adyacentes (uno al lado del
otro), las hojas pueden redistribuir el peso y,
posiblemente facilitará la operación.
Hojas
Abrazaderas
de las aspas
Figura 16
6
Instalación del kit de luz
RECUERDE desconectar la alimentación. Las
hojas del ventilador ya debe de adjuntar al
ventilador.
Su ventilador y el aparato de luz a pesar de
pre-cableado han sido desmontados en la
fábrica para la facilidad en el transporte
marítimo. Por favor, siga estos pasos para
completar la instalación de su ventilador y la
luz. PARA REDUCIR EL RIESGO DE
INCENDIO NO EXCEDA EL VOLTAJE
MÁXIMO.
hasta que encaje en la sección estrecha de los
agujeros.. Luego aprietese 2 tornillos sueltos
previamente y otro tornillo quitado
previamente(Figura 18)
1. Paso 1 Quite 1 de los 3 tornillos en el anillo
6. Quite la arandela de goma, la arandela de
metal, la tuerca de metal, y la taza de
interruptor y finial del aparato de luz.
Coloque la pantalla de vidrio sobre el
vástago de aparato de luz, fijela con la
arandela de goma, la arandela de metal,
tuerca, tapa de metal y finial. No apriete en
exceso. (Figura19)
de montaje y afloje los otros 2 tornillos.
(Figura 17)
7. Restablezca el poder y su aparato de luz
2.Ponga los ojos de cerradura en la placa de
juego de lámpara sobre los 2 tornillos
aflojados del anillo de montaje, gire a la placa
de juego de lámpara hasta que encaje en la
sección estrecha de los agujeros. Luego
aprietese 2 tornillos sueltos previamente y otro
tornillo quitado previamente(Figura 17)
3.Quite 1 de los 3 tornillos de la placa de juego
de lámpara y sueltese los otros 2 tornillos (no
quitar). Conecte el cable blanco del motor con
el cable blanco del juego de lámpara. Conecte
el cable negro del motor con el cable negro del
juego de la lámpara. (Figura 18)
4. Coloque los ojos de cerradura en el juego de
lámpara sobre los 2 tornillos aflojados de la placa
de juego de lámpara, gire el juego de lámpara
7
Cable
negro
5. Coloque las 3 bombillas (60 vatios,
incluido) en el juego de lámpara. (Figura 19)
Placa de
juego de
lámpara
Cable
blanco
Lampara
Tornillo
Figura 18
está listo para las operaciones.
Anillo de
montaje
Lampara
Placa de
juego de
lámpara
Difusorde vidrio
Bombillas
Tornillo
Figura 17
Figura 19
Arandela de Goma
Tuerca Metálica
Tapa de metal
Tuerca
Decorative
Operación de suventilador de techo: Notas Especiales:
Paso 1: Asegúrese de que la alimentación
encuentra recuperado al ventilador, como durante
la instalación será muy probablemente apagado en
el interruptor de pared o caja de fusibles.
Nota:
El ventilador es controlado sólo por el sistema de
mando a distancia. No hay otros dispositivos de
control de pared como los atenuadores,
controladores de ventiladores, etc.Los cuales son
compatibles con este sistema. Si hay un
interruptor que controla la alimentación a esta
unidada,segúrese de que es un interruptor de un
sólo on / off ó el interruptor de balancín.
Paso 2: Instale la batería de 12 voltios en el
emisor portátil (Figura 20) como se muestra en la
(Figura 21). Asegúrese de que la batería está
fijado con terminales + / - coincididos. El mando a
distancia se iluminará a la medida que se enciende
una función. Esta luz indica que el mando a
distancia tiene una buena batería. Si no ve esta
iluminación por favor cambie la batería.
Paso 3: Comience evaluando las funciones del
ventilador con el mando a distancia (Figura 20).
Ver detalles de la operación más adelante.
• Botones del ventilador 1-6: el número
máximo será más rápido para los giros del
ventilador. Pulse de una vez en cada botón de la
velocidad deseada. # 1 es la velocidad más baja y
# 6 es la velocidad más alta.
• Botón apagado de ventilador: Presione una
vez para apagar ventilador.
• Botón de luz: Pulse una vez para encender la
luz de encendido / apagado. Mantenga pulsado el
botón para el completo rango de regulación y lo
suelte cuando se alcance la luz deseada.
• Botón Revés: Está en la parte posterior de
compartimiento de la batería (Figura 21). Pulselo
de una vez para invertir el ventilador.
• El sistema a distancia funciona a una distancia
máxima de 20 pies. Si la distancia es mayor, el
sistema puede experimentar problemas técnicos /
funcionales y debe reducirse la distancia.
• El ventilador viene con un sistema de mando a
distancia con completas funciones. El sistema está
preprogramado para las operaciones en la fábrica.
Sin embargo, si usted experimenta cualquier
problema en las funciones, puede ser necesario
volver a programar el mand a distancia del
ventilador (vea las instrucciones a continuación
para la reprogramación de los pasos).
Reprogramación de su ventilador
de techo:
Paso 1: Apague la energía a su ventilador de techo.
Paso 2: Utilize una herramienta pequeña para
cambiar la frecuencia en el sistema de control.
Paso 3: Restablezca poder a la unidad.
Nota: Después de conectar, no oprima cualquier
otro botón en el control antes de oprimir el botón
“ FA N O F F ” , h a c i e n d o e s o h a r á q u e e l
procedimiento fracase.
Paso 4: Dentro de los 60 segundos de girar el
ventilador de alimentación de CA ON. Pulse el
transmisor de la botón “Fan OFF” y mantenga el
botón “FAN OFF” de 10 segundos, El receptor.
Paso 5: Once ha detectado la frecuencia
establecida, en la luz de tu ventilador a parpadear
dos veces.
Paso 6: El receptor ha aprender la frecuencia ue ha
sido seleccionado en el transmisor después de
completar los pasos anteriores, debe ser capaz de
funcionar el ventilador de techo y la luz. Si el
ventilador no está respondiendo al transmisor, por
favor, a su vez el poder hacia el receptor, y repetir
el proceso.
Figura 20
Cambiar la
frecuencia
Botón Revés
Figura 21
8
La configuración de velocidad para clima caliente
o frío dependiendo de factores tales como la
superficie de las habitaciones, altura de techo, el
número de ventiladores, etc
NOTA
Para activar el funcionamiento inverso de este
ventilador, pulse el boton(invertir) mientras está en
marcha.
Figura 22
Clima cálido - (Adelante) Una corriente de
aire descendente crea un efecto refrescante
como se muestra en la Figura 22. Esto le
permite ajustar su aire acondicionado en un
mayor ajuste sin que ello afecte su
comodidad.
Clima Frío - (Inversa) Un flujo de aire mueve
el aire caliente hacia arriba fuera de la zona
límite, como se muestra en la Figura 23. Esto
le permite configurar su unidad de
calefacción en un ajuste más bajo sin afectar a
su comodidad.
9
Figura 23
Cómo cuidar
delventilador
Resolución de Problemas
He aqui algunas sugerencias para ayudarle el
mantenimiento del ventilodor.
1. Debido al movimiento natural del ventilador,
algunas conexiones se podrian aflojar. Examinar
las conexiones del soporte, soportes, y
accessorios de las aspas dos veces al año.
Asgurarse de que estén seguros. (No es necesario
retirar el venitlador del techo).
2. Limpiar el ventilador periódicamente para ayudar
a mantener su apariencia de nuevo con el
transcurso del tiempo. Usar solamente un cepillo
suave o paño sin hilas para evitar rayar el acadado.
El recubrimiento metálico se sella con una laca
para minimizar la decoloración o manchado. No
usar agua al limpiarlo. madera, o posiblemente
causar choque eléctrico.
3. Se puede aplicar una capa ligera de pulidor para
muebles a las aspas de madera para brindar
protección adicional y realzar su belleza. Cubrir
los rayones pequeños con una ligera aplicación de
betún para calzado.No hay necesidad de aceitar el
ventilador. El motor tiene cojinetes
permanentemente lubricados.
4. No hay necesidad de aceitar el ventilador. El
motor tiene cojinetes permanentemente
lubricados.
Para mas informacion sobre su
Ventiladorde Hampton Bay escriba:
Summerwind International, LLC.
749 Port America Place, Suite 400
Grapevine, TX 76051
CALL TOLL FREE 1-877-262-7511
PROBLEMA
SOLUCIÓN
El ventilador
no funciona
1.Revisar los fusibles o interruptores de circuitos.
2.Verificar las conexiones de cables de linea al ventilador y conexiones de
cable del interruptor.
3.Revise los interruptores de frequencia del receptor y transmisor, los
interruptores de las dos unidades debén de estar en las mismas posiciones.
Cambie la frequencia para descartar que su ventilador tenga interferencia
con otra unidad.
4. Cambio de la batería (consulte la página 8).
5. Vuelva a programar la unidad (consulte la página 8).
El ventilador
emiteruido
1.Asegurarse de que todos los tornillos de la cubierta del motor estén
ajustados.
2.Asegurarse de que los tornillos que sujetan el soporte de aspas del
ventilador al eje del motor estén apretados.
3.Asegurarse de que las conexiones de tuercas para cable no esten rozando
unas contra otras o contra la pared interior de la cubierta protectora del
interruptor.
4.Permitir un período de "desgaste" de 24 horas. La moyaría de los ruidos
asociados con un ventilador nuevo desaparecen durante este tirmpo.
5.Si se está usando un juego opcional de iluminación para el venitlador de
techo, aseguarse de que los tornillos que aseguran el vidrio estén
apretados. Asimsmo, verificar que la bombilla esté segura.
6.Asegurarse de que el escudete superior esté a una corta distancia del techo.
No debe hacer contacto con el techo.
7.Asegúrese de que la caja del techo esté fija y que las almohadillas aislantes
de goma estén colocadas entre el soporte de montaje y la toma de corriente.
ADVERTENCIA
ASEGURARSE DE QUE LA ELECTRICIDAD ESTÉ DESACTIVADA EN EL
TABLERO DE DISTRIBUCIÓN ELÉCTRICA ANTES DE INTENTAR
CUALQUIER REPARACIÓN REFERIRSE A LA SECCIÓ "CÓMO EFECTUAR
CONEXIONES ELÉCTRICAS".
10
Especificaciones
Tamaño del
Velocidad
Ventilador
70
(1.78)
Amperios
Vatios
RPM
CFM
1
0.12
6
50
3665
2
0.18
8
61
4471
0.25
13
72
5277
Voltios
3
120
4
0.30
18
83
6084
5
0.38
26
94
6890
6
0.55
36
105
7697
Estas son mediciones aproximadas. No incluyen los Amperios y vatios usado por el juego de iliminación.
Distributed por
Home Depot U.S.A.,Inc.
2455 Paces Ferry Rd.,N.W.
Atlanta,GA30339
11
N.W.
G.W.
C.F.
10.71KGS/
23.61LBS
12.38KGS/
27.29LBS
2.76
Garantía de por Vida
(Garantía del Motor de por Vida)
El Hampton Bay garantiza que el motor del ventilador se encuentra libre de defectos en cuanto a
mano de obra y materiales presentes en el momento de su envío desde la fábrica por un período de
por vida después de la fecha de compra por parte del comprador original. Asimismo. el Hampton
Bay garantiza que todas las otras piezas del ventilador, exluyendo cualesquiera aspas de vidrio o de
plexiglás están libres de defectos en cuanto a mano de obra y materiales en el momento de su envío
desde la fábrica durante un período de un año después de la fecha de compra por parte del
comprador original. Acordamos corregir dichos defectos sin recargo. o a unestra discreción
efectuar el reemplaza con un modelo comparable o superior si se devuelve el producto al Hampton
Bay. Para obtener servicio de garantia, se deberá presentar una copia de la factura como prueba de
compra. Todos los costos de desmontar y reinstalar el producto corren por cuenta del comprador
El(los) daño(s) a cualquier pieza tales como por accidente o mal uso o instalación inadecuada o
debidos a la fijación de cualesquiera accesorios. No está(n) cubierto(s) por esta garantia. Debido a
la variación en las condiciones climaticas, esta garantia no cubre ningún cambio en el acabado de
bronce. Incluyendo la herrunnmbre picaduras, corrosión, manchado o pelado. Los acabados be
bronce de este tipo brindan su vida útil más larga cuando están protegidos contra varias condiciones
climáticas. Una cierta cantidad de “oscilación” es normal y no se debe considerar como un defecto.
El servicio prestado por personas no autorizadas anulará la garantía. No existe ninguna otra
garantía expresa. El Hampton Bay por la presente renuncia a cualquiera y todas las garantías,
incluyendo pero sin limitarase a aquellas de comerciabilidad e idoneidad para un propósito
específico hasta donde la ley lo permita. La duración de cualquier garantía implicíta a la que no se
pueda renunciar está limitada al período de tiempo que se especifica en la garantía expresa. Algunos
estados no permiten limitaciones sobre la duración de una garantía implícita de modo que es posible
que la limitación mencionada arriba no le sea aplicable a Vd. El distribuidor no será responsible por
daños incidentales, emergentes, o daños especiales que surjan de o en conexión con el uso o
rendimiento del producto excepto cuando la ley indique lo contrario. Algunos estados no permiten
la exclusión de los daños incidentales o emergentes de modo que es posible que la exclusión o
limitacion mencionada arriba no le sea aplicable. Esta garantía otorga derechos legales especificos,
y es posible que Vd. también tenga otros derechos los cuales varían de estado. Esta garantía
gobierna sobre todas las garantías previas. El coste del envío por devoluciones del producto como
parte de una reclamación de la garantía debe ser pagado por el cliente.
Puede presentar una copia del recibo de
compra original para beneficiarse del
servicio de garantía.
Para mas informacion sobre su
Ventiladorde Hampton Bay escriba:
Summerwind International, LLC.
749 Port America Place, Suite 400
Grapevine, TX 76051
Pegue el recibo aquí para
localizarlo fácilmente
12