Transcript
Item # 1000000000
Model # DC5326ABZ
Safety Information
Pre-Installation
IMPORTANT SAFETY INSTRUCTIONS
(Save These Instructions)
TOOLS REQUIRED
□ Read all instructions prior to beginning the
USE AND CARE GUIDE
installation process.
□ Make sure the power is turned off at the
electrical panel box before beginning your
installation. Turning the power off at the wall
LED LIGHT FIXTURE
□
WARNING: This lighting is suitabel for wet
locations.
Ladder
Gloves
Installation
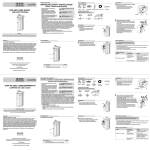
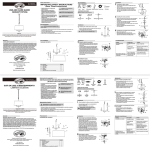
2 Installing the mounting bracket assembly
Safety goggles Phillips screwdriver Electrical tape
□ Make sure the power is off.
□ Pull the supply wires down out of the outlet box.
□ Fasten the mounting bracket assembly (CC) to the
outlet box with the outlet box screws (AA).
Wirestripper
CC
AA
HARDWARE INCLUDED
CAUTION: The LEDs in this product
are not replaceable.
NOTE: Hardware not shown to actual size.
shock.
CAUTION: Keep the lamp away from
square x 2-1/8 in. deep metal octagon outlet box.
materials that may burn.
The box must be directly supported by the
building structure.
□ All electrical connections must be in accordance with local codes and the National Electrical Code.
AA
Outlet box screws
x2
CC
Mounting bracket assembly
x1
BB
Wire connectors
x3
licensed electrician.
DD
Canopy screws
x2
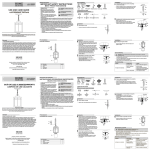
3 Making the electrical connections
□ This equipment has been tested and found to comply with the limits for a Class B digital device,
pursuant to Part 15 of the FCC Rules. These limits are designed to provide reasonable protection
against harmful interference in a residential installation. This equipment generates, uses and can
radiate radio frequency energy and, if not installed and used in accordance with the instructions, may
cause harmful interference to radio communications. However, there is no guarantee that interference
will not occur in a particular installation. If this equipment does cause harmful interference to radio or
television reception, which can be determined by turning the equipment off and on, the user is
encouraged to try to correct the interference by one or more of the following measures:
□ Reorient or relocate the receiving antenna.
□ Increase the separation between the equipment and receiver.
□ Connect the equipment into an outlet on a circuit different from that to which the receiver is
connected.
□ Consult the dealer or an experienced radio/TV technician for help.
THANK YOU
Outlet box
□ Attach the ground wire from the outlet box to the ground
screw on the mounting bracket (CC), which is green and
marked "GND".
□
to the negative wires from the supply circuit, the positive
Installation
1 Removing the canopy
A
□ Loosen the set screws (C) and remove the canopy
(A) from the fixtre body (B).
B
C
from the supply circuit, and the ground wire (bare) from
the wire connectors (BB).
□ Wrap electrical tape (not included) around the wire
connectors (BB), and ensure they are secure.
□ Push all excess wire and wire connections back
into the outlet box.
CC
BB
We appreciate the trust and confidence you have placed in Home Decorators Collection through the purchase of this LED
light fixture. We strive to continually create quality products designed to enhance your home. Visit us online to see our
full line of products available for your home improvement needs. Thank you for choosing Home Decorators Collection!
Warranty
Pre-Installation
1-YEAR LIMITED WARRANTY
The manufacturer warrants this lighting fixture against defects in materials and workmanship for a period
of one year from the date of purchase. If within this period the product is found to be defective in material
or workmanship, the product must be returned, with a copy of the bill of sale as proof of purchase, to the
original place of purchase. The manufacturer will, at its option, repair, replace, or refund the purchase
price to the original purchaser or consumer. This warranty does not cover light bulbs or the fixture
becoming damaged due to misuse, accidental damage, improper handling and/or installation, and
specifically excludes liability for direct, incidental, or consequential damages. As some states do not allow
exclusions or limitations on an implied warranty, so the above exclusions and limitations may not apply.
This warranty gives you specific rights and you may also have other rights that vary from state to state.
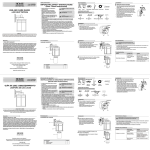
PACKAGE CONTENTS
Care and Cleaning
Installation
4
□
□
A
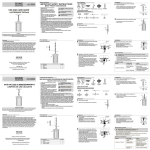
Attaching the canopy to the ceiling
CAUTION: Do not use chemical solvents or harsh
Raise the canopy (A) up to the outlet box.
Secure the canopy (A) to the mounting bracket
assembly (CC) using the canopy screws (DD)
provided.
may occur.
□
CC
A
removing the fuse at the fuse box.
□ Use a dry or slightly dampened, clean cloth (use clean water, never use a solvent) to wipe the
interior and exterior surfaces of the fixture.
□
DD
Troubleshooting
B
Contact the Customer Service Team at 1-800-986-3460 or visit www.homedepot.com/homedecorators.
5
C
□
Attaching the fixture body
to the canopy
Problem
A
Secure the fixture body (B) to the canopy (A)
using the set screws (C) provided.
B
The light will not illuminate.
Possible Cause
Solution
The power is off.
Make sure the power supply is on.
There is a faulty wire
connection.
Check the wiring.
Contact a quali ed and licensed
electrician if you are not comfortable
troubleshooting wiring problems.
There is a faulty switch.
Test or replace the switch.
C
Questions, problems, missing parts? Before returning to store,
call Home Decorators Collection Customer Service
8 a.m. - 6 p.m., EST, Monday - Friday
Part
1-800-986-3460
www.homedepot.com/homedecorators
Description
Quantity
A
Canopy [preassembled on the Fixture body (B)]
1
B
C
Fixture body
1
2
Set screw [preassembled on the Fixture body (B)]
Retain this manual for future use.
Artículo #1000000000
Modelo #DC5326ABZ
Información de seguridad
Preinstalación
INSTRUCCIONES DE SEGURIDAD IMPORTANTES
(Guarda estas instrucciones)
HERRAMIENTAS NECESARIAS
□ Lee todas las instrucciones antes de comenzar
GUÍA DE USO Y MANTENIMIENTO
LÁMPARA DE LED LUCES
la instalación.
□ Asegúrate de que la corriente esté desconectada
en el panel de electricidad antes de comenzar la
instalación. Cortar el suministro de electricidad
ADVERTENCIA: Este sistema de
iluminación puede usarse en lugares
húmedos.
PRECAUCIÓN: Las bombillas LED en
este producto no son reemplazables.
evitar una descarga.
□ Esta lámpara se debe montar en una caja eléctrica
PRECAUCIÓN: Mantén la bombilla
octogonal de metal de 25.8 cm cuadrados y 5.11
alejada de materiales potencialmente
cm de profundidad. La caja debe estar directamente
apoyada en la estructura de la vivienda.
□ Todas las conexiones se deben hacer conforme con el Código Nacional de Electricidad y con los
códigos de electricidad locales. Si no estás familiarizado con los métodos de instalación del cableado
□ Este equipo ha sido probado y se ha determinado que cumple con los límites para los equipos digitales
GRACIAS POR TU COMPRA
Escalera
de Clase B, en consonancia con la Part 15 de las Regulaciones de la FCC. Estos límites están diseñados
para brindar una protección razonable contra la interferencia dañina en las instalaciones residenciales.
Este equipo genera, usa y puede irradiar energía de radiofrecuencia y, de no instalarse y usarse según
las instrucciones, pudiera ocasionar interferencia dañina a las comunicaciones radiales. Sin embargo,
no existe garantía de que no se producirá interferencia en una instalación particular. Si este equipo
ocasionara interferencia dañina a la recepción radial o televisiva, lo que se puede determinar apagando
y encendiendo el equipo, se le exhorta al usuario a eliminar la interferencia mediante una o varias de
las siguientes medidas:
□ Reoriente o reubique la antena receptora.
□ Aumente la separación entre el equipo y el receptor.
□ Conecte el equipo a un tomacorriente de un circuito diferente al circuito al que está conectado el
receptor.
□ Pida ayuda a un concesionario o técnico de radio/TV experimentado.
Guantes
Instalación
Gafas de
seguridad
2 Cómo instalar el soporte de montaje
Destornillador
Phillips
Cinta de
electricista
Caja eléctrica
□ Asegúrate de que la corriente esté apagada.
□ Saca los cables de suministro de electricidad de
la caja eléctrica.
□ Ajuste la soporte de montaje (CC) en la caja de
salida usando tornillos de montaje (AA).
Pelacables
CC
AA
HERRAJES INCLUIDOS
NOTA: No se muestra el tamaño real de los herrajes.
AA
Tornillos de la
caja eléctrica
x2
BB
Conectores
de cable
x3
CC
Soporte de montaje
x1
DD
Tornillos de cubierta
x2
3 Cómo hacer las conexiones eléctricas
□ Conecta el cable a tierra de la lámpara al cable al
tornillo a soporte de montaje (CC), el cual es verde y
Instalación
1 Cómo retirar la cubierta
A
□ Afloja los tornillos de fijación (C) y quita la cubierta (A)
del cuerpo de la lámpara (B).
B
C
□ Conecta los cables negativos (cable blanco) desde la lámpara
a los cables negativos desde el circuito de energía, los cables
positivos (cable negro) desde la lámpara a los cables positivos
desde el circuito de energía y el cable a tierra (desnudo) desde
la lámpara al cable a tierra desde el circuito de energía utilizando
los conectores de cables (BB).
□ Enrosca cinta de electricista (no incluida) alrededor de los
BB
□
CC
Empuja los cables excedentes y las conexiones de cables
hacia adentro de la caja eléctrica.
Apreciamos la confianza que has depositado en Home Decorators Collection al comprar esta lámpara de LED luces.
Nos esforzamos para continuamente crear productos de calidad diseñados para mejorar tu hogar. Visítanos por
Internet para ver nuestra línea completa de productos disponibles para las necesidades de mejoras de tu
hogar. ¡Gracias por elegir Home Decorators Collection!
Garantía
Preinstalación
GARANTÍA LIMITADA DE 1 AÑOS
El fabricante garantiza que esta lámpara estará libre de defectos en materiales y mano de obra por un
periodo de cincoaño a partir de la fecha de su compra. Si durante este lapso, el producto resulta
defectuoso en cuanto a material omano de obra, deberá devolverlo al lugar de la compra original, junto con
una copia de la factura de venta comocomprobante de la compra. El fabricante, según su criterio, reparará,
sustituirá o reembolsará el precio de la compra alcomprador o consumidor original. Esta garantía no cubre
los focos ni que la luminaria resulte dañado debido a un maluso, daño accidental, manejo o instalación
inapropiados y, asimismo, de manera especifica excluye la responsabilidad por daños directos, incidentales
o emergentes. Puesto que algunos estados no permiten las exclusiones o limitacionesen una garantía
implícita, es posible que las exclusiones y limitaciones anteriores no se apliquen. Esta garantía le brinda
derechos legales especificos y usted podría tener también otros derechos que varían según el estado.
CONTENIDO DEL PAQUETE
Mantenimiento y limpieza
Instalación
4
A
PRECAUCIÓN: No uses solventes químicos ni abrasivos fuertes para
limpiar la lámpara o los componentes, porque se pueden dañar.
□ Eleva la cubierta (A) hasta la caja de eléctrica.
□ Asegura la cubierta (A) al soporte de montaje
(CC) con las tornillo de cubierta provistas.
CC
A
□ Para limpiar la lámpara, desconecta primero la electricidad apagando el cortacircuitos o quitando el
fusible correspondiente en la caja de fusibles.
□ Usa un paño limpio, seco o ligeramente húmedo (usa sólo agua limpia, nunca un solvente) para
limpiar el interior y exterior de la lámpara.
□ Deja secar la lámpara completamente antes de restablecer la electricidad.
DD
B
Comuníquese con el equipo de servicio al cliente al 1-800-986-3460 or visit www.homedepot.com/
homedecorators.
C
Solución de problemas
5
□
Cómo fijar la cuerpo de la lámpara
al cubierta
Asegura la cuerpo de la lámpara (B) al cubierta (A)
con las tornillo de fijación (C) provistas.
Problema
A
La lámpara no se enciende.
B
Causa posible
Solución
La electricidad está
apagada.
Asegúrate de que el suministro de
electricidad está encendido.
Hay una conexión
defectuosa del cable.
Revisa el cableado.
Comunícate con un electricista
satisfecho con la solución de
problemas del cableado.
C
Hay un interruptor
defectuoso.
¿Preguntas, problemas o piezas faltantes?
Antes de regresar a la tienda, llama al servicio al cliente de Home Decorators
Collection, de 8 a.m. a 6 p.m., hora estándar del Este, de lunes a viernes
1-800-986-3460
www.homedepot.com/homedecorators
Conserva este manual para uso en el futuro.
Pieza Descripción
Cantidad
A
Cubierta [preensamblado a la Cuerpo de la lámpara (B)]
1
B
C
Cuerpo de la lámpara
Tornillo de fijación [preensamblado a la Cuerpo de la lámpara (B)]
1
2
Prueba o reemplaza el interruptor