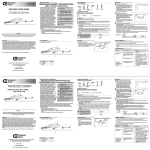
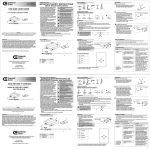
Transcript
Item #**********,**********
Model #ES4763OB4-D,
ES4763SBA-D
Safety Information
IMPORTANT SAFETY INSTRUCTIONS
(Save These Instructions)
□ This portable luminaire has a polarized plug (one
USE AND CARE GUIDE
PENDANT FIXTURE
Installation
Pre-Installation
WARNING: Do not install this lighting
system in a wet location.
blade is wider than the other) as a feature to
r
only one way into a polarized outlet. If the plug
does not insert fully into the outlet, reverse the
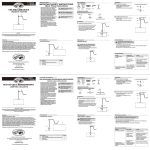
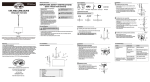
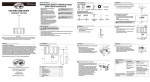
2 Installing the hardware
TOOLS REQUIRED
Ladder
Gloves
Safety goggles
□ Install the hanger pins (BB) in the desired
locations using the drill and hammer
(not included.)
□ Install the hooks (AA) into the hanger pins (BB).
Hammer
Drill
BB
AA
HARDWARE INCLUDED
CAUTION: Turn off/unplug the light and
allow it to cool before replacing the bulb.
electrician for assistance. Never use this product
with an extension cord unless the plug can be
fully inserted. Do not alter the plug in any way,
as serious injury or damage may result.
□ Make sure the power is turned off at the electrical
panel box before beginning your installation.
Turning the power off at the wall switch is not
sufficient to prevent electrical shock.
□ Read all instructions prior to beginning the
installation process.
□ All electrical connections must be in accordance
with local codes and the National Electrical Code.
If you are unfamiliar with methods of installing
electrical wiring, secure the services of a qualified
licensed electrician.
NOTE: Hardware not shown to actual size.
CAUTION: Keep the lamp away from
materials that may burn.
AA
Hook
x2
BB
Hanger pin
x2
3 Installing the fixture body
CC
Adjuster tab
x1
(preassembled on the wire)
□ Adjust the height of the adjuster tab (CC) to the
desired location.
□ Hang the adjuster tab (CC) on the hook (AA).
Installation
1 Installing the shade and bulb
□
AA
CC
A
Unscrew the socket ring (B) from the fixture body (A).
□ Place the fabric shade (C) over the fixture body (A).
□ Screw the socket ring (B) back onto the fixture
body (A) to secure the shade (B) in place.
□ Install the bulb (not included) into the bulb socket
on the fixture body (A).
THANK YOU
A
B
We appreciate the trust and confidence you have placed in Hampton Bay through the purchase of this pendant fixture.
We strive to continually create quality products designed to enhance your home. Visit us online to see our full line of
products available for your home improvement needs. Thank you for choosing Hampton Bay!
C
Warranty
Pre-Installation
Maintenance
5-YEAR LIMITED WARRANTY
PACKAGE CONTENTS
REPLACING THE BULB
of five year(s) from the date of purchase. If within this period the product is found to be defective in material
or workmanship, the product must be returned, with a copy of the bill of sale as proof of purchase, to the
original place of purchase. The manufacturer will, at its option, repair, replace, or refund the purchase price
CAUTION: Refer to the re-lamping label located on
the fixture. Do not exceed the recommended wattage.
D
C
excludes liability for direct, incidental, or consequential damages. Some states do not allow exclusions
or limitations on an implied warranty, so the above exclusions and limitations may not apply. This warranty
□
□
□
Turn off the power to the light xture.
Remove the old light bulb, and install the new light bulb.
Restore power to the light xture.
Care and Cleaning
CAUTION: Do not use chemical solvents or harsh
abrasives to clean the fixture or components, as damage
may occur.
□ To clean the fixture, unplug it from the outlet.
□ Use a dry or slightly dampened, clean cloth (use clean water, never use a solvent) to wipe the
interior and exterior surfaces of the fixture.
□ Allow the fixture to dry completely before power is restored.
A
Contact the Customer Service Team at 1-877-527-0313 or visit www.homedepot.com.
Troubleshooting
B
Questions, problems, missing parts? Before returning to store,
call Commerial Electric Customer Service
8 a.m. - 6 p.m., EST, Monday - Friday
1-877-527-0313
HOMEDEPOT.COM
Retain this manual for future use.
Part
Description
Quantity
A
Fixture body
1
B
Socket ring [preassembled on the fixture body (A)]
1
C
D
Fabric shade
1
Polarized plug
1
Problem
Possible Cause
Solution
The light bulb will not
illuminate.
The light bulb is burned
out.
Replace the light bulb.
The power is off.
Make sure the power supply is on.
There is a faulty wire
connection.
Check the wiring.
Contact a quali ed and licensed
electrician if you are not comfortable
troubleshooting wiring problems.
There is a faulty switch.
Test or replace the switch.
There are crossed wires,
The fuse blows or the circuit
breaker trips when the light bulb or the power wire is not
properly grounded.
is illuminated.
Check the wire connections.