Transcript
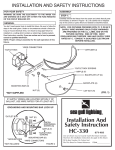
*JUNCTION
BOX
HC-447
*NOT INCLUDED
092999
*CONDUIT
NOTE: FOR FIXTURES PROVIDED WITH 75˚C OR 90˚C
SUPPLY WIRE ONLY—(THESE WARNINGS ARE PROVIDED
ON THE U.L. LABEL AND ON THE FIXTURE CARTON): RISK
OF FIRE. MOST DWELLINGS BUILT BEFORE 1985 HAVE
SUPPLY WIRE RATED 60˚C. CONSULT A QUALIFIED
ELECTRICIAN BEFORE INSTALLING.
SOCKET
FITTER
GASKET
GLASS GLOBE
WARNING: BE SURE THE ELECTRICITY TO THE WIRES
YOU ARE WORKING ON IS SHUT OFF. EITHER THE FUSE
REMOVED OR THE CIRCUIT BREAKER OFF .
(IF APPLICABLE)
CENTER SHADE
You don’t need special tools to install this fixture. Be sure to
follow the steps in the order given. Under no circumstances
should a fixture be hung on house electrical wires, nor should a
swag type fixture be installed on a ceiling which contains a
radiant type heating system. NOTE: Proper wiring is essential
for the safe operation of this fixture. Read instructions carefully.
If you are unclear as to how to proceed, consult a qualified
electrician.
CENTER SHADE
TOP SHADE
LONG
MACHINE
SCREW
GENERAL
INSTALLATION AND SAFETY INSTRUCTIONS
INSTALLATION
HC-447
NOTE: If fixture is assembled, follow steps one and two.
1. To disassemble fixture, remove three long machine screws and remove
shade sections.
2. Unscrew glass globe from fitter.
IF SUPPLY WIRES ARE LOCATED WITHIN 3” OF BALLAST, USE WIRE
RATED FOR FOR AT LEAST 90˙C.
3. Slip fixture wires into length of conduit or weather resistant box and
tighten securely.
4. Take note of the color of the wire(s) on your fixture. Identify which
group your fixture wire(s) falls into and connect the wires according to
the directions below:
GROUP A: Connect to Black House Wire
GROUP B: Connect to White House WIres
BLACK
WHITE
PARALLEL WIRE (ROUND
&
SMOOTH)
*PARALLEL WIRE (SQUARE &
RIDGED)
WHITE OR GREY WITH TRACER
WHITE OR GREY WITHOUT TRACER
BROWN, GOLD, OR BLACK WITHOUT TRACER
BROWN, GOLD, OR BLACK WITH TRACER
NOTE: When parallel wire (SPT 1 & SPT 2) is used, the tracer wire is
square shaped or ridged and the less tracer wire is round in shape or
smooth. (Seen best when viewed from wire end.) To separate wires,
grasp the ends of each wire and pull apart.
NOTE: If fixture is assembled, follow steps one and two.
5. Take your fixture wire(s) from group A and
place evenly against the black wire from the
outlet box and twist together the bare parts of
the metal.
6. Fit a wire connector (not supplied.) over the
twisted wires and screw the connector
clockwise until you feel a firmness.
7. Try gently to pull the connector off the wires. If you
can pull the connector off, carefully repeat steps 4
and 5 and check again for a firm connection.
8. Connect the fixture wire from group B to the
white wire from the outlet box in the same
manner.
9. GROUNDING INSTRUCTIONS: Connect
fixture ground wire to green ground wire.
NEVER CONNECT GROUND WIRE TO BLACK
OR WHITE POWER SUPPLY WIRES.
FINAL INSTALLATION
1. Install lamp (not furnished). With gasket in
place, screw glass globe into fitter.
2. Slide center shade (if applicable) down over
glass globe and seat into fitter.
3. Slide top shade over glass globe and seat into
center shade.
4. Thread long screws into fitter.