1
INSTALLATION AND SAFETY INSTRUCTIONS
FOR YOUR SAFETY
ASSEMBLY
WARNING: BE SURE THE ELECTRICITY TO THE WIRES YOU
ARE WORKING ON IS SHUT OFF. EITHER THE FUSE REMOVED
OR THE CIRCUIT BREAKER OFF .
GENERAL
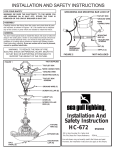
Carefully remove the fixture from the carton and check that all
parts are included, as shown in Figure 1 & 2. Be careful not to
misplace any of the screws or parts which are needed to install
this fixture.
STEP 1:
You don’t need special tools to install this fixture. Be sure to follow the
steps in the order given. Under no circumstances should a fixture be
hung on house electrical wires, nor should a swag type fixture be
installed on a ceiling which contains a radiant type heating system.
Read instructions carefully. If you are unclear as to how to proceed,
consult a qualified electrician.
NOTE: Proper wiring is essential for the safe operation of this
fixture.
(FIG. 1)
FINIAL (A)
TOP
ASSEMBLY (B)
SCREWS (C)
Attach finial [A] to top assembly [B] of fixture (if not factory installed).
CAUTION:
Fixtures with photo-cells should be mounted at least 48”
from all sides to avoid reflection of light back onto Photo-cell,
causing the Photo-cell to malfunction or flicker.
NOTE: Your handcrafted, solid brass lighting
fixture has been coated with a durable, baked-on
acrylic lacquer which gives maximum protection
against the weather. In time however, the
brightness of the brass will tarnish giving way to an
authentic old world brass finish.
NOTE: To keep your solid polished brass fixture
looking new for years to come, regularly apply a good
quality non-abrasive car wax to all metal surfaces,
giving the fixture an extra protective coating.
CAGE (D)
WARNING
NOTE: DO NOT INSTALL ON A POST OR A POLE THAT
RESULTS IN A VERTICAL RISE OF 25 FEET OR HIGHER.
NOTE: This glass is handcrafted, the slight imperfections in
the glass add to the authenticity of the fixture.
NOTE: Be sure that all sections of top finial are
securely tightened to prevent water seepage into
the fixture
SCREWS
FITTER (E)
ITEM #
Fill in item number located on carton and file this sheet for
future reference
HC-234
012405
INSTALLATION
HC-234
STEP 1:
A. Take note of the color of the wire(s) on your fixture. Identify
which group your fixture wire(s) falls into and connect the wires
according to the directions below:
STEP 2:
GROUND INSTRUCTIONS:
Connect the ground wire from the fixture (bare metal or green
insulated wire) to the ground wire from the power supply (bare metal
or green insulated wire) using a small wire connector (not supplied).
NEVER CONNECT GROUND WIRE TO BLACK
OR WHITE POWER SUPPLY WIRES.
STEP 3:
Slide fitter (E) onto post. Secure in place.
FINAL ASSEMBLY
Make sure no bare wires can be seen outside wire connectors.
NOTE: IF GLASS PANELS ARE NOT INSTALLED, PLEASE
FOLLOW THIS STEP: PLACE BOTTOM EDGE OF GLASS INTO
CHANNEL. BEND TABS OVER EDGE TO SECURE IN PLACE.
GROUP A: CONNECT TO BLACK
HOUSE WIRE
BLACK
GROUP B: CONNECT TO WHITE
HOUSE WIRE
WHITE
STEP 1:
Install lamp.
*PARALLEL WIRE (ROUND & SMOOTH)
*PARALLEL WIRE (SQUARE & RIDGED)
STEP 2:
Place top assembly [B] onto cage [D] and secure in place with
screws [C].
WHITE OR GREY WITH TRACER
WHITE OR GREY WITHOUT TRACER
CLEANING
BROWN, GOLD OR BLACK WITHOUT
TRACER
BROWN, GOLD OR BLACK WITH TRACER
*NOTE: When parallel wire is used, the tracer wire is square shaped
or ridged, and the less tracer wire is round in shape or smooth. (Seen
best when viewed from wire end.) To separate wires, grasp the ends
of each wire and pull apart.
B. Take your fixture wire(s) from group A and place evenly
against the black wire from the outlet box. Do Not twist wires
together before using wire connectors.
C. Fit a wire connector (not supplied) over the wires and screw
the connector clockwise until you feel a firmness.
D. Try gently to pull the connector off the wires. If you can pull
the connector off, carefully re-do steps B and C, as above, and
check again for a firm connection.
E. Connect the fixture wire from group B to the white wire from
the outlet box in the same manner.
To clean, wipe fixture with a soft cloth. Clean glass with a mild soap.
Do not use abrasive materials such as scouring pads or powders,
steel wool or abrasive paper.
ORDERING PARTS
Keep this sheet for future reference, and in case you need to order
replacement parts. All parts for this fixture can be ordered from place
of purchase. Be sure to use exact wording from illustration when
ordering parts.