1
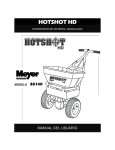
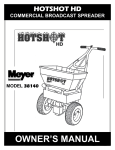
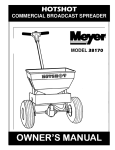
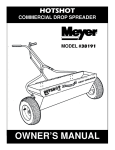
HOTSHOT HD
COMMERCIAL BROADCAST SPREADER
MODEL 38160
OWNER’S MANUAL
ASSEMBLY
5/32 Dia. x 1 1/4”
Cotter Pin
Free
Wheel
3/16 Dia. x 2”
Cotter Pin
1/4-20 Hex
Nut
1/4-20 x 2 3/4”
Hex Bolts
Drive
Wheel
Attach leg/brace to frame inserting the 1/4-20 x
2 3/4” bolts from the inside of the frame as
shown. Secure with (4) 1/4-20 hex nuts. NOTE:
Bolts are extra long and will be used for attaching the
ice melt deflector.
2
Remove spreader and components from carton
and place spreader upside down. Slide drive and
free wheels on axle as shown with the longer
portion of wheel hub facing the frame. Secure free wheel
with a 5/32 Dia. x 1 1/4” cotter pin. Secure drive wheel to axle
with 3/16” Dia. x 2” cotter pin.
1
Screen
Note Position of
Handle Lever
Bumper
Bar
Control Tube
Deflector
Bracket
Wing Nut &
Washer
Deflector
1/4-20 x 1 1/2”
Carriage Bolts
& Nuts
3/32” Dia.
Cotter Pin
& Clevis Pin
3/32” Dia.
Cotter Pin
Turn spreader upright on wheels. Insert screen into hopper
sliding it under the screen clips. Attach the upper handle
assembly to handle brace with the handle lever facing up
as shown. The holes in the handle brace are slotted and will be
used to adjust for complete shutoff in step #5. Secure with (2)
1/4-20 x 1 1/2” carriage bolts, and locknuts. Install control tube to
handle lever with and a 3/32” dia. cotter pin and clevis pin.
Remove tape holding the lower rod to the pivot lever and slip
opposite end of control tube over lower control rod. Secure with a
3/32” dia. cotter pin.
3
Install deflector bracket to the inside of deflector as
shown and secure with (2) #10-24 x 1/2” screws and
locknuts. Note position of holes in the deflector when
installing the bracket. bolts. Hold the ends of the deflector
open slightly to clear the spreader frame in the back. Hang the
deflector onto the spreader bumper bar. Align the slots in the
back of deflector with the top frame bolts and secure both sides
of the deflector with washers and wing nuts. To remove, simply
loosen the wing nuts, spread the deflector slightly to clear the
frame, and slide the deflector off. Retighten wing bolts.
4
Slotted
To check spreader for complete shutoff, pull the on/off
VIEW INSIDE OF HOOPER
Hole
control lever back to the “OFF” position. Determine if the
Hole should be
hole in the hopper is completely closed. Also check to make
closed in “OFF”
sure shut off plate is not closing too far which will cause the control
Position
lever to bind. If adjustment is needed, loosen the two carriage
bolts holding the upper handle to the handle brace assembled in
step #3. The holes in the brace are slotted to allow the upper
handle to be moved. Slide the upper handle toward the hopper to
increase the shutoff, move handle in the opposite direction to
reduce shutoff. Re-tighten bolts and recheck shutoff.
5
Slotted
Hole
OPERATION
1. The spreader can be used with or without the deflector. With
the deflector the overall swath width will be approximately 24” to
30”. Without the deflector the spreader will throw most ice melt
products 10 feet or more.
2. Always fill the spreader on the driveway or sidewalk-not on
the lawn. Make sure screen is in hopper and spreader is in the
“OFF” position.
3. Start spreader moving before opening port. Close before
stopping. Always push spreader, never pull.
4. Hold handle so top of spreader is level. Tipping the
spreader too far can cause uneven spreading.
5. When transporting spreader, make sure that it is in the
“OFF” position. Make sure handle lever is locked using the
hitch pin through the hole in lever.
6. Empty spreader after each use. Return leftover material to
its original container.
MAINTENANCE
1. Never store unused material in spreader. Return unused product
to its original container.
2. Wash spreader thoroughly after each use and dry completely in
Oil Bearing
In Hopper
sun or heated area.
3. Grease axle bearings in frame. Oil the impeller shaft bearing in
hopper, pivot points on the shut-off plate.
4. Remove gear cover and wash gears thoroughly. Oil all bearing
areas and lubricate gear teeth with dry graphite or oil. Re-install
gear cover.
5. Gear mesh should be checked on a regular basis during high
use periods. Clearance between the axle gear and pinion gear
should be minimal but not tight. If adjustment is necessary, loosen
axle collar set screw and hold gears together. Slide axle collar
against the gear support and tighten axle collar set screw. Spin drive
wheel. Gears should run freely and smoothly. Re-install gear cover
when finished.
6. Impeller surface should be cleaned periodically to remove buildup of product. Build-up can cause the spread pattern to change.
7. Tire pressure should be 20-25 PSI.
Grease
Axle Collar
Oil
Oil
LIMITED WARRANTY
Meyer Products warrants to Purchaser the following:
Meyer Products, Inc., warrants to the original purchaser for a period of one year from the date of purchase of Meyer® and Diamond® brand spreader
products that they will be free from defects in materials or workmanship, with the exceptions stated below. No person is authorized to change this
warranty or to create any additional warranty on Meyer®/Diamond® products.
Meyer Products will repair any product that proves to be defective in materials or workmanship. In the event repair is not possible or practical (as
determined by Meyer Products in its sole discretion), Meyer Products will either replace the product with a new product of similar model and price, or
refund the full purchase price, as determined by Meyer Products. Customer must keep the complete spreader system serviced/maintained as recommended by Meyer Products.
This warranty does not cover:
• Problems caused by failure to follow the product instructions, or failure to maintain the product as described in the Operator’s Manual;
• Damage resulting from rust, corrosion
• Damage caused by usage that is not in accordance with product instructions (use of the spreader for any purpose other than spreading approved
material is considered misuse and abuse);
• Any spreader, or any part, component, or assembly thereof, which has been modified or altered;
• Problems caused by using accessories, parts, or components not supplied by Meyer Products;
• Cost of tax, freight, transportation or storage charges, environmental charges, solvents, sealants, lubricants or any other normal shop supplies.
• Problems caused by collision, fire, theft, vandalism, riot, explosion, lightning, earthquake, windstorm, hail, water, flood, or any other Acts of God;
• Liability for damage to property, or injury to, or death of any person arising out of the operation, maintenance or use of the covered product;
• Products with missing or altered serial numbers;
How To Get Service:
• It is the responsibility of the original purchaser to establish the warranty period by verifying the original delivery date. A bill of sale, cancelled check
or some other appropriate payment record may be kept for that purpose. It is recommended, but not required, that the consumer verify the original
delivery date by immediately returning the attached Warranty Registration Card.
How State Law Applies:
This warranty gives you specific legal rights, and you may also have other rights which vary from state to state.
Parts List for Model 38160
9
10
19
8
20
22
16
11
12
15
13
21
17
7
66
7
23
25
24
14
26
4
5
27
18
3
28
2
29
30
38-Inside
Hopper
31
1A
1
32
35
34
37
36
33
PART OF OUR SERVICE IS PROVIDING REPLACEMENT PARTS,
Parts may be obtained through your
local distributor. Be sure to give the:
Meyer Products, Inc.
#
PART #
1
PSB16092
1A
#
PART #
Hopper*
13
PSB16094
PSB16091
Hopper Assembly
14
2
PSB16093
3
216-486-1313
www.meyerproducts.com
PART #
Impeller w/ Roll Pin**
26
PSB14915
Rate Control Plate*
PSB14868
Gear Cover Clamps (3)
27
PSB12704
Rate Knob w/ Washer*
Frame Ass’y. w/ Bearings 15
PSB15753
Gear Cover (2)
28
PSB14913
Adjusting Swivel*
PSB14860
Axle
16
PSB15951
Free Wheel w/ Cotter
29 PSB14885-1 Spring Housing Assy*
4
PSB14855
Axle Bearings (4)
17
PSB16095
Impeller Assembly
30
PSB14916
Control Tube
5
PSB15950
Drive Wheel w/ Cotter Pin 18
PSB14878
Pivot Lever Assembly*
31
PSB15498
Upper Handle Assembly
19
PSB14836
Shutoff Plate Guide*
32
PSB14870
Handle Grips (2)
7
8
9
PSB14867-3 Impeller Shaft**
DESCRIPTION
Cleveland, Ohio 44112
#
6
DESCRIPTION
18513 Euclid Ave
IF YOUR LOCAL
DISTRIBUTOR
CANNOT SUPPLY
PARTS, CONTACT:
1. SPREADER MODEL NUMBER
2. SPREADER NAME
3. PART NUMBER
4. NAME OF PART AS SHOWN
DESCRIPTION
PSB14832
Axle Gear w/ Cotter Pin
20
PSB16113
Shutoff Plate*
33
PSB14047
Handle Lever Assembly
PSB14865
Agitator
21
PSB14846
Shutoff Plate Link*
34
PSB16097
Handle Brace/Leg
22
PSB15750
Deflector Bracket
35
PSB14864
Screen Clip (2)
PSB16096
Deflector
36
PSB14863
Hopper Screen
37
PSB16098
Fastener/Parts Package
Pointer W/ Screw & Nut* 38
PSB14848
Reinforcing Plate*
PSB14312-1 Impeller Bearing Ass’y*
10
PSB14971
Axle Collar (3)
23
11
PSB14833
Pinion Gear w/ Roll Pin**
24 PSB14872-1 Hopper Cover
12
PSB14834
Gear Support**
25
PSB12708
*Parts in hopper ass’y,
**Parts in impeller ass’y,