1
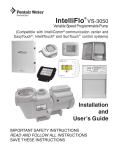
IntelliFlo Variable Speed
and
IntelliFlo VS-AU
®
®
Programmable Pump
(Compatible with IntelliComm ® communication center and
EasyTouch®, IntelliTouch ® and SunTouch® control systems)
Installation
and
User’s Guide
IMPORTANT SAFETY INSTRUCTIONS
READ AND FOLLOW ALL INSTRUCTIONS
SAVE THESE INSTRUCTIONS
Customer Service / Technical Support
IntelliFlo® Variable Speed Pump
IntelliFlo® VS-AU
(P/N 011018)
(P/N 348019)
1620 Hawkins Ave., Sanford, NC 27330
USA • (800) 831-7133 or (919) 566-8000
10951 West Los Angeles Ave., Moorpark, CA 93021
USA • (800) 831-7133 or (805) 553-5000
Pentair Water AU/NZ – 2 Redwood Drive, Notting Hill, VIC 3168
AUS • +61 3 9574 4000 – NZ • +64 9579 6254
Web sites: visit www.pentairpool.com - staritepool.com - pentairpooleurope.com
Declaration of Conformity
We declare, under sole responsibility, that the product identified in this declaration, and to which
this declaration relates, are in conformity with the protection requirements of Counci Directive 98/37/EEG
Manufacturer: Pentair Water Pool and Spa, Inc.
IntelliFlo® Variable
Speed Pump
(P/N 011018)
IntelliFlo® VS-AU
(P/N 348019)
© 2011 Pentair Water Pool and Spa, Inc. All rights reserved
IntelliComm®, EasyTouch®, IntelliTouch®, SunTouch®, IntelliFlo®, Eco Select™ and Pentair Water Pool and Spa® is a
registered tradmark and/or trademark of Pentair Water Pool and Spa, Inc. and/or its affiliated companies in the
United States and/or other countries. Unless noted, names and brands of others that may be used in this document
are not used to indicate an affiliation or endorsement between the proprietors of these names and brands and Pentair
Water Pool and Spa, Inc. Those names and brands may be the trademarks or registered trademarks of those parties
or others.
i
Contents
Section 1: IntelliFlo Pump Overview ............................................................................. 1
IntelliFlo Pump ......................................................................................................... 1
External Control ....................................................................................................... 1
Features .................................................................................................................. 2
IntelliFlo Drive Assembly and Control Panel ............................................................ 3
IntelliFlo Motor Features .......................................................................................... 3
Section 2: Operator Control Panel ................................................................................ 4
IntelliFlo Operator Control Panel .............................................................................. 4
Controls and LEDs .................................................................................................. 4
Section 3: Operating the Pump ..................................................................................... 6
Starting the pump .................................................................................................... 6
Stopping the pump ................................................................................................... 6
Operating the pump at preset speeds ..................................................................... 6
Pump Operating Modes .......................................................................................... 7
Programming the Pump .......................................................................................... 7
IntelliFlo Variable Speed and VS-AU Pump Menus .................................................. 8
Settings: Pump Address .......................................................................................... 9
Settings: Set Time ................................................................................................... 9
Settings: Set AM/PM or 24 Clock ............................................................................. 10
Settings: Set Temperature Unit ................................................................................ 10
Settings: Screen Contrast Level .............................................................................. 10
Settings: Language .................................................................................................. 11
Settings: Set Minimum Speed (RPM) ...................................................................... 11
Settings: Set Maximum Speed (RPM) ..................................................................... 11
Settings: Password ................................................................................................. 12
Password Protection ............................................................................................... 12
Settings: Ramp Speed ............................................................................................ 13
Speed 1-8 (Schedule a Time to Run the Pump) ...................................................... 14
External Control ....................................................................................................... 15
Features: Quick Clean ............................................................................................ 15
Programming for Constant Run .............................................................................. 15
Features: Time Out ................................................................................................. 16
Priming ................................................................................................................ 17
AntiFreeze ........................................................................................................... 19
Priming the pump for the first time, or after service ................................................ 20
Priming the Pump ................................................................................................ 21
External Control with IntelliComm Communication Center ..................................... 23
Connecting the pump to EasyTouch and IntelliTouch Systems ............................... 23
Connecting the pump to a SunTouch System ......................................................... 25
IntelliFlo® Variable Speed and VS-AU Pump Installation and User’s Guide
ii
Contents
Section 4: User Maintenance ......................................................................................... 26
Pump Strainer Basket .........................................................................................................
Pump Strainer Basket Service ............................................................................................
Motor Service ......................................................................................................................
Winterizing ..........................................................................................................................
Priming the pump after service ............................................................................................
26
26
27
28
28
Section 5: Installation and Removal ............................................................................. 29
IntelliFlo Variable Speed Kit Contents .................................................................................
IntelliFlo VS-AU Kit Contents ..............................................................................................
Installing the IntelliFlo .........................................................................................................
Location .................................................................................................................
Piping .....................................................................................................................
Electrical ................................................................................................................
Wiring the IntelliFlo Pump ...................................................................................................
Ground Wire Connection ........................................................................................
Pump Disassembly .............................................................................................................
Pump Reassembly/Seal Replacement ................................................................................
Shaft Seal Replacement .........................................................................................
Drive Assembly Removal and Installation ............................................................................
Replacement Parts .............................................................................................................
Illustrated Parts List ............................................................................................................
IntelliFlo Pump Dimensions ................................................................................................
IntelliFlo Flow and Power vs Flow Pump Curve ...................................................................
IntelliFlo Electrical Specifications ........................................................................................
29
29
29
29
29
29
30
30
31
32
32
33
33
34
35
35
35
Section 6: Troubleshooting ............................................................................................ 36
Alerts and Warnings ........................................................................................................... 36
General IntelliFlo Troubleshooting Problems ....................................................................... 37
IntelliFlo® Variable Speed and VS-AU Pump Installation and User’s Guide
iii
IntelliFlo® Variable Speed Pump & IntelliFlo® VS-AU Pump
WARNINGS AND SAFETY INSTRUCTIONS
Warnings and safety instructions for Pentair Water Pool and Spa® pumps and other related products are available at:
http://www.pentairpool.com/pool-owner/safety-warnings/
Please refer to http://www.pentairpool.com/pool-owner/safety-warnings/ for warnings and safety instructions related
to the IntelliFlo® Variable Speed Pump and IntelliFlo® VS-AU pump.
READ AND FOLLOW ALL WARNING AND SAFETY INSTRUCTIONS!
This is the safety alert symbol. When you see this symbol on your system or in this manual, look
for one of the following signal words and be alert to the potential for personal injury.
Warns about hazards that can cause death, serious personal injury, or major property
damage if ignored
Warns about hazards that may cause death, serious personal injury, or major property
damage if ignored.
Warns about hazards that may or can cause minor personal injury or property
damage if ignored.
NOTE indicates special instructions not related to hazards.
Carefully read and follow all safety instructions in this manual and on equipment. Keep safety labels
in good condition; replace if missing or damaged.
FAILURE TO FOLLOW ALL INSTRUCTIONS AND WARNINGS CAN RESULT IN SERIOUS BODILY
INJURY OR DEATH. THIS PUMP SHOULD BE INSTALLED AND SERVICED ONLY BY A QUALIFIED POOL SERVICE PROFESSIONAL. INSTALLERS, POOL OPERATORS AND OWNERS
MUST READ THESE WARNINGS AND ALL INSTRUCTIONS IN THE OWNER'S MANUAL BEFORE USING THIS PUMP. THESE WARNINGS AND THE OWNER'S MANUAL MUST BE LEFT
WITH THE POOL OWNER.
Warnings and safety instructions for Pentair Water Pool and Spa® pumps and other related products are
available at: http://www.pentairpool.com/pool-owner/safety-warnings/ Call (800) 831-7133 for
additional free copies of these instructions. Please refer to www.pentairpool.com for more information
related to Pentair Water Pool and Spa® pumps.
SUCTION ENTRAPMENT HAZARD: STAY OFF THE MAIN DRAIN AND AWAY FROM ALL SUCTION OUTLETS!
F
THIS PUMP PRODUCES HIGH LEVELS OF SUCTION AND CREATES A STRONG VACUUM AT
THE MAIN DRAIN AT THE BOTTOM OF YOUR POOL AND SPA. THIS SUCTION IS SO STRONG
THAT IT CAN TRAP ADULTS OR CHILDREN UNDER WATER IF THEY COME IN CLOSE PROXIMITY TO A POOL OR SPA DRAIN OR A LOOSE OR BROKEN DRAIN COVER OR GRATE.
READ AND KEEP THESE INSTRUCTIONS FOR FUTURE REFERENCE
IntelliFlo® Variable Speed and VS-AU Pump Installation and User’s Guide
iv
IntelliFlo® Variable Speed Pump & IntelliFlo® VS-AU Pump
WARNINGS AND SAFETY INSTRUCTIONS
THE USE OF UNAPPROVED COVERS OR ALLOWING USE OF THE POOL OR SPA WHEN COVERS ARE
MISSING, CRACKED OR BROKEN CAN RESULT IN BODY OR LIMB ENTRAPMENT, HAIR ENTANGLEMENT,
BODY ENTRAPMENT, EVISCERATION AND/OR DEATH.
The suction at a pool or spa drain or outlet can cause:
Limb Entrapment: When a limb is sucked or inserted into an opening resulting in a mechanical bind or swelling.
This hazard is present when a drain cover is missing, broken, loose, cracked or not properly secured.
Hair Entanglement: When the hair tangles or knots in the drain cover, trapping the swimmer underwater. This
hazard is present when the flow rating of the cover is too small for the pump or pumps.
Body Entrapment: When a portion of the body is held against the drain cover trapping the swimmer underwater.
This hazard is present when the drain cover is missing, broken or the cover flow rating is not high enough for the
pump or pumps.
Evisceration/Disembowelment: When a person sits on an open pool
(particularly a child wading pool) or spa outlet and suction is applied directly to the intestines, causing severe
intestinal damage. This hazard is present when the drain cover is missing, loose, cracked, or not properly secured.
Mechanical Entrapment: When jewelry, swimsuit, hair decorations, finger, toe or knuckle is caught in an opening
of an outlet or drain cover. This hazard is present when the drain cover is missing, broken, loose, cracked, or not
properly secured.
NOTE: ALL SUCTION PLUMBING MUST BE INSTALLED IN ACCORDANCE WITH THE LATEST NATIONAL
AND LOCAL CODES FOR SWIMMING POOLS, SPAS AND HOT TUBS, INCLUDING NSPI STANDARDS AND
CPSC GUIDELINES.
TO MINIMIZE THE RISK OF INJURY DUE TO SUCTION ENTRAPMENT HAZARD:
• Pools and spas should utilize a minimum of two drains per pump.
• A properly installed and secured ANSI/ASME A112.19.8 approved anti-entrapment
suction cover must be used for each drain.
• Each suction cover must be installed at least three (3') feet apart, as measured from the
nearest point to nearest point.
• Regularly inspect all covers for cracks, damage and advanced weathering.
• If a cover becomes loose, cracked, damaged, broken or is missing, close the pool or spa
immediately, shut off the pump, post a notice and keep the pool or spa closed until an
appropriate certified cover is properly installed.
• Replace drain covers as necessary. Drain covers deteriorate over time due to exposure
to sunlight, pool chemicals and weather.
• Avoid getting hair, limbs or body in close proximity to any suction cover, pool drain or
outlet.
• Disable suction outlets or reconfigure into return inlets.
A clearly labeled emergency shut-off switch for the pool pump and spa jet pump must be in an easily
accessible, obvious place near the pool or spa. Make sure bathers know where it is and how to use it in
case of emergency.
IntelliFlo® Variable Speed and VS-AU Pump Installation and User’s Guide
v
IntelliFlo® Variable Speed Pump & IntelliFlo® VS-AU Pump
WARNINGS AND SAFETY INSTRUCTIONS
HAZARDOUS PRESSURE: STAND CLEAR OF PUMP AND FILTER DURING START-UP
Pool and spa circulation systems operate under high pressure. When any part of the circulating system (i.e. lock
ring, pump, filter, valves, etc.) is serviced, air can enter the system and become pressurized. Pressurized air
can cause the pump housing cover filter lid and valves to violently separate which can result in severe personal
injury or death. Filter tank lid and strainer cover must be properly secured to prevent violent separation. Stand
clear of all circulation system equipment when turning on or starting up pump.
CAUTION!: Electrical controls such as on/off switches, timers, and control systems, etc. should be properly
installed to allow the operation (start-up, shut-down, or servicing) of any pump or filter without requiring the user to
place any portion of his/her body over or near the pump strainer lid or filter lid. Such installation should allow the
user to stand clear of the filter and pump during system start-up, shut down or servicing of the system.
Before servicing pool and spa equipment, make note of the filter pressure. Be sure that all controls are set to
ensure the system cannot inadvertently start during service. Turn off all power to the pump. IMPORTANT: Place
filter manual air relief valve in the open position and wait for all pressure in the system to be relieved.
Before starting the system, fully open the manual air relief valve and place all system valves in the "open"
position to allow water to flow freely from the pool and spa back to the pool or spa. Stand clear of all pool and spa
equipment and start the pump. IMPORTANT: Do not close filter manual air relief valve until all pressure has
been discharged from the valve and a steady stream of water appears. Observe filter pressure gauge and be
sure it is not higher than the pre-service condition.
IntelliFlo® Variable Speed and VS-AU Pump Installation and User’s Guide
vi
IntelliFlo® Variable Speed Pump & IntelliFlo® VS-AU Pump
WARNINGS AND SAFETY INSTRUCTIONS
General Installation Information
•
•
All work must be performed by a qualified pool professional, and must conform to all
national, state, and local codes.
Install to provide drainage of compartment for electrical components.
General Installation Information
Pumps improperly sized or installed or used in applications other than for which
the pump was intended can result in severe personal injury or death. These risks
may include but not be limited to electric shock, fire, flooding, suction entrapment
or severe injury or property damage caused by a structural failure of the pump or
other system component.
The pump can produce high levels of suction within the suction side of the
plumbing system. These high levels of suction can pose a risk if a person comes
within the close proximity of the suction openings. A person can be seriously
injured by this high level of vacuum or may become trapped and drown. It is
absolutely critical that the suction plumbing be installed in accordance with the
latest national and local codes for swimming pools.
•
These instructions contain information for a variety of pump models and therefore some instructions
may not apply to a specific model. All models are intended for use in swimming pool applications.
The pump will function correctly only if it is properly sized to the specific application and properly
installed.
General Warnings
•
•
•
•
•
•
•
Never open the inside of the drive motor enclosure. There is a capacitor bank that holds a
230 VAC charge even when there is no power to the unit.
The IntelliFlo pump is not submersible
The IntelliFlo pump is capable of high flow rates; use caution when installing and
programming to limit pumps performance potential with old or questionable equipment
Code requirements for the electrical connection differ from state to state. Install equipment in
accordance with the National Electrical Code and all applicable local codes and ordinances.
Before servicing the pump; press the Stop button and disconnect the communication cable,
then switch OFF power to the pump by disconnecting the main circuit to the pump.
This appliance is not intended for use by persons (including children) of reduced physical,
sensory or mental capabilities, or lack of experience and knowledge, unless they have been
given supervision or instruction concerning the use of the appliance by a person responsible
for their safety.
Children are not allowed to operate or play with the appliance.
Two Speed Pump Controls Notice California (Title 20 Compliance)
Please read the following important Safety Instructions. When using two-speed pumps manufactured on or after
January 1, 2008, the pump's default circulation speed MUST be set to the LOWEST SPEED, with a high speed
override capability being for a temporary period not to exceed one normal cycle, or two hours, whichever is less.
IntelliFlo® Variable Speed and VS-AU Pump Installation and User’s Guide
1
Section 1
Pump Overview
Introduction
The IntelliFlo® Variable Speed pump and IntelliFlo VS-AU pump are well suited for all of your pool, spa,
cleaner, waterfall and other water application. Using the control panel, IntelliFlo can use one of the four
selectable preset speeds or the pump speed can be adjusted to run at a specific speed. IntelliFlo
outperforms all conventional pumps in its class. Advanced energy conservation features ensure that your
filtration system is operating at peak efficiency.
The IntelliFlo pump is a variable speed pump that can use up to eight speeds that can be adjusted to run at
specific speeds and time intervals. The IntelliFlo pump out performs all conventional pumps in its class.
The pump can operate from 450 RPM to 3450 RPM with preset speeds of 750, 1500, 2350 and 3110
RPM. The pump can be adjusted from the control panel to run at any speed between 450 RPM to 3450
RPM for different applications. The pump control panel alarm LED and error messages warn the user
against under and over voltage, high temperature, over current and freeze protection with user defined
minimum and maximum speed presets.
External Control
The IntelliFlo pump can communicate with an IntelliTouch®, EasyTouch®, or SunTouch® control system or
the IntelliComm® communication center via a two-wire RS-485 communication cable. The communication
cable is included with the IntelliFlo Variable Speed pump (P/N 011018). For the IntelliFlo VS-AU pump
(P/N 348019) the communication cable (P/N 350122) can be purchased separately from Pentair.
EasyTouch and IntelliComm can remotely control the IntelliFlo VS-AU four preset speeds. The IntelliTouch
system can be configured to control a total of eight speeds. The pump’s address and other pump functions
are accessed from the pump’s control panel.
IntelliFlo® pump
IntelliFlo Variable Speed and IntelliFlo VS-AU pump Installation and User’s Guide
2
Features
Adjusts to various pool sizes
Prevents thermal overload
Detects and prevents damage from under and over voltage conditions
Protects against freezing
Communicates with a Pentair EasyTouch, IntelliTouch or SunTouch control system or IntelliComm
communication center via a two-wire RS-485 cable connection
Easy to use operator control panel
Operator control panel buttons for speed control
Built-in strainer pot and volute
Ultra energy-efficient TEFC Square Flange Motor
Compatibility with most cleaning systems, filters, and jet action spas
Motor assembly features permanent magnet synchronous motor
Heavy-duty, durable construction designed for long life
12 Programmable Speeds
Eight Set speeds
Schedule
Duration
Manual
Four IntelliComm speed modes
Priming Feature
Load Sensing
Enable or Disable
Lock out protection
Four Digit password
Enable or Disable
LCD Display
Power and Speed
Text Alerts
Antifreeze Protection
Adjustable speed
Adjustable Temperatures
Enable and Disable in stand alone
Additional Features
Clock and Timer
Maximum and Minimum Speed Limits
Quick Clean Mode
Address up to 16 pumps
Service Features
Timeout Mode
IntelliFlo Variable Speed and IntelliFlo VS-AU pump Installation and User’s Guide
3
IntelliFlo Drive Assembly and Control Panel
The IntelliFlo drive assembly consists of an operator control panel and the system electronics that drive the
motor. The drive microprocessor controls the motor by changing the frequency of the current it receives
together with changing the voltage to control the rotational speed.
Communication port for connection to
EasyTouch, IntelliTouch or SunTouch
control system or IntelliComm
communication center via two-wire
RS-485 cable (P/N 350122)
Operator Control Panel,
buttons and LED
AC power connection
compartment
Motor stand
IntelliFlo Drive Assembly
IntelliFlo Variable Speed and VS-AU Motor Features
•
•
•
•
•
•
•
•
•
•
•
Permanent Magnet Synchronous Motor (PMSM)
High efficiency (3450© RPM 92% and 1000 RPM 90%)
Superior speed control
Operates at lower temperatures due to high efficiency
Same technology as deployed in hybrid electric vehicles
Designed to withstand outdoor environment
Totally enclosed fan cooled
Three-phase motor
56 Square Flange
Six-Pole
Low noise
IntelliFlo Variable Speed and IntelliFlo VS-AU pump Installation and User’s Guide
4
Section 2
Operator Control Panel
This section describes the IntelliFlo Variable Speed and VS-AU pump operator controls and LEDs.
IntelliFlo Operator Control Panel
®
Line 1: Key Lockout Icon
FILTER
12:15
1100
15.WRPM
Line 2:
Line 3: Count down Time
Line 4:
1
Current Speed
T POWER
0.00 150 WATTS
Running
Speed 1
RUNNING
Speed
1
Speed
2
Speed
3
Current Time
Speed
4
Current Power usage
Current feature running
4
2
3
5
6
7
8
Quick
Clean
Time
Out
Controls and LEDs
1
Speed 1 button/LED: Press button to select Speed 1 (750 RPM). LED on indicates Speed 1 is active.
2
Speed 2 button/LED: Press button to select Speed 2 (1500 RPM). LED on indicates Speed 2 is active.
3
Speed 3 button/LED: Press button to select Speed 3 (2350 RPM). LED on indicates Speed 3 is active.
4
Speed 4 button/LED: Press button to select Speed 4 (3110 RPM). LED on indicates Speed 4 is active.
5
Select button: Displays available menu items or enters edit mode for changing a value on line two of the display.
6
Escape button: Moves to next level up in the menu structure, and/or stops editing the current setting.
7
Menu button: Accesses the menu items if the pump is stopped.
8
Enter button: Saves current menu item setting. Press this button to acknowledge alarms and warning alerts.
IntelliFlo Variable Speed and IntelliFlo VS-AU pump Installation and User’s Guide
5
Controls and LEDs (Continued)
®
Line 1
Line 2
15
Line 3
Line 4
FILTER
12:15
1100
15.WRPM
T POWER
0.00 150 WATTS
Running
Speed 1
RUNNING
Speed
1
Speed
2
Speed
3
Speed
4
14
9
15.W
10
Quick
Clean
Time
Out
11
13
12
9
Arrow buttons:
• Up arrow: Move one level up in the menu tree or increase a digit when editing a setting.
• Down arrow: Move one level down in the menu tree or decrease a digit when editing a setting.
• Left arrow: Move cursor left one digit when editing a setting.
• Right arrow: Move cursor right one digit when editing a setting.
10
Quick Clean: Duration and speed (RPM) can be preset to save energy. The LED is on when active.
Time Out: When active (LED on), at the end of a “Time Out” preset time, the pump will run a schedule.
11
Start/Stop button: Start or Stop the pump. When the LED is on, the pump is currently running or in a
mode to start automatically.
Reset button: Reset alarm or alert.
12
13
LEDs
14
On: This green, power LED is on when IntelliFlo VS is powered on.
Warning: LED is on if a warning condition is present.
Alarm: The green LED is on if an alarm condition occurs. See “Alerts and Warning” on page 36.
15
Control Panel LCD:
• Line 1 - Key icon indicates password protect mode is active. If password protect is not enabled, no key icon
is displayed.
• Line 2 - Displays the current pump speed (RPM).
• Line 3 - Count down time and Watts
• Line 4 - Current pump status.
IntelliFlo Variable Speed and IntelliFlo VS-AU pump Installation and User’s Guide
6
Section 3
Operating the IntelliFlo Pump
This section describes how to operate the IntelliFlo Variable Speed and VS-AU pump using the control panel
buttons and menu features.
Starting the pump
To start the pump
1. Be sure the pump is powered on and the green power LED is on.
2. Select one of the speed buttons, then press the Start button (LED on) to start the pump.
Stopping the pump
To stop the pump
•
Press the Stop button to stop the pump.
Note: The pump can automatically restart if the communication cable is connected.
Servicing Equipment (Disconnect Power to Pump)
•
When servicing equipment (filters, heaters, chlorinators etc.), disconnect the communication cable,
and switch OFF circuit breaker to remove power from the pump
Operating the IntelliFlo pump at preset speeds
The IntelliFlo Variable Speed and VS-AU pump is programmed with four default speeds of 750, 1500,
2350 and 3110 RPM. A Speed button is assigned to each of the preset speeds as shown.
To operate the pump at one of the four preset speeds
1. Be sure the pump is powered on and the green power LED is on.
2. Press the Speed button (1- 4) corresponding to the desired preset speed, and release quickly. The
LED above the Speed button will come on as shown.
3. Press the Start button. The pump will quickly ramp to the selected preset speed.
LED lit
Speed
1
Speed
2
Speed
3
Speed
4
Adjusting the pump speed
1. While the pump is running, press the Up Arrow to increase speed setting.
2. Press the Down Arrow to decrease speed Setting.
3. Press and hold down a Speed Button for three (3) seconds to save speed to the button or press the
Enter button to save the speed.
IntelliFlo Variable Speed and IntelliFlo VS-AU pump Installation and User’s Guide
7
Pump Operating Modes
The IntelliFlo Variable Speed and VS-AU pump can be programmed three ways:
1. Manual Operation: Speed buttons 1-4 can be programmed for Manual operation. This means the
speed button is pressed and then the start button and the pump runs a programmed speed. Speeds
5-8 can not be programmed for Manual operation because there are no buttons associated with
them.
To operate the pump in Manual Mode, press one of the four speed buttons, and press the Start/Stop
button to run the assigned speed for that button. When the pump is running a Manual Speed Setting
(speed 1, 2, 3 or 4 button pressed manually) and a scheduled speed is set to run, the scheduled
speed will take priority regardless of speed (RPM) assigned to each button. When the Scheduled
Speed's time is over, it will not revert back to the manually pressed speed. If the pump is running a
schedule and a speed button is pressed manually, the pump will run the manually selected speed until
the next scheduled speed program.
2. Egg Timer (Duration): Speeds 1-4 can be programmed to run for a duration of time once pressed.
This means that the Speed button is pressed and then the start button and the pump runs a
programmed speed and the speed will turn off at the end of a preprogrammed amount of time.
Speeds 5-8 have no direct pump speed buttons and therefore cannot be programmed with an EggTimer.
3. Schedule: The speed button can be programmed to turn on and off at a certain time. The LED
above the Start/Stop button must be lit for the pump to run schedules. When a speed is set to run in
Schedule mode it can still be operated manually. When a speed is programmed to run 23 hours and
59 minutes per day it will not turn off. For example, for the pump to run 24 hours per day, program
the pump to start at 8:00 AM and stop at 7:59 AM.
Programming the Pump
When the pump is running a manual speed and password time out is activated (see page 12) the pump can be
turned off but it cannot be turned back on. Pressing the Start/Stop button places it in the Running Schedule
mode. Therefore, it will only run Speeds that are Scheduled to come on at their scheduled Start Time.
IntelliFlo Variable Speed and IntelliFlo VS-AU pump Installation and User’s Guide
8
IntelliFlo Variable Speed and IntelliFlo VS-AU pump Menus
MAIN SCREEN
SETTINGS
(page 9)
Press MENU button to access menus
Pump Address
(1-16) Default: ADDRESS 1
Set Time
(hr:mm) Default: 12:00 AM
Set AM/PM
Temperature Unit
Screen Contrast
Language
SPEED 1-8
(page 13)
AM/PM
24 hr.
Fahrenheit - Default: F˚
C˚ Celsius
(1-5) Default 3
English - Default: English
Set Min Speed
(1100 RPM - 1700 RPM) - Default: 1100 RPM
Set Max Speed
(1900 RPM - 3450 RPM) - Default: 3450 RPM
PASSWORD
Disabled/Enabled - Default: Disabled
Password Time Out (1 min. - 6 hours) Default:10 minutes
Enter Password (xxxx) Default: 1234
RAMP SPEED
(5 RPM - 400 RPM) Defualt: 200 RPM
Speed 1 (1-4)
Manual
Schedule
Egg Timer
Speed 5 (5-8)
Disabled
Set Speed - Default: MANUAL
Set Speed
Set Start Time
Set Stop Time
Set Speed
Time
Default: Disabled
Schedule
EXT CONTROL
(page 15)
FEATURES
(page 15)
Program 1
Set Speed
Set Start Time
Set Stop Time
Speed - Default: 1100 RPM
Program 2
Speed - Default: 1500 RPM
Program 3
Speed - Default: 2350 RPM
Program 4
Speed - Default: 3110 RPM
Time Out
Time Out Duration (1 min. to 10 hrs.) Default: 3 hours
Quick Clean
PRIMING
(page 17)
DISABLED/ENABLED
Default: Enabled
MAX PRIMING TIME
(1 min. to 30 min. hrs.) Default: 11 minutes
PRIMED SENSITIVITY
(1 - 100%) Default: 1
PRIMING DELAY
ANTI FREEZE
(page 19)
Set Speed (1100 -3450 RPM) Default: 3450 RPM
Time (1 min. to 10 hrs.) Default: 10 minutes
DISABLED/ENABLED
SET SPEED
PUMP TEMPERATURE
(1 second - 10 minutes) Default: 20 seconds
Disabled / Enabled - Default: Enabled
Set Speed (1100 RPM - 3450 RPM) Default 1100 RPM
40˚ F - 50˚ F (4.4˚ C - 10˚ C) Default: 40˚ F (4.4˚ C)
IntelliFlo Variable Speed and IntelliFlo VS-AU pump Installation and User’s Guide
9
IntelliFlo Pump Menus
The IntelliFlo pump menu descriptions are as follows:
Settings: Pump Address
The IntelliFlo pump address needs to be changed when there is more than one IntelliFlo pump on an automation
system. Addressing the pump allows the automation system to know which pump to send a command to. The
“Pump Address” setting is used when the IntelliFlo pump is connected via the RS-485 COM port to an
IntelliTouch®, EasyTouch®, SunTouch® or IntelliComm® system. The default pump address is #1. When
connected to EasyTouch®, SunTouch® or IntelliComm® the pump only communicates with address #1. The
pump address can be set from 1-16. However, IntelliTouch® can communicate to four (1-4) IntelliFlo pumps.
Note: IntelliFlo pumps cannot be connected in series with other pumps.
To access the Settings menu:
1.
2.
3.
4.
5.
6.
Be sure the green power LED is on and the pump is stopped.
Press the Menu button. “Settings” is displayed.
Press the Select button. “Pump Address” is displayed. The Factory default setting is address “1.”
To change the pump address, press the Select button. The first digit “1” selected.
Press Up or Down arrow button to change the address number from 1-16.
Press the Enter button to save the setting. To cancel any changes, press the Escape button to exit
edit mode without saving.
7. Press the Escape button to exit.
Settings: Set Time
Use “Set Time” to set the IntelliFlo system time. The IntelliFlo system clock controls all scheduled start and stop
times, functions, and programmed cycles. The system clock can store the correct time for up to 96 hours after
power is shut off. The IntelliFlo will retain the time memory for 96 hours before a reset is needed.
To access the Set Time menu:
1.
2.
3.
4.
5.
6.
7.
Check that the green power LED is on.
Press the Menu button. “Settings” is displayed.
Press the Select button. “Pump Address” is displayed.
Use the Up or Down arrow button to scroll to “Set Time”
Press the Select button. The cursor will appear in the Minutes column.
Press Up or Down arrow button to set the time.
Press the Enter button to save the setting. To cancel any changes, press the Escape button to exit
edit mode without saving.
8. Press the Escape button to exit.
IntelliFlo Variable Speed and IntelliFlo VS-AU pump Installation and User’s Guide
10
Settings: Set AM/PM or 24 Clock
This setting is for changing the pump’s time clock from regular time (AM/PM) to a 24 hour clock. For example,
Midnight (12:00 AM) is 0000 hr., 8:00 AM is 0800 hr., and 11:00 PM is 2300 hr.
To access the AM/PM or 24 hr. menu:
1.
2.
3.
4.
5.
6.
7.
Check that the green power LED is on.
Press the Menu button. “Settings” is displayed.
Press the Select button. “Pump Address” is displayed.
Use the Up or Down arrow button to scroll to “AM/PM.”
Press the Select button to change the setting.
Press Up or Down arrow button to choose between 24 hr and AM/PM.
Press the Enter button to save the setting. To cancel any changes, press the Escape button to exit
edit mode without saving.
8. Press the Escape button to exit.
Settings: Set Temperature Unit
Use this setting to set the temperature unit to Celsius (°C), or Fahrenheit (°F). The IntelliFlo Anti Freeze
protection feature (see page 19) can be set to either Fahrenheit or Celsius.
To access the Temperature Units menu:
1.
2.
3.
4.
5.
6.
7.
8.
Check that the green power LED is on.
Press the Menu button. “Settings” is displayed.
Press the Select button. “Pump Address” is displayed.
Use the Up or Down arrow button to scroll to “Temperature Units” menu item. The Factory default
setting is “F” (Fahrenheit).
Press the Select button. “F” is displayed.
Press Up or Down arrow button to choose between Celsius (°C), or Fahrenheit (°F).
Press the Enter button to save the setting. To cancel any changes, press the Escape button to exit
edit mode without saving.
Press the Escape button to exit.
Settings: Screen Contrast Level
This setting changes the contrast of the LCD screen. The default setting is 3. Screen contrast levels can be
adjusted from 1 to 5 units for low or high lighting conditions.
To access the Temperature Units menu:
1.
2.
3.
4.
5.
6.
7.
Check that the green power LED is on.
Press the Menu button. “Settings” is displayed.
Press the Select button. “Pump Address” is displayed.
Use the Up or Down arrow to scroll to "Contrast level.
Press the Select button. Screen will show current contrast setting number. The default is "3".
Press the Select button to change the setting. Number will highlight.
Press the Enter button to save the setting. To cancel any changes, press the Escape button to exit
edit mode without saving.
8. Press the Escape button to exit.
IntelliFlo Variable Speed and IntelliFlo VS-AU pump Installation and User’s Guide
11
Settings: Language
To access the language menu:
1. Check that the green power LED is on.
2. Press the Menu button. “Settings” is displayed.
3. Press the Select button. “Pump Address” is displayed.
4. Use the Up or Down arrow button to scroll to “Language”.
5. Press the Select button to access the language menu.
6. Press Select to highlight current Language in use.
7. Press the Enter button to select the desired language for the control panel. To cancel any changes,
press the Escape button to exit edit mode without saving.
8. Press the Escape button to exit.
Settings: Set Minimum Speed (RPM)
The minimum pump speed can be set from 450 RPM to 1700 RPM. The default setting is 450 RPM.
To access the Set Minimum Speed menu:
1. Check that the green power LED is on.
2. Press the Menu button. “Settings” is displayed.
3. Press the Select button. “Pump Address” is displayed.
4. Use the Up or Down arrow button to scroll to “Set Min Speed”.
5. Press the Select button to change the setting. The cursor will appear in the first number column
(ones)
6. Press Up or Down arrow button to change the pump’s minimum speed setting from 450 to 1700
RPM.
7. Press the Enter button to save the setting. To cancel any changes, press the Escape button to exit
edit mode without saving.
8. Press the Escape button to exit.
Settings: Set Maximum Speed (RPM)
The maximum speed can be set from 1900 RPM to 3450 RPM. The default setting is 3450. This setting is
used to set the maximum running speed of the pump. When the pump is set to Priming "Enabled" the pump will
ramp up to and run at the Maximum Speed setting to attain the prime. A Service Professional must set the
Maximum Speed of the pump to not exceed the maximum flow rate of the system on which it will operate.
CAUTION: The Maximum Flow rate setting should be set so the system never operates at or above
a 0.635 meters vacuum.
To access the Set Maximum Speed menu:
1. Check that the green power LED is on.
2. Press the Menu button. “Settings” is displayed.
3. Press the Select button. “Pump Address” is displayed.
4. Use the Up or Down arrow button to scroll to “Set Max Speed”.
5. Press the Select button to change the setting. The cursor will appear in the first number column
(ones)
6. Press Up or Down arrow button to change the pump’s maximum speed setting from 1900 to 3450
RPM.
7. Press the Enter button to save the setting. Press the Escape button to exit. To cancel any changes,
press the Escape button to exit edit mode without saving.
IntelliFlo Variable Speed and IntelliFlo VS-AU pump Installation and User’s Guide
12
Settings: Password
When the Password feature is enabled, the pump will enter into password protection mode for a
preprogrammed amount of time after the last button is pressed. The entered password is any combination of
four (4) digits.
To access the Password menu:
1. Check that the green power LED is on.
2. Press the Menu button. “Settings” is displayed.
3. Press the Select button. “Pump Address” is displayed.
4. Use the Up or Down arrow button to scroll to “Password”.
5. Press the Select button. The default setting is “Disabled”.
6. Press the Select button to change the setting.
7. Press Up or Down arrow button to change the setting to Enabled”.
8. Press the Enter button to save the setting.
9. Press Down arrow button. “Password Timeout” is displayed.
Factory default time is 10 minutes, this means the pump will go into Password Protection mode 10
minutes after the last control panel key press.
10. Press Select to change time setting from 1 minute to 6 hours.
11. Press the Enter button to save the setting.
12. Press Down arrow button. “Enter Password” is displayed.
13. Press Select to change the setting.
14. Press Left or Right arrow button to move cursor and press up and down arrow to change
password number to desired setting.
15. Press the Enter button to save the setting. To cancel any changes, press the Escape button to exit
edit mode without saving.
16. Press the Escape button to exit.
Password Protection
Password: The default for this setting is disabled, which means the pump does not have password protection.
When this feature is enabled, for a preset amount of time after the last button is pressed, the pump’s display will
prompt for the password before allowing access to the pump’s control panel and buttons The password must
be a four (4) numeric digit password. Write down the password and keep in a secure place.
• When the pump is password protected the pump can always be turned off by pressing the Start/
Stop button.
•
When running the pump in manual mode it can not be turned back on with the press of the Start/
Stop button.
•
Pressing the Start/Stop button when the pump is off will return it back to the Running Cycles
Mode and will run at the next scheduled run time. If the present time is within the scheduled run
time the pump will run the scheduled speed.
•
All functions including programming are disabled in Password Protection Mode.
•
If any button other than the Start/Stop button is pressed, the screen reads Enter Password.
•
When Password Protection is enabled there is a key icon displayed in the upper left side of the
LCD.
IntelliFlo Variable Speed and IntelliFlo VS-AU pump Installation and User’s Guide
13
®
Key lockout
icon
FILTER
12:15
1100
RPM
15.W
Actual
Speed
POWER
Running Speed 1
RUNNING
Entering Password
•
When Password Protection is enabled the press of any button other than the speed button will cause
the Screen to ask for a Password.
•
To enter password use the left and right arrows to move the cursor and the Up and Down arrow
button to scroll through the digit, then press the Enter button to confirm.
Settings: Ramp Speed
The Ramp Speed can be set from 5 RPM to 400 RPM. The default setting is 200 RPM. This means when
the pump changes speeds it will ramp at 200 RPM increments. For example, when the pump changes speeds
from 1500 RPM to 2350 RPM it will ramp to 1700 RPM wait approximately 5 seconds then move to 1900
RPM, wait 5 seconds and then move to 2300 RPM wait five (5) seconds then move to 2350 RPM. This
adjustment is made available to the user to help minimize the occurrence of a false tripping alarm when switching
speeds. Note: Using the five (5) RPM setting would cause the pump to take a long time to switch
between speeds.
To access the Ramp Speed menu:
1. Check that the green power LED is on.
2. Press the Menu button. “Settings” is displayed.
3. Press the Select button. "Pump Address" is displayed.
4. Use the Up or Down arrow button to scroll to "Ramp Speed".
5. Press the Select button. The Default setting is 200 RPM.
6. Press the Left or Right arrow button to move cursor and press up and down arrow to change the
setting.
7. Press Enter to save the setting.
IntelliFlo Variable Speed and IntelliFlo VS-AU pump Installation and User’s Guide
14
Speed 1-8 (Schedule a Time to Run the Pump)
By setting a start time and a stop time, Speeds 1-8 can be programmed to run a certain speed at a certain time
of day. To run a scheduled pump speed, press the Start button (LED on). The LCD screen will display
“Running Schedules” when it is ready to run a scheduled speed. If the start button is pressed during a scheduled
speed time the screen will read Running Speed X and will run speed X. (If priming is enabled it will prime first
at the maximum RPM setting of the pump before running speed X.)
Note: The IntelliFlo pump will not run the scheduled speeds until the Start/Stop button is pressed
(LED on) to place the pump in the “Running Schedule” mode.
To set a schedule to run the pump:
1. Check that the green power LED is on.
2. Press the Menu button. “Settings” is displayed.
3. Use the Up or Down arrow button to scroll to “Speed 1-8”.
4. Press the Select button. “Speed 1” is displayed.
5. Use the Up or Down arrow button to choose the speed you wish to program.
6. Press the Select button. Select Manual, Schedule, or Egg Timer for speeds 1-4. “Disabled” or
“Schedule” for speed 5-8 is displayed.
Speeds 1-4 default setting is MANUAL. To create a schedule for speed 1-4 Press Select to
highlight manual.
Speeds 5-8 default setting is DISABLED. To create a schedule for speed 5-8, Press Select to
highlight Disabled.
7. Use the Up or Down arrow button to scroll to “Schedule”.
8. Press the Enter button.
9. Press the Down arrow button. Set speed will be displayed.
10. Press the Select button to change the speed. The first digit will highlight (ones digit).
11. Use the Up or Down arrow button to change the speed.
12. Press the Enter button to save the setting.
13. Press the Down arrow button. “Set Start Time” is displayed.
14. Press the Select button to change the start time. The cursor will highlight the minute column.
15. Use the Left arrow button to move the cursor to the hour column if desired.
16. Press the Enter button to save the setting.
17. Press Down arrow. “Set Stop Time” is displayed
18. Press the Select button to change the stop time.
19. Press the Enter button to save the setting.
20. Press the Start/Stop button. The LED above the button will light up and the pump will start if within
a scheduled time or “Running Schedule” is displayed.
When the pump is running a scheduled speed or a duration speed (egg timer) the countdown time (T 00:01)
showing the hours and minutes is displayed on the screen.
Note: Speeds 5-8 can be programmed to operate in Schedule mode only. The IntelliFlo Variable
Speed pump and IntelliFlo VS-AU pump can run eight (8) different speeds at eight (8)
programmed start and stop times per day.
Note: When two speeds are scheduled during the same run time the pump will run the higher RPM
Speed regardless of Speed # in use.
IntelliFlo Variable Speed and IntelliFlo VS-AU pump Installation and User’s Guide
15
Programming for Constant Run
When programming a schedule for a Speed it can not be programmed with the same start and stop
times. However, it will run without stopping if it is programmed with the Start time set one minute
after the stop time. Example: A single speed will run non stop if programmed with a Start Time of
8:00 AM and a Stop time of 7:59 AM.
External Control
This function is for programming speeds that will run when the IntelliComm power center controller sends it a
command. For example, Terminal 3 and 4 in IntelliComm will correspond to External Control Program #1. (5
and 6 to Ext Ctrl #2). Use the External Control feature to program the IntelliComm power center.
To access the Ext. Ctrl. menu:
1.
2.
3.
5.
6.
7.
8.
9.
Check that the green power LED is on.
Press the Menu button. “Settings” is displayed.
Use the Up or Down arrow button to scroll to “Ext. Ctrl.”.
Press the Select button. “Program 1” is displayed.
Press the Select button. “1100 RPM’ is displayed.
Press the Select button. The “RPM” number will highlight.
Press Up or Down arrow button to change the RPM setting.
Press the Enter button to save the setting. Note: To cancel any changes, press the Escape button to
exit without saving.
10. Press the Escape button.
11. Use the Up or Down arrow button to scroll to “Program 2”.
12. Repeat Step 5 through 9 to set Program 2, 3, and 4.12 Programmable Speeds.
Features: Quick Clean
This feature can be used to ramp the pump up to a higher RPM for vacuuming, cleaning, adding chemicals,
after a storm for extra skimming capability. Press the Quick Clean button (LED on) and then the Start/Stop
button (LED on) to start the pump at preset RPM and duration of time. When the Quick Clean cycle is
over it will resume regular schedules, it will be in the “Running Schedule” mode.
IntelliFlo Variable Speed and IntelliFlo VS-AU pump Installation and User’s Guide
16
Quick Clean
(Continued)
To access the Quick Clean menu:
1. Check that the green power LED is on.
2. Press the Menu button. “Settings” is displayed.
3. Use the Down arrow button to scroll to “Features”.
5. Press the Select button. “Timeout” is displayed.
6. Press the Down arrow button. “QuickClean” is displayed.
7. Press the Select button. “Set Speed” is displayed.
8. Press the Select button. The “RPM” first (ones) column will highlight.
9. Use the Up or Down arrow button to change the speed.
10. Press the Enter button to save the setting.
11. Press the Down arrow button. “Time Duration” is displayed.
12. Press the Select button. The cursor will appear in the minutes column.
13. Use the Up or Down arrow button to change the time from 1 minute to 10 hours.
14. Press the Enter button to save the setting. Note: To cancel any changes, press the Escape button to
exit without saving.
15. Press the Escape button to exit.
Features: Time Out
This feature keeps the pump from running for a programmable amount of time. This feature can be used to
allow newly glued pipe joints time to dry before circulation of the pool water is resumed. This feature keeps
the pump from running for a programmable amount of time. When this feature's time is up the pump will be
in the “Running Schedule” mode, Start/Stop LED will be lit and ready to turn on at the next scheduled run
time.
To access the Time Out menu:
1.
2.
3.
5.
6.
7.
8.
Check that the green power LED is on.
Press the Menu button. “Settings” is displayed.
Use the Down arrow button to scroll to “Features”.
Press the Select button. “Timeout” is displayed.
Press the Select button. “Timeout Duration” is displayed.
Press the Select button. The “Minutes” column will highlight.
Press the Left arrow button to scroll to the hours setting. Time out can be set from 1 minute to 10
hours.
9. Press the Enter button to save the setting. Note: To cancel any changes, press the Escape button to
exit without saving.
10. Press the Escape button to exit.
IntelliFlo Variable Speed and IntelliFlo VS-AU pump Installation and User’s Guide
17
Priming
The default setting for Priming is ENABLED. Enabling this feature allows the pump to use its "Flow
Technology" to make sure the pump is primed when it starts. This feature will not override the "Max Speed"
setting. The priming feature ramps the pump to 1800 RPM and pauses for three (3) seconds. If there is
sufficient water flow in the pump basket the pump will go out of priming mode and run its commanded speed. If
the flow in the pump basket is not sufficient, the pump will ramp to the "Max Speed" setting and stay there for
the priming delay time, which is defaulted at 20 seconds. If there is sufficient water flow in the pump basket at
this time, it will go out of priming mode and ramp to the commanded speed. If there is still insufficient flow in the
pump basket, the pump will try to prime at the "Maximum Speed" for the amount of time set up in the
"Maximum Priming Time" menu.
Maximum Priming Time: The Maximum Priming Time can be set from 1 minute to 30 minutes. The default
setting is 11 minutes. This is the maximum amount of time the pump will try to prime before giving an error.
However if the pump does not see a sufficient amount of water in the pump basket this can cause the pump to
report a Dry Priming Alarm within seconds of the beginning of the priming cycle.
Priming Dry Alarm: An insufficient amount of water in the basket during priming will cause the pump to report
a Priming Dry Alarm. The basket should be filled with water and the pump restarted when this alarm occurs.
Note: When a Priming Dry Alarm takes place it will try to restart after 10 minutes.
Primed Sensitivity: The primed sensitivity can be set from 1% to 100%. The factory default setting is 1%
meaning that the pump is at its most sensitive setting in regards to determining if the pump has attained a prime
or not. Increasing this number will decrease the amount of flow needed for the pump to sense that it is primed.
Making this number too high could cause the pump to think it has attained a prime and evacuated the air from
the system when it has not. If the system is such, that the pump has trouble coming out of the priming mode and
it is evident that the pump basket is full of water and flowing then the Primed Sensitivity number can be
increased.
Priming Delay: The priming delay can be set from 1 second to 10 minutes. The default setting is 20 seconds.
This means the pump will ramp to 1800 RPM and stay there for three (3) seconds which it will always do in the
hard Priming Mode. If there is sufficient flow in the pump basket, the pump will then go out of priming mode
and ramp to its commanded speed. If there is insufficient water flow in the pump basket the pump will ramp to
the Max Speed Setting and stay there for the default time of 20 seconds. It may be necessary to increase the
prime delay to allow the system to stabilize before the pump goes into running mode. If the pump errors out
immediately after priming, then increasing the Priming Delay time may correct the issue.
When the pump is connected to an automation system and the “Maximum Prime Time” feature is enabled, it will
remain active.
Continue to next page for priming MENU information.
IntelliFlo Variable Speed and IntelliFlo VS-AU pump Installation and User’s Guide
18
Priming
(Continued)
To access the Priming menu:
1.
2.
3.
4.
5.
6.
7.
Check that the green power LED is on and press the Menu button. “Settings” is displayed.
Use the Down arrow button to scroll to “Priming”
Press the Select button. The factory default is set to priming “Enabled“.
To disable priming, press the Select button.
Use the Up arrow button. “Disabled” is displayed.
Press the Enter button.
Press the Down arrow button. Screen will read "Max Priming Time". Factory default is set to 11
minutes.
8. Press the Select button to change the setting. The cursor will highlight the minutes column.
9. Use the Up or Down arrow button to change the time from 1 minute to 30 minutes..
10. Press the Enter button to save the setting.
11. Press the Down arrow button. The screen will read "Primed Sensitivity". The default for this setting
being "1".
12. Press the Select button to change the setting. The cursor will highlight the number.
13. Use the Upor Down arrow button to change the time from 1% to 100%. Increasing the number
makes the Priming less sensitive.
14. Press Enter to save.
15. Press the Down arrow button. Screen will read "Priming Delay". The default for this setting is
20 seconds.
16. Press the Select button to change the Setting.
17. Use the Up or Down arrow button to change the setting from 1 second to 10 minutes. Caution:
Increasing the Priming Delay causes the pump to stay in the priming mode longer.
18. Press the Enter button to save the setting. Note: To cancel a change, press the Escape button
instead of the Enter button to exit without saving.
19. Press the Escape button to exit.
Disable Priming Feature on the Pump
When the IntelliFlo pump is connected to an automation control system, the IntelliFlo internal priming feature
cannot be disabled by the external automation control system. If IntelliFlo is connected to an automation
control system, (IntelliTouch, EasyTouch or SunTouch), the automation control system's priming features are
in addition to the pumps internal priming settings. If priming is enabled on the pump, on startup it will prime
using its internal logic first before responding to commands from any automation control system. If the
IntelliFlo pump is connected to an automation control system and priming is not desired, it must be disabled
both on the pump and within the automation control system.
To disable the priming feature on the pump and let automation system control the pump:
1. Open the lid on the LCD screen of the pump.
2. Verify the green power LED is on. Press the MENU button. Settings is displayed.
3. Use the DOWN arrow button to scroll to "Priming".
4. Press the Select button. The factory default is set to priming "Enabled".
5. Press the UP arrow button until "Disabled" is displayed.
6. Press the Enter button.
7. Press the Escape button to save and exit the pump menu.
IntelliFlo Variable Speed and IntelliFlo VS-AU pump Installation and User’s Guide
19
AntiFreeze
This feature allows you to set a speed (1100 RPM -3450 RPM) that will run when the pump goes into anti
freeze mode. The temperature level that you wish anti freeze mode to start can also be set.
IMPORTANT NOTE: This feature is for protection of the pump. It should not be depended upon for freeze
protection of the pool. Certain situations could cause the pump to sense a different temperature than actual air
temperature. Your automation systems air temperature sensor should be used to sense actual temperature. For
example, if the pump is located indoors, the temperature of the room does not indicate the outdoor temperature.
The pump does not sense the water temperature.
To access the AntiFreeze menu:
1. Check that the green power LED is on.
2. Press the Menu button. “Settings” is displayed.
3. Use the Down arrow button to scroll to “AntiFreeze”.
4.
5.
6.
7.
Press the Select button. The factory default is AntiFreeze “Enabled“.
To disable AntiFreeze. Press the Select button, “Enabled” will highlight.
Use the Up arrow button. “Disabled” is displayed.
Press the Enter button.
To program AntiFreeze when enabled:
8. Press the Down arrow button. “Set Speed” is displayed. The factory default is 1100 RPM.
9. Press the Select button to change the setting. The cursor will highlight the first column (ones).
10. Use the Up or Down arrow button to select 1100 - 3450 RPM.
11. Press the Enter button to save the setting.
12. Press the Down arrow button. “Pump Temperature” is displayed. This is the temperature the pump
will activate AntiFreeze. The factory default is 40° F (4.4° C).
13. Press the Select button to change the setting. The cursor will highlight the first column (ones). This
setting can be changed from 40° F to 50° F (4.4° C - 10° C).
14. Press the Enter button to save the setting. Note: To cancel any changes, press the Escape button to
exit without saving.
15. Press the Escape button to exit.
IntelliFlo Variable Speed and IntelliFlo VS-AU pump Installation and User’s Guide
20
Priming the pump for the first time, or after service
Before the IntelliFlo pump is started for the first time it must be primed. To prime a pump means filling the
pump and suction pipe with water. This process evacuates the air from all the suction lines and the pump. It
may take several minutes to prime depending on the depth of water, pipe size and length. It is easier to
prime a pump if you allow all the air to escape from the pump and pipes. The water cannot enter unless the
air can escape. Pumps do not hold prime, the pool piping system has that task.
CAUTION - To avoid permanent damage to the IntelliFlo pump, before starting the pump, fill the IntelliFlo
housing strainer with water so that the pump will prime correctly. If there is no water in the strainer the pump will
not prime.
•
•
•
•
•
NEVER run the pump dry! Running the pump dry may damage the seals, causing leakage and
flooding!
Do not add chemicals to the system directly in front of pump suction. Adding undiluted chemicals
may damage the pump and will void the warranty.
Open gate valves before starting system.
Be sure to release all air from filter and piping system.
The IntelliFlo pump is a variable speed pump. Typically the lower speeds are used for filtration and
heating. The higher speeds can be used for spa jets, water features, and priming.
CAUTION - Before starting this procedure, first read the following:
Before removing the pump lid:
1.
2.
3.
4.
5.
6.
Press the Stop button if the pump is running before proceeding.
Disconnect the communication cable from the pump.
Disconnect main power supply
Close the gate valves in suction and discharge pipes.
Release all pressure from pump and piping system.
Never tighten or loosen the clamp while the pump is operating.
WARNING! If the pump is being pressure tested, release all pressure before removing the trap cover.
Do not block the pump suction while the pump is running. If a body part blocks the pump suction it may cause
severe or fatal injury. Small children using the pool must ALWAYS have close adult supervision.
WARNING! FIRE and BURN HAZARD - The pump motor may run at a high temperatures. To reduce the
risk of fire, do not allow leaves, debris, or foreign matter to collect around the pump motor. To avoid burns when
handling the motor, shut off the motor and allow it to cool for 20 minutes before trying to work on it. The IntelliFlo
provides an automatic internal cutoff switch to protect the motor from heat damage during operation.
IntelliFlo Variable Speed and IntelliFlo VS-AU pump Installation and User’s Guide
21
Priming the pump for the first time, or after service
(Continued)
Priming the Pump
NOTICE: If you replace the o-ring with a non-lubricated o-ring, you may need to apply a silicone based
lubricant.
• Clean and inspect o-ring; reinstall on trap cover.
• Replace trap cover on trap; turn clockwise to tighten cover.
NOTICE: Tighten the pump lid by hand only (no wrenches)!
Priming time will depend on vertical length of suction lift and horizontal length of suction piping. If pump
does not prime, make sure that all valves are open, suction pipe end is under water, pump suction is below
water level, and that there are no leaks in suction pipe.
To prime the IntelliFlo pump:
1. Turn the pump clamp and lid in a counterclockwise direction until it
stops and remove them.
2. Fill the pump strainer pot with water.
3. Check the system and ensure water has an open path for free system
flow.
4. Reinstall the pump clamp and lid onto the strainer pot. The pump is now
ready to prime.
5. Make sure all electrical connections are clean and tight.
Top view
6. Open the air release valve on the filter, and stand clear of the filter.
7. Switch the pump on at the circuit breaker. Ensure that the green power light is on.
8. Press the Speed 1 button to select the pump speed of 750 RPM.
9. Press the Start button to start the pump. Use the Up/Down button to increase the speed as necessary
to prime the pump.
10. When water comes out of the air release valve, close the valve. The system should now be circulating water
back to the pool without air bubbles showing in either the hair and lint pot or at the pool return fittings.
11. Use the Up/Down button to adjust the operating speed as desired.
IntelliFlo Variable Speed and IntelliFlo VS-AU pump Installation and User’s Guide
22
External Control with IntelliComm® Communication Center
The IntelliFlo pump can be remotely controlled by the Pentair Water Pool and Spa IntelliComm
Communication Center using an optional RS-485 communications cable (P/N 350122). The IntelliComm
provides four pairs of input terminal connections. These inputs are actuated by either
15 - 240 VAC or 15 - 100 VDC. Using the device's inputs, the programmed IntelliFlo pump speeds can
be controlled.
Note: For the IntelliFlo pump to accept commands from IntelliComm, the pump must be in the
“Running Schedules” mode (LED above the Start/Stop button lit).
If more than one input is active the highest number will be communicated to the IntelliFlo pump. The
IntelliComm will always communicate to pump using ADDRESS #1.
Program number priority is as follows: Example: If programs 1 and 2 are activated, program 2 will run,
regardless of the assigned speed (RPM). The higher program number (2 being higher) will always take
priority. The following table shows the wiring terminal descriptions for IntelliComm.
External Control
IntelliComm Communication Center
Terminal number
Terminal name
Voltage
Maximum
current
Phase type
Frequency
1-2
Power supply
100 - 240 VAC
100 mA
1 Input
50/60 Hz
3-4
Program 1
15 -240 VAC
or
15 - 100 VDC
1 mA
1 Input
50/60 Hz
5-6
Program 2
15 -240 VAC
or
15 - 100 VDC
1 mA
1 Input
50/60 Hz
7-8
Program 3
15 -240 VAC
or
15 - 100 VDC
1 mA
1 Input
50/60 Hz
9-10
Program 4
15 -240 VAC
or
15 - 100 VDC
1 mA
1 Input
50/60 Hz
5 mA
1 Output
N/A
RS-485
11
12
+ Data: Yellow
- Data: Green
-5 to +5 VDC
Ground
IntelliFlo Variable Speed and IntelliFlo VS-AU pump Installation and User’s Guide
23
Connecting IntelliFlo to EasyTouch ® and IntelliTouch® System
The IntelliFlo pump can be controlled by an EasyTouch or IntelliTouch automation system via the RS-485
communication cable (P/N 350122). In this configuration, EasyTouch/IntelliTouch starts, stops and
controls the speed of the IntelliFlo pump. When the EasyTouch/IntelliTouch does this, it rewrites the
IntelliFlo pump memory, which can take several seconds. This causes a delay after a command is given on
the EasyTouch/IntelliTouch control panel until the IntelliFlo pump physically responds.
The IntelliFlo pump control panel is disabled when communicating with the EasyTouch/IntelliTouch system.
Note that EasyTouch/IntelliTouch will not start communicating with the IntelliFlo pump until the pump is
assigned to a circuit. The IntelliFlo pump default pump address is one which is the only address that works
with EasyTouch. See page 9 for details about how to check the pump address and change if necessary.
For more information, refer to the EasyTouch User's Guide (P/N 520584).
To connect the IntelliFlo pump communication cable to EasyTouch or IntelliTouch load center:
1.
CAUTION - Switch the main power off to the EasyTouch load center.
2. Unlatch the two enclosure door spring latch, and open the door.
3. Remove the two retaining screws securing the high voltage cover panel, and remove it from the
enclosure.
4. Loosen the two access screws securing the control panel.
5. Lower down the hinged control panel to access the EasyTouch or IntelliTouch circuit board.
6. Route the communication cable into the plastic grommet (located on the lower left side of the load
center), up through the low voltage raceway to the EasyTouch or IntelliTouch circuit board.
Control panel
access screw
Control panel
access screw
Front door
Retaining screws
(for High Voltage
Cover Panel)
High voltage Cover
Panel
Grommet (to low
voltage raceway)
EasyTouch Load Center (front view)
IntelliFlo Variable Speed and IntelliFlo VS-AU pump Installation and User’s Guide
24
7. Strip back the cable conductors 6mm (1/4”). Insert the two wires into the COM port screw
terminals on the EasyTouch/IntelliTouch circuit board. Secure the wires with the screws.
8. EasyTouch COM port (J20): Connect the GREEN (#2) and YELLOW (#3) wires to the COM
port screw terminals (#2 and #3). Be sure to match the color coding of the wires; YELLOW to
YELLOW and GREEN to GREEN. The Red wire is not connected. Secure the wires with the
screws.
IntelliTouch COM port (J7/8): Connect the GREEN (#2) and YELLOW (#3) wires to the COM
port (J20) screw terminals (#2 and #3). Be sure to match the color coding of the wires; YELLOW
to YELLOW and GREEN to GREEN. The Red wire is not connected. Secure the wires with the
screws.
Note: Multiple wires may be inserted into a single screw terminal.
IntelliTouch Personality
board COM PORT
(J7/J8)
EasyTouch
COMPORT
(J20)
Indoor Control Panel
IntelliChlor
IntelliFlo
RF Transceiver
BLK
GRN
YEL
RED
EasyTouch circuit board
IntelliTouch circuit board
9. Close the control panel into its original position and secure it with the two screws.
10. Install the high voltage cover panel and secure it with the two retaining screws.
11. Close the load center front door. Fasten the spring latch.
12. Switch the power on to the load center.
IntelliFlo Variable Speed and IntelliFlo VS-AU pump Installation and User’s Guide
25
Connecting the IntelliFlo pump to a SunTouch ® System
The IntelliFlo pump can be controlled by a SunTouch system via the RS-485 communication cable
(P/N 350122).
WARNING - Switch OFF main system power to the SunTouch Power Center before making any connections.
To connect the IntelliFlo pump two wire RS-485 communication cable to the SunTouch circuit board:
1. Unlatch the front door of the SunTouch power center, and open the door.
2. Loosen the retaining screw on front panel. Open the hinged front panel to access the electronics
compartment.
3. Route the two conductor cable up through the power center grommet opening located on the left
side, and up through the low voltage raceway to the motherboard.
4. Strip back the cable conductors 6.00 mm (1/4”). Insert the wires into the screw terminals
(provided). Secure the wires with the screws. Make sure to match the color coding of the wires;
YELLOW to YELLOW and GREEN to GREEN.
5. Insert the connector on the COMPORT (J11) screw terminal on the SunTouch circuit board.
6. Close the control panel and secure it with the retaining screw.
7. Close the front door. Fasten the spring latch.
VALVE ACTUATORS
RESET
SOLAR
ONLY
INTAKE RETURN SOLAR PUMP AUX 1 AUX 2 AUX 3
VLV A VLV B VLV C
GAS
HEATER
CLNR
J11
SunTouch circuit board
COM PORT
RS-485 communication
cable (P/N 350122)
IntelliFlo
VS-3050
Drive
230 VAC
Power to Pump
IntelliFlo Variable Speed and IntelliFlo VS-AU pump Installation and User’s Guide
26
Section 4
User Maintenance
The following information describes how to service and maintain the IntelliFlo Variable Speed and VS-AU
pump.
Pump Strainer Basket
The strainer, sometimes referred to as the “Hair and Lint Pot,” is in front of the of the pump. Inside there is
a basket which must be kept clean of leaves and debris at all times. View the basket through the top see
through lid to inspect for leaves and debris.
Regardless of the length of time between filter cleaning, it is most important to visually inspect the hair and lint
pot basket at least once a week. A dirty basket will reduce the efficiency of the filter and possibly the heater.
WARNING — DO NOT open the strainer pot if pump fails to prime or if pump has been operating without
water in the strainer pot. Pumps operated in these circumstances may experience a build up
of vapor pressure and may contain scalding hot water. Opening the pump may cause serious
personal injury. In order to avoid the possibility of personal injury, make sure the suction and
discharge valves are open and that the strainer pot is cool to the touch, then open with
extreme caution.
CAUTION — To prevent damage to the pump and filter and for proper operation of the system, clean
pump strainer and skimmer baskets regularly.
Pump Strainer Basket Service
Clamp, pot
If the IntelliFlo pump is installed below the water level of the pool,
close the return and suction lines before opening the hair and lint pot
on the pump.
1. Press the Stop button to stop the pump and switch off the pump
at the circuit breaker.
2. Disconnect the communication cable from the IntelliFlo pump.
3. Relieve pressure in the system.
4. Turn the clamp and lid in a counterclockwise direction until it
stops.
5. Remove the clamp and lid.
6. Remove the basket and put the debris into the trash and rinse out
the basket. If the basket is cracked, replace the basket.
7. Replace the basket and fill the pump pot and volute with water
up to the inlet port.
8. Clean the cover, o-ring, and sealing surface of the pump pot. Grease
the o-ring with Teflon® or silicone lubricant.
9. Reinstall the lid by placing the clamp and the lid on the pot.
IntelliFlo Variable Speed and IntelliFlo VS-AU pump Installation and User’s Guide
Lid
O-ring, lid
Basket
Pot volute
27
Pump Strainer Basket Service (Continued)
10. Ensure that the lid o-ring is properly placed. Seat the clamp and lid then
turn clockwise until the handles are horizontal as shown.
11. Reconnect the communication cable to the pump if required.
12. Switch the power ON at the circuit breaker. Reset the pool time clock
to the correct time.
WARNING — FILTER OPERATES UNDER HIGH PRESSURE. WHEN
ANY PART OF THE CIRCULATING SYSTEM (e.g., LOCK RING,
PUMP, FILTER, VALVES, ETC.) IS SERVICED, AIR CAN ENTER
THE SYSTEM AND BECOME PRESSURIZED. PRESSURIZED
AIR CAN CAUSE THE LID TO BLOW OFF WHICH CAN RESULT
IN SEVERE INJURY, DEATH, OR PROPERTY DAMAGE. TO AVOID THIS
POTENTIAL HAZARD, FOLLOW THESE INSTRUCTIONS.
13.
14.
15.
16.
Open the manual air relief valve on top of the filter.
Stand clear of the filter. Press the Start button on the pump.
Bleed air from the filter until a steady stream of water comes out.
Close the manual air relief valve.
Motor Service
1. Protect from heat:
• Shade the motor and controller from the sun.
• Any enclosure must be well ventilated to prevent overheating. Particular attention should be paid to the
motor fan cover and the cooling fins between the drive and the motor.
• Provide ample cross ventilation.
2. Protect against dirt:
• Protect from any foreign matter or splashing water.
• Do not store (or spill) pool chemicals near the motor.
• Avoid sweeping or stirring up dust near the motor while it is operating.
• If a motor has been damaged by dirt it voids the motor warranty.
3. Protect against moisture:
• Protect from splashing pool water.
• Protect from the weather.
• Protect from lawn sprinklers.
• If a motor has become wet - let it dry before operating. Do not allow the pump to operate if it has been
flooded.
• If a motor has been damaged by water it voids the motor warranty.
Note: DO NOT wrap motor and controller with plastic or other air tight materials. The motor and
controller may be covered, but not wrapped in plastic, during a storm, for winter storage, etc., but
never when operating, or expecting operation.
IntelliFlo Variable Speed and IntelliFlo VS-AU pump Installation and User’s Guide
28
Winterizing
To protect the IntelliFlo pump electronics from damage due to freezing conditions, the pump will switch it
self on to generate internal heat when the air temperature drops below 4.4° C (40° F). The IntelliFlo pump
“Anti Freeze” feature is not intended to protect the system plumbing from freezing. The Anti Freeze
temperature feature is adjustable and can be changed from 4.4° - 10° C (40° - 50° F). See page 10 for
more information.
1. If the air temperature drops below 4.4° C (40° F) the water in the pump can freeze and cause damage.
Freeze damage is not warrantable.
2. To prevent freeze damage follow the procedures listed below.
• Shut off electrical power for the pump at the circuit breaker.
• Drain the water out of the pump by removing the two thumb-twist drain plugs located at the bottom of
the volute. Store the plugs in the pump basket.
• Cover the motor to protect it from severe rain, snow and ice.
• Do not wrap the motor in plastic. It will cause condensation and rust on the inside of the motor.
Note: In mild climate areas, when temporary freezing conditions may occur, run your filtering equipment
all night to prevent freezing.
Priming the pump after service
Before a system start-up, the pump and system must be manually primed. Make sure to reopen valves
before operating. To prime IntelliFlo pump, the strainer pot must be filled with water.
CAUTION — DO NOT run the pump dry. If the pump is run dry, the mechanical seal will be damaged and
the pump will start leaking. If this occurs, the damaged seal must be replaced. ALWAYS
maintain proper water level in your pool. Continued operation in this manner could cause
a loss of pressure, resulting in damage to the pump case, impeller and seal.
For instructions about how to prime the IntelliFlo pump, refer to “Priming the pump for the first time or after
servicing,” on page 20.
IntelliFlo Variable Speed and IntelliFlo VS-AU pump Installation and User’s Guide
29
Section 5
Installation and Removal
The following information describes how to install the IntelliFlo pump.
Note: Before installing this product, read and follow all warning notices and instructions on page iii- vi.
IntelliFlo Pump Kit Contents
•
•
IntelliFlo Variable Speed Pump: IntelliFlo Variable Speed pump, FWC cover, gasket, screws,
communication cable, and Installation and User’s Guide (this manual).
IntelliFlo VS-AU Pump: IntelliFlo VS-AU pump, FWC cover, gasket, screws, suction and discharge
port unions, and IntelliFlo and Installation and User’s Guide (this manual).
Installing the IntelliFlo pump
Only a qualified service person should install the IntelliFlo pump. Refer to “IMPORTANT SAFETY
PRECAUTIONS” on pages iii to vi for additional installation guidance.
Location
1. Install the pump as close to the pool or spa as possible. To reduce friction loss and improve efficiency,
use short and direct suction and piping returns.
2. Install a minimum of 5 feet (1,524 meters) from the inside wall of the pool and spa. Canadian
installations require a minimum of 9.8 feet (3 meters) from pool water.
3. Install the pump a minimum of 2 feet (0.61 meters) from the heater outlet.
4. Do not install the pump more than 8 feet (2.438 meters) above the water level or 3 feet (0.914 meters)
below water level.
5. Install the pump in a sheltered well ventilated location protected from excessive moisture, (i.e., rain,
sprinklers, etc.).
6. For hot tubs and spas, do not install within an outer enclosure or beneath the skirt of a hot tub or spa.
7. Install the pump with a rear clearance of at least 3 inches (76.2 mm) so that the motor can be removed
easily for maintenance and repair.
Piping
For improved pool plumbing, it is recommended to use a larger pipe size. When installing the inlet and outlet
fittings (male adaptors), use thread sealant.
Do not install 90° elbows directly into pump inlet or outlet. A valve, elbow or tee installed in the suction line
should be no closer to the front of the pump than five times the suction line pipe diameter (i.e., 2 inch
(5.1 cm) pipe requires a 10 inch (254 mm) straight run in front of the suction inlet of the pump). This will
help the pump prime faster and last longer.
Flooded suction systems should have gate valves installed on suction and discharge pipes for maintenance,
however, the suction gate valve should be no closer than five times the suction pipe diameter as described
above.
Electrical
• A means for disconnection must be incorporated in the fixed wiring in accordance with the wiring
rules.
• If the supply cord is damaged, it must be replaced to avoid a hazard. The supply cord can be
purchased separately from the manufacturer, its service agent or similarly qualified persons.
• The pump is to be supplied through a residual current device (RCD) having a rated residual
operating current not exceeding 30mA.
IntelliFlo Variable Speed and IntelliFlo VS-AU pump Installation and User’s Guide
30
Wiring the IntelliFlo Pump
To connect the IntelliFlo pump to an AC power source:
1. Make sure all electrical breakers and switches are turned off before wiring motor.
2. Make sure that the wiring voltage is 230 VAC ± 10%.
3. Use #12 AWG for wire runs up to 100 feet (30.5 meters)and #10 AWG for lengths longer than 100
feet (30.5 meters). When in doubt use a heavier gauge (larger diameter) wire. Heavier gauge will allow
the motor to run cooler and more efficient.
4. Make sure all electrical connections are clean and tight.
5. Cut the wires to the appropriate length so they do not overlap or touch when connected.
6. Permanently ground the motor using the green ground wire, as shown below. Use the correct wire size
and type specified by National Electrical Code. Make sure the ground wire is connected to an electrical
service ground.
7. Bond the motor to the pool structure in accordance with the National Electrical Code. Use a solid
No. 8 AWG or larger copper conductor (No. 6 or larger in Canada). Run a wire from the external bonding
lug to the pool bonding structure, as shown below.
8. The pump should be permanently connected to either a circuit breaker, 2-pole timer or 2-pole relay.
If AC power is supplied by a GFCI circuit breaker, use a dedicated circuit breaker that has no other
electrical loads.
9. IMPORTANT: When connecting the pump to an automation system ( IntelliTouch, EasyTouch,
SunTouch and IntelliComm), continuous power must be supplied to the pump by connecting it
directly to the circuit breaker. When using an automation system, Be sure that no other lights or
appliances are on the same circuit.
NOTE: When the IntelliFlo is started and stopped by removing power with a relay or timer,
a two-pole device should be used to apply and remove power to both POWER LINE TERMINALS.
GROUND WIRE
CONNECTION
BONDING LUG
IntelliFlo Variable Speed and IntelliFlo VS-AU pump Installation and User’s Guide
31
Pump Disassembly
WARNING — Always disconnect power to the pool pump at the circuit breaker and disconnect the
communication cable before servicing the pump. Failure to do so could result in death or
serious injury to serviceman, pool users or others due to electric shock.
Read all servicing instructions before working on the pump.
WARNING — DO NOT open the strainer pot if pump fails to prime or if pump has been operating without
water in the strainer pot. Pumps operated in these circumstances may experience a build up
of vapor pressure and may contain scalding hot water. Opening the pump may cause serious
personal injury. In order to avoid the possibility of personal injury, make sure the suction and
discharge valves are open and strainer pot temperature is cool to touch, then open with
extreme caution.
CAUTION — Be sure not to scratch or mar the polished shaft seal faces; seal will leak if faces are
damaged.
All moving parts are located in the rear subassembly of the IntelliFlo pump.
Tools required:
• 3/32 inch Allen head wrench.
• ½ inch open end wrench.
• 9/16 inch open end wrench.
• Flat blade and phillips head screwdriver
To remove and repair the pump mechanical seal, perform the following procedures:
1.
2.
3.
4.
5.
6.
7.
Switch off the pump circuit breaker at the main panel.
Disconnect the RS-485 communication cable from the pump (if connected to pump).
Drain the pump by removing the drain plugs.
Remove the six bolts that hold the main pump body (strainer pot/volute) to the rear subassembly.
GENTLY pull the two pump halves apart, removing the rear subassembly.
Use a 3/32 inch Allen head wrench to loosen the two holding screws located on the diffuser.
Hold the impeller securely in place and remove the impeller lock screw by using a Phillips head
screwdriver. The screw is a left-handed thread and loosens in a clockwise direction.
8. Use a flat blade screwdriver to hold the motor shaft. The motor shaft has a slot on the end which is
accessible through the center of the fan cover.
IntelliFlo Variable Speed and IntelliFlo VS-AU pump Installation and User’s Guide
32
Pump Disassembly (Continued)
9. To unscrew the impeller from the
shaft, twist the impeller
counterclockwise.
MOTOR
BOLT (4x)
GASKET
SEAL
SET
SCREW
10. Remove the rotating portion of the
mechanical seal from the impeller.
11. Remove the four bolts from the seal
plate to the motor, using a
9/16 inch wrench.
12. Place the seal plate face down on
a flat surface and tap out the carbon
spring seat.
13. Clean the seal plate, seal housing,
and the motor shaft.
O-RING
MOTOR
BOLT (2x)
SEAL PLATE
IMPELLER
LOCK
SCREW
LOCK SCREW SEAL
Shaft Seal Replacement
The Shaft Seal consists primarily of two parts, a rotating member and a ceramic seal. The pump requires little
or no service other than reasonable care, however, a shaft seal may occasionally become damaged and must
be replaced. Note: The polished and lapped faces of the seal could be damaged if not handled with
care.
Pump Reassembly/Seal Replacement
1. When installing the replacement shaft seal, use silicone sealant on the metal portion before pressing into
the seal plate as shown. Note: Use extreme care when applying sealant. Ensure that no sealant
contacts the seal plate surface or the ceramic seal. Allow sealant to cure overnight before
reassembling.
2. Before installing the rotating portion of the seal into the impeller, be sure the impeller is clean. Use a
light density soap and water to lubricate the inside of the seal. Press the seal into the impeller with your
thumbs and wipe off the ceramic and carbon faces with a clean cloth.
3. Remount the seal plate to the motor.
4. Grease the motor shaft thread and screw impeller onto the motor shaft.
5. Screw in the impeller lock screw (counterclockwise to tighten).
6. Remount the diffuser onto the seal plate. Make sure the plastic pins and holding screw inserts are
aligned.
7. Grease the diffuser o-ring and seal plate gasket prior to reassembly.
8. Assemble the motor subassembly to the strainer pot-pump body by using the two (2) through bolts for
proper alignment. Do not tighten the through bolts until all six (6) bolts are in place and finger tightened.
9. Fill the pump with water.
10. Reinstall the pump lid and plastic clamp. See “Pump Strainer Basket Service” on page 26 for details
11. Reconnect the RS-485 communication cable to the pump (if present).
12. Prime the pump, see page 17 and 21.
IntelliFlo Variable Speed and IntelliFlo VS-AU pump Installation and User’s Guide
33
Drive Assembly Removal and Installation
To remove the IntelliFlo drive and control panel from the motor assembly:
1. Make sure all electrical breakers and switches are turned off before removing the drive.
2. Disconnect the RS-485 communication cable from the pump (if present).
3. Open the control panel cover.
4. Remove the three Phillips head screws securing the drive to the motor assembly as shown.
CAUTION: TO AVOID ELECTRICAL HAZARD, DO NOT REMOVE THE FOUR TAMPER
PROOF BITS FROM THE MOTOR ASSEMBLY
5. Lift up the drive assembly and remove it from the motor adapter located on top of the motor assembly.
Note: Be careful not to remove the gasket between the drive and motor, it is critical in keeping
moisture out of the drive and motor. Replace the gasket if damaged. Do not reassemble with a
damaged or missing gasket.
To install the IntelliFlo drive assembly onto the motor assembly:
1. Make sure all electrical breakers and switches are turned off before installing the drive.
2. Be sure that the gasket between the drive and motor is in place. It is critical in keeping moisture out of
the drive and motor. Replace the gasket if damaged. Do not reassemble with a damaged or missing
gasket.
3. Verify that the three (3) orange motor post caps are in position before placing the drive on the motor
assembly.
4. Align the drive assembly with the motor adapter and seat the drive on the motor assembly.
5. Secure and tighten the drive assembly with the three Phillips head screws.
Phillips head screw
Phillips head screws
Note: Do not remove
these screws
Adapter connector
Gasket
Orange motor post
caps (QTY. 3)
IntelliFlo Variable Speed and IntelliFlo VS-AU pump Installation and User’s Guide
34
Illustrated Parts List
23
22
31
26
30
27
25
20
34b
3
13
1
10
32
33
21
37
34a
19
24
7
2
17
15
36
4
35
34
28
16
5
11
18
6
29
12
9
8
14
IntelliFlo Variable Speed Pump P/N 011018 and IntelliFlo VS-AU Whole Pump P/N 348019
Replacement Parts
Item No. Part No.
1
2
070387
070429
3
070430
4
5
6
7
8
070431
(QTY 2)
070927
070929
071131
071403
9
10
11
071406
071444
071652
12
071657
13
071660
14
072183
15
072184
16
17
18
19
072928
073131
075713
192115
20
350013
Description
BASKET AQ & WF
BOLT HEX HD, 2-56x0.875 s/s,
(QTY 4)
BOLT 3/8 - 16 X 1¼ HEX CAP 18-8 s/s,
(QTY 4)
BOLT 3/8 -16 X 2 HEX CAP 18-8 s/s,
FOOT WF - PUMP MOTOR SUPPORT
FOOT INSERT WF PUMP
PLUG DRAIN WFE (Almond) (QTY 2)
NUT 3/8 - 16 BRASS NICKEL PLATED,
(QTY 2)
NUT ¼ - 20 HEX s/s (QTY 2)
O-RING 238, 3.484x0.139, Buna-N 70
SCREW ¼-20 X 1 LH PHILLIPS PAN
MS 18-8 s/s
SCREW ¼ - 20 X 1 in. HEX CAP 18-8 s/s,
(QTY 3)
SCREW SET 4-40 X 1-1/8 WFE SCKT
CAP 18-8 s/s (QTY 2)
WASHER FLAT ¼ X 5/8 20 GA THICK
18-8 s/s (QTY 2)
WASHER 3/8 ID X 7/8 OD .05 THICK
18-8 s/s, (QTY 6)
DIFFUSER ASSEMBLY WFE 12
IMPELLER WFE 12 1000 SER
RUBBER WASHER WFE PUMP
O-RING 112, 0.487x0.103
Buna-N 70 (QTY 2)
O-RING LID CH/WF 2-436
Item No. Part No.
21
22*
23
350015
350082
353251
Description.
HOUSING WFE (Almond)
CONTROL COVER ASSEMBLY (buy 350601)
INTELLIFLO VARIABLE SPEED &VS-AU
MTR DRV 3.2KW (Items 22, 25, 26, 27, 33)
24
350105S
VFD MOTOR 3.2 KW PMSM (ALMOND)
25
350107
SCREW 10-24 X 3¼ in. PH MS 18-8 s/s,
(QTY 3)
26
350108
INTELLIFLO DRIVE GASKET
27
350142
SPACER CAP (QTY 3)
28
350201
SEAL PLATE KIT, WFE ALMOND (item 34/35)
29
357100
GASKET SEAL PLATE TO HOUSING
30
357151
LID SEE THRU WF
30
357156
LID CHEMICAL RESISTANT (Baquail
resistant)
31
357199
CLAMP CAM & RAMP WF (Almond)
32
357243
POT WF ASSY ALMOND (Items 1,7 (Qty. 2)
33
350621
Junction Box Cover - Almond
34a/b 357603
Union kit** (includes two complete unions for
one pump)
Note: (*) Not serviceable parts.
350202 Seal plate Kit: Almond w/gasket/seal plate (includes mechanical seal installed
and seal plate gasket) - (Items 29, 34, 35)
350601 Drive Control Cover Assy. Kit: Almond (contains drive Variable Speed, VSAU, drive lid screws orange spacer caps) - (Items 22, 25 (Qty. 3), 26, 27 (Qty. 3)
350612 Hardware/gasket Assy. Kit: Contains 3 screws, 3 spacer caps and drive
gasket - (Items 25, 26, 27)
350122 - 50 ft. Communication Cable (Not included with IntelliFlo VS-AU pump (P/N
348019)
357149 Almond Volute/Seal plate Replacement Kit: Items 1, 7 (Qty 2), 19 (Qty 2),
20, 23, 24, 25, 29, 30 ,31, 34, 35)
(**) Not included with IntelliFlo Variable Speed Pump (P/N 011018)
IntelliFlo Variable Speed and IntelliFlo VS-AU pump Installation and User’s Guide
35
IntelliFlo Pump Dimensions
10.78 in (273.8 mm)
12.50 in (317.5 mm)
23.41in (594.6 mm)
IntelliFlo Flow Pump PerformanceCurve
IntelliFlo Electrical Specifications
Circuit Protection: Two-pole 20 AMP device at the Electrical Panel.
Input: 230 VAC, 50/60 Hz, 3200 Watts, 1 phase
IntelliFlo Variable Speed and IntelliFlo VS-AU pump Installation and User’s Guide
36
Section 6
Troubleshooting
CAUTION: Before installing this product, read and follow all warning notices and
instructions on page iii - vi.
Alerts and Warnings
The IntelliFlo pump displays all alarms and warnings on the control panel display. When an alarm or
warning condition exists, the corresponding LED will be lit on the display. All control panel buttons are
disabled until the alarm or warning is acknowledged with the Enter button. Press the Reset button to clear
the alarm once the fault condition has been resolved. Note: The IntelliFlo pump will not start if the impeller is
rotating. The alerts and warnings are:
• Power out failure: The incoming supply voltage is less than 170 VAC. The drive faults to protect
itself from over current. The drive contains capacitors that keep it powered up long enough to save
the current run parameters. If power is restored during this process, approximately 20 seconds, the
drive will not restart until completed.
• Priming error: If the pump is not defined as primed within the "Max Priming Time" it will stop and
generate a “Priming Alarm” for 10 minutes, then attempt to prime again. The "Max Priming Time" is
set by the user on the priming menu as discussed on page 11. If the IntelliFlo cannot prime within
five attempts it will generate a permanent alarm that must be manually reset.
• Overheat alert: If the drive temperature gets above 54.4° C (130° F) the IntelliFlo will slowly
reduce speed until the over temperature condition clears.
• Anti-freezing: When active, the motor will run at the preset RPM until the drive temperature
increases above the minimum. The pump’s internal antifreeze protection is disabled when connected
to an automation system. Freeze protection is provided by selecting YES at the ON WITH FREEZE
portion of the IntelliTouch's appropriate circuit function menu. To re-enable the pump’s internal
antifreeze protection, the power to the drive must be cycled off then back on.
• Over current: Indicated that the drive is overloaded or the motor has an electrical problem. The
drive will restart 20 seconds after the over current condition clears.
• Over voltage: Indicates excessive supply voltage or an external water source is causing the pump
and motor to rotate thereby generating an excessive voltage on the drives internal DC buss. The
drive will restart 20 seconds after the over voltage condition clears.
IntelliFlo Variable Speed and IntelliFlo VS-AU pump Installation and User’s Guide
37
General IntelliFlo Troubleshooting Problems
Use the following general troubleshooting information to resolve possible problems with your IntelliFlo pump.
Note: Turn off power to unit prior to attempting service or repair.
Problem
Possible Cause
Corrective Action
Pump failure.
(For IntelliFlo aler t display
messages, refer to Aler ts
and Warning on page 36.)
Pump will not prime - Air leak in suction.
PRIME ERROR may be displayed.
Check suction piping and valve
glands on any suction gate valves.
Secure lid on pump strainer pot and
make sure lid gasket is in place.
Check water level to make sure
skimmer is not drawing air.
Pump will not prime - Not enough water.
Reduced capacity and /or
head.
(For IntelliFlo aler t display
messages, refer to Aler ts
and Warning on page 36).
Ensure that the suction lines, pump,
strainer, and pump volute are full of
water.
Pump does not come out of prime.
Adjust prime sensitivity to a higher
setting (default setting is 1%)
Pump strainer clogged.
Clean pump strainer pot.
Pump strainer gasket defective.
Replace gasket.
Air pockets or leaks in suction line.
PRIME ERROR may be displayed.
Check suction piping and valve
glands on any suction gate valves.
Turn off electrical power to the pump.
Clogged impeller.
PRIME ERROR may be displayed.
Remove the (6) bolts that holds the
volute to the seal plate.
Slide the motor and seal plate away
from the volute.
Clean debris from impeller. If debris
cannot be removed, complete the
following steps.
1. Remove diffuser and O-ring.
2. Remove left hand thread anti-spin
bolt and O-ring.
3. Remove, clean and reinstall
impeller.
4. Reinstall anti-spin bolt and
O-ring.
Reinstall diffuser, and O-ring.
Reinstall motor and seal plate into
volute.
Reinstall (6) bolts around seal plate
and volute and tighten securely.
Pump trips and restar ts
constantly
Pump strainer clogged.
PRIME ERROR may be displayed.
Clean suction trap.
Air in system
Bleed air from filter. Ensure that air
bubbles are not visible coming into
pump pot.
Suction lift above design limits
Inser t vacuum gauge into pump por t
connection por t. Confirm vacuum
level is 25 in. mercur y (hg) or less.
Blocked suction
Blocked discharge
Stop pump and clear blockage.
System flow too high. System changing flow too quickly.
In floor cleaning system issues.
Reduce system flow. Change speed.
Reduce water flow. In floor cleaning
systems must be designed with
balanced hydraulic losses on all legs.
Priming not enabled.
Enable priming from the "PRIMING"
menu.
Issues related to other equipment, such as, Heat Pumps and
Heaters with internal valves that vibrate.
Lowering ramp speed below 200
RPM may resolve the issue or
addition of external manual valve
controls, may resolve issue.
IntelliFlo Variable Speed and IntelliFlo VS-AU pump Installation and User’s Guide
38
Troubleshooting Problems (Continued)
Problem
Possible Cause
Corrective Action
Inadequate circulation.
(For IntelliFlo aler t display
messages, refer to Aler ts
and Warning on page 36).
Filter ot pump basket dir ty.
Check trap basket; if plugged, turn
pump off and clean basket.
Suction/discharge piping is too small.
Check and clean pool filter.
Speed is set too slow for proper filtration cycle.
Increase filtration run time
Could appear as a "Low Voltage" alarm.
PRIME ERROR may be displayed.
Check voltage at motor terminals and
at panel while pump is running. If low,
see wiring instructions or consult
power company.
Check for loose connections.
Could appear as "Over Heat" aler t.
PRIME ERROR may be displayed.
Check line voltage; if less than 90%
or more than 110% of rated voltage
consult a licensed electrician.
Increase ventilation.
Reduce ambient temperature.
Tighten any loose wiring connections.
Motor internal terminal overload
protector is open.
Motor runs too hot. Turn power to
motor off.
Check for proper voltage.
Check for proper impeller or impeller
rubbing.
The pump motor is running but with loud noise.
If suction and discharge piping are
not adequately suppor ted, pump
assembly will be strained. Do not
mount pump on a wooden platform!
Securely mount on concrete platform
for quietest performance. Foreign
matter (gravel, metal, etc.) in pump
impeller. Disassemble pump, clean
impeller, follow pump ser vice
instructions for reassembly.
Cavitation.
Improve suction conditions. Increase
pipe size. Decrease number of
fittings. Increase discharge pressure.
Improper automation IntelliFlo setup.
1. Ensure that the communication
cable is connected at both ends.
2. Check that the IntelliFlo local
address matches with the address
used in the IntelliTouch.
3. Check that the IntelliFlo has been
assigned a circuit name on the
IntelliTouch.
4. Ensure that the IntelliFlo display
says "DISPLAY NOT ACTIVE".
Communication network inoperative.
A defective device on the network
can inhibit the proper operation of
other network device. Devices
should be disconnected sequentially
until the network star ts working.
Electrical problem.
(For IntelliFlo aler t display
messages, refer to Aler ts
and Warning on page 36).
Mechanical Troubles and
Noise.
IntelliFlo does not respond
to IntelliTouch, EasyTouch,
SunTouch, IntelliCOM
commands
IntelliFlo Variable Speed and IntelliFlo VS-AU pump Installation and User’s Guide
Notes
LIT. PKG. KIT P/N 354603
Manual P/N 354604 Rev. A