1
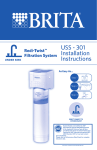
Drop-In
Filtration System
USS - 120
Installation
Instructions
As Easy As...
Step 1
Step 2
Step 3
CONNECT TO
AUXILIARY FAUCET
OR KITCHEN FAUCET
System Tested and Certified by NSF International against
NSF/ANSI Standard 42 for Aesthetic Chlorine, Taste &
Odor, and Particulate Class IV. System Tested and Certified
by NSF International against NSF/ANSI Standard 372 for
low lead content and compliance.
Please refer to Performance Data Sheet for complete reduction data.
Drop-In Filtration System Model USS-120
Tools & Materials Required
main components
secondary
components
filter system head
package contents
main:
filter system head with
mounting bracket
mounting screws
filter o-ring
filter o-ring
filter cartridge
filter cartridge
auxiliary faucet adapter
mounting bracket
filter housing
secondary:
mounting screws
auxiliary faucet adapter
1/4” plastic tubing
1/4" plastic tubing
filter housing wrench
filter housing
filter housing wrench
tools needed for installation
optional items
drill with 1/8" drill bit
hollow-wall anchor
bolts or toggle bolts
phillips screwdriver
adjustable wrench
pencil
1/8” drill bit
hacksaw
utility knife
plumber's tape
1
bucket
2
3
silicone grease
’
30
tape measure
866-709-2086
safety glasses
drill
Internet & Mobile
My Brita® Filtration System (Replace system every 5 years)
System Model No.
2
Date Purchased / Date to Replace
For FREE Filter Replacement
Reminder, go to
www.protectplus.com
Before You Begin
Please read all instructions, specifications, and precautions before
installing and using your water filter system.
NOTICE
Precautions: for cold water use only.
Consult your local plumbing codes and install accordingly.
This filter must be protected from freezing, which can cause cracking of the filter and water leakage.
Because of the product’s limited service life and to prevent costly repairs or possible water damage, we strongly recommend that
the head of the filter be replaced every five years. If the head of the filter has been in use for longer than this period, it should be
replaced immediately. Date the top of any new head to indicate the next recommended replacement date.
DO NOT DRILL THROUGH AN ALL-PORCELAIN OR CAST IRON SINK. If installing on an all-porcelain or cast iron sink, the faucet
must be mounted in a pre-drilled sprayer hole or through the countertop next to the sink. If the countertop must be drilled, make
certain that the area below the drilling location is free of wiring and pipes. Also, make sure that there is sufficient room to make the
proper connections to the bottom of the faucet mount. DO NOT DRILL THROUGH COUNTER TOPS MORE THAN 1” IN THICKNESS
OR COUNTERTOPS MADE OF TILE, MARBLE, GRANITE, OR SIMILAR SUBSTANCE. Consult with a plumber or the countertop
manufacturer for assistance.
! CAUTION
Please wear safety glasses to protect eyes when drilling.
WARNING
WARNING: Be sure that all electrical appliances and outlets are turned off at the circuit breaker before working in the cabinet area.
Filtration Facts
•
These filters are not water purifiers. Do not use with water that is microbiologically unsafe or of unknown quality without adequate disinfection before or after the system. Systems certified for Cyst reduction may be used on disinfected water that may contain filterable Cysts.
••
This unit is not designed to filter sulfur odor (rotten egg odor) caused by hydrogen sulfide. Use of carbon filters to treat sulfur odor may intensify taste/odor problems.
••
Please comply with all state and local regulations regarding the installation of water treatment devices.
••
The contaminants or other substances reduced by the water filter device are not necessarily in your water.
Operation / Maintenance Data
These units are intended for non-commercial use. They should be used only in ambient air temperature of between 35 degrees F /
2 degrees C and 100 degrees F / 38 degrees C. Placement of these units in direct sunlight or use of electrical heating equipment on
these units must be avoided. Replace filter cartridge when and as directed in the installation / operation instructions included with
each cartridge. Replacement filter cartridges are available at retail outlets.
USS-120 installation instructions
Version V2.0A
3
Helpful Hints
Before You Start
•
WARNING
Locate space in your cabinet to secure water filter system.
• Check under the sink to locate a solid wall surface to mount the filter system.
**FILTER SYSTEM MUST BE
MOUNTED IN A VERTICAL POSITION**
• Position on cabinet wall to provide easy access for future cartridge change-outs.
•
If you have anything other than
flexible hose under your sink, check to see if you need to purchase special fittings.
•
Turn off cold water shut-off valve to kitchen sink.
•
Turn on cold water faucet on kitchen
sink to release water pressure.
These directions are for direct connect to your kitchen faucet. If you already have an
auxiliary faucet, visit us online at www.protectplus.com to download instructions to
connect to auxiliary faucet. To learn more about the benefits of using an auxiliary faucet
with your system, see page 10.
As Easy As...
direct connect to kitchen faucet
Step 1 Attach Head to Inside
of Cabinet Wall
direct connect to kitchen faucet
Step 2 Attach tubing/fittings
to the water line/head
direct connect to kitchen faucet
4
Step 3 Install Filter and Test for
Leaks
direct connect to kitchen faucet
Step 1 Attach Head to Inside
of Cabinet Wall
materials and tools needed
Remove filter housing from system
head.
•
Mount bracket to system head.
•
Measure and mark location of
mounting holes.
•
Mount system head to wall of cabinet.
’
30
•
3
Locate an easy access area to mount the filter.
2
•
1
Note: Mount the filter system to a solid cabinet wall
or wall. If a solid surface is not available, use hollowwall anchor bolts or toggle bolts (not included) to
secure to the wall.
1/8” drill bit
drill
phillips
screwdriver
safety
safety
glasses
glasses
tape measure
CAUTION
Mount to cabinet
in vertical position
4-6" FROM BOTTOM
Mounting
Bracket
System
Head
INLET
USS-120 installation instructions
OUTLET
Version V2.0A
5
direct connect to kitchen faucet
Attach tubing/fittings
to the water line/head
Step 2
materials and tools needed
WARNING
COLD
WATER
VALVE
COLD
WATER
VALVE
•
Disconnect the top of the cold water plumbing line from the faucet shank. Ensure cold water shut-off valve is closed, and turn on cold water on faucet.
•
Screw the Kitchen Faucet Adapter onto the lower end of the faucet shank and upper end of cold water line.
•
Note position of Kitchen Faucet Adapter as attached to cold water line.
Step 2 continued on next page >>
6
direct connect to kitchen faucet
Step 2 Attach tubing/fittings
to the water line/head
<< Step continued from previous page
materials and tools needed
utility knife
wet ends of tubing before inserting
COLD
WATER
FAUCET
LINE
1/4" PLASTIC TUBING
cut squarely on both ends
A
do not bend or crimp
do not cut at an angle
1/4" PLASTIC TUBING
B
COLD
WATER
FAUCET
LINE
COLD
WATER
VALVE
•
Determine lengths of 1/4" plastic tubing needed to connect to both inlet port and outlet port of Kitchen Faucet Adapter.
•
Cut 1/4" plastic tubing squarely on both ends to length.
•
Avoid extra long lengths that may create kinks in the line.
USS-120 installation instructions
Version V2.0A
7
direct connect to kitchen faucet
direct connect to kitchen faucet
Install Filter and Test Step 3
for Leaks
Troubleshooting
Guide
Leaks between system
head and filter housing
*
*
*
*
*
Remove the filter housing and inspect the o-ring.
Make sure it is in place and free from dirt and
particles.
Install the filter/filter housing.
Turn on the cold water supply valve and turn
on the filter faucet.
Make sure filter housing is seated tightly. Leaks around fittings
•
Insert the new Filter Cartridge over
the standpipe in the bottom of the
Filter Housing.
•
Screw the Filter housing back onto
the System Head and hand-tighten.
Using the Filter Housing Wrench,
tighten 1/4 turn. Note: Do not over
tighten.
•
Turn on the cold water shut-off valve.
Turn on the kitchen faucet.
Allow the water to run approximately
10 minutes.
•
Check for any leaks.
•
If system is leaking, turn off cold
water shut-off valve and refer to
troubleshooting guide.
8
*
*
Turn off the cold water shut-off valve. Press in the gray collar on the Inlet and/or Outlet fittings. Remove tube and inspect. Repair/
replace tubing. Reconnect tubing. Ensure it hasn't been crimped.
Turn the cold water shut-off valve back on and turn on the faucet.
Leaks on Kitchen Faucet
Water Line connections
*
Turn off the cold water shut-off valve to the filter system.
*
Locate the kitchen faucet adapter.
- If the 1/4” plastic tubing is leaking, follow the previous steps.
- If the thread between the kitchen faucet adapter and the kitchen faucet stem is leaking, tighten more securely. If leaking continues, disconnect the 3/8” plastic tubing and remove the kitchen
faucet adapter. Wrap the kitchen
faucet adapter and the cold water supply
line with plumber’s tape and re-install.
- Turn the cold water shut-off valve back
on and turn on the faucet.
» If leaks continue, turn off the water supply and
call Customer Service or your local plumber.
direct connect to kitchen faucet
EV
ACE ERY
PL
SIX
Use and Care
HS
Filter Replacement
(every 6 months)
RE
direct connect to kitchen faucet
MO
NT
Brita® Filtration System USS-120
Usage and quality of water in your incoming
water line affect the life of filter cartridges.
Cartridges should be replaced sooner if
water pressure at the faucet begins to drop
noticeably or if the filter fails to perform
satisfactorily.
For FREE Filter Replacement Reminder, go to
www.protectplus.com
Note: Place bucket or rags under the filter
system to catch any water drips.
•
Using the Filter Housing Wrench
Turn the filter right to left (as you
face it) until it releases. Remove and
discard used filter.
•
See page 8 for inserting new filter.
•
Changing water filter on a regular basis ensures optimum performance of the water filtration system.
After prolonged periods of non-use, it
is recommended that the filter system
be flushed thoroughly. Let water run
for 10 minutes before using.
The filter used with this filter system
has a limited service life. Changes
in taste, odor, and/or flow of the water
being filtered indicate that the filter
should be replaced.
Please see the Performance Data Sheet
for the certified performance of specific
systems with stated cartridges.
System
Filter Model Numbers
USS-120 Drinking Water Filtration System
USF-101 - Level 1 filter (included with system)
USF-102 - Level 2 filter
Replace filters every six months or sooner.
USF-103 - Level 3 filter
USF-104 - Level 4 filter
Replacement Parts
Part Number
Description
WFAS-300
Mounting Screws (Package of 2)
WFAF-600
Kitchen Faucet Adapter
WFAF-300
1/4" Plastic Tubing
BRTAH-100
FCT-102
System Head
Filtered Water Faucet - Chrome
USS-120 installation instructions
Version V2.0A
9
The Benefits of Using an Auxiliary Faucet
with your BRITA® USS-120 Filtration System
Only filters the water you want to filter.
Optimizes filter life by only filtering
water for drinking and cooking.
Improves filter performance depending
upon the filter you use.
See enclosed Performance Data Sheet
for claims.
The USS-120 Filtration System is one of the
MODEL # FCT-102 Chrome
Instructions and hardware
included.
10
few undersink filtration systems on the market
today that gives users the option to connect
their system directly to their kitchen faucet or an
auxiliary faucet. Both methods offer benefits to
the end user.
Debajo del
fregadero
Sistema de
filtración de
inserción
USS - 120
Instrucciones
de instalación
Tan fácil como...
Paso 1
Paso 2
Paso 3
Conecte al grifo
auxiliar o al grifo
de cocina
Normas NSF/ANSI
Sistema probado y certificado por NSF internacíonal según
la norma NSF/ANSI 42 para cloro estético, sabor y olor,
y partículas clase IV. Sistema probado y certificado por
NSF internacíonal según la norma NSF/ANSI 372 para la
conformidad y bajo contenido de plomo.
Refiérase a la Hoja de datos del rendimiento para la información completa sobre los
componentes que disminuye.
Sistema de filtración de inserción Modelo USS-120
Implementos y materiales
necesarios
componentes
principales
componentes
secundarios
cabezal del sistema
de filtración
Contenido del
paquete
principal:
tornillos de montaje
junta tórica del filtro
cartucho de filtro
cabezal de sistema de
filtración con soporte
de montaje
junta tórica del filtro
adaptador de grifo auxiliar
cartucho de filtro
soporte de montaje
carcasa del filtro
secundarios:
tornillos de montaje
adaptador de grifo
auxiliar
tubería plástica de 1/4” (6.4 mm)
carcasa del filtro
tubería plástica de 1/4”
(6.4 mm)
lave para la carcasa del filtro
implementos necesarios para la instalación
llave para la carcasa del
filtro
artículos
opcionales
Taladro con brocas de
1/8” (3,18 mm)
destornillador
de estrella
llave ajustable
lápiz
broca para taladro
de 1/8”
cuchilla multiuso
pernos de anclaje o
pernos acodados para
pared hueca
segueta
1
2
cinta de plomería
3
’
30
cinta para medir
866.709.2086
gafas de seguridad
Información del producto y servicio
taladro
Internet y móvil
www.protectplus.com
Sistema de filtración universal My Brita®
Número de modelo del sistema
12
cubeta
grasa de silicona
Video de instalación gratuito
www.protectplus.com
(reemplace el sistema cada 5 años)
Fecha de compra / Fecha de cambio Para recordatorios GRATIS de
cambio del filtro, ingrese a
www.protectplus.com
Antes de comenzar
Lea todas las instrucciones, especificaciones y precauciones antes de
instalar o utilizar su sistema de filtración de agua.
Aviso
Precauciones: para uso con agua fría únicamente.
Lea todas las instrucciones, especificaciones y precauciones antes de instalar o utilizar su sistema de filtración de agua.
Este filtro deberá estar protegido del congelamiento, lo cual puede ocasionar la rotura del filtro y goteo de agua.
Debido a la vida de servicio limitada del producto y para evitar reparaciones costosas o posible daño originado por el agua,
recomendamos enfáticamente reemplazar el cabezal del filtro cada cinco años. Si el cabezal del filtro ha estado en uso por un
período mayor, debe reemplazarse de inmediato. Coloque la fecha en la parte superior de cualquier cabezal nuevo para indicar la
próxima fecha de reemplazo recomendada.
NO TALADRE EN UN FREGADERO TOTALMENTE ELABORADO EN PORCELANA O HIERRO FUNDIDO. Si instala en un fregadero
totalmente elaborado en porcelana o hierro fundido, el grifo se deberá montar en un agujero previamente taladrado para el rociador
o a través de la encimera al lado del fregadero. Si es necesario taladrar la encimera, compruebe que el área debajo del lugar donde va
a taladrar no tenga cableado ni tubos. Asimismo, compruebe que exista suficiente espacio para hacer las conexiones adecuadas a la
parte inferior del soporte del fregadero. NO PERFORE ENCIMERAS QUE TENGAN MÁS DE UNA PULGADA (2.5 cm) DE ESPESOR,
NI LAS DE BALDOSAS, MÁRMOL, GRANITO O MATERIALES SIMILARES. Consulte con un plomero o con el fabricante de la
encimera para obtener asistencia.
! Precaución
Use gafas de seguridad para proteger los ojos cuando taladre.
Advertencia
ADVERTENCIA: Verifique que todos los electrodomésticos y los tomacorrientes estén desconectados en el interruptor de circuito
principal antes de trabajar en el área del gabinete.
•
••
••
Datos sobre la filtración
Estos filtros no son purificadores de agua. No utilice con agua que sea microbiológicamente insegura o de calidad
desconocida sin la adecuada desinfección antes o después del paso por el sistema. Los sistemas certificados para la
disminución de quistes pueden ser utilizados en aguas desinfectadas que puedan contener quistes filtrables.
Esta unidad no está diseñada para filtrar el olor a azufre (olor a huevos podridos) que ocasiona el sulfuro de hidrógeno. Utilizar filtros
de carbón para tratar el olor a azufre puede intensificar los problemas de sabor/olor.
Cumpla con todas las regulaciones estatales y locales relacionadas con la instalación de las unidades para tratamiento de agua.
•• Los contaminantes u otras sustancias que disminuye esta unidad de filtración de agua no están necesariamente en el agua de su
vivienda.
Información de funcionamiento/mantenimiento
Estas unidades no están destinadas para uso comercial. Deben utilizarse sólo en ambientes donde la temperatura del aire esté entre
35 grados F / 2 grados C y 100 grados F / 38 grados C. Debe evitar exponer estas unidades a la luz solar directa o al uso de equipo de
calefacción. Cambie el cartucho del filtro como y cuando lo indiquen las instrucciones de instalación/operación que se incluyen con
cada cartucho. Los cartuchos de reemplazo del filtro están a disposición en las tiendas al detal.
USS-120 installation instructions
Version V2.0A
13
Consejos útiles
Antes de comenzar
•
Ubique el espacio en su gabinete
para fijar el sistema de filtración de
agua.
•
Revise bajo el fregadero para ubicar
una superficie de pared sólida para
montar el sistema de filtración. **EL
SISTEMA DE FILTRACIÓN DEBERÁ
MONTARSE EN POSICIÓN
VERTICAL**
•
Coloque en una pared del gabinete
que brinde acceso fácil para futuros
cambios del cartucho.
•
Si tiene otro tipo de mangueras
distintas de las flexibles debajo del
fregadero, verifique si necesita
comprar acoples especiales. Cierre
la válvula de suministro de agua fría al fregadero.
•
Advertencia
Abra el grifo de agua fría del
fregadero para eliminar la presión
del agua.
Estas instrucciones son para Conexión directa a su grifo de la cocina. Si ya dispone de un
grifo auxiliar, visítenos en línea en www.protectplus.com descargar instrucciones para
conectar a la llave auxiliar. Para conocer más sobre los beneficios de usar un grifo auxiliar
con su sistema, consulte la página 20.
Tan fácil como...
Conexión directa al grifo de la cocina
Paso 1 Fije el cabezal a la parte
interior de la pared del
gabinete
Conexión directa al grifo de la cocina
Paso 2 Fije la tubería/acoples
a la tubería de agua/
cabezal
Conexión directa al grifo de la cocina
14
Paso 3 Instale el filtro y pruebe si
hay fugas
Conexión directa al grifo de la cocina
Step 1
Fije el cabezal a la parte
interior de la pared del gabinete
Materiales e implementos necesarios
Retire la carcasa del filtro del cabezal
del sistema.
•
Monte el soporte al cabezal del
sistema.
•
Mida y marque la ubicación de los
agujeros de montaje.
•
’
30
•
3
Ubique un área de fácil acceso para
montar el filtro.
2
•
1
Nota: Monte el sistema del filtro en la pared sólida
de un gabinete o en la pared. Si no existe una
superficie sólida, utilice los pernos de anclaje o
pernos acodados para pared hueca (no se incluyen)
para fijarlo a la pared.
broca para
taladro de 1/8”
taladro
destornillador de
estrella
safety
gafas
de
glasses
seguridad
cinta para medir
Precaución
Monte al gabinete en
posición vertical
4-6” (10.2 cm a 15.2 cm)
desde la parte inferior
Monte el cabezal del sistema a la
pared del gabinete.
Soporte de
montaje
Cabezal del
sistema
Entrada
USS-120 installation instructions
Salida
Version V2.0A
15
Conexión directa al grifo de la cocina
Fije la tubería/acoples a la
tubería de agua/cabezal
Paso 2
Materiales e implementos necesarios
Advertencia
Válvula de
agua fría
Válvula de
agua fría
•
Desconecte la parte superior de la tubería de agua fría del vástago del grifo.
Revise que la válvula de cierre de agua fría esté cerrada y abra el suministro de
agua fría del grifo.
•
Atornille el adaptador del grifo de cocina en el extremo inferior del vástago del
grifo y el extremo superior de la tubería de agua fría.
•
Observe la posición del adaptador del grifo de cocina cuando lo fije a la tubería de
agua fría.
Paso 2 - Continúa en la página siguiente>>
16
Conexión directa al grifo de la cocina
Paso 2
Fije la tubería/acoples a la
tubería de agua/cabezal
<< Paso 2 - Continúa en la página siguiente
Materiales e implementos necesarios
utility knife
Moje los extremos de la tubería
antes de insertarla
Tubería del
grifo de
agua fría
A
Corte en ángulo recto en
ambos extremos
Tubería plástica de 1/4” (6.4 mm)
Entrada
Salida
No doble ni engarce
No corte en ángulo
Tubería plástica
de 1/4” (6.4
mm)
1/4" PLASTIC
TUBING
Entrada
B
Salida
Tubería del
grifo de
agua fría
Salida
Entrada
Válvula de
agua fría
•
Determine la longitud de la tubería plástica de ¼” (6.4 mm) necesaria para
conectar los puertos de entrada y salida al adaptador del grifo de la cocina.
•
Corte la tubería plástica de ¼” (6.4 mm) en ángulo recto en ambos extremos al
largo necesario.
•
Evite dejar la tubería a un largo excesivo que pudiera crear torceduras.
USS-120 installation instructions
Version V2.0A
17
Conexión directa al grifo de la cocina
Instale el filtro y
pruebe si hay fugas
Conexión directa al grifo de la cocina
Paso 3
Guía para solución de
problemas
Fugas entre el cabezal
del sistema y el
alojamiento del filtro.
*
*
*
*
*
Retire la carcasa del filtro e inspeccione la junta
tórica.
Compruebe que esté en su lugar y que no tenga
suciedad ni partículas.
Instale el filtro/la carcasa del filtro.
Abra la válvula de suministro de agua fría y abra el
grifo del filtro.
Compruebe que la carcasa del filtro encaje
ajustadamente.
Fugas alrededor de los
acoples
Válvula de agua
caliente
Válvula de agua
fría
•
Inserte el nuevo cartucho del filtro
sobre el tubo vertical en la parte
inferior de la carcasa del filtro.
•
Atornille la carcasa del filtro
nuevamente en el sistema y apriete a
mano. Utilizando la llave de la carcasa
del filtro apriete ¼ de vuelta. Nota:
No apriete demasiado.
•
Abra la válvula de suministro de agua
fría. Abra el grifo de la cocina.
Deje que el agua corra
aproximadamente durante 10
minutos.
•
Revise si hay fugas.
•
Si el sistema tiene fugas, cierre la
válvula de suministro de agua fría
y consulte la guía de localización y
solución de problemas.
18
*
Cierre la válvula de suministro de agua fría.
Presione en la anilla gris de los acoples de entrada
y/o salida. Retire la tubería e inspeccione. Repare/
cambie la tubería. Vuelva a conectar la tubería.
Compruebe que no esté comprimida. Turn the cold
water shut-off valve back on and turn on the faucet.
Fugas en las conexiones
de la tubería de agua del
grifo de cocina.
*
Cierre la válvula de suministro de agua fría
al sistema de filtración.
Ubique el adaptador del grifo de cocina.
- Si la tubería de plástico de ¼” (6.4 mm) gotea, siga los pasos previos.
- Si la rosca entre el adaptador del grifo de
cocina y el espárrago está goteando,
apriétela de forma más segura. Si el goteo
continúa, desconecte la tubería plástica
de 3/8" y retire el adaptador del grifo de
cocina. Envuelva el adaptador del grifo de
cocina y la tubería de suministro de agua fría
con cinta de plomería y vuelva a instalar. - Vuelva a abrir la válvula de suministro de
agua fría y abra el grifo.
» Si la fuga continúa, cierre el suministro de agua y
llame al Departamento de servicio al cliente o a un
plomero local.
Conexión directa al grifo de la cocina
ZO CADA
LA
S
Uso y mantenimiento
S EIS
SE
Reemplazo del filtro
(cada 6 meses)
REEM
P
Conexión directa al grifo de la cocina
ME
Sistema de filtración Brita® USS-120
El uso y la calidad del agua de su tubería
de alimentación de agua afectan la vida
de los cartuchos del filtro. Los cartuchos
deben cambiarse con mayor frecuencia
si la presión del agua del filtro comienza
a disminuir notablemente o si el filtro no
funciona satisfactoriamente.
Para recordatorios GRATIS de Cambio del filtro,
ingrese a
www.protectplus.com
Nota: Coloque una cubeta o paños debajo del sistema
de filtración para recoger un posible goteo.
•
Usando la llave de la carcasa del
filtro gire el filtro de derecha a
izquierda (estando orientado de
frente a él) hasta que afloje. Retire
y deseche el filtro usado. Consulte
la página 18 para insertar el filtro
nuevo. Cambiar el filtro de agua con
regularidad garantiza el desempeño
óptimo del sistema de filtración de
agua.
Después de períodos prolongados
sin uso, se recomienda purgar
completamente el sistema de
filtración. Deje correr el agua durante
10 minutos antes de usar.
El filtro que se utiliza con este sistema
de filtración tiene una vida de servicio
limitada. Los cambios en el sabor, olor
y/o flujo del agua que se filtra indican
que debe cambiar el filtro.should be
replaced.
Consulte la Hoja de datos de rendimiento
para obtener la información sobre el
rendimiento certificado de sistemas
específicos con los cartuchos indicados.
Sistema
Números de modelo de los filtros
USS-120 Sistemas de filtración de agua potable
Filtro de nivel 1 USF-101 (se incluye con el sistema)
Filtro de nivel 2 USF-102
Reemplace los filtros cada seis meses o
menos.
Piezas de recambio
Filtro de nivel 3 USF-103
Filtro de nivel 4 USF-104
Pieza número
Descripción
WFAS-300
Tornillos de montaje (paquete de 2)
WFAF-600
Adaptador de grifo de cocina
WFAF-300
Adaptador de grifo de cocina
BRTAH-100
FCT-102
Cabezal del sistema
Grifo para agua filtrada – cromado
USS-120 installation instructions
Version V2.0A
19
Los beneficios de utilizar un grifo auxiliar con
su sistema de filtración BRITA® USS-120
Solo filtra el agua que usted desea filtrar.
Optimiza la vida del filtro ya que filtra
solo el agua para beber y cocinar.
Mejora el rendimiento del filtro
dependiendo del filtro que utilice.
Consulte la Hoja de datos de
rendimiento que se incluye para ver los
enunciados.
El sistema de filtración USS-120 es uno
MODELO n.° FCT-102 cromado.
Incluye instrucciones y
accesorios.
20
de los pocos sistemas de filtración del mercado
para colocación bajo el fregadero que brinda
a los usuarios la opción de conectar el sistema
directamente al grifo de la cocina o a un grifo
auxiliar. Ambos métodos brindan beneficios al
usuario final.
Great-tasting water that's better for you,
better for the environment1
Agua de estupendo sabor que es mejor para usted, mejor para el ambiente1
Great-tasting water >
Agua de estupendo sabor
When water tastes better,
you'll drink more of it
Si el agua tiene mejor sabor, beberá más
Reduce chlorine (taste and odor) 2 >
Disminuye el cloro (sabor y olor)2
Brita® filters reduce chlorine (taste and odor) 2 found in tap
water, leaving you with great-tasting water
Los filtros Brita® disminuyen el cloro (sabor y olor) 2 que se encuentra en el
agua del grifo, brindándole un agua de estupendo sabor
Products to fit your life >
Productos que se adaptan a su estilo de vida
A variety of Brita® products to fit you and your
family's lifestyle
Una diversidad de productos Brita® que se adaptan a usted y al
estilo de vida de su familia
Better for the environment,
and your wallet 3 >
Es mejor para el medio ambiente y su cartera 3
Visit Brita online at www.Brita.com
to learn how you can make a positive impact
on the environment
Visita Brita® línea en www.Brita.com para aprender cómo usted
puede hacer un impacto positivo en el medio ambiente
1 Better compared to tap. No bottles to throw away.
2 Substances reduced may not be in all users' water.
3 Can save money versus bottled water.
1 Mejor en comparación con el agua del grifo. Sin botellas que desechar.
2 Las sustancias que disminuye puede que no estén en el agua de
todos los usuarios.
3 Se puede ahorrar dinero en comparación con el agua embotellada.
© 2014 Protect Plus. All rights reserved. Protect Plus is a trademark of Protect Plus, LLC. The BRITA trademark and
logo are registered trademarks of Brita LP and are used under license by Protect Plus, LLC. All rights reserved.
©2014 Protect Plus. Todos los derechos reservados. La marca comercial y el logo BRITA son marcas comerciales
registradas de Brita LP y se usan bajo licencia de Protect Plus, LLC. Todos los derechos reservados.
USS-120 installation instructions
Version V2.0A
21
22