1
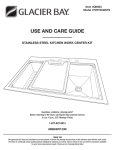
Item #QK004
Model #7OTH035STS
USE AND CARE GUIDE
STAINLESS STEEL SINGLE-BOWL SINK KIT
Questions, problems, missing parts?
Before returning to the store, call Glacier Bay Customer Service
8 a.m.–6 p.m., EST, Monday–Friday
1-877-527-0313
HOMEDEPOT.COM
THANK YOU
We appreciate the trust and confidence you have placed in Glacier Bay through the purchase of this stainless steel single-bowl sink kit.
We strive to continually create quality products designed to enhance your home. Visit us online to see our full line of products available
for your home improvement needs. Thank you for choosing Glacier Bay!
Table of Contents
Table of Contents. . . . . . . . . . . . . . . . . . . . . . . . . . . . . . . . . . . . 2
Safety Information. . . . . . . . . . . . . . . . . . . . . . . . . . . . . . . . . . . 2
Warranty. . . . . . . . . . . . . . . . . . . . . . . . . . . . . . . . . . . . . . . . . . . 3
One-Year Manufacturer Defect Warranty. . . . . . . . . . . . . . . . . 3
Warranty Claim Procedure. . . . . . . . . . . . . . . . . . . . . . . . . . . . 3
Pre-Installation. . . . . . . . . . . . . . . . . . . . . . . . . . . . . . . . . . . . . . 4
Planning Installation . . . . . . . . . . . . . . . . . . . . . . . . . . . . . . . . 4
Tools Required. . . . . . . . . . . . . . . . . . . . . . . . . . . . . . . . . . . . . 4
Parts Required. . . . . . . . . . . . . . . . . . . . . . . . . . . . . . . . . . . . . 4
Package Contents . . . . . . . . . . . . . . . . . . . . . . . . . . . . . . . . . . 5
Installation . . . . . . . . . . . . . . . . . . . . . . . . . . . . . . . . . . . . . . . . . 6
Undermount. . . . . . . . . . . . . . . . . . . . . . . . . . . . . . . . . . . . . . . 6
Topmount. . . . . . . . . . . . . . . . . . . . . . . . . . . . . . . . . . . . . . . . . 9
Accessory . . . . . . . . . . . . . . . . . . . . . . . . . . . . . . . . . . . . . . . 10
Garbage Disposer (Optional) . . . . . . . . . . . . . . . . . . . . . . . . . 12
Maintenance. . . . . . . . . . . . . . . . . . . . . . . . . . . . . . . . . . . . . . . 13
Cartridge Replacement . . . . . . . . . . . . . . . . . . . . . . . . . . . . . 13
Care and Cleaning . . . . . . . . . . . . . . . . . . . . . . . . . . . . . . . . . . 13
Service Parts. . . . . . . . . . . . . . . . . . . . . . . . . . . . . . . . . . . . . . . 14
Safety Information
1. Your installation must comply with all local plumbing building
codes. Have a qualified tradesman do or approve your plumbing
installation.
2. Please carefully read this guide before installing or using this
product. Store this guide in a safe place so you will know where
it is when you want to refer to it.
2
CAUTION: Always wear safety goggles and gloves
during installation to prevent personal injury.
Warranty
one-year manufacturer defect WARRANTY
This stainless steel single-bowl sink kit is warranted to the original purchaser to be free of defects in material and workmanship for
one (1) year from the date of purchase.
Our obligation shall be limited to the repair or replacement of a unit (at our discretion) that may prove, by our sole examination, to be
defective under normal use and service during the warranty period. We may issue credit in the amount of the invoice value of the defective
product (or a percentage of it according to use) in lieu of repair or replacement.
Any failure of this product that is not traceable to a defect in material or workmanship is not covered by this warranty. These
non-warrantable items include, but are not limited to:
□□ Change in colour or finish due to chemical usage
□□ Damage due to the use of steel wool on the stainless steel surface
□□ Improper installation not in accordance with the manufacturer’s instructions
□□ Dents, bumps, and scratches incurred during shipping, handling, or installation
□□ Damage caused by failure to follow care and cleaning guidelines
□□ Alterations made to the unit by the purchaser or installer
□□ Damage caused by accidental impact, fire, flood, freezing, or normal wear
□□ Bends and warping caused by forced connections, over-tightened fittings, and inadequate support during installation
A thorough inspection must be made before installation and any damage must be promptly reported. We will not be liable for failures or
damage that could have been discovered or avoided by proper inspection and testing prior to installation.
Incidental repairs that would involve a minimum of time and effort on behalf of the purchaser will not be considered warranty work and no
compensation will be deemed forthcoming.
This warranty is non-transferable and shall be voided if the unit is removed from its initial installation or if it is not installed following the
manufacturer’s instructions.
Under no circumstance shall we be held liable for personal injury or property damage resulting from improper installation or use of this
product. We will not be held liable for inconvenience caused by loss of use of this product, costs incurred for labour or materials, removal
and installation of replacement units, or any other incidental or consequential damages. Costs relating to obtaining access for repair or
replacement are the responsibility of the user.
This warranty does not extend to commercial and institutional installation or use.
Warranty claim procedure
If a claimable defect occurs, please contact our customer service team at 1-877-527-0313, 8 a.m. – 6 p.m., EST, Monday–Friday.
Before you make your claim call, please ensure you have:
□□ Description of the sink
□□ Proof of sale
□□ Details regarding the defect
□□ Name(s) and address(es) of the owner and installer
Claims must be filled out in writing and returned within six (6) months of the appearance of a defect. Failure to comply with this stipulation
will make this warranty null and void. We reserve the right to a thirty-day (30) delay following the receipt of a claim in which to inspect the
product. We assume no responsibility for labour costs, removing or replacing a previously installed product, transportation, or the return of
a product.
3homedepot.com
Please contact 1-877-527-0313 for further assistance.
Pre-Installation
PLANNING INSTALLATION
CAUTION: Always wear safety goggles and gloves during
installation to prevent personal injury.
NOTE: More than one person may be required to complete the
installation of this product.
Inspect your unit before proceeding. Check the surface for any flaws or damage, including dents, bends, bumps, or scuff marks. If any
damage is noticed, do not proceed with installation. Report any damage immediately.
You may choose to install this sink either undermount (from below the counter) or topmount (from above the counter). You must install this
sink only in a counter at least 36 in. (914 mm) wide with a solid surface that has a minimum thickness of at least 3/4 in. (19 mm). With
undermount installation, there should also be a 1 in. (25.4 mm) build-up around the sink. Requirements vary for installation in a granite,
marble, stone, or butcher block counter, so please contact your fabricator for specific details.
Protect the entire surface of the product during installation to prevent damage.
Tools Required
Measuring tape
Carpenter’s square
Wrenches (2)
Pencil
Saber-saw
or Jig-saw
Electric drill with
3/8 in. (10 mm)
drill bit and 1 in.
(25.4 mm) or
3 in. (76.2 mm)
hole saw
Pipe wrench
Phillips
screwdriver
Plumber’s putty
Silicone sealant
Hacksaw
Teflon tape
Safety goggles
PARTS Required
NOTE: Parts not shown to actual size.
Plastic flange (1)
Tail pipe (1)
4
Connecting nut (1)
Pre-Installation (continued)
Package Contents
A
B
J
D
C
E
K
F
G
L
H
M
I
Part
Description
N
Quantity
Part
Description
Quantity
A
Stainless steel sink
1
H
Strainer gasket
1
B
Faucet with spray head assembly
1
I
Lower strainer body
1
C
Soap dispenser assembly
1
J
Topmount clips
10
D
Flangeless strainer basket
1
K
Undermount clips
10
E
Strainer screw
1
L
Garbage disposer adaptor
1
F
Upper strainer body
1
M
Rubber ring
1
G
Strainer ring
1
N
Hex wrench
1
5homedepot.com
Please contact 1-877-527-0313 for further assistance.
Installation – Undermount
1 Creating the template
2 Cutting the counter
NOTE: Undermount sinks are mounted from below the
counter. If you are installing a topmount or “drop-in” sink,
please see “Installation – Topmount” on page 9.
NOTE: It is highly recommended that undermounting be
performed by a professional installer. Improper installation
will void the warranty.
□□ Using a carpenter’s square, draw a line (5) from front to
back on the bottom of the counter to indicate the location
of the center of the sink.
□□ Draw a line (2) parallel to the front edge of the counter
to indicate how far back the sink should be located from
the front of the counter (7). Typical setback is 3 1/2–4 in.
(89–102 mm) from the front of the counter, depending on
the cabinet structure, the counter overhang, the type of
sink bowl, and the deck size.
□□ On a piece of cardboard or paper, draw a rectangle of the
same size as the hole that you will cut out to accommodate
the sink. As this sink is 33 in. x 22 in. (838 mm x 559 mm),
we recommend that you use a template size of 30 7/8 in. x
19 7/8 in. (784 mm x 505 mm) with square corners.
CAUTION: Always wear safety goggles and gloves when
using power tools to prevent personal injury.
□□ Place the template (8) on the counter with its front (2)
parallel to the front of the counter (7). Ensure that it
is placed so that the sink will clear all objects and the
mounting hardware can be installed. Make sure there is
a minimum of 3 in. (79.2 mm) of space underneath on all
four sides for the undermount clips (K).
□□ Stick a line of tape (9) around the template, and trace the
template onto the tape with a pencil.
□□ Double check the location of the cut line before removing
the template.
□□ Use a saber-saw or jig-saw to cut along the cut line. Place
a support underneath the cut-out portion of the counter to
prevent it from falling during cutting.
NOTE: The flat mating surface of the sink that will touch
the underside of your counter is 1 1/16 in. (27 mm) on all
four sides.
5
□□ Mark the center point (6) of the sink on the template.
□□ Cut the template out of the piece of cardboard or paper.
5
4
6
3
2
19 7/8 in. (505 mm)
30 7/8 in. (784 mm)
1
3 1/2–4 in.
(89–102 mm)
7
6
6
1
2
4
8 9
3
7
Installation – Undermount (continued)
3
Drilling the holes for
the undermount clips
CAUTION: Always wear safety goggles and gloves when
using power tools to prevent personal injury.
□□ On the underside of the counter, mark the location of the
ten holes (5) for the undermount clips (K). These holes
should be equally spaced around the perimeter of the
cutout with three each on sides 2 and 4 and two each on
sides 1 and 3. They should be set back from the cutout
opening by 1 3/8 in. (35 mm).
□□ Using an electric drill with a 3/8 in. (10 mm) drill bit, drill
each hole so that it is 3/8 in. (10 mm) in diameter and
5/8 in. (15.8 mm) deep.
4
1
3
5
2
4 Testing the fit of the sink
□□ Place the sink (A) underneath the cutout in the counter to
test its fit. Ensure that the reveal is equal on all four sides
when viewed from above. Make adjustments to the cutout
if necessary.
□□ When you are satisfied with the location of the sink (A),
mark the location of the edge of the counter cutout on at
least two sides of the lip of the sink.
A
7homedepot.com
Please contact 1-877-527-0313 for further assistance.
Installation – Undermount (continued)
5 Installing the sink
NOTE: Install the strainers, faucet, and soap dispenser
before this step. See “Installation – Accessory” on page 10.
□□ Put the threaded inserts on the bolts of the undermount
clips (K) loosely in the holes that you drilled for them in
the underside of the counter. Ensure that the clamps of
the undermount clips (K) are turned so that they do not
interfere with the placement of the sink.
□□ Place a small bead of silicone sealant (not included) around
the upper lip of the sink (A).
□□ Carefully place the sink (A) into its location under the
counter, lining up the pencil marks on the lip of the sink
that you made when you tested the fit of the sink.
□□ Carefully rotate the clamps of the undermount clips (K)
over the clamp bar on the sink (A) and gently tighten the
bolts of the undermount clips (K), working from side to side
to fasten the sink (A) firmly. Recheck the alignment visually
from above.
□□ Wipe away any excess silicone and, for best results, allow
the bond to rest undisturbed for 8 hours or overnight.
□□ Install the counter as directed by the manufacturer and
install all other plumbing as required.
8
A
K
6
2
4
9
7
10
8
3
5
1
Tightening sequence for clips
Installation – Topmount
1 Creating the template
NOTE: Topmount sinks are dropped into the counter from
above. If you are installing an undermount sink, please see
“Installation – Undermount” on page 6.
□□ Place the sink (A) upside down on the counter. Center the
sink (A) on the counter so that it is parallel to the front
of the counter, ensuring that it will not interfere with the
inside structure of the cabinet or the counter. It must clear
the overhang of the counter and the front inside face of
the cabinet.
□□ Trace the outline of the sink (A) with a pencil.
2 Cutting the counter
CAUTION: Always wear safety goggles and gloves when
using power tools to prevent personal injury.
□□ Using an electric drill with a 1 in. (25.4 mm) hole saw,
carefully drill four holes (3) inside the cut line.
□□ Use a saber-saw or jig-saw to cut along the cut line (2).
Place a support underneath the cutout portion of the
counter to prevent it from falling during cutting.
□□ Insert the sink (A) into the cutout in the counter to test the
fit. Make adjustments to the cutout, if necessary.
□□ Draw a new line (2) 3/8 in. (9.5 mm) inside the first line (1).
This will be the cut line. As this sink is 33 in. x 22 in.
(838 mm x 559 mm), the cut line should be 32 1/4 in. x
21 1/4 in. (819 mm x 540 mm).
1
3 2
A
1
1
A
2
9homedepot.com
Please contact 1-877-527-0313 for further assistance.
Installation – Topmount (continued)
3 Installing the sink
NOTE: Install the strainers, faucet, and soap dispenser
before this step. See “Installation – Accessory” on page 10.
□□ Apply silicone sealant (not included) around the underside
of the lip of the sink (A) on all four sides.
A
□□ Carefully lower the sink (A) into the counter, ensuring that
the factory installed topmount clips (J) do not catch on the
counter edges.
□□ Slide each topmount clip (J) along the rails so that they are
evenly spaced around the sink (A).
6
□□ Swing the clamps on the topmount clips (J), and tighten
the screws progressively until the sink rim is flush with
the counter. Check the alignment as you tighten so that the
front of the sink (A) is parallel to the front of the counter.
Adjust and re-tighten if necessary. Do not over tighten.
J
A
Installation – Accessory
1 Installing the flangeless strainer
D
NOTE: If you are installing a garbage disposer (not supplied), do not
install the strainer. See “Installation – Garbage Disposer” on page 12.
□□ Connect the upper strainer body (F) and the strainer
ring (G), and insert them into the drain hole from the top
of the sink (A).
□□ Connect the strainer gasket (H) and lower strainer body (1),
and insert them into the drain hole from underneath the
sink (A).
A
F
G
H
I
1
□□ Connect the plastic flange (1) and tail pipe (2), and thread the
connecting nut (3) through the tail pipe and flange up to the
lower strainer body (I). Lock the connecting nut by hand.
2
10
E
□□ Insert the strainer screw (E) through the entire assembly,
from the upper strainer body (F) to the lower strainer
body (I). Tighten with a Phillips screwdriver.
NOTE: The plastic flange (1), tail pipe (2), and connecting nut (3)
are not supplied.
4
9
7
10
8
3
5
1
Tightening sequence for clips
□□ Wipe away the excess sealant with a rag.
□□ Apply a small amount of plumber’s putty (not included) in
the notch around the drain hole of the sink (A).
2
3
Installation – Accessory (continued)
2
Installing the faucet with
spray head assembly
NOTE: More than one person may be required to complete
this step.
1
□□ Thread the hose (16) through the faucet pipe (3), inserting
the end with the small fitting (15) first.
□□ Thread the hose (16) through the faucet body (5), inserting
the end with the small fitting (15) first.
3
2
□□ Screw the end of the faucet pipe (3) with the nut onto the
faucet body (5). Tighten the screw (4) with the supplied Hex
wrench (N).
□□ Hold the end of the hose (16) with the large fitting (1) with
one hand and, with the other hand, hand tighten the spray
faucet head (2) clockwise onto the large fitting (1). Push
the hose (16) in so that the sprayer faucet head (2) aligns
properly with the notches on the faucet pipe (3).
7
4
□□ Unscrew the retaining ring (13) from the bottom of the
faucet body (5), ensuring that the washer (11) and gasket
(12) are removed with the retaining ring (13).
8
9
5
□□ Install the faucet (B) through the hole in the sink (A) by
threading the hose (16) through the hole, and placing the
base of the faucet through the hole.
□□ From underneath, slide the washer (11), gasket (12), and
retaining ring (13) over the free end of the hose (16). Slide
them up to the exposed threaded section (10) of the faucet.
□□ Tighten the retaining ring (13) by hand until it is snug. Using
a wrench or pliers, tighten the assembly. Gently tighten the
two screws on the retaining ring (13). Do not over tighten.
□□ Attach the end of the hose (16) with the small fitting (15)
onto the faucet outlet (14) and hand tighten. Using one
wrench on the hexagonal nut of the faucet outlet (14) and
another on the nut of the hose (16), tighten the two ends
together. Tightening with just a single wrench may deform
the hose nut.
□□ Install the counterweight (6) on the hose (16) about 30 in.
(762 mm) from the underside of the faucet body (5). This
can be adjusted based on your own requirements, but this
is the normal location.
□□ The lever (7) and screw rod (8) have been installed before
shipment. If the handle body (9) becomes loose over time,
remove the lever (7) and tighten the screw rod (8) with the
supplied Hex wrench (N).
10
11
12
13
30 in.
(762 mm)
14
15
16
6
16
15
14
11homedepot.com
Please contact 1-877-527-0313 for further assistance.
Installation – Accessory (continued)
3
Installing the soap
dispenser assembly
□□ Insert the pump top (1) into the dispenser assembly (2).
Add one rubber gasket (3) onto the dispenser assembly (2).
Insert the dispenser assembly (2) through the pre-drilled
hole on the top surface of the sink (A).
1
A
□□ From the bottom of the sink (A), insert the other
rubber gasket (3), the bottom gasket (4), and the lock
nut (5) through the dispenser assembly (2). Hand
tighten.
3
4
5
□□ Screw the soap reservoir (6) onto the dispenser assembly
(2) to complete the installation.
□□ To fill the reservoir (6), lift the pump top (1) straight up to
remove it from the dispenser assembly (2). Carefully pour in
liquid soap. Replace the pump top (1).
2
NOTE: This unit is designed to use household liquid soap only.
Using any other soap or chemicals in this unit may damage the
dispenser and void the warranty.
6
3
A
Installation – Garbage Disposer (optional)
1 Installing the garbage disposer
L
NOTE: If you are installing a garbage disposer (not supplied),
do not install a strainer in the sink.
NOTE: The garbage disposer adaptor is designed to fit the
flange of the Insinkerator brand of garbage disposers.
□□ To install a garbage disposer, place the rubber ring (M)
around the underside lip of the adaptor (L).
□□ Insert the adaptor (L) into the drain hole of the sink (A).
□□ Install the garbage disposer to the adaptor (L) according
to the garbage disposer manufacturer’s installation
instructions.
12
A
M
Maintenance
CARTRIDGE REPLACEMENT
□□ Turn off the water supply to the faucet (B).
□□ Remove the lever (1) by hand. Loosen the screw rod (2) with
the Hex wrench (N) and pull out the handle body (3). The top
lever of the cartridge (6) will be exposed.
1
□□ Unscrew the cap (4) and rings (5), making sure not to
damage the threads of the cartridge (6).
□□ Pull the cartridge (6) out and replace it with a new 1 3/8 in.
(35 mm) ceramic cartridge.
6
5
4
3
2
7
□□ Replace the rings (5) and the cap (4). Place the handle body
(3) on the cartridge (6).
□□ Hand tighten the screw rod (2) back onto the handle body
(3), and tighten it with the Hex wrench (N). Do not over
tighten. Tighten the lever (1) back on.
□□ Slowly open the water feed to the faucet to test.
Care and Cleaning
Your sink is manufactured with the highest grade stainless steel and will provide you many years of enjoyment with the proper care.
Do
□□ After use, always rinse your sink with tap water to
dilute and remove deposits.
□□ Towel dry the sink after use whenever possible
to prevent water spots. Should water spots occur,
clean with a mild solution of vinegar and water
followed by a thorough rinse.
□□ Use liquid soap, a general household cleaner, or
a weak solution of vinegar and water for regular
cleaning.
□□ Only use plastic scouring pads recommended for
use in stainless steel sinks, and only use them in
the bowl of the sink. Scrub in the direction of the
satin finish lines.
Do Not
□□ Do not allow any food, detergent, soap or grease
to dry or sit for extended periods of time on the
surface of the sink.
□□ Never use abrasive cleaning products, as they will
dull and scratch the finish.
□□ Do not use scouring pads on the deck, as they will
dull the mirror finish.
□□ Never use steel wool pads, as they will leave iron
particles on the sink, which will cause corrosion.
□□ Never leave mild steel or cast iron pans on your
sink for extended periods of time, as this can cause
corrosion.
13homedepot.com
Please contact 1-877-527-0313 for further assistance.
Service Parts
STAINLESS STEEL SINGLE-BOWL SINK KIT
If you are missing parts or if you require replacement parts, please call our customer service team at 1-877-527-0313, 8 a.m.– 6 p.m., EST,
Monday–Friday. Identify the required part(s) and have the part number(s) ready.
D
A
B
G
K
H
L
E
I
C
F
J
Part
M
Description
Part number
Quantity
A
Faucet sprayer head
QH0058
1
B
Faucet handle
QH0059
1
C
Faucet hose
QH0060
1
D
Cartridge
QH0061
1
E
Dispenser pump top and assembly
QH0062
1
F
Soap dispenser assembly kit
QH0063
1
G
Flangeless strainer basket
QH0064
1
H
Strainer ring
QH0065
1
I
Strainer gasket
QH0066
1
J
Strainer body (includes upper and lower body)
QH0067
1
K
Topmount clips
QH0068
10
L
Undermount clips
QH0069
10
M
Garbage disposer adaptor and rubber ring
QH0070
1
14
Questions, problems, missing parts?
Before returning to the store, call Glacier Bay Customer Service
8 a.m.– 6 p.m., EST, Monday–Friday
1-877-527-0313
homedepot.C0m
Retain this manual for future use.