1
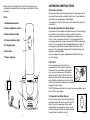
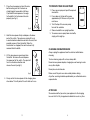
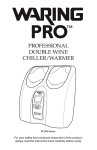
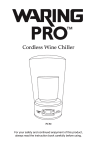
PROFESSIONAL
CORDLESS WINE OPENER
& Vacuum Pump
WO50B
For your safety and continued enjoyment of this product,
always read the instruction book carefully before using.
IMPORTANT SAFEGUARDS
When using electrical appliances, basic safety precautions should
always be followed including the following:
1. Do not operate wine opener with a damaged cord or plug, after the appliance malfunctions or if it has been dropped
or damaged in any manner. Return appliance to the
nearest Authorized Service Center or phone Waring
Customer Service at 800 492-7464 for examination, repair or
electrical or mechanical adjustment.
2. To protect against risk of electrical shock, do not put the
electric wine opener in water or other liquid. This may cause
personal injury and/or damage to the product.
3. To protect against fire, do not operate the unit in the
presence of explosive and/or flammable fumes.
4. Do not use the electric wine opener for other than
intended use.
5. This product is intended for normal domestic household use
only.
13.Use of attachments not recommended or sold by
Waring may cause fire, electrical shock, injury or
damage to the product.
14.Do not operate your appliance in an appliance garage
or under a wall cabinet. When storing in an appliance
garage, always unplug the unit from the electrical
outlet. Not doing so could create a risk of fire, especially
if the appliance touches the walls of the garage or the door
touches the unit as it closes.
CAUTION: Corkscrew is sharp. Handle carefully. Keep hands
and utensils out of the container while operating to prevent the
possibility of severe personal injury and/or damage to the
product or property.
SAVE THESE INSTRUCTIONS
for household use only
6. When using or recharging the electric wine opener keep
your workspace clean and free from potential hazards.
7. For indoor use only. Do not expose the electric wine opener
or charging unit to rain or other extreme conditions.
8. Never force the electric wine opener onto a bottle or
attempt to speed up the mechanism. The electric wine
opener will work best when it is operated at its intended
speed.
9. Do not touch or adjust the electric wine opener’s
mechanism or the corkscrew spiral. Hold the electric
wine opener by its rubberized housing only.
10. Do not attempt to open bottles if the switch is not
working correctly.
11. Do not attempt to open the electric wine opener or the
charging base. It has no serviceable parts. Charge the
electric wine opener only by using the recharging base
and power cord supplied.
12. Never remove the plug from the socket by pulling the
power cord.
1
2
Operating Instructions
Before you use this product for the first time, please take a
few moments to read these instructions. Keep them for future
reference.
Connection and Use
We recommend that you charge your electric wine opener for at
least eight hours before using for the first time. Please follow the
instructions for recharging as stated below:
This appliance is for 120 volts only and should not be used with
a converter.
Parts
1. Rubberized handset
Recharging Your Electric Wine Opener
2. Power Up/Down switch
Plug one end of the adapter cord into the base of the recharging
base and the other end into an electrical outlet. Place the
electric wine opener into the recharging base, making sure
that it is firmly in position and that it is fully engaged with the
recharging connection. A green charge light will flash indicating
that the unit is charging. It will take approximately 6-8 hours to
recharge your electric wine opener. When your electric wine
opener is fully recharged, the green light will stop flashing and
become a solid green light.
Your wine opener can open approximately 80 bottles of wine
on a full charge.
3. Power indicator light
4. Charge indicator light
2
5. Charging base
1
6. Foil cutter
7. Power adapter
Foil Cutter
4
7
3
5
For your convenience, this unit has a
removable foil cutter, which is stored in
the base of the unit. Before removing the
cork, you must remove any foil from the
bottle (see fig 1). Attach foil cutter to the
top of the wine bottle. Keep hand on lower
part of bottle and turn foil cutter in twisting
(fig 1)
motion to remove foil. Remove foil to expose
top part of cork surface.
CAUTION: Blade on foil cutter is sharp. Please keep fingers away
from cutter's sharp edges.
To Operate Your Wine Opener
6
3
Press the lower part of the switch (indicated
by a down arrow) to remove a cork from the
bottle. Press the upper part of the switch
(indicated by an up arrow) to release a cork
from the mechanism after you have removed
the cork from the bottle (see fig 2).
4
(fig 2)
1. Place the wine opener on top of the wine
bottle making sure that it remains as
straight/upright as possible at all times.
If you hold the wine opener at an angle
to the bottle it will not remove the cork
properly (see fig. 3).
(fig 3)
2. Hold the wine opener firmly and depress the lower
part of the switch. The corkscrew spiral will turn in
a counterclockwise direction and enter the cork, then
gradually remove it from the bottle. When the
mechanism has stopped, the cork has been fully
removed from the bottle.
3. Lift the wine opener up and away from
the bottle. To remove the cork, depress
the upper part of the switch. The spiral will
turn in a clockwise direction and
release the cork (see fig 4).
TO OPERATE YOUR VACUUM PUMP
1.Place vacuum pump on top of the opened
wine bottle.
2.Press down on the top of the pump
approximately 20 times or until you feel
resistance.
3.Twist the top of the vacuum pump
to mark the seal date.
4. Store wine bottle in an upright position.
5. To remove vacuum pump from wine bottle,
simply pull straight up.
cleaning and maintenance
Always unplug the appliance from the electrical outlet before
cleaning.
To clean housing, wipe with a clean, damp cloth.
Never immerse power adapter, charging base or housing in water
or any other liquids.
Never place in a dishwasher.
(fig 4)
4. Always return the wine opener to the charging base
when done. This will protect the unit while not in use.
Make sure all the parts are clean and dry before storing.
Any other servicing should be performed by an authorized service
representative.
AFTER USE
We recommend that you return your appliance to the charging
base so that it is fully charged and available for use at any time.
5
6
©2012 Waring Products
Division of Conair Corporation
150 Milford Road
East Windsor, NJ 08520
www.waringproducts.com
Printed in China
WO50B IB
12WR132195
IB-11433