Download Arrow CHD1010 Instructions / Assembly

Transcript
01H
717741112
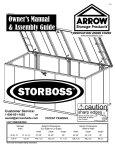
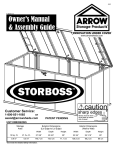
Owner’s Manual
& Assembly Guide
R
www.arrowsheds.com
COMMANDER SERIES
All Sizes
Gloves must be worn
at all times to reduce
risk of injury!
* See Inside for Detailed Safety Information.
Customer Service:
1-800-851-1085 or
[email protected]
BASE BUILDING DIMENSIONS
Approx. †
Size
10’ x 10’
3,0 m x 3,1 m
Storage
Area
101 Sq. Ft. 697 Cu. Ft.
2
9,4 m
19,7 m3
†
10x10
Base Size
122 1/4” x 127 1/2”
310,5 cm x 323,9 cm
Additional
per Module
122 1/4” x 57 1/2”
310,5 cm x 146,1 cm
For proper base construction see page 5
Size rounded off to the nearest foot
Exterior Dimensions
(Roof Edge to Roof Edge)
Width
Depth
Height
Interior Dimensions
(Wall to Wall)
Width
Depth
Height
Door
Opening
Width
Height
123 1/4”
128 3/4”
92 1/2”
118 1/4”
123 1/2”
91 1/4”
98 1/4”
72 3/4”
313,1 cm
327,0 cm
235,0 cm
300,4 cm
313,7 cm
231,8 cm
249,6 cm
184,8 cm
Each Module adds an additional 57 1/2” (146,1 cm) in length, 47.2 Sq. Ft. (4,4 m2)
additional storage area, and 324 Cu. Ft. (9,2 m3) additional storage volume.
SAFETY PRECAUTIONS...
02H
Safety precautions MUST be followed at all times throughout the construction of your building!
Care must be taken when handling various pieces
of your building since many contain sharp edges.
Please wear work gloves, eye protection and
long sleeves when assembling or performing any
maintenance on your building.
Practice caution with the tools being used in the
assembly of this building. Be especially familiar with
the operation of all power tools.
Keep children and pets away from the worksite
during construction and until the building is
completely assembled. This will help avoid
distractions and any accidents which may occur.
Do NOT attempt to assemble your building on a
windy day. The large panels can catch the wind like
a “sail”, causing them to be whipped around making
construction difficult and unsafe.
Do NOT attempt to assemble your building before
double checking that you have all the parts
indicated in the parts lists, as well as all hardware
(page 6-11). Any building left partially assembled
may be seriously damaged by even light winds.
IMPORTANT NOTE ON ANCHORING
NEVER concentrate your weight on the roof of the
building. When using a step ladder make sure that
it is fully open and on even ground before climbing
on it.
• Your building MUST be anchored to prevent wind
damage. An anchoring kit is not supplied with your
building and you have many options when it comes to
anchoring. See anchoring page for more info.
• If you need to take a break from assembly, place
sandbags or other weights on the floor frame to
temporarily anchor it.
2
ASSEMBLY TIPS & TOOLS
03A
Watch the Weather Closely:
Be sure the day you choose to install your building is dry and calm.
Do NOT attempt to assemble your building on a windy day. Be careful on wet or muddy ground.
Use Teamwork:
Whenever possible, two or more people should work together to assemble your
building. One person can hold the parts or panels in place while the other person fastens them together
and handles the tools. This makes the process of assembling your building faster and safer.
Tools and Materials:
Here is a list of some basic tools and materials you will need to assemble
your building. Decide which method of anchoring and the type of base you will use to make a complete
list of the materials you will need.
WHAT YOU NEED
RECOMMENDED TIME SAVERS
BASE PREPARATION TOOLS
•
•
•
•
•
•
•
•
Work Gloves
Safety Glasses
Step Ladder
No. 2 Phillips Screwdriver (Magnetic Tip Preferred)
Utility Knife or Scissors
Pliers
Carpenter’s Level
Tape Measure
•
•
•
•
•
Power Drill (Cordless, Variable Speed)
Nut Driver or Wrench
Square
String (for squaring the frame)
Awl (to align holes)
•
•
•
•
Lumber and/or Concrete
Hammer and Nails
Spade or Shovel
Hand Saw or Power Saw
How to Select and Prepare Your Building Site:
Before you start to assemble your
building, you will want to decide on a good location. The best location is a level area with good drainage.
• Allow enough working space so it is not difficult to move parts into position for assembly. Be sure there will be enough
space at the entrance for the doors to completely open. Also, there needs to be enough space outside the building to be
able to fasten the panel screws from the outside.
• Before assembling any parts, your base should be constructed and an anchoring system should
be ready to use.
R
3
BEFORE YOU BEGIN...
04H
Your Commander Shed has a Modular Design.
This means your Commander
Shed can be extended to virtually any
length with the addition of Extension Modules.
Extension Modules can be installed when you first
construct your building, or they can be added to it later.
How you assemble your building will depend upon how many
Extension Modules you have purchased. See below to see
how many Modules are included in your building.
How your building was shipped.
Now that you have received your building you need to take inventory of
what you have to ensure nothing is missing.
Depending on the size building you purchased, your building arrived
in two or more cartons. Locate the carton label; you should have one
carton labeled C1GA and one labeled C2GA. Also, if you purchased
a building 15’ (4,6 m) in length or longer, you should have at least one
carton labeled GA5M.
C1GA - This carton contains the painted parts needed to erect
a 10’ (3,1 m) building. You should have one C1GA
carton.
C2GA - This carton contains the un-painted parts needed to
erect a 10’ (3,1 m) building. You should have one C2GA
carton.
GA5M - This carton contains the Extension Module. Review the
chart to the right to determine how many GA5M cartons
you should have received.
Please note: Most illustrations in this assembly manual depict a 10’x10’
(3,0 m x 3,1 m) building. A 10’x10’ (3,0 m x 3,1 m) building contains a
front and rear wall section and one truss section (see page 9). Each
additional Extension Module simply adds one more truss section to the
building (see page 11). Every truss section is identical to every other
truss section and the instructions clearly indicate how to assemble any
length building. Read all instructions carefully.
4
Nominal
Size
10’x10’
10’x15’
10’x20’
10’x25’
10’x30’
Extension
Modules
0
1
2
3
4
Nominal
Extension
Size
Modules
3,0 m x 3,1 m
0
3,0 m x 4,6 m
1
3,0 m x 6,1 m
2
3,0 m x 7,5 m
3
3,0 m x 9,0 m
4
CONSTRUCTING A BASE...
05H
Before you assemble your building, you must construct a base.
The length of your base, shown as “L” in the diagrams below, will depend on the length of your building. See below.
Nominal Size
# of Modules
Length “L”
10’x10’
3,0 m x 3,1 m
0
127 1/2”
323,9 cm
10’x15’
3,0 m x 4,6 m
1
185”
469,9 cm
10’x20’
3,0 m x 6,1 m
2
242 1/2”
616,0 cm
10’x25’
3,0 m x 7,5 m
3
300”
762,0 cm
10’x30’
3,0 m x 9,0 m
4
357 1/2”
908,1 cm
OPTION 1: Concrete Slab
The slab should be at least 4” (10,2 cm) thick. It must be level
and flat to provide good support for the frame.
For each additional module beyond the
lengths listed, increase the length of
your base by 57 1/2” (146,1 cm).
IMPORTANT: When deciding on a base
for your building you must take into
consideration use and permit requirements.
A concrete base is best for most purposes,
but a wood platform may be suitable for light
use. Before beginning construction, check
local building codes regarding footings,
location and other requirements.
The following are the recommended materials for your base.
• 1 x 4’s (19 mm x 89 mm) (will be removed once the concrete cures)
• Concrete • Sheet of 6 mil plastic
• We recommend for a proper strength concrete to use a mix of:
1 part cement • 3 parts pea sized gravel • 2 1/2 parts clean sand
AR
RE
NT
Prepare the Site/Construct a Base
RO
"
F
1. Dig a square, 6” (15,2 cm) deep into the ground (remove grass).
1/4 m
2
2
2. Fill up to 4” (10,2 cm) in the square with gravel and tamp firm.
1 ,5 c
0
31
3. Cover gravel with a sheet of 6 mil plastic.
4. Construct a wood frame using four planks of 1x4 (19 mm x 89 mm)
lumber.
Note: Finished Slab dimensions, with lumber removed.
5. Pour in concrete to fill in the hole and the frame giving a
Platform/Slab will extend 2” (5 cm) beyond floor frame on
total of 4” (10,2 cm) thick concrete. Be sure surface is level.
all four sides. Seal this 2” (5 cm) of wood with a roofing
cement (not included), or bevel concrete when pouring
for good water drainage.
Allow 3 - 5 hours for construction and a week for curing time.
L
OPTION 2: Wood Platform
These are the recommended materials for your base:
• 2 x 4's (38 mm x 89 mm) Pressure Treated Lumber • 5/8" (15,5 mm) 4 x 8 (1220 mm x 2440 mm) Plywood-exterior grade
• 10 & 4 penny Galvanized Nails • Concrete Blocks (optional)
NOTE: Pressure Treated Lumber must not be used where it will make contact with your storage building. The properties of
Pressure Treated Lumber will cause accelerated corrosion. If Pressure Treated Lumber comes in contact with your storage
building your warranty will be voided.
The platform should be level and flat (free of bumps, ridges etc.)
to provide good support for the building. The necessary materials
may be obtained from your local lumber yard.
AR
16
6 c "/24"
m/6
1,0
c
40,
RE
To construct the base follow instructions and diagram.
Construct frame (using 10 penny galvanized nails)
Measure 16"/24" (40,6 cm/61,0 cm) sections to construct
inside frame (see diagram)
Secure plywood to frame (using 4 penny galvanized nails)
L
Allow 6 - 7 hours for construction.
5
m
T
ON
FR
/4"
21
12 ,5 cm
0
31
HARDWARE - C1GA
C1GA Hardware
Key Part
Part
No. No.
Description
1
2
3
4
5
6
7
8
9
10
11
12
13
14
15
16
65103
65923
65004
66611
66625
66783
65106
65943
66646
67468
66609
66778
66183L/R
66781
67545B
6228
Qty.
Hex Nut (#8-32)
Small Bolt (#8-32 x 3/8) (10 mm)
Small Screw (#8AB x 5/16) (8 mm)
Large Screw (#10AB x 1/2) (13 mm)
Long Bolt (#10-32 x 3/4) (19 mm)
Flat Head Screw (#8-32 x 1/2) (13 mm)
Square Nut (#10-32)
Large Bolt (#10-32 x 7/16) (11 mm)
Washer Sheet
Peak Cap (Arrow Logo)
Hinge
Lock Eyelet
Roof Trim Cap
Spring Latch
Weather Stripping
Track Support
06H
SB
2
1
List
292
256
354
209
2
36
20
14
12
2
6
1
4
1
1
4
Confirm that all hardware and parts are present
before attempting to assemble your building.
For missing parts contact Customer Service. Do not
return to store.
#2 Phillips
11/32 Hex.
SS
3
#2 Phillips
5
LNB
#2 Phillips
FS
6
#2 Phillips
#2 Phillips
7
LS
4
LB
8
#2 Phillips
9
10
11
12
13
14
15
16
Part Numbers
Part Number
1. Each part has an identifying part number on it.
2. Part Numbers are referenced in each step.
3. Unpainted parts have a stamped in number and painted
parts have a number that is inked on.
Remove inked on numbers with soap and water after assembly.
6
HARDWARE - C2GA / GA5M
C2GA Hardware
*Packed loose in carton
Key Part
Part
Qty.
No. No.
Description
List
1
10651
Latch Plate *
3
8
2
7003
Shear Plate LT *
8
3
7004
Shear Plate RT *
1
4
66779
Slide Bolt *
2
5
66780
Cane Bolt *
2
6
66782
Door Handle *
GA5M Hardware
Key Part
Part
No. No.
Description
2
3
7
8
9
10
11
12
7003
7004
65103
65923
65004
66611
66646
67293B
Qty.
Shear Plate LT *
Shear Plate RT *
Hex Nut (#8-32)
Small Bolt (#8-32 x 3/8) (10 mm)
Small Screw (#8AB x 5/16) (8 mm)
Large Screw (#10AB x 1/2) (13 mm)
Washer Sheet
Weather Stripping
1
2
3
4
5
6
7
8
List
4
4
92
92
180
40
7
1
11/32 Hex.
9
SS
SB
#2 Phillips
10
LS
Some Tips for Assembly:
At the top of each page you will see
one or more Part Cues like the one
to the right. These Part Cues are
designed to help you quickly identify
the parts needed for each step.
Quantity Needed
10629 4
Part No.
End View
Part Name
Small Bolt
Small Screw
Large Bolt
Large Screw
Flat Head Screw
Long Bolt
#2 Phillips
12
11
Rear Frame
Various fasteners are used throughout the
construction of your building. In each step you
will see the abbreviations listed below used
in the illustrations to help you identify which
fastener to use.
SB SS LB LS FS LNB -
#2 Phillips
The fasteners used in each step are shown actual
size at the top of each page. If you are unsure
which fastener to use, hold it up to the picture and
use the one that matches.
SB
SB
7
QTY 18
07H
7743
7822
8576
8577
8578
8579
10618
10619
10620
10621
10622
80017
80037
6635
9009
9204
10625
10627
10628
10629
10630
10631
10632
10633
10634
1
2
3
4
5
6
7
8
9
10
11
12
13
14
15
16
17
18
19
20
21
22
23
24
25
C1GA
C1GA
C1GA
C1GA
C1GA
C1GA
C1GA
C1GA
C1GA
C1GA
C1GA
C1GA
C1GA
C2GA
C2GA
C2GA
C2GA
C2GA
C2GA
C2GA
C2GA
C2GA
C2GA
C2GA
C2GA
Part
No.
Key Carton
No. No.
Roof Panel
Wall Panel
Right Gable
Left Gable
Right Roof End Panel
Left Roof End Panel
Front Wall Panel
Corner Panel
Right Roof Trim
Front and Rear Ridge Cap
Right Door Jamb
Left Roof Trim
Left Door Jamb
Roof Beam Bracket
Gable Brace
Roof Beam Brace
Side Wall Angle
Front Wall Channel
Front Wall Diagonal
Rear Frame
Rear Wall Channel
Rear Wall Diagonal
Side Frame
Front and Rear Side Wall Channel
Mid Side Wall Channel
Part
Description
8
12
2
2
2
2
2
4
2
2
1
2
1
4
2
2
4
6
4
4
2
2
4
4
2
Qty.
List
26
27
28
29
30
31
32
33
34
35
36
37
38
10638
10639
10640
10641
10642
10643
10644
10645
10646
10649
10650
10652
10673
Part
No.
Long Fascia
Short Fascia
Wall Post
Truss Post
Truss Post Insert
Upper Chord Truss
Lower Chord Truss
Truss Splice
Knee Brace
Front and Rear Roof Beam
Mid Roof Beam
Wall Post (Hinge)
Front Frame
Part
Description
QTY: 4
Length: 65 3/4” (167,0 cm)
Green Plastic Edge Trim is also included
in carton C1GA and must be used when
assembling your building.
C2GA
C2GA
C2GA
C2GA
C2GA
C2GA
C2GA
C2GA
C2GA
C2GA
C2GA
C2GA
C2GA
Key Carton
No. No.
PARTS LIST - MAIN BUILDING
8
1
1
5
4
4
4
4
2
8
8
4
2
2
Qty.
List
08H
13
7
8
28
SNAP
Bend to separate.
10627
2
18
37
19
18
19
26
18
10627
Part 10627 Front Wall
Channel (No. 18) may be
joined in pairs.
38
2
9
23
16
1
7
38
25
28
34
35
31/32 17
3
10
35
2
15
27
29
4
11
24
34
17
2
14
5
1
Part No. 30 (Truss Post Insert) fits inside Part
No. 29 (Truss Post) and is not shown below.
8
29
23
35
31
36
31/32
24
33
36
14
6
1
12
9
24
34
17
32
10
29
36
33
35
1
1
6
12
23
31
35
1
25
34
32
35
28
29
8
1
2
23
24
20
17
21
22
20
1
2
14
28
2
20
2
5
16
3
20
2
14
2
22
21
9
15
4
2
28
2
8
09H
Door Panel (Hinge)
Right Door Panel
Left Door Panel
Horizontal Door Brace
Vertical Door Brace (Latch)
Vertical Door Brace (Hinge)
Top Door Trim
Door Astragal
Door Diagonal Brace
Vertical Door Brace
Cane Bolt Bracket
2
1
1
4
2
2
2
2
8
4
2
12
13
14
15
16
17
18
19
20
21
22
23
24
25
GA5M
GA5M
GA5M
GA5M
GA5M
GA5M
GA5M
GA5M
GA5M
GA5M
GA5M
GA5M
GA5M
GA5M
10623
10624
80051
10635
10678
10637
10647
10648
10626
10636
10675
C1GA
C1GA
C1GA
C1GA
C1GA
C1GA
C1GA
C1GA
C2GA
C2GA
C2GA
7822
7743
6015
10680
10625
10632
10634
10650
10641
10642
10643
10644
10645
10646
Wall Panel
Roof Panel
Roof Trim
Mid Ridge Cap
Side Wall Angle
Side Frame
Mid Side Wall Channel
Mid Roof Beam
Truss Post
Truss Post Insert
Upper Chord Truss
Lower Chord Truss
Truss Splice
Truss Knee Brace
Part
Description
1
2
3
4
5
6
7
8
9
10
11
List
Part
No.
Key Carton
No. No.
Qty.
Part
No.
Key Carton
No. No.
Part
Description
EXTENSION MODULE
DOORS
PARTS LIST - DOORS & MODULE
10
4
4
2
1
2
2
2
4
2
2
2
2
1
4
Qty.
List
10H
6
1
7
8
3
8
10
9
11
5
2
7
4
1
Right Door
4
5
4
Left Door
9
6
4
10
10
9
11
9
9
10
9
9
9
11
12
18
12
17
16
19
14
13
20
25
23
17
18
16
19
22
12
24
13
12
22
13
23
15
25
20
Part No. 21 (Truss Post Insert) fits inside Part
No. 20 (Truss Post) and is not shown above.
19
13
Extension Module
14
11H
Step 1: Trusses
You will need for this page:
LS
SB
(QTY: 12)
(QTY: 24)
10641 2
10642 2
Truss Post
Truss Post
Insert
12H
10643 2
Upper Chord
Truss
10644 2
Lower Chord
Truss
7003
4
Left Shear
Plate
7004
Washers are to be used on painted parts only. Washers
are not necessary on unpainted parts and there are
not enough to use on every screw and bolt.
4
Right Shear
Plate
Align the bottoms of the Truss Post and Truss
Post Insert and Join as shown. Insert Large
Screws along both sides of the Truss Post
where holes align.
1
LS
10641
10642
2
Repeat instruction 1 to build a second Truss
Post Assembly. Set aside for use on next
page.
With the Upper and Lower Chord Trusses
positioned as shown below, attach Shear
Plates where indicated below. Attach Shear
Plates using Small Bolts and Nuts to Upper Chord
first, then to the Lower Chord. Do not tighten at this
time.
3
10641
10642
4
LS
Leave top holes open.
Repeat instruction 3 to build a second Chord
Truss Assembly. Set aside for use on next
page.
7004
10643
SB
SB
10644
7003
SB
LS
Build two Assemblies.
7004
SB
7003
Build two Assemblies.
Holes must align in this direction.
10643
10641
10642
CORRECT
INCORRECT
10644
Truss Post Insert fits INSIDE
Truss Post as shown.
10643
10644
12
Not this direction
Step 1: Continued
You will need for this page:
LS
10645 1
SB
(QTY: 12)
Truss Splice
(QTY: 14)
SB
Knee Brace
6
10642
Attach Knee Braces to
Truss using Large Screws
as shown. Do not tighten at
this time. With the Truss assembled,
check that the width of the Truss
is 118 1/4” (300,4 cm) across the
top and bottom of the Truss. If so,
tighten all fasteners. Repeat steps
to build additional Trusses.
Truss Post Assembly (2)
Chord Truss Assembly (2)
Attach Truss Splice to Truss using Small Bolts
and Nuts as shown below, but do not tighten at
this time. Temporarily secure the peak of the
Truss using two Small Bolts and Nuts as shown.
10644
10641
•
•
5
10643
SB
Assemblies from previous page:
Next, insert the Upper/Lower Chord Truss
Assembly into the Truss Post Assembly as
shown. Secure with Small Bolts and Nuts. Do
not tighten at this time. Repeat for other side.
SB
SB
10646 4
13H
SB
LS
7
LS
SB
SB
SB
10645
10646
LS
SB
LS
LS
LS
10646
LS
LS
118 1
/
300,4 4”
cm
Repeat for Additional Trusses
Number of Trusses Needed
The number of Trusses you will
need to construct your building
will depend on the size of your building. All
buildings require at least two Trusses. See the
chart to the right to determine the number of
Trusses needed for your building.
Nominal Size
# of Modules
# of Trusses
10’x10’
3,0 m x 3,1 m
0
2
10’x15’
3,0 m x 4,6 m
1
3
10’x20’
3,0 m x 6,1 m
2
4
10’x25’
3,0 m x 7,5m
3
5
10’x30’
3,0 m x 9,0 m
4
6
13
Step 2: Rear Wall
You will need for this page:
LS
SB
(QTY: 8)
1
(QTY: 15)
10629 4
14H
10630 2
10631 2
10640 3
Rear Wall
Channel
Rear Wall
Diagonal
Wall Post
Rear Frame
)
Lay out the parts and position them as shown. Overlap the Rear Frames by
4” (10,2 cm) and connect them to the Wall Post in the center of the Rear
Wall using Small Bolts and Nuts as shown. Do not tighten at this time.
4
Attach other two Wall Posts at the sides of the Rear Wall using
Small Bolts and Nuts as shown. Attach both Rear Wall Channels
using Small Bolts and Nuts. Slide the Rear Wall Diagonals into
the Frame and secure with Large Screws.
2
SB
OUTSIDE
10629
SB
2
0,
1
”(
cm
LS
SB
LS
SB
LS
10629
LS
SB
10631
SB
LS
10631
SB
LS
10630
SB
10630
10640
LS
LS
SB
10640
10640
SB
SB
10629
SB
SB
10629
SB
INSIDE
SB
14
Step 2: Continued
You will need for this page:
SS
7822
Wall Panel
(QTY: 30)
2
15H
10619 2
Corner Panel
10619
10619
INSIDE
SS
7822
7822
10619
SS
SS
7822
10630
SS
7822
LEAVE HOLES OPEN
ALONG SIDE OF WALL
SS
OUTSIDE
Place washers on all bolts and
screws used on painted parts. This
will help to prevent leaks and corrosion.
SS
Using Small Screws, attach a Wall Panel and Corner
Panel to each corner of the Rear Wall as shown. The
Corner Panel should only be secured to the Wall Panel
where the panels overlap. Do not secure the Corner Panel to the
Rear Wall itself, this will be done in Step 5.
3
4
Carefully set the Rear Wall Assembly aside for use in Step 5.
R
15
Step 3: Front Wall
You will need for this page:
LS
SB
(QTY: 34)
(QTY: 24)
10640 2
10652 2
10627 6
10628 4
Wall Post
Wall Post
(Hinge)
Front Wall
Channel
Front Wall
Diagonal
10673 2
Front Frame
10638 1
Left Front Wall Assembly
10640
16H
10639 1
Right Front Wall Assembly
10652
Long Fascia
10652
10627
10640
SB
SB
SB
LS
SB
LS
10628
10628
LS
10627
SB
LS
SB
Short Fascia
LS
SB
Lay out the parts and position them as
shown. Double check that holes align as
shown. If holes do not align, the Wall Post
(Hinge) is most likely upside-down.
1
2
Insert the Front Wall Channels into the Wall
Post and Wall Post (Hinge) as shown and
secure with Small Bolts and Nuts.
3
Insert Front Wall Diagonals into the Front
Wall Assembly as shown and secure with
Large Screws.
4
Assemble two Front Frames together with
the Long and Short Fascias as shown
below and secure using Large Screws.
SB
LS
10628
10628
LS
LS
10627
SB
SB
10673
SB
10673
SB
Fascia pieces should fit inside Front Frame as shown.
LS
10639
10673
10638
Door Header Assembly
16
10639
LS
Step 3: Continued
You will need for this page:
SB
SS
SB
SB
Front Wall
Panel
(QTY: 12)
(QTY: 8)
10618 2
SB
SB
SB
SB
SB
SB
10619 2
17H
Assemblies from previous page:
•
•
•
Corner Panel
Left Front Wall Assembly
Right Front Wall Assembly
Door Header Assembly
Slide the Door Header Assembly down onto
the Front Wall Assemblies as shown and
secure with Small Bolts and Nuts. Once these
pieces are joined, take care when moving them as the
Door Header may bend.
5
Using Small Screws, attach a Front Wall
Panel and Corner Panel to each corner of
the Front Wall as shown. The Corner Panel
should only be secured to the Front Wall Panel where
the panels overlap. Do not secure the Corner Panel to
the Front Wall itself, this will be done in Step 6. Also,
leave the holes closest to the door open in the Front
Wall Panel. These will be used to attach the Door
Jambs in Step 6.
6
Left Front Wall Assembly
Right Front Wall Assembly
10619
10619
LEAVE HOLE OPEN
IMPORTANT: A minimum of
two people should be used
at all times when handling or
maneuvering the Front Wall
Assembly. When installing
the Front Wall Assembly
in the building, two people
should hold the Assembly in
place until it is secure. Failure to do so could result in
bending the Front Frame
and Fascia pieces.
10618
10619
10618
LEAVE HOLE OPEN
LEAVE HOLES OPEN
ALONG SIDE OF WALL
LEAVE HOLE OPEN
17
10618
Step 4: Truss Installation
You will need for this page:
LS
SB
(QTY: 8)
(QTY: 4)
10632 4
10634 2
Assemblies from Step 1:
•
Side Wall
Channel
Side Frame
18H
10632
Truss Assemblies (2)
Overlap Length
SB
10632
8 1/4”
21,0 cm
SB SB
SB
10632
Assemble two sets of Side Frames by
overlapping them by 8 1/4” (21,0 cm) and
inserting two Small Bolts and Nuts as shown
above. These will form the left and right Floor Frames.
1
10632
Notched side of Frame must
face inside building.
32 7/8” (83,5 cm) from the edge of each Floor
Frame, erect a Truss Assembly and secure
using a Large Screw on each side. Once two
Truss Assemblies are in place, connect them with a
Mid Side Wall Channel and secure with Large Screws.
Support Trusses until Mid Side Wall Channels are in
place.
2
10632
10632
Truss Spacing
LS
LS
10634
10634
A
32 7/8”
83,5 cm
B
57 1/2”
146,1 cm
LS
LS
LS
LS
10632
B
LS
A
18
A
Step 4: Continued
You will need for this page:
SB
19H
Side of beams with small holes must face up.
10650 4
Outer
Main
Outer
Roof Beam
(QTY: 14)
End View of Double Beam
10650
Outer
10650
Main Roof Beam
Main
Outer
10650
10650
10650
Remove Bolts holding Truss peaks together (from
Step 1-6). Next, place two Middle Roof Beams
back-to-back and secure with two Small Bolts
and Nuts as shown above. This is the Main Roof Beam.
3
4
Install the Main Roof Beam and secure with two
Small Bolts and Nuts at each end. Next, install
the outer Roof Beams in the same manner.
Small holes in tops of beams.
R
19
Step 4:
20H
Continued for Extension Modules
You will need for this page:
LS
SB
(QTY: 6+)
(QTY: 18+)
10632 2+
Side Frame
10634 2+
Side Wall
Channel
10650 4+
Assemblies from Step 1:
•
Roof Beam
All remaining Truss
Assemblies
If you are erecting a 10x10 (3,0 m x 3,1 m) building, skip this page
and move on to page 21.
All Truss Sections are assembled in the
same manner as the Truss Section just
erected. Install one additional Side Frame
per side for each additional Module. Overlap Side
Frames by 8 1/4” (21,0 cm). Refer to page 13 to
see how many Trusses should be included in your
building.
5
One Side Frame per side is added for
each additional Extension Module.
10650
57 1/2” (146,1 cm) behind the previous Truss,
erect a Truss Assembly and secure using a Large
Screw on each side. Once two Truss Assemblies
are in place, connect them with a Mid Side Wall Channel
and secure with Large Screws. Support Trusses until Mid
Side Wall Channels are in place.
6
Remove Bolts holding Truss peaks together (from
Step 1-6). Next, place two Middle Roof Beams
back-to-back and secure with two Small Bolts
and Nuts as shown. This is the Main Roof Beam.
7
8
Install the Main Roof Beam and secure with two
Small Bolts and Nuts at each end. Next, install
the outer Roof Beams in the same manner.
Repeat until all Trusses have been installed.
Outer
Main
Outer
Side of beams with small holes must face up.
20
Main Roof Beam
10650
Outer
10650
Main
Outer
10650
10650
Step 5: Rear Wall Install
You will need for this page:
LS
(QTY: 2)
LS
(QTY: 4)
10633 2
21H
Assemblies from Step 2:
Side Wall
Channel
•
Rear Wall Assembly
10633
10633
10’x10’ (3,0 m x 3,1 m)
building shown.
Carefully position the Rear Wall Assembly
in place at the rear of the building and secure
to Side Frame with one Large Screw per
side as shown.
1
Slide one end of the Front and Rear Side
Wall Channel behind the Corner Panel
and secure with a Large Screw. Secure the
other end with a Large Screw when done. Repeat
for the other Front and Rear Side Wall Channel.
2
10633
R
21
Step 6: Front Wall Install
You will need for this page:
LS
LS
(QTY: 2)
(QTY: 4)
10633 2
10622 1
80037 1
Side Wall
Channel
Right Door
Jamb
Left Door
Jamb
Assemblies from Step 3:
•
Front Wall Assembly
SS
(QTY: 6)
LS
LS
10633
10633
LS
LS
LS
LS
LS
Just as in the rear, carefully position
the Front Wall Assembly as shown
and secure with a Large Screw on
both sides. Install Front and Rear Side Wall
Channels using Large Screws.
1
10’x10’ (3,0 m x 3,1 m)
building shown.
IMPORTANT: When installing the Front Wall Assembly
in the building, two people
should position and hold
the Assembly in place until it is secure. Failure to do
so could result in bending
the Front Frame and Fascia
pieces.
Position the Door Jambs as shown
and secure to the Front Wall Panel
using Small Screws. Double check
that the holes in the Door Jamb line up with
the holes in the Wall Post (Hinge). If they
do not, the Left and Right Door Jambs are
most likely switched.
2
80037
22
10622
22H
Step 7: Wall Angles
You will need for this page:
LS
SB
(QTY: 4+)
(QTY: 4+)
10625 4+
LS
(QTY: 4)
23H
10625
LS
Side Angle
Starting at the middle of the building, install all
Side Wall Angles along the side of the building.
Secure overlaps with Small Bolts and Nuts first,
then insert Large Screws where the Wall Angles meet
the building frame.
1
SB
LS
SB
LS
10’x10’ (3,0 m x 3,1 m)
building shown.
All angles overlap by 8 1/4”
(21,0 cm)
10625
LS
Overlap Length
Once the first Side Wall Angles are in place, continue
until all Side Wall Angles are installed along the entire
length of the building. At the front and rear of the building,
secure Wall Angles with Large Screws as shown. All Side Wall
Angles overlap by 8 1/4” (21,0 cm).
2
8 1/4”
21,0 cm
10625
10625
R
23
Step 8: Wall Panels
24H
IMPORTANT:
At this time, take a moment to ensure the building is level and square. Measure
diagonally across the building from opposite corners; when these measurements
match, the building is square. For the remainder of assembly it will be important
that the building is both level and square.
EQUAL MEASUREMENTS
Crimped Rib
Uncrimped Rib
FASTEN TO TOP FRAMES
Whenever a crimped rib and an uncrimped rib
meet, the crimped rib should be placed UNDER
the uncrimped rib if possible. See next page.
7822
FASTEN TO WALL CHANNELS
Use the diagram to the right when attaching Wall Panels.
• Secure the top row to Top Frames
• Secure the middle row to Wall Channels
• Secure the lower row to Floor Frames
• Secure the circled holes to the Panel next to it
Corner Panel
FASTEN TO FLOOR FRAMES
Corner Panels lay under Front and Side Panels.
24
Step 8: Continued
You will need for this page:
SS
(QTY: 150+)
25H
7822 10+
SB
(QTY: 9+)
Wall Panel
10’x10’ (3,0 m x 3,1 m)
building shown.
Working one side at a time, lift the Panels into
place and secure top and bottom of Panels
with Small Screws. Be sure to overlap ribs as
shown on the previous page.
1
Place a Small Bolt and Nut through the center
hole of the Panel everywhere Panels overlap,
as shown below. Note: When attaching to
corner panels, use screws.
2
Continue until ALL Wall
Panels have been installed.
Place small bolt thru center hole where Panels overlap.
R
25
Step 9: Gables
You will need for this page:
SB
(QTY: 8)
8577 2
Left Gable
8576 2
Right Gable
26H
6635
4
Bracket
69835 4
Edge Trim
GABLES ARE STACKED TOGETHER
DURING SHIPPING AND MAY BE MISTAKEN FOR ONE GABLE! SEPARATE
GABLES BEFORE CONTINUING.
Edge Trim (Plastic)
69835
Edge Trim MUST cover Gable edge.
Install Edge Trim to cover Gable Edge
BEFORE doing ANY work with Gables.
Failure to do so could result in injury.
8576
8577
6635
1
Install Roof Beam Brackets on all Gables using
two Small Bolts and Nuts per Bracket. Leg of
Bracket must face center of Gable as shown.
Leg of Roof Beam Bracket must face center of Gable as shown.
26
Step 9: Continued
You will need for this page:
SS
(QTY: 16)
9009
SB
(QTY: 2)
1
27H
6228 2
Gable Brace
Track Sup.
Gable must fit UNDER Side Wall Angle at corner.
8576
8577
Working with one Gable at a time,
attach the Gables to the top Rear
Frame with Small Screws. The
Gable should be attached using the row of
holes closest to the outside of the building. Do
not insert screws into the two holes closest to
where the Gables join. These will be used to
attach the Track Support later.
2
10’x10’ (3,0 m x 3,1 m)
building shown.
To secure Gables together, position
the Gable Brace as shown below and
insert a single Small Bolt and Nut
through the second hole from the bottom only.
3
Leave two holes open on each side of the Gable peak to attach Track Support.
Attach Gable to holes closest
to the Outside of the building.
9009
Gable
Outside
Inside
10629
Rear Wall
Attach Brace with bolt thru
second hole from bottom only.
SB
SB
6228
Install Track Support.
4
Position Track Supports as shown.
Secure Track Supports to Gable
using one Small Bolt and Nut.
Secure to Rear Frame using two Small
Screws.
R
27
Step 9: Continued
You will need for this page:
SB
(QTY: 13)
Leave Hole Open
10649
10649 4
28H
10649
10649
Roof Beam
10649
10’x10’ (3,0 m x 3,1 m)
building shown.
10649
5
6
Top View of Gables
Seal the gap between the Gables using the
weather stripping tape as shown.
Secure two Front and Rear Roof Beams
together with a single bolt to form the Main Roof
Beam as shown above. The end of the Main
Roof Beam with the open hole should face the Gable.
Tape should wrap around
gap between Gables.
Weather Stripping Tape
Position the Front and Rear Roof Beams as
shown below and attach to Gable and Truss
using two Small Bolts and Nuts per side. Install
the Main Beam first.
Tape BOTH Gable joints before installing Roof Beams.
7
CUT
Beam End Views
Side of Beams with small holes must face up.
28
Step 9: Continued
You will need for this page:
9204
29H
1
SB
9204
Beam Brace
(QTY: 2)
10’x10’ (3,0 m x 3,1 m)
building shown.
8
Attach the Roof Beam Brace to the
Track Support with one Small Bolt
and Nut as shown.
Tab end attaches to Roof Beam.
Rotate to align with Roof Beam and
secure to Roof Beam with one Small
Bolt and Nut as shown. Repeat
Steps 9-2 thru 9-9 to install Gables at the
front of the building. T