Transcript
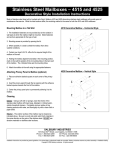
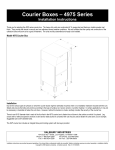
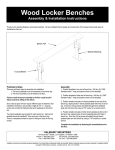
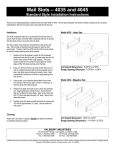
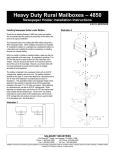
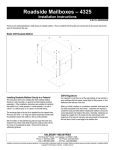
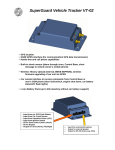
19900 Free-Standing Enclosures
For 19000 Series Recessed Mounted Cell Phone Lockers
Installation Instructions
Installation of the free-standing enclosure requires first installing the enclosure to its mounting surface, then installing the enclosure front panel to the
enclosure and lastly installing the recessed cell phone locker into the enclosure.
Installing Free-Standing Enclosure to Floor
Installing Enclosure Front Panel
Place the enclosure onto the selected location. Mark the fastener
locations on the mounting surface by transferring the four (4) large
holes locations in the bottom side flanges to the mounting surface.
Remove the enclosure and make the holes for the installation
fasteners. Install the fasteners (not provided). Return the enclosure
to the selected location. Complete the installation of the fasteners.
The use of leveling nuts on stud anchors is suggested.
Install the front panel to the enclosure using #10 x 1/2 in. long screws
(provided). Attach it to the enclosure along the two sides and the
bottom. Hand tighten the screws.
Installing Recessed Cell Phone Locker
Install the locker unit into the enclosure by sliding it into the enclosure
until its front peripheral flange is flush against the front of the
enclosure. Open the four corner compartments of the cell phone
locker. Install #8 x 1-1/4 in. long screws (provided) through the top
and bottom of the locker unit into the enclosure. Close the
compartment doors.
SALSBURY INDUSTRIES
nd
1010 East 62 Street, Los Angeles, CA 90001-1598
Phone: 1-800-624-5269
Int’l Phone: 323-846-6700
Fax: 1-800-624-5299
Int’l Fax: 323-846-6800
Installation instructions are provided as general guidelines. It is advised that a professional installer be consulted. Salsbury Industries assumes no product assembly or installation liability.
Copyright © 2013 Salsbury Industries. All rights reserved. (Rev. 01, 4/17/2013) Page 1 of 1