1
Best Barns USA
Assembly Book
Revised August 10, 2015
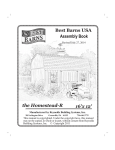
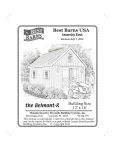
the Meadowbrook-R
12' x 10'
Manufactured by Reynolds Building Systems, Inc.
205 Arlington Drive
Greenville, PA 16125
724-646-3775
This manual is copyrighted. Under the copyright laws, this manual
may not be copied, in whole or in part, without consent from Reynolds
Building Systems, Inc. © Copyright 2011
IMPORTANT INFORMATION ABOUT YOUR SHED KIT
This manual will show the assembly for the 12' x 10' Meadowbrook building kit. If you
received duplicate books, use the one with the latest revision date.
The foundation size should measure 10'-0" deep by 11'-9" long. Do Not make the foundation
larger than the building size. The siding should project beyond the foundation for water to
expel properly from the sidewalls.
Read the instructions before starting the assembly of the building. If you have any questions
about assembling the kit, call 800-245-1577. Business hours (8:00-5:00 ET) Monday thru
Friday. After business hours call 724-866-HELP (4357) or email to [email protected].
The material that is included in our kit is listed on the back page. The optional floor package,
if purchased, will be supplied by a local lumber supplier.
Our kit does not include the shingles, the quantity needed is listed under Step 14. The siding
is primed. You will need to apply a finish coat using latex acrylic paint.
Some of the framing lumber was used in the shipping pallet. Unpack the material from the
pallets, then unscrew the OSB sheathing, it will be used for the loft flooring. Unscrew the
2x4s from the shipping pallet. This material will be used for wall bracing and wall plates.
The bit for the screws is packed in the hardware bag.
Stacking the boards, according to size, will make them easier to find when needed. Some
boards have colored ends. All the 72" long 2x4s have black ends, stack these boards together.
Before you begin construction, be sure to study this assembly manual. Also, obtain a building
permit and check all pertinent building code regulations.
Thank you for your purchase.
Bill & Linda Rinella, owners
The siding is made in 4x8 sheets with grooves
cut into the face, the long edge is beveled so
that the siding overlays where they butt.
LAP Edge
To identify which edge we want you to use, we
will refer to the edge as either the 'LAP' Edge
or the Tongue Edge. Nail siding with 8d galv.
nails, spaced 12" apart.
Tool List
Hammer & Phillips Screwdriver
Framing Square & Level
Hand or Circular Saw
Tongue Edge
Power Drill/Screwdriver
Measuring Tape
2 - 8' Step Ladders
Always wear safety glasses when cutting or nailing!
Constructing Details for Deluxe Floor System
Deluxe floors include 4x4 runners, standard floors do not
Foundation size is 10'-0" x 11'-9". Check local building codes in your area, the construction may
have to change. For a concrete slab, install sill sealer as a moisture barrier between the concrete and
the wall plates. Foam sill sealer can be purchased at home centers in rolls 3-1/2" or wider.
1. Cut joist headers to floor length. See Below.
Layout for 16" on center joist spacing. 'X' marks where floor joist will be placed.
Joist Header
X
X
15-1/4"
X
X
16"
X
X
X
X
16"
2. Cut 2x4-10' floor joist to 9'-9". Treated lumber may be thicker than 1-1/2". Take this into
account when cutting the length of floor joists. Shorten joist measurements if necessary to
obtain 10'-0" building width.
h
Widt
lding
" Bui
0
10' -
FRO
NT
Buil
ding
Len
gth
11' -
9"
WA
LL
4x4 Treated Runners
2x4 Joist Header
Joist 9' - 9" Long
Nail the 2x4s to the 4x4
runners to keep the 2x4
frame from moving.
It is important that the floor be
level and square. Before nailing
the flooring, measure the floor
diagonally (corner to corner).
Then measure the opposite
corners. These measurements will
be the same if the floor is square.
Material Description
2x4 Joist Headers
2x4 Floor Joist
4x4 Treated Runners
Flooring 5/8" or 3/4"
Screw Floor Nails
Galv. Box Nails
10' x 12' shed
2 pcs. 12'
10 pcs. 10'
3 pcs. 12'
4 pcs. 4x8
1 lb.
8d
1 lb.
16d
10' x 16' shed
2 pcs. 16'
13 pcs. 10'
6 pcs. 8'
5 pcs. 4x8
2 lb.
8d
1 lb.
16d
Step 1
Assemble Trusses
1. Position (2) two half trusses between a 116-1/4" long 2x4 bottom cord.
2. Hold truss parts in place by temporarily screwing 2x4 blocks to the floor. There are short 2x4
blocks supplied in the kit for this purpose. Use the 2-1/2" wood screws.
3. Secure the tops together with a 22-3/4" long ridge block and wood gusset. Apply wood glue
between the 2x4 boards and the gusset. Nail the gusset with (16) sixteen 6d common nails.
4. Secure the truss bottom legs to the bottom cord with wood gussets. Note: You may have to
spread the truss bottom to fit the bottom 2x4. Use 12 nails per gusset.
5. Assemble (3) three more trusses.
6. Turn trusses over and apply wood gussets to the opposite side.
Top Gusset
2x4 Block
2x4 Truss Half
2x4 Ridge Block
2x4 Block
2x4-116-1/4" Bottom Cord
Lower Gusset
Wood Gusset with 2x4 Block
7. Assemble the last truss without the bottom cord.
Locate wood gussets with a 2x4 block attached
to one side.
8. Attach this block/gusset to the bottom of each
truss leg. Secure to leg with 6d galv. nails and
wood glue.
9. Turn truss over and apply gussets.
Do Not remove blocks from floor until Step 2 is completed.
Step 2
Assemble Roof Gable Without Loft Doors
1. Position (2) two half trusses between a 116-1/4" long 2x4 bottom cord.
2. Secure 2x4 gable studs to the truss with (10) ten 1"x4" metal plates.
3. Install wood gusset to bottom of truss and the ridge.
34-1/4" Long Gable Stud
21-1/2" Long Gable Stud
35-3/4" Long Center Stud
4. Screw (3) three 16" long 2x4 blocks
across the bottom of the 2x4 bottom
cord. Use 2-1/2" screws.
5. Turn the gable over. Cut a 4x8 siding panel in half creating (2) twO 4'x4' siding panels.
6. Install the siding extending 3/4" below the bottom 2x4. Cut the top flush with the top frame.
Use 6d galv. nails. Space 12" apart.
7. Install pre-cut siding, from our kit, on the ends.
Tip; To prevent gable studs from
being knocked loose when nailing
siding, lay 2x4 OSB sheathing,
supplied in kit, under the studs.
LAP
Cut Siding Flush With Frame
Supplied in Kit
Siding Extends
3/4" Below Plate
Step 3
Install Rear Gable Overhang & Trim
1. Apply 47" long 2x3 boards to the gable. These boards have a blue marking on one end. Install
this end at the peak. Install boards flush with the top of the gable frame. Use 10d sinkers.
2. Install a 42-1/4" long 2x3 at the sides of the gable, flush with the frame.
Install Ends With Blue
Mark At Ridge
2x3-47" Board
3. Apply 1x4 white pine trim to gable. Install a 47" long 1x4 at the top of the gable. These
boards have a blue marking on one end. Install this end at the top. Install trim flush with
the top of the gable frame. Use 8d galv. nails.
4. Install a 42-1/4" long 1x4 at the sides of the gable, flush with the frame.
1x4Trim
Step 4
Assemble Roof Gable With Loft Doors
1. Assemble another gable frame. Create an opening
for the loft doors by installing a 36" long 2x4 between
the gable studs. The opening height should 24-3/4"
from the bottom 2x4 truss member.
36" Long 2x4
24
-3
/4
"
34-1/4" Long
Gable Stud
2. Turn gable over.
3. Cut a 4x8 siding panel in half for the center siding. Cut top flush with the gable frame.
If you don't need loft access from the outside, attach loft door frames to
the gable to create a decorative look and weather tight storage area.
4. Cut siding from the loft door opening, flush with the edge of the opening.
5. Nail siding on the gable.
Use 6d galv. nails.
Supplied in Kit
6. Assemble the loft doors. The loft door frames are
temporarily held together with corrugated fasteners,
this is the back side of the door frame. Place the
doors on level surface, face side down. Cut the siding
from above step to the size of the door frame. Secure
the siding panel to the frame with 1" screws provided.
Step 5
Install Gable Trim & Loft Doors
1. Apply 47" long 2x3 boards to the gable. These boards have a blue marking on one end.
Install this end at the peak. Install boards flush with the top of the gable frame.
2. Install a 42-1/4" long 2x3 at the sides of the gable, flush with the frame.
3. Install 29-1/4" long 1x3 trim boards on each side of the loft door opening.
Install a 43" long trim board across the top.
4. Install loft doors using 4" hinges and 1-1/4" long hinge screws. The screws
have a square head. The bit is packed with the screws. Install barrel bolts to
the inside top of the doors to prevent doors from opening.
2x3-47" Board
5. Apply 1x4 white pine trim to gable. Install a 47" long 1x4 at the top of the gable. These
boards have a blue marking on one end. Install this end at the top. Install trim flush with
the top of the gable frame. Use 8d galv. nails.
6. Install a 42-1/4" long 1x4 at the sides of the gable, flush with the frame.
Step 6
Assemble Back Wall
1. Position 68-1/2" and 65-1/2" long 2x4 boards together and indicate where the wall studs
will be located. Mark the ends that will butt together with the letters 'A' and 'B'.
X
X
19-3/4"
X
X
65-1/2" Wall Plate
68-1/2" Wall Plate
24"
X
X
A B
A B
23-1/4"
X
X
24"
X
X
X
X
2. Install 72" long wall studs, between the wall plates, over the 'X' marks and where the plates
meet. Use (2) two 10d sinkers at each end of stud. Nail wall frames together using 10d sinkers.
3. For a 12' long building, cut a 70-1/2" long 2x6 board in half so the center 2x6 tie plate will
span where the sidewalls meet..
4. Install (2) two 35-1/4" and a 70-1/2" long 2x6 boards as tie plates over the top plate. The 2x6s
will extend 3-1/2" beyond the end of the wall frame.
70-1/2" Long 2x6 Tie Plate
35-1/4" Long
2x6 Tie Plate
153-1/2"
3-1/2"
AB
5. Square wall frame.
6. Cut (2) two 77-1/4" siding panels to a length of 75-3/4". Install the first siding panel with the
'LAP' edge extending 3-1/2" beyond the wall frame. Use the 8d galv. nails spaced 12" on center.
7. Install a full width siding panel in the center.
45" Siding Panel
8. Cut and install 45" wide siding panel. Siding
will extend 3-1/2" past wall frame.
LAP
Siding Extends Below Plate
Siding Extends 3-1/2" Past Wall
Step 7
Assemble Front Wall Panel
Assemble door header jacks and door spacer to aid in the door wall assembly.
69-1/2" long 2x4
1. Cut (2) two 2x4-6' to a length of 69-1/2".
2. Assemble a door header jack by nailing
a 69-1/2" long 2x4 to a 72" long 2x4.
ends
Use 10d sinkers.
flush
72" long 2x4
3. Assemble another door jack.
4. Butt a 68-1/2" long 2x4 and a 65-1/2" long 2x4 together as shown below. Important; to keep
the 2x4 aligned straight, place the 2x4 against a straight object. The top of the back wall, from
Step 6, would be ideal.
5. Locate a 2x4 that was removed from the shipping pallet. Cut this 2x4 to a length of 64-1/2".
34-3/4"
Back Wall Panel
65-1/2" long 2x4
64-1/2" long 2x4
(door spacer)
68-1/2" long 2x4
6. Install the 64-1/2" long 2x4, centered over the bottom 2x4s. The bottom 2x4s will extend
34-3/4" beyond the top 2x4 door spacer on both ends.
7. Gather 2x4s and components shown below and
assemble the door wall. Use 10d sinkers.
65-1/2" long 2x4
68-1/2" long 2x4
8. Install (4) four wall
studs between the top
and bottom wall plates.
Pre-built Door Header
Door Jack
Door Jack
64-1/2" long 2x4
(door spacer)
18-1/4"
18-1/4"
Step 7
Assemble Front Wall Panel Continued
9. For a 12' long building, cut a 70-1/2" long 2x6 board in half. Install one of the 2x6 boards
so the left end is extending 3-1/2" beyond the wall frarme.
10. Install a 70-1/2" long and the cut off from above.
The end 2x6 will extend 3-1/2" beyond the wall
frame.
35-1/4" Long
2x6 Tie Plate
11. Cut (2) two 32-1/4" x 6" siding panels to a height of 4-1/2".
12. Locate a 16" wide siding panel that has a 'LAP' edge. Cut the siding to 75-3/4" length. Position
the 'cut' edge flush with the left side of the door opening. Do not nail the LAP edge until the
'left' siding panel is applied.
13. Cut a full width siding panel width to 22-1/2", measuring from the 'Tongue' edge. Install the
panel with the 'cut' edge extending 3-1/2" beyond the left end of the wall frame.
14. Cut another 16" wide panel to a length of 75-3/4" and install with the 'cut' edge flush with
the right side of the door opening.
15. Install the 4-1/2" siding panels over the door opening.
16. Cut the cutoff siding panel, from step number 13,
to extend 3-1/2" beyond the wall frame.
LAP Edge
LAP Edge
s
are Edge
Butt Squ ther
Toge
Tongue Edge
ds
Exten
Siding Header
Below
ge
Cut Ed
Cut Edge
16" Panel with LAP Edge
Assemble End Walls
X
X
1. Position (2) two 2x4-10' boards
together and indicate with 'X' marks,
where the wall studs will be located.
11-1/4"
10' - 0" Wall Plate
X
X
Step 8
X
X
24"
24"
X
X
2. Install 72" wall studs between the top and bottom plates.
3. Install (2) two 56-1/2" long 2x4s as tie plates over the top plate. The 2x4s will be 3-1/2"
short of the end of the wall frame.
56-1/2" Tie Plate
3-1/2"
56-1/2" Tie Plate
14
1-1
/2
"
2"
-1/
1
14
Top Plate
Wall Stud
4. Square wall frame. Measure
diagonally (corner to corner).
5. Locate a 36-3/4" x 77-1/4" siding panel with the 'Tongue' edge. Install the siding panel on
the left corner, with the 'cut' edge flush with the end of the wall and flush with the top of
the 2x4 tie plate. The siding should extend below the bottom plate.
6. Install a 48-3/4" x 77-1/4" siding panel in the center of the wall frame.
7. Install a 36" x 77-1-4" panel
witht he 'LAP' edge last.
LAP
Tongue Edge
36-3/4" Panel
Cut Edge
Siding Extends 3/4" Below Plate
Step 8
Assemble End Walls Continued
8. Repeat step numbers 1 thru 3 on previous page
to assemble anotehr end wall frame
9. Install siding panels as shown below.
12" Panel with
Tongue Edge
Step 9
Set Lower Walls
1. Secure wall panels together at the corners. Use (4) four 10d coated nails per corner. Nail
wall panels to the floor. Nail through the bottom plate. Space 10d sinkers 24" apart.
2. Install (2) two 1x4-72" boards along each side of the door opening, flush with the bottom
edge of the siding. Tack these boards with a couple nails; you may want to move the trim
later when you install the doors. Use 8d galv. nails.
3. Install a 1x3-72" board across
the top of the side trim.
Install 2x4-6' to hold
wall straight.
1x4-72" Trim
1x3-72" Trim
4. Cut 2x4 bottom plate
from door opening.
Step 10
Install Trim
1. Install (2) two 1x3-62" long trim boards flush with the top of the front wall. Use 8d galv. nails.
2. Install 1x4-75 3/4" trim boards at the corners of the front and back. Install the trim flush with
siding on the end wall.
3. Install 1x4x74-3/4" trim boards at the corners of the front wall.
2x6 Tie Plates
6
rim
2" T
1x3-
ds
Boar
DOOR WALL
1x4-75 3/4" Trim Board
1x4-74 3/4" Trim Board
Step 11
Set Left Gable
1. Install the gable on the left end wall. The gable siding will extend over the 1x3 trim on
the lower wall. NOT behind the trim! Secure gable to wall by nailing through the gable
blocks with 10d sinkers. Nail siding along the 1x3 trim board with 6d galv. nails.
Gable Siding
1x3 T
rim
Step 12
Set Trusses
Front Wall
1. Layout the truss spacing on the front wall. Start at the left corner of the building. Measure from
the inside face of the wood gusset when marking the location of the first truss. See next page.
2. Locate the truss hangers, there are left and right hangers. Select the right hangers.
3. Using 1-1/2" hanger nails, install the right hangers to the 2x6 tie plate.
The top hanger flange should line up with the 'X' mark.
Important: When marking the back wall, use the left hangers and
place the 'X' mark on the same side of the line so your trusses are
parallel when they are installed.
2x6 Tie Plate
Long Side Nailed
to Wall Plates
Inside of Building
Step 12
Set Trusses Continued
4. Install the trusses over the 'X' marks. Install hanger to the opposite side of the trusses.
Secure truss to metal hangers using 1-1/2" hanger nails.
Wood Gusset
Left Gable
20-3/8"
24"
Front Wall
Note: The center truss will
not have a bottom cord.
Step 13
Install Trusses & Loft Floor
1. Install front gable.
2. Install OSB loft flooring over the rear and front trusses. Notch the flooring around the
gable studs on the rear and front gables. Secure floor with 7d sinkers. Note: Some OSB
panels may be attached to the shipping pallet.
2' x 4' OSB
4' x 4' OSB
2' x 4' OSB
Note: The rear loft floor
may extend past the
bottom truss cord.
Step 14
Install Roof Sheathing
Install roof sheathing on the steep side of the roof. Use a straight edge to align the top of the
sheathing with the top of the truss. See Detail 'B'. Make sure the trusses are plumb and the roof
sheathing meets the center of the truss. Use 7d sinkers spaced 12" apart.
Install first sheet flush with back gable trim. Work back to front. The top roof sheathing will not
extend to the ridge. This will allow an opening for air ventilation when you install a ridge vent.
Cut 80" long roof sheathing flush
with face of the gable trim
46" x 72"
Install
42" x 72"
46" x 80"
This R
ow Firs
t
42" x 80"
Remove From
Shipping Pallet
ge
t Ed
igh
Stra
ss
Tru
Detail 'B'
Install Shingles - not included in kit
1. Install felt paper and metal roof edge the permitter of the building.
2. Install shingles according to the instructions on the wrapper. If you need more detailed
instructions on installing shingles, there are good publications at book stores or newsstands.
Building Tip: Install ridge vent in lieu of shingles caps. Ridge
vent provides ideal ventilation, preventing heat or moisture from
damaging your building or its contents.
Roof Shingles
Building Length
10'x12' 10'x16'
7 bdl.
10 bdl.
Roof 'drip' Edge
6 pcs.
Material Description
7 pcs.
Shingles
s
Trus Air
Space
Ridge vent provides
ideal ventilation.
Step 15
Install Doors & Hardware
1. Lay the left door with the trim facing up. The
siding on the left door extends past the door trim.
See detail below.
2. Install 5" hinges to the left side of the door frame.
To position the hinge properly, hold the rectangular
plate against the frame. Use 1-3/4" black screws.
3. Install hinges to the right side of the other door.
4. Before you fasten the hinges to the door
trim, temporarily prop the doors in the
opening. Leave a space at the top of the
doors and between the doors and the
side trim to allow room for the doors to
expand when they absorb moisture.
Left Door
If your door opening is out of square,
the space around the doors will not be
even. You can remove and reposition
the side trim to make allowances for
this. The side trim does not have to be
flush with the frame of the door opening.
You can move the trim in or out to make
the door spacing equal.
5. Install hinges to trim with 2" screws.
Install Door Latch
Siding Extends Past Trim
Barrel Bolt on the
back of left door
6. Install a barrel bolt on the lower back of
the door to secure this door in place when
closed. You will need to drill a hole for
the round shaft to drop into.
7. Install another barrel bolt at the top of the
door.
OSB Shim
Meadowbrook and Woodville 10'x 12' Barn kit
Qty.
2x4 & 2x6 Framing
Qty.
Size
4
Wall Plates
120
"
8
Truss - Bottom Cords
116 1/4"
8
2x4 Boards Attached to Pallet
Description
Size
Whie Pine Trim
4
1x4 Gable Trim
47
1/2"
80
"
4
1x4 Gable Trim
43
"
31 Wall Studs black ends
72
"
4
1x4 Corner Trim
75
3/4"
4
Wall Plates
68 1/2"
4
1x4 Corner Trim
74
3/4"
4
Wall Plates
65 1/2"
2
1x4 Door Trim
72
"
4
Wall Plates
56 1/2"
1
1x3 Top Door Trim
72
"
1
Gable Studs & Framing
36
4
1x3 Lower Wall Trim
62
"
1
Gable Studs & Framing
35 3/4"
2
1x3 Loft Door Trim
29
1/4"
4
4
Gable Studs & Framing
Gable Studs & Framing
34 1/4"
21 1/2"
1
1x3 Loft Door Trim
43
"
9
Truss Ridge Blocks
22 3/4"
3
Exterior Siding & Soffit
48" x 77-1/4"
2
12" x 77-1/4"
6
Gable Nailing Blocks
15 3/4"
2
36" x 77-1/4"
4
48" x 75-3/4"
4
2x6 Tie Plates for Sidewalls
70 1/2"
2
16" x 77-1/4"
2
"
2x3 Framing
"
4
Siding for Roof Gables
6" x 32-1/4"
48" x 48"
4
Siding for Roof Gables
16" x 30"
6" x 32-3/4"
4
Gable Overhangs
47
4
Gable Overhangs
42 1/4"
2
Siding For Door Header
2
Gable Blocks
6 1/4"
4
8" x 48" Front Soffit Panels (Woodville model)
Pre-built Components
Hardware
14
Pre-built Truss Halves
3
lb. 10d Sinkers
20
Truss Hangers
2
32" x 72" Pre-built Barn Doors
3
lb. 8d Galv.
75
Hinge Screws
2
18" x 29" Loft Door Frames
2
lb. 7d Sinkers
1
Door Hasp
1
2x3 Door Header
3
1
lb. 6d Common
lb. 6d Galv.
2
2
4" Barrel Bolts
6" Barrel Bolts
42" x 72"
3
lb. Hanger Nails
12
2-1/2" Screws
2
67-1/2"
Loft Floor & Roof Sheathing
2
42" x 80"
2
46" x 80"
2
46" x 72"
4
4" Door Hinges
36
1" Screws
2
48" x 48"
4
24" x 48"
6
5" Door Hinges
24
1-5/8" Screws
22 1x4 Drive-on Plate
Miscellaneous Lumber
12 Wood Truss Ridge Gussets
8" x 24"
20 Wood Bottom Truss Gussets
12" x 12"
Roof Material
by Owner
2
Miscellaneous
Center Truss Blocks w/gusset
Roof Shingles
7 bdl.
Roof 'drip' Edge
6 pcs.
3-1/2"x7-1/2"