1
Best Barns USA
Assembly Book
Revised July 21, 2014
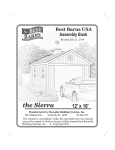
the Sierra
12' x 20'
Manufactured by Reynolds Building Systems, Inc.
205 Arlington Drive
Greenville, PA 16125
724-646-3775
This manual is copyrighted. Under the copyright laws, this manual
may not be copied, in whole or in part, without consent from Reynolds
Building Systems, Inc. © Copyright 2012
IMPORTANT INFORMATION ABOUT YOUR SHED KIT
Thank you for purchasing our Sierra kit. These instructions will construct a 12'x16' building.
If you received two books, use the one with the latest revision date.
If you have any questions about assembling the kit, call 800-245-1577. If you are calling after
normal business hours, call 724-866-HELP (4357) or email to [email protected].
Before you begin construction, be sure to study this assembly manual. Also, obtain a building
permit and check all pertinent building code regulations.
The material that is included in our kit is listed on the back page. The optional floor package,
if ordered, will be supplied by a local lumber supplier.
The door opening is for a 8' wide x 7' high garage door. You will need to order your garage
door with an 9" low headroom kit.
The foundation size should measure 12'-0" wide by 20'-0". Do Not make the foundation larger
than the building size. The siding should project beyond the foundation for water to expel
properly from the sidewalls.
IMPORTANT: Unpack the material from the pallet, then unscrew the 2x4s from the pallet.
The bit for the screws is packed in the hardware bag. Remove the OSB panel, it will be used
for roof sheathing. The 2x4s will be used for wall bracing and interior door jamb material.
When building the trusses, our instructions suggest using the floor as a work area. If your
foundation is a concrete slab it will not be possible to use this method. Build the 12' long back
wall to use as a platform.
The LP siding has a 50 year warranty and is already primed. Apply two coats of latex acrylic
paint for the finish coat. Paint the bottom edge of the siding, this is very important. Maintain
6" to 8" of clearance from the bottom edge of the siding and the ground. Don't allow garden
mulch to build up and keep shrubs a minimum of 1' away from the building.
Thank you for your purchase.
Bill & Linda Rinella, owners
Tool List
Hammer & Phillips Screwdriver
Framing Square & Level
Circular Saw and/or Hand Saw
Power Drill/Screwdriver
Measuring Tape & Chalkline
2-8' Step Ladders
Always wear safety glasses when cutting or nailing!
Optional Wood Floor System
Shown below is a typical wood floor. Depending on your area, the construction may have to be
changed to meet local codes. The foundation size should be 12' - 0" x 20' - 0".
1. Cut (2) two treated 2x4-8' boards in half.
2. Butt 4x4-10' treated runners together. Use one of the 4' long
2x4s to secure them together. Note: Use 16d galv. nails to
secure all treated framing together.
3. Repeat to join the other 4x4 runners.
4' Long 2x4
4x4 Treated Runners
4. Cut (2) two 2x4-12' joist headers to 12' - 0".
5. Layout for 12" on center joist spacing. 'X' marks where floor joist will be placed.
Detail 1
2x4 - 12 0"
Joist Header
X
X
11-1/4"
X
X
12"
X
X
12"
X
X
6. Cut all the 2x4-12' boards to 11'-9". These boards will be the floor joist. Treated lumber
may be thicker than 1-1/2". Take this into account when cutting the length of floor joists.
Shorten joist measurements if necessary to obtain 12'-0" building width.
7. Install floor joist boards between the joist headers. Install this section over 4x4s.
2x4-12' Joist Header
2x4-11' 9" Floor Joist
4x4 Runners
8. Cut (2) two 2x4-8' treated boards to 8' - 0".
9. Layout for 12" on center joist spacing, see Detail 1.
10. Assemble another floor section.
Install over the 4x4s and nail
both floor sections together.
11. Square the floor. See note below. The angle
measurement should be 23' - 4". Nail several
floor joist to the 4x4 runners to hold the floor
frame in place.
4x8
4x8
4x4
4x8
12.Install floor using 8d spiral nails.
Notes To Floor
Material Description 12' x 20' shed
2x4 Treated
4 pcs. 8'
2x4 Treated
24 pcs. 12'
4x4 Treated Runners
8 pcs. 10'
Flooring 3/4"
8 pcs. 4x8
Screw Floor Nails
5 lb.
8d
Galv. Box Nails
5 lb. 16d
It is important that the floor be level and square. Square
the floor as follows: before nailing the flooring, measure
the floor diagonally (corner to corner). Then measure
the opposite corners. These measurements will be the
same if the floor is square.
Step 1
Assemble Trusses
Building Tip: To aid in the assembly of the trusses, temporarily screw 2x4 blocks to
the floor. There are short 2x4s, that may have an angle on one end, supplied in kit.
This will insure that all the trusses are assembled the same.
1. Screw (2) two 2x4 blocks to the 12' wide end of the floor at the corner, see below.
2. Place two truss legs together. Position the notch in the 2x4s (called a bird's mouth) into
the 2x4 blocks. Important: You must have 12'-0" between the bird's mouth. Affix more
2x4 blocks above the truss legs to hold the truss members in place.
3. Secure the tops together with a wood gusset. Apply wood glue between the 2x4 boards and
the gusset. Nail the gusset to the 2x4s with 6d common nails. Use 14 nails per gusset.
4. Install a 2x4-90" collar tie between the 2x4 boards. Hold in place with 2x4 blocks. Install
12"x24" gussets to the ends of the collar tie. Glue and nail using 14 nails per gusset.
5. Turn this truss over and apply wood gussets to the opposite side.
6. Repeat 2 through 5 to assemble (8) eight more trusses.
Do Not remove blocks from floor until completing Step 2.
12"x24" Gusset
Top Gusset
Top Truss Member
!
2x4 Block
2x4-90" Collar Tie
!
2x4 Block
2x4 Block
! Install collar tie the same
distance from edge of floor.
Step 2
Assemble Roof Gables
1. Butt (2) two 72" long 2x4s together and secure by nailing a 3-1/2" x 31-3/4" long plywood gusset across the top where they butt together. Use glue and 6d common nails.
3/4" Plywood Gusset
72" long 2x4
2. Place (2) two truss members in the jig. Secure the top together with a barbed metal plate.
3. Remove the 2x4 blocks at the corners of the floor and insert the gable plate assembled
above into the bird's mouth. Make sure the 2x4 gable plate is straight. If necessary, tack
2x4 blocks to hold plate straight.
Barbed Metal Plate
2x4 Gable Plate
2x4 Block
23-1/2" Gable Stud
Screw gable plate to truss
leg with 2-1/2" screw.
4. Remove the two 2x4 blocks that held the collar tie in position.
5. Install 2x4x23-1/2" gable studs. Nail through the bottom plate with 10d sinkers
and secure the top with barbed metal drive-on plates.
7. Repeat to assemble another gable. Remove 2x4 blocks.
Step 3A
Install Siding on Gables
1. Select one of the gable frames, Turn the gable over letting the bottom plate overhang
the floor so the gable lays flat.
LAP
Edge
2. Install gable siding using 6d galv. nails across
the top of the gable frame. Use 8d galv. nails
along the bottom edge. See Note Below. *
LAP
Edge
Siding Extends 3/4"
Below Bottom Plate
Gable trim will cover where
the siding butts together.
Install Siding on Ends
3. Install siding on the other gable frame.
Step 3B
Build 2x4 Assembly
1. Locate (2) two 49-1/2" boards that have shorter 2x4s attached. Butt these boards together.
2. Apply glue over the exposed area of the longer boards. Using 6d common,
nail a 3-1/2" x 44" OSB filler over the bottom boards. Align the boards
against the floor or other object to make sure the boards are straight
before securing the OSB filler.
3. Install a 55" long 2x4 over the OSB filler.
For added strength apply glue between
the 2x4 board and the OSB filler. Secure
with (8) eight 2-1/2" long deck screws at
each end and the center.
4. Mark this side (B) so when installed this
side will face the back of the building.
Another layer of 2x4s will be installed
after the 1x6 door jamb is installed
5. Install (8) eight more screws
on the opposite side in the
center as shown.
B
ong
L
55"
44"
r
ille
BF
S
gO
Lon
2x4
UE
GL
49-1/2" board with
shorter 2x4 attached
Step 4
Assemble 12' Back Wall
1. Position 2x4-68-1/2" boards together and indicate with 'X' marks, where the wall studs
will be located. Mark the ends that will butt together with the letters 'A' and 'B'.
X
X
19-3/4"
X
X
68-1/2" Wall Plate
68-1/2" Wall Plate
24"
X
X
X
X
A B
A B
23-1/4"
24"
X
X
X
X
68-1/2" Wall Plate
A
B
2x4-7' Wall Studs
2. Install 7' wall studs between the top and bottom plates. Assemble wall frames with
10d sinkers, two (2) nails at each stud end. Nail both wall frames together.
3. Square wall frame. Measure diagonally (corner to corner). The measurements will be the
same when the wall is square.
4. Install the first siding panel with the 'LAP' edge extending 3-1/2" past the wall frame. The
bottom will extend 3/4" below the bottom plate. Use 8d galv. nails spaced 12" apart.
5. Install the other siding panels. Cut the last panel to extend 3-1/2" beyond the wall frame.
The siding will be 1/2" below the
top of the wall frame on all walls.
LAP
Edge
Siding Extends 3-1/2"
Past 2x4 Stud
/4”
d3
n
e
xt plate
AB
to e
ing bottom
d
i
S ow
bel
Step 5
Assemble 10' Long Sidewalls
1. Position (2) two 2x4-48" boards and (2) two 2x4-72" boards together and indicate with 'X'
marks, where the wall studs will be located.
X
X
48" Wall Plate
23-1/4"
X
X
X
X
X
X
72" Wall Plate
23-1/4"
X
X
24"
X
X
X
X
48" Wall Plate
72" Wall Plate
If you are installing the optional walk-in door see the instructions
at the back of the book.
2. Install 7' wall studs between the top and bottom plates. Nail both wall frames together.
3. Repeat to assemble (3) three more 10' long sidewall frames.
4. Square wall frame. Select (1) one of the 2' wide panels with the 'tongue' edge and install panel
with the 'cut' edge flush with the end of the wall and extending 3/4" below the bottom plate.
5
Install (2) two more full width siding panels.
Siding 1/2" Below
Top Plate
dge
LAP E
Tongue Edge
Cut Edge
Siding Extends 3/4" Below Plate
6. Select (1) one of the 10' wall frames and repeat to apply siding to
another sidewall frame.
Step 6
Assemble Sidewalls for 20' Building Length
1. Select one of the 10' sidewalls assembled in Step 5. Butt a 10' wall frame against the
wall with siding. DO NOT nail these frames together so they can be separated later.
2. Square the wall frame. Install a full width siding panel but do not nail along the long edge
that overlaps the 10' wall frame. You can nail this edge after the wall panels are installed.
This will enable you to separate the wall panels making them easier to handle.
Do Not Nail Along This Edge
dge
LAP E
6' Wall Plate
10' Wall Panel from Step 5
3. Install another full width siding panel and
the 2' wide siding panel.
4. Repeat to apply siding to the other 10' wall frame.
4' Wall Plate
Step 7
Assemble Door Walls
1. Locate a 7' wall stud with a 83-1/2" long 2x4 attached.
2. Assemble a wall frame using a 7' wall stud, the double stud
and (2) two 19" long 2x4 wall plates. Use 10d sinkers.
2x4-7' Wall Studs
19" Bottom Wall Plate
83-1/2" Long 2x4
3. Repeat to assemble another wall frame.
Mark 'Left Frontwall'
4. Locate a 24" wide siding panel that has a 'LAP' edge.
Position this panel with the 'LAP' edge flush with the
2x4 header support and extending 3/4" below the bottom
plate.
Cut Edge Extends3-1/2"
Beyond Frame
LAP Edge
Siding Extends 3/4" Below Plate
Mark 'Right Frontwall'
83-1/2" Long 2x4
5. Install the remaining siding with the tongue edge flush
with the edge of the 83-1/2" long2x4.
Cut Edge Extends3-1/2"
Beyond Frame
83-1/2" Long 2x4
Bottom Plate
Step 8
Set Walls
1. Set wall panels. Secure at corners with 10d sinkers (4 nails per corner). Secure to floor
with 10 sinkers. Disassemble shipping pallet and use the 2x4s to brace the front wall and
the sidewalls.
2. Install the pre-built 2x4 assembly, from Step 3B, between the front wall panels. Install
assembly on the front wall panels with the side marked with the letter 'B' facing the
back of the building.
3. Install (2) two 3-1/2" x 48" siding panels over the built-up assembly. Note: The trim
boards will hide where the siding panels meet; the fit does not have to be exact.
2x4 Wall Brace
Pre-built
2x4 Assembly
Nail Siding Panels
Where They Overlap
3-1/2" x 48"
Siding Panels
Left Frontwall
10' Sidewall
Step 9
Install Back Wall Trim
1. Install 87-3/4" long 1x4 corner trim boards to the rear wall. Install trim flush with the 2x4
top plate and flush with the siding on the sidewalls. Use 8d galv. nails, spaced 12" apart.
Flush Across
Top Plate
2. Cut (2) two 1x4-6' trim
board to fit between the
corner trim boards.
These trim boards
measure 4-1/4" wide.
1x4
Trim
Side
Wall
Back
WAll
flush
87-3/4" Long 1x4 Corner Trim
Step 10
Install Front Wall Trim & Door Jamb
1. Install 87-3/4" long 1x4 corner trim boards and 1x4 trim boards to the front wall,
flush with the top plate on the sidewall.
2. Install 48" long x 5-3/8" wide primed siding
material on the top of the door opening.
3. Install 83" long x 5-3/8" wide primed siding
material on the sides of the door opening.
3/8" Thick Primed
Door Jamb
2x4 Assembly
Step 11
Install Gables
1. Install a gable on the rear wall. The gable siding will extend over the 1x4 trim
on the lower wall. NOT behind the trim!
Secure gable to wall by nailing through the gable plate with 10d sinkers. Nail
siding along the 1x4 trim board with 8d galv. nails.
Important: Bottom edge of siding
extends over 1x4 trim
2. Repeat to install a gable on the front wall.
Step 12
Install 2x4 Tie Plates
1. Install a 2x4-6' board over the sidewall,
against the rear gable plate. Use 10d
sinkers.
2x4-6' Tie Plates
Sidewall
2. Install (2) two more 2x4-6' boards next to the first one.
3
Install a 48" long 2x4 at the front of the building.
4. Install 2x4 tie plates on the opposite sidewall.
2x4-6' Tie Plates
2x4-6' Tie Plates
Cut to Fit
Step 13
Layout Roof Trusses
1. Layout the truss spacing from the rear of the building. Measure from the inside of the rear gable
when marking the location of the first truss. Important: When marking the opposite wall, place
the 'X' mark on the same side of the line so your trusses are parallel when they are installed.
2. Using 1-1/2" hanger nails, install metal hangers to the 2x4 tie plate. The opening should line
up with the 'X' mark, the bottom of the opening, flush with the 2x4 tie plate. See Detail 'D'.
Detail 'D'
2x4 Tie Plate
Measure From
Backside of 2x4
Inside of Building
21-3/8"
24"
Step 14
Set Roof Trusses
Set roof trusses. Secure trusses to metal
hangers with 1-1/2" hanger nails.
Rear Gable
Step 15
Install Eave Soffit & Corner Trim
1. Locate a 5" wide x 24" siding panel that has a 'tongue' edge. Install this panel under the truss
overhang at the rear of the building. Install the siding/soffit panel with the beveled edge flush
with the end of the trusses and the cut edge against the gable siding. Use 6d galv. nails.
2. Install (5) five more full length siding panel under the trusses. Cut the last panel to fit.
3. Install soffit panels on the
opposite side. Start with a
24" long panel that has a
'LAP' edge.
4. Cut 87-3/4" long 1x4 trim boards
to length and install at the corners.
Soffit
Beveled Edge
Step 16
Install 1x6 Fascia
When installing 1x6 fascia, next step, it will be necessary to install 22-1/2" long 2x4
blocks between trusses where the fascia boards meet.
The 2x4 blocks have a beveled edged on the top to allow the roof sheathing to rest on.
Install block through the end of the trusses with 10d sinkers.
SOFFIT BLOCK DETAIL
ascia
1x6 F
2x4 Block - Beveled Edge
Starting at the rear of the building, install 4'x6' OSB roof panels and 1x6-7' white pine fascia
boards on each side flush with the face of the siding on the back gable. Install the fascia so the
bottom edge of the roof sheathing will rest on the 1x6.Use 8d galv. nails to install fascia.
1x6 - 7' Fascia Board
ra
t
igh
st
22-1/2" Long 2x4
w/ Beveled Edge
ge
ed
Step 17
Install Roof Sheathing
1. Install roof sheathing per layout below. Make sure the trusses are plumb and the roof
sheathing meets the center of the truss. Use 7d sinkers spaced 12" apart. The top row of
roof sheathing will be about 1" below the ridge to allow for ventilation.
Important: Make sure the front gable is plumb and the roof sheathing extends 8-1/2" past
the siding along the face of the gable.
2. Install a 1x6 - 7' fascia board. Install a 22-1/2" long 2x4 soffit block, with beveled edge,
between the truss.
3. Cut a 1x6 - 7' fascia board flush with the end of the roof sheathing.
48" Long
Panel
72" Long Panel
48" x 72"
48" Long
Panel
83-1/2" Long Panel
Remove From Pallet
48" x 72"
48" x 48"
48" x 59-1/2"
1x6 - 7' Fascia Boards
2x4 Block
Sheathing Will Extend
8-1/2" Beyond Gable
Step 18
Install Front Soffit
1. Install 86-1/4" long 2x4s under the roof sheathing, against the front gable.
2. Install 86" long 2x4s under the front edge of the roof sheathing. Hold the 2x4s against the
roof sheathing and screw through the sheathing into the 2x4 boards. Use 1-5/8" long screws.
3. Install 8-1/2" wide siding under the gable overhang as the soffit. Use 6d galv. nails.
4. Install (2) two 87" long 1x6 trim boards over the 2x4 boards, flush with the top of the roof
sheathing. Use 8d galv. nails.
5. Install 83-1/2" long 1x6 fascia boards flush with the 2x4 boards at the front of the building.
6. Install 1x6 trim on the back gable.
1x6 Gable Trim
Soffit Panels
Install Optional Door Sill
If you ordered the optional floor, install the
galvanized door sill. Secure sill with pan
head screws.
Galv. Door Sill
Step 19
Install 2x4 Around Door Jamb
1. Install a 2x4 - 7' on the inside of the door opening to support the door track.
Use 2x4 wall bracing material
2. Install 51-1/2" long 2x4s across the top of the door jamb.
51-1/2" Long 2x4
Prime Door Jamb
2x4-7'
VIEW FROM INSIDE
Step 20
Install Roofing — Not Supplied in Kit
1. Install metal roof edging perimeter of
the roof area. If you are not installing
shingles at this time, you can purchase
felt paper to protect the roof sheathing.
Install the felt paper before you install
the metal roof edge.
1x
3
Ga
bl
e
Felt
Paper
Tr
im
1x6 Fascia
2. Install shingles according to the instructions on the wrapper. If you need more detailed
instructions on installing shingles, there are good publications at book stores or newsstands.
Building Tip: Install a ridge vent in lieu of shingle caps. Ridge vent provides ideal ventilation,
preventing heat or moisture from damaging your building or its contents.
Shingles
Optional ridge vent provides
ideal ventilation.
Optional DoorOpening
s
Trus Air
Space
Frame Door Opening
1. Cut (2) two 80-1/2" long header supports form
2x4-7' boards.
2. Cut (2) two 37-1/2" boards from a 2x4-7'.
2x4 Header
3. Cut a 3-1/2" x 37-1/2" filler from a 48" long
OSB board included in the kit.
4. Assemble the door header.
5. Install door header over header supports.
80-1/2" Header
Supports
37-1/2" Long 2x4
door opening
34-1/2"
OSB Filler
Material Packaged In Lumber Kit
Collar Ties
2x4
90"
3
1 lb. box
10d
Sinkers
22
Truss Rafters
2x4
86-1/4"
3
1 lb. box
8d
Galv.
35
Wall Studs
2x4
84"
2
1 lb. box
7d
Sinkers
Double Studs
2x4
84"
1
1 lb. box
6d
Galv.
18
Wall Plates
2x4
72"
3
1 lb. box
6d
Common
4
Wall Plates
2x4
68-1/2"
1
1 lb. box
1-1/2" Hanger Nails
2
Door Jamb
2x4
51-1/2"
6
ea.
1x4
Metal Plates
1
Door Assembly
2x4
55"
14
ea.
2x4
Metal Truss Hangers
4
Wall Plates
2x4
48"
1
bag Wood Screws
4
Wall Plates
2x4
19"
2
ea.
4
Gable Studs
2x4
23-1/2"
4
pcs. 1x6 Gable Trim
87"
2
Pre-built Door Assembly
49-1/2"
6
pcs. 1x6 Fascia Trim
84"
2
SidingOver Door
3/8"
3-1/2" x 48"
2
pcs. 1x4 Door Trim-sides 84"
8
Primed Soffit Boards 3/8"
5" x 48"
2
pcs. 1x4 Door Trim-top
2
Primed Soffit Boards 3/8"
5" x 24"
1
pc.
4
Primed Soffit Boards 3/8"
8-1/2" x 48"
2
pcs. 7/16" Filler Board 3-1/2" x 48"
2
Primed Door Jamb
3/8"
5-3/8" x 48"
14
pcs. 7/16"Truss Gussets 8" x 20"
2
Primed Door Jamb
3/8"
5-3/8" x 83"
28
pcs. 7/16"Truss Gussets 12" x 24"
2
Plywood Gusset
3/4" x 3-1/2" x 32"
2
pcs. 7/16" OSB 37-1/2" x 83-1/2"
7
2
Continued On Back Page
Bottle Glue
51-1/4"
7/16" Filler Board 3-1/2" x 44"
Material Packaged In Siding & Roof Sheathing Kit
2
pcs. 2x4 Collar Ties
90"
11
Siding Panels
48" x 87-1/4"
4
pcs. 2x4 Truss Rafters
86-1/4"
6
Siding Panels
24" x 87-1/4"
6
pcs. 2x4 Wall Studs
84"
2
Siding Panels-Gables
48" x 40"
4
pcs. 2x4 Wall Plates
48"
4
Siding Panels-Gables
48" x 28"
4
pcs. 2x4 Fasica Blocks
22-1/2"
2
Roof Sheathing
37-1/2" x 72"
4
pcs. 1x4 Wall Trim
72"
4
Roof Sheathing
37-1/2" x 48"
8
pcs. 1x4 Corner Trim
87-3/4"
4
Roof Sheathing
48" x 72"
4
pcs. 716"Wood Gussets
8" x 20"
2
Roof Sheathing
48" x 59-1/2"
8
pcs. 716"Wood Gussets
12" x 24"
2
Roof Sheathing
48" x 48"
1
lb.
10d Sinkers Nails
4
Front Gable Soffit
1
lb.
8d Galv. Nails
2
Sidewall Soffit
1
lb.
7d Sinkers
4
2x4 Metal Truss Hangers
1
lb.
6d Common
1/2 lb.
1-1/2" Hanger Nails
Roof Covering - not supplied in kit
12 bdl.
9 pcs.
Roof Shingles
Roof 'drip' Edge
10'
8-1/2" x 48"
5" x 48"