1
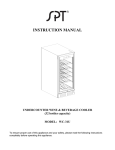
INSTRUCTION MANUAL
Compressor Cooling Under-Counter
Wine & Beverage Cooler (19-bottles capacity)
Model: WC-1901US
This manual contains important information including safety and installation instructions of the appliances. Please
read it carefully before use and follow all safety information & instructions. It is recommended to keep this manual for
easy reference so that you can be familiar with the operation of the appliance.
ATTENTION
To protect the unit against damage during transit, the bottom is inserted with
protective foam pieces. The foam pieces must be removed before use.
Gently tilt and lay the unit on its back and remove the two foam pieces
inserted inside the unit’s bottom frame.
CONTENTS
IMPORTANT SAFETY INFORMATION........................................................................................P.1
STRUCTURE AND INSTALLATION DRAWING...........................................................................P.2
INSTALLATION INSTRUCTIONS………………………………………………...................................P.3
OPERATING THE WINE COOLER………………………………………………………………………. P.3
CARE AND MAINTENANCE........................................................................................................P.5
TROUBLESHOOTING..................................................................................................................P.6
WARRANTY………...............................................................................................………...P.7
IMPORTANT SAFETY INFORMATION
Before using this appliance, please properly position and install as described in this manual. Please
read the manual carefully. To avoid the risk of fire, electrical shock, or injury when using the
appliance, follow basic precautions, including the following:
•
•
•
•
•
•
•
•
•
•
•
•
•
•
•
•
•
•
•
This appliance is intended to be used exclusively for the storage of wine.
Make sure the voltage/current marked on the rating label corresponds with your supply voltage.
Plug into a grounded 3-prong outlet, do not remove grounding prong, do not use an adapter, and do
not use an extension cord.
It is recommended that a separate circuit, serving only your appliance be provided.
Never clean appliance parts with flammable fluids or harsh chemicals. These fumes can create a fire
hazard or explosion.
Do not store or use gasoline or other flammable vapors and liquids in the vicinity of the appliance.
Do not connect or disconnect the electric plug when your hands are wet.
Unplug the appliance before cleaning, maintenance or servicing. Failure to do so can result in electrical
shock or death.
Do not attempt to repair or replace any part of the appliance unless it is specifically recommended in this
material. All other servicing should be referred to a qualified technician.
Have two or more people to move and install the appliance to avoid any personal injury or damage to
the appliance.
To ensure proper ventilation for the appliance, the front of the unit must be completely unobstructed.
Locate the unit away from direct sunlight and sources of heat (stove, heater, radiator, etc.).
The fuse (or circuit breaker) size should be 10 amps or higher.
It is important for the appliance to be leveled in order to work properly. Adjust the feet to level it.
This appliance is not intended for use by young children or physically challenged persons without
supervision. Never allow children to operate, play with or crawl inside the appliance.
Do not use solvent-based cleaning agents of abrasives on the interior. These cleaners may damage or
discolor the interior.
Do not use this appliance for other than its intended purpose.
The use of attachments not recommended by the manufacturer may be hazardous.
When you dispose the appliance, take off the door and leave the shelves in place so that children may
not easily climb inside. And make sure the coolant circuit, particularly the heat exchanger at the
back/bottom of the unit not be damaged. The
symbol on the product or its packaging indicates that
this product is not to be handled as normal household waste and should be taken to a recycling
collection point for electrical and electronic goods.
1
STURCTURE AND INSTALLATION DRAWING
Pictures in this manual show the structure of the appliance as well as installation drawing. The
dimension and shelf quantity may be different than the actual unit.
Parts Identification
1.
Interior fan
2.
Control panel
3.
Shelf stopper
4.
Handle
5.
Glass door with stainless steel frame
6.
Leveling leg
7.
Bottom grille
8.
Deep shelves
9.
Bottom shelf
10.
Security lock
Installation Drawing
2
INSTALLATION INSTRUCTIONS
Before Using Your Appliance
•
•
Remove all exterior and interior packing materials.
Allow the appliance to stand upright for approximately 2 hours before connecting power. This
will reduce the possibility of a cooling system malfunction from handling during transportation.
• Use a soft cloth and lukewarm water to clean the interior surfaces.
• Install the door handle:
1. Remove the door gasket on the left side to expose the
G asket
two screw holes. (The gasket is easily displaced by
hand, no tools are needed)
2. Install the handle as shown with two screws and
washers (provided). DO NOT over tighten as this will
F la t Washer
H a n d le
damage the handle and door frame.
Locker
Washer
3. Replace door gasket to its original position.
S crew
Door F r a me
Lock & Unlock the Door
•
Key is found within the packing of this manual.
•
Insert key into the lock and turn counter-clockwise to unlock and clockwise to lock.
OPERATING THE WINE COOLER
Working Climate
•
•
This appliance is designed for operation within the SN to T climate (see below climate class
chart). It is recommended to maintain the ambient temperature around 71-77°F, which helps
the appliance work with low power consumption.
If the ambient temperature is above or below the designed climate range, the performance
may be affected. For example, an appliance operating in extreme cold or hot conditions may
cause interior temperature to fluctuate and the settings of 41-71°F may not be reached.
Climate Class
SN
N
ST
T
Ambient Temp.
50 - 89°F / 10 - 32 °C
60 - 89°F / 16 - 32 °C
64 - 100°F / 18 - 38 °C
64 - 109°F / 18 - 43 °C
Wine Storage
•
The maximum loaded bottles may vary subject to different size and shape of wine bottles. The
19-bottle capacity is based on standard Bordeaux-style 750ml bottles.
•
•
To prevent damage to the door gasket, make sure the door is fully open before pulling shelves out.
Recommended temperatures for chilling/storage your wines.
Red Wines
Dry/White Wines
Rose Wines
Sparkling Wines
59 – 64°F / 15 – 18°C
48 - 57°F / 9 - 14°C
50 - 52°F / 10 - 11°C
41 - 46°F / 5 - 8°C
3
CONTROL PANEL
Lighting
°C or °F
interchange
Display window
Temp increase
Temp decrease
Power
POWER
• Once the appliance is plugged into a power outlet, unit powers on automatically.
•
Touch the Power button
to turn off (or turn on) appliance.
Warning:
To avoid damage to the compressor, please do not turn on the appliance within 5 Minutes
after appliance was turned off.
INTERIOR LIGHTING
• Touch the Light button
to turn on (or turn off) the interior cool LED lighting.
• The light will remain on until it is turned off.
TEMPERATURE SETTING
• The temperature range can be set between 41 - 72°F (5 - 22°C).
• Touch the
or
button to increase or decrease the set temperature. Each touch is in
increment of 1°F/1°C.
• First touch of the
or
button will recall the previous set temperature in the display window.
If unit has experienced a power failure (or power unplugged), previous set temperature will
remain as the unit is equipped with memory function.
• After 5 seconds of inactivity, the display will change to show cabinet’s internal temperature.
Notice:
During initial use or after appliance has been off for a long time, you may find a few degrees
variance between the set temperature and the displayed temperature. This is normal and the
appliance will be in order after a few hours.
TEMPERATURE DISPLAY WINDOW
• Displays set temperature when setting the temperature and will change to display actual
internal temperature after 5 seconds of inactivity.
• If display window shows “HH” or “LL” along with a continuous buzz, this means malfunction of
the temperature probe. The appliance is designed to run periodically to help keep the coldness
inside under such circumstance. However, set temperature may not be achieved and to avoid
destroying your stored wines, it is strongly recommended to have the appliance repaired
immediately. Please contact Sunpentown at 1-800-330-0388.
SELECTING DISPLAY IN FAHRENHEIT (°F) OR CELSIUS (°C )
• Touch the
button to change temperature display between Fahrenheit (°F) and Celsius (°C) .
4
CARE AND MAINTENANCE
CLEANING THE WINE COOLER
•
•
•
•
•
•
Turn off power, unplug the appliance and remove all items including the shelves.
Wipe the inside surfaces with a sponge and baking soda solution (2 tablespoons of baking
soda to a quart of warm water).
Wash the shelves with a mild detergent solution. Allow shelves to dry before placing back
into the wine cooler.
Take caution when cleaning the control panel and any electrical parts. Wring out excess water
from the sponge or cloth.
Wipe the outside cabinet with warm water and mild liquid detergent. Dry with a clean soft cloth.
Do not use steel wool or steel brush on the stainless steel. These will contaminate the
stainless steel with steel particles and rusting may occur.
POWER FAILURE
Most power failures are corrected within a few hours and should not affect the temperature of your
appliance if you minimize the frequency of door opening. If the power is going to be off for a longer
period of time, you need to take the proper steps to protect your contents.
MOVING THE WINE COOLER
•
•
•
•
•
Remove all items.
Securely tape down all loose items (shelves) inside the appliance. (Recommend using
painter’s tape)
Turn the adjustable leg up to the base to avoid damage.
Tape the door shut (recommend painter’s tape)
Be sure the appliance stays secure in the upright position during transportation. Also protect
outside of appliance with a blanket, or similar item.
ENERGY SAVING TIPS
•
•
•
The appliance should be located away from heat producing appliances and away from direct
sunlight.
Ensure that the unit is adequately ventilated. Never cover or obstruct air vents.
Ensure door is closed tightly and do not open the door too frequently or for a long period of
time.
VACATION & STORAGE
•
If the appliance will not be used for an extended period, remove all items and turn off the
appliance.
•
Clean and dry the interior thoroughly. Leave the door ajar to allow air to circulate inside the
cabinet to avoid possible condensation, mold and odor forming.
5
TROUBLESHOOTING
Most common problems can be resolved by referring to the suggestions listed below:
PROBLEM
POSSIBLE CAUSE / MEASURE
The appliance does not operate
Not plugged in.
The appliance is turned off.
The circuit breaker tripped or a blown fuse.
The appliance is not cold enough
Check the temperature control setting.
External environment may require a higher setting.
The door is opened too frequently.
The door is not closed completely.
The door gasket does not seal properly.
Insufficient ventilation in the front grille.
Appliance is placed next to a heat source.
The appliance turns on and off
frequently
The room temperature is hotter than normal.
A large amount of contents has been added to the
appliance.
The door is opened too frequently.
The door is not closed completely.
The temperature control is not set correctly.
The door gasket does not seal properly.
Too much vibration
Check to assure that the appliance is level.
Check to assure no parts inside the cabinet or in the
compressor chamber are loose.
The appliance makes too much noise
The rattling noise may come from the flow of the
refrigerant, which is normal.
As each cycle ends, you may hear gurgling sounds
caused by the flow of refrigerant.
Contraction and expansion of the inside walls may
cause popping and crackling noises.
The appliance is not level.
The door will not close properly.
The appliance is not level.
The gasket is dirty.
The shelves are out of position.
The display window shows “HH” or
“LL” and a continuous buzz sound.
The temperature probe is out of order.
6
Your Guarantee
If this product is found to be faulty as a result of faulty materials or workmanship within one year
from date of purchase, it will be repaired free of charge.
This guarantee is subject to the following terms:
•
Sunpentown must be notified of the fault.
•
Proof of purchase must be presented to Sunpentown’s nominated representative.
•
The warranty will be void if the product if modified, misused or repaired by an unauthorized
person.
•
The warranty after repair will not be extended beyond the original one-year period.
•
All replacement parts will be new or reconditioned.
•
Parts, which are replaced, become the property of Sunpentown.
•
The warranty applies for the use of the product in the USA only.
What is NOT COVERED:
•
Warranty does not include freight charges.
•
Incidental or consequential damage caused by possible defects with this product.
•
Damage to product caused by improper power supply voltage, accident, fire, floods or acts
of nature.
•
Failure of product resulting from unauthorized modifications to the product.
•
Improper installation or failure to perform the necessary maintenance.
This GUARANTEE is in addition to your Statutory Rights
SUNPENTOWN INTERNATIONAL INC.
14625 Clark Ave. City of Industry, CA 91745
Tel: 800-330-0388
[email protected]
www.sunpentown.com
7