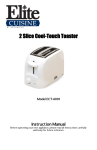
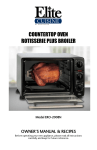
1
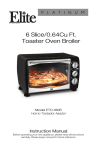
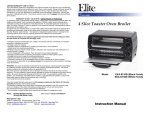
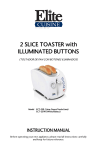
4-Slice Toaster Oven Broiler Horno Tostador Dorador Model EKA-9210XB (black) EKA-9210XW (white) Instruction Manual Before operating your new appliance, please read all instructions carefully and keep for future reference IMPORTANT SAFEGUARDS When using any electrical appliance, basic safety precautions should always be followed, including following: 1. 2. 3. 4. 5. 6. 7. 8. 9. 10. 11. 12. Do not place appliance on or near a hot gas or electric burner, or in a heated oven. 13. Always attach plug to the appliance first, then plug cord into wall outlet. To disconnect, turn any control to‟ OFF‟ position, then remove plug from wall outlet. 14. Oversized foods or metal utensils must not be inserted in the appliance as they may cause a fire or risk of electrical shock. 15. A fire may occur if the appliance is covered or touching flammable material including curtains, draperies, walls and the like when in operation. Do not store any items on top of the appliance at any time. 16. Do not clean this appliance with metal scouring pads. Pieces can break off the pad and touch electrical parts, involving a risk of electrical shock. 17. Extreme caution should be exercised when using containers constructed of other material other than metal or glass in the oven. 18. Do not store any materials other than manufacturer‟s recommended accessories in this oven when not in use. 19. Do not cover crumb tray or any part of the oven with metal foil. This will cause overheating of the oven. 20. Do not place any of the following materials in the oven: paper, cardboard, plastic and the like. 21. Extreme caution must be used when removing tray or disposing of hot grease. Use oven mitts and handle with care. 22. Do not use appliance for anything other than the intended use. Read ALL instructions before operation. Do not touch hot surfaces. The temperature of the door or the outer surfaces may be high when the toaster oven is in operation. Always use handles or knobs, and oven mitts when handling hot materials. Make sure to remove all packaging plastics and other materials from unit before operating. Wash all removable accessories before using for the first time. To protect against electrical shock, do not immerse cord, plug or appliance itself in water or any other liquids. Close supervision is always necessary when appliance is used by or near children. Unplug the appliance from outlet when not in use and before cleaning. Always allow appliance to cool completely before putting on or taking off parts. Do not operate this or any appliance with a damaged cord or plug or after the appliance malfunctions or has been damaged in any manner. Return the appliance to the nearest authorized service facility for examination, repair or adjustment. The use of accessory attachments not recommended by the appliance manufacturer is not recommended and may cause fire, shock or injuries. Do not use this appliance outdoors or for commercial use. For household use only. Do not let cord or plug hang over the edge of table or counter or touch hot surfaces. SAVE THESE INSTRUCTIONS THIS PRODUCT IS FOR HOUSEHOLD USE ONLY! 1 SHORT CORD PURPOSE NOTE: A short power cord is provided to reduce the risk of personal injury resulting from becoming entangled in or tripping over a longer cord. If an extension cord is used: (1) the marked electrical rating of the extension cord should be at least as great as the electrical rating of the product; (2) the extension cord should be arranged so that it will not drape over the countertop or tabletop where it can unintentionally be pulled on or tripped over by children or pets. Longer power-supply cords or extension cords are available and may be used if care is exercised in their use. POLARIZED PLUG If this appliance is equipped with a polarized plug (one blade is wider than the other), please follow the below instructions: To reduce the risk of electrical shock, this plug is intended to fit into a polarized outlet only one way. If you are unable to fit the plug into the electrical outlet, try reversing the plug. If the plug still does not fit, contact a qualified electrician. Never use the plug with an extension cord unless the plug can be fully inserted into the extension cord. Do not alter the plug of the product or any extension cord being used with this product. Do not attempt to defeat the safety purpose of the polarized plug 2 PARTS INDICATOR 3 HOW TO OPERATE BEFORE USING FOR THE FIRST TIME 1. 2. 3. 4. Remove all packaging materials including plastics, cardboard, Styrofoam and literature. Wash Toasting Pan and Wire Rack in warm soapy water. Wipe the outside and inside of the oven with a damp cloth or sponge to remove any packaging residue. Make sure oven is thoroughly dry before using. Place oven on a flat, stable surface. Position the oven so that it is at least 2 inches (5cm) away from any surrounding object. Ensure that nothing has been placed on top of the oven. 5. 6. Make sure the Crumb Tray is properly closed before using. For the first time only: Turn the Function Knob to „Toast‟ and the Timer Knob to 15 minutes. This will burn off any oils and protective coating applied the heating elements during manufacturing. NOTE: The oven may smoke during this process. This is harmless and normal for a new oven and will not last more than 10-15 minutes. HOW TO USE TOASTING: NOTE: When setting to „Toast‟, both TOP and BOTTOM heating elements will turn on. 1. Rotate the Function Knob clockwise to „Toast‟ position 2. Open the oven door and place the bread slice on the Wire Rack. You may place up to 4 slices side by side. TIMER SETTING: 3. Choose your toast darkness preference by adjusting the „Timer Knob‟ clockwise to select toasting time. NOTE: To test the toasting of your type of bread, we suggest starting at short time, as bread varies according to humidity, thickness and texture. Each type of bread will toast differently according to these properties. 4 4. NOTE - When setting the Timer Knob for less than 10 minutes, always rotate timer to over 10 minutes and then rotate back to your chosen time. This will ensure a safe and accurate timer setting. When the toast cycle is finished the bell will ring and the electrical power is automatically turned off. To stop the cycle at any time, rotate the Timer Knob counter clockwise to „OFF‟ position and the bell will ring. NOTE - The bread will burn if the toasting time is set for too long. Close supervision is always necessary during toasting. HOW TO USE (CONT.) BROILING: NOTE: When setting to „Broil‟, only the TOP heating element will turn on. 1. Slide in the Wire Rack. Always use the Toasting Pan when broiling food like chicken wings or drumsticks which contain fat. 2. Place food on the Toasting Pan and place in the oven on the Wire Rack. NOTE – We always suggest preheating the oven about 3-5 minutes before placing the food inside. 3. Rotate the Function Knob clockwise to the „Broil‟ position. BAKING NOTE: When setting to „Bake‟, only the BOTTOM heating element will turn on. 1. Slide the Wire Rack into the bottom rack level. 2. Place food on the Toasting Pan. NOTE: It is not necessary to only use the Toasting Pan when baking. You may use only metal pans that are no bigger than 9x10inches in size. NOTE: We always suggest preheating oven 5 minutes at this setting before placing food inside. 3. Rotate the Function Knob clockwise to „Bake‟ position 4. The Timer Knob is the on/off switch: a) For short time, rotate the Timer Knob clockwise (up to 60 minutes), when the cycle is finished, the bell will ring and the power is automatically turned off OR b) For longer time, rotate the Time Knob counter clockwise to “stay on” setting. The cooking will continue until the Timer Knob is manually turned to “off” position and the bell will ring. NOTE: Always monitor the food at this setting to prevent overcooking. Overturn the food during the process or add the flavoring if necessary. Always use oven mitts to prevent the risk of scalding. 4. 5. 5 Set the time based on the food type and thickness. The heating element will be cycled on and off to maintain the set temperature. The maximum time that can be set by the timer is 60 minutes, for longer time, you must set the timer to the “stay on” position. You must stop the oven manually by turning the Timer Knob to „OFF‟ position once the food is done. NOTE – Always monitor the food at this setting to ensure that you are not overcooking. HOW TO USE (CONT.) DEFROSTING: NOTE: Always use the Toasting Pan when defrosting any foods. 1. Slide in the Wire Rack. CAUTION: Be sure to remove ALL packaging, plastic wrapping or paper from the frozen food before putting in the oven. 2. Place the food on the Toasting Pan and place in the oven on Wire Rack. 3. Turn the Function Knob to the temperature between 200-250 degrees depending on thickness of food. NOTE: It is unnecessary to preheat the oven to use the Defrost feature. NOTE: The time needed for Defrosting is largely dependent on food, weight, type and shape. If food is thick and heavy, temperature should be set no higher than 250 degrees. CAUTION: Be sure to turn over food so prevent possible burning. CAUTION: Food will be hot. When removing, always use oven mitts or a dishtowel NOTE: If food can be cut easily with a knife, the Defrosting process has ended. WARNING: Always cook food promptly after Defrosting. COOKING CHART *Please note that the following cooking times are approximate and included only for reference: Food Bagel Toast Hamburger Pizza Bacon Sausage Fish Steak Quantity 2 – 3 Slices 2 – 3 Slices 2 – 3 Patties 2 Slices 2cm cutlet 3 – 4 pieces 1 – 2 slices 1cm cutlet 6 Time 2 – 3 minutes 2 – 3 minutes 10 – 15 minutes 6 – 8 minutes 7 – 12 minutes 8 – 10 minutes 10 – 12 minutes 10 – 15 minutes CLEANING & MAINTENANCE 1. 2. 3. 4. 5. Before cleaning unplug the toaster oven and let it cool completely. Wash all the removable attachments with mild, soapy water including the Rack and the Toasting Pan. Do NOT wash in dishwasher. Do not use abrasive cleansers, scrubbing brushes and chemical cleaners as this will cause damage to the non-stick coating of Baking Tray. Use a damp cloth to wipe the inside of the oven. To clean the door, you can use a wet cloth saturated with detergent or soap. CAUTION: Never immerse the unit or plug in water or any other liquid. 6. 7. 8. 9. 7 This appliance has a drop open Crumb Tray at the bottom of the baking chamber. First unplug the appliance and allow to completely cool. To clean out the crumbs, simply tilt the unit backwards and push the „Crumb Tray Slide Fastener‟ towards the rear, down, allowing it to drop on counter top. Wipe interior of crumb tray with a damp cloth. After cleaning, push the „Crumb Tray Slide Fastener‟ down and in to lock the crumb tray back into place. LIMITED WARRANTY* ONE (1) YEAR WARRANTY IS ONLY VALID WITH A DATED PROOF OF PURCHASE 1. Your small kitchen appliance is built with precision, inspected and tested before leaving our factory. 2. It is warranted, to the original purchaser to be free from any manufacturing defects under normal use and conditions for one (1) year, cord excluded. This Warranty applies only to the original purchaser of this product. 3. If you need to exchange the unit, please return it in its original carton, with a sales receipt, to the store where you purchased it. If you are past the stores allowed return policy period, please see the enclosed Warranty. 4. If you use your appliance for household use and according to instructions, it should give you years of satisfactory service. 5. During the one-year warranty period, a product with a defect will be either repaired or replaced with a new or reconditioned comparable model (at our option) when the product is returned to our Service Center. (See the “Returns” section below). 6. The repaired or replacement product will be in warranty for the remaining balance of the one-year warranty period and an additional one-month period. 7. This limited warranty covers appliances purchased and used within the 50 contiguous states plus the District of Columbia and does NOT cover: - Damages caused by unreasonable use, neglect, normal wear and tear, commercial use, improper assembly or installation of product. - Damages caused in shipping. - Damages caused by replacement or resetting of house fuses or circuit breakers. - Defects other than manufacturing defects. - Breakage caused by misuse, abuse, accident, alteration, lack of proper care and maintenance, or incorrect current or voltage. - Lost or missing parts of the product. Parts will need to be purchased separately. - Damages of parts that are not electrical; for example: cracked or broken plastic or glass. - Damage from service or repair by unauthorized personnel. - Extended warranties purchased via a separate company or reseller. - Consumer‟s remorse is not an acceptable reason to return a product to our Service Center. *One Year Limited Warranty valid only in the 50 contiguous states plus the District of Columbia, excluding Puerto Rico and the Virgin Islands. This warranty is effective only if the product is purchased and operated in the USA; product usage which is in violation of the written instructions provided with the unit will void this warranty. For international warranty, please contact the local distributor. **Any instruction or policy included in this manual may be subject to change at any time. MAXI-MATIC, USA 18401 E. Arenth Ave. City of Industry, CA 91748 Customer Service Dept: (626) 912-9877 Ext: 120/107 MON-FRI 8am-5pm PST Website: www.maxi-matic.com email: [email protected] 8 RETURN INSTRUCTIONS RETURNS: A. Any return of defective merchandise to the manufacturer must be processed accordingly by first contacting customer service (contact information shown below) to obtain an RA # (Return Authorization Number). We will not accept any returns of merchandise without an applicable RA #. B. IMPORTANT RETURN INSTRUCTIONS. Your Warranty depends on your following these instructions if you are returning the unit to Maxi-Matic USA: 1. Carefully pack the item in its original carton or other suitable box to avoid damage in shipping. 2. Before packing your unit for return, be sure to enclose: a) Your name, full address with zip code, daytime telephone number, and RA#, b) A dated sales receipt or PROOF OF PURCHASE, c) The model number of the unit and the problem you are having (Enclose in an envelope and tape directly to the unit before the box is sealed,) and d) Any parts or accessories related to the problem. 3. Maxi-Matic USA recommends you ship the package U.P.S ground service for tracking purposes. We cannot assume responsibility for lost or damaged products returned to us during incoming shipment. For your protection, always carefully package the product for shipment and insure it with the carrier. C.O.D shipments cannot be accepted. 4. All return shipping charges must be prepaid by you. 5. Mark the outside of your package: MAXI-MATIC USA 18401 E. ARENTH AVE. CITY OF INDUSTRY, CA 91748 6. Once your return has been received by our warehouse, Maxi-Matic USA will repair or replace the product if it is defective in material or workmanship, subject to the conditions in paragraph B. 7. Maxi-Matic will pay the shipping charges to ship the repaired or replacement product back to you. 9 IMPORTANTES MEDIDAS DE SEGURIDAD Cuando use aparatos eléctricos, precauciones básicas de seguridad deberán de seguirse, incluyendo las siguientes: 1. Lea todas las instrucciones cuidadosamente, antes de usar el aparato 2. No toque las superficies calientes, use el mango o las agarraderas. 3. Remueva todo material de empaque, antes de usar el aparato 4. Lave todas las partes o accesorios removibles, antes de usar por primera vez. 5. Para protegerse, de una descarga eléctrica, no sumerja el cordón, enchufe eléctrico o aparato en agua o ningún otro líquido. 6. Cercana supervisión es necesaria, cuando el aparato sea usado por o cerca de niños 7. Desconecte el aparato, cuando no esté en uso y antes de limpiarlo. Permita que enfríe completamente para remover las partes o accesorios. 8. Nunca use ningún aparato con el enchufe dañado. Si el cordón de alimentación es dañado este debe ser remplazado por el fabricante, personal capacitado o su agente de servicio, para evitar riesgos 9. El uso de accesorios no recomendados por el fabricante, pueden causar daños personales o al aparato. 10. No lo use a la intemperie o en lugares húmedos. 11. No deje que el cordón eléctrico cuelgue de la orilla de la mesa o mostrador, alguien podría enredarse con el cordón y causar un tropezón 12. No lo ponga sobre o cerca de superficies calientes como estufas y hornos 13. Siempre deberá conectar el cordón eléctrico al aparato y después al toma corriente eléctrica, si aplica. 14. Siempre deberá de apagar el aparato antes de desconectar del toma corriente. 15. Nunca introduzca utensilios de metal en el aparato, podría causar fuego, descarga eléctrica o daños personales 16. Fuego podría ocurrir, si el aparato es cubierto o toca material inflamable como: Cortinas alfombras y paredes cuando esté en uso. 17. Extrema precaución deberá tener cuando use depósitos construidos de otro material que no sean de metal o vidrio, si aplica. 18. Para reducir el riesgo de una descarga eléctrica, este Aparato tiene una enchufe polarizada (un lado de las navajas de la enchufe es más ancha que la otra) y esta diseñada para entrar en un receptáculo polarizado de una sola manera. 19. No ponga dentro o en la superficie exterior del aparato los siguientes materiales, papel, cartón, plásticos, algún otro material inflamable o artículos similares que no sean comestibles 20. PRECAUCION. Par evitar daños a la superficie de sus muebles. Algunas superficies de mesas o mostradores hechos y recubiertos de laminado de CORIAN, MADERA FINA O FORMICA. No están diseñados para soportar calores prolongados generados por ciertos aparatos eléctricos de cocina. GUARDE ESTAS INSTRUCCIONES ESTE PRODUCTO ES PARA USO DOMĚSTICO UNICAMENTE 10 PROPOSITO DEL UN CORDO CORTO Se incluye un cordón eléctrico corto en este aparato con el propósito de reducir riesgos de lastimarse usted mismo ya que podría tropezar. Extensiones eléctricas pueden usarse. Si va a utilizar un cordón más largo, tenga en consideración lo siguiente: La extensión eléctrica a utilizar deberá ser igual o de mas amperaje que las especificaciones eléctricas del aparato. Para evitar un tropiezo o enredarse con la extensión eléctrica, deberá de acomodarse de tal manera de que no cuelgue del lugar donde tiene colocado el aparato, o que éste pueda ser jalado por niños o sus mascotas. ENCUHFE POLARIZADO Ésta tiene un enchufe polarizado. Significa que una de las dos navajas que componen el enchufe es más ancho que el otro, favor de seguir las siguientes recomendaciones: Para reducir el riesgo de una descarga eléctrica. Este enchufe solo se conecta de una sola manera en la toma de corriente eléctrica, si el enchufe no entra en el receptáculo inviértalo y trate de introducirlo de nuevo, si aún no entra en el receptáculo, contacte a un electricista calificado. No intente modificar el enchufe de ninguna manera. 11 DESCRIPCION DE PARTES 12 COMO UTILIZAR ANTES DE USAR POR PRIMERA VEZ:______________________________ 1. 2. 3. 4. Remueva y guarde todo material de empaque incluyendo plásticos, cartón, espuma y manual en caso de retornar el producto. Lave todos los accesorios con agua y jabón limpie el interior y exterior del horno con un trapo húmedo esto es para remover todo residuo de empaque y seque perfectamente. Coloque el horno en una superficie plana y estable. Coloque el horno a una distancia de 5cm. retirado de qualquier objeto a su alrrededor. 5. 6. COMO USAR: 5. 6. COMO TOSTAR PAN: 7. NOTA: Cuando seleccione “Toast” 8. Los dos elementos térmicos de 9. arriba y abajo estarán funcionando. 10. 1. Coloque el selector de funciones 11. en „Toast‟. . Ensure that nothing has been 2. Habrá el horno y coloque las placed on top of the oven. rebanadas de pan en la parrilla. Podrá poner hasta cuatro rebanadas de pan COMO AJUSTAR EL TEMPORIZADOR: 3. Seleccione que tan tostado quiere su pan utilizando el temporizador NOTA: Se sugiere empezar con intervalos cortos de tiempo para comprobar que tipo de pan va a tostar ya que varía de acuerdo a la textura, humedad y grosor del pan. Cada clase de pan se va a dorar diferente de acuerdo a esas propiedades. 13 4. Asegúrese de que la charola este colocada en su lugar antes de utilizar Para personas que lo van a usar por primera vez: Coloque el selector de funciones en (TOAST) y el temporizador en 60 minutos. Esto quemara cualquier residuo de manufactura. NOTA: El horno podrá emitir humo durante este proceso. Esto es normal e inofensivo y no durara más de 10 o 15 minutos. NOTA – Cuando seleccione menos de 10 minutos, siempre haga girar el temporizador a mas de 10 minutos y luego regrese al tiempo seleccionado. Esto asegurara que el temporizador ha sido colocado correctamente. Cuando el ciclo de tostar haya terminado un sonido tipo campana se oirá y el horno se apagara automáticamente. Para parar el ciclo de tostar en cualquier momento, Coloque el temporizador en la posición de „OFF‟ y la alarma de campana sonara. NOTA – El pan se quemara si ha selecciona un tiempo muy largo. Muy cercana supervisión es necesaria durante el ciclo de tostar. COMO USAR (CONT.) ASAR A LA PARRILLA: NOTA: Cuando seleccione „Broil‟, Únicamente el elemento térmico de arriba entrara en funcionamiento. 1. Siempre utilice la bandeja para cocinar, asar alitas o piernas de pollo que contienen mucha grasa. 2. Coloque los alimentos en la bandeja y ponga sobre la parrilla de alambre. NOTA – Le sugerimos precalentar el horno entre 3 y 5 minutos antes de colocar los alimentos dentro del horno. 3. Coloque el selector de funciones en la posición de „Broil‟. 4. El temporizador actúa como interruptor de apagado/encendid: COMO HORNEAR: NOTA: Cuando seleccione „Bake‟ Deslice la parrilla de alambre en las ranuras de la parte baja del horno. 1. Ponga los alimentos dentro de la bandeja. NOTA: No es necesario que utilice la bandeja cuando hornee. Puede usar bandejas de metal que no sean más grandes de 22 x 25 cm. NOTA: Siempre sugerimos precalentar el horno 5 minutos en esta selección antes de colocar los alimentos dentro del horno. 2. Coloque el selector de funciones en „Bake‟. a. b. 3. 4. 14 Para periodos cortos de tiempo coloque el temporizador hasta (15 minutos) Cuando el ciclo haya terminado la alarma de campana sonara y el horno se apagara automáticamente or Para periodos largos de tiempo coloque el temporizador en (“stay on” setting). El horno continuara encendido hasta que manualmente lo apague y la alarma suene. NOTA: Siempre esté al tanto de los alimentos que se están cocinando, en esta selección para prevenir el sobre cocinado. De vuelta los alimentos durante el proceso o agréguele condimentos si es necesario. Siempre utilice guantes o toallas de cocina para evitar quemaduras. Seleccione el tiempo de acuerdo a al tipo de y grosor de los alimentos. El elemento térmico se mantendrá encendido intermitente para mantener la temperatura deseada. El tiempo máximo establecido es de 60 minutos, para periodos mas grandes, deberá de colocar el temporizador en “stay on” y manualmente colocarlo en apagado „OFF‟ una vez que los alimentos se hayan cocinado. NOTA – Siempre revise los alimentos para asegurarse que no se estén sobrecosiendo. COMO USAR (CONT.) COMO DESCONGELAR: NOTA: Siempre utilice la bandeja para descongelar cualquier tipo de alimentos. 1. Coloque la parrilla de alambre dentro del horno. PRECAUCIÓN: Asegúrese de quitar todo material de empaque como plásticos, cartón y papel de los alimentos congelados antes de ponerlos dentro del horno. 2. Coloque los alimentos dentro de la bandeja y póngalos sobre la parrilla de alambre dentro del horno. 3. Coloque el control de temperatura en 200-250 dependiendo en el grosor de los alimentos. NOTA: No es necesario precalentar el horno cuando descongele. 15 NOTA: El tiempo que se requiere para descongelar los alimentos depende principalmente de peso, tipo y forma. Si los alimentos son gruesos la temperatura debe ser puesta en no más de 250 grados. PRECAUCIÓN: Asegúrese de dar vuelta los alimentos para prevenir que se quemen. CUIDADO: Los alimentos estarán calientes cuando los remueva del horno. Siempre utilice guantes o toallas de cocina. NOTA: Si los alimentos pueden ser cortados fácilmente con un cuchillo. El proceso de descongelar ya termino. CUIDADO: Siempre cocine rápidamente los alimentos después de descongelarlos. TABLA DE TIEMPOS SUGERIDOS NOTA: Las siguientes tiempos de cocinar que se dan en esta tabla, son aproximados y se dan como referencia únicamente. Tipo de alimento Rosquilla de pan Pan Hamburguesa Pizza Tocino Sausage Pescado Filete Tiempo Porción 2–3 Rebanadas 2–3 Rebanadas 2–3 Porciones redondas 2 Rebanadas 2cm cutlet 3 – 4 piezas 1–2 Rebanadas 1cm cutlet 2 – 3 minutos 2 – 3 minutos 10 – 15 minutos 6 – 8 minutos 7 – 12 minutos 8 – 10 minutos 10 – 12 minutos 10 – 15 minutos MANTENIMIENTO Y LIMPIEZA 1. 2. 3. 4. Favor de desconectar el aparato del tomacorriente y dejar que enfrié antes de limpiar. Limpie todos los accesorios en agua tibia y con jabón. No los lave en el lavaplatos. No use limpiadores abrasivos, espátulas o brochas de alambre podrían dañar la capa de antiadherente en la charola. Use un trapo húmedo para limpiar el interior del oven. 16 5. 6. 7. Limpie la puerta de vidrio con un trapo humedo y limpio. PRECAUCION: Nunca sumerja la unidad en agua o en ningún otro liquido. Para limpiar los reciduos de alimentos, simplemente incline el aparato hacia atras y empuje la charola deslizandola por la parte trasera del aparato. Limpie con un trapo humedo. Después de limpiar deslice la charola en su lugar. GARANTÍA LIMITADA * UN (1) AÑO GARANTIA ES VALIDA CON UNA PRUEBA DE COMPRA FECHADA 1. Su aparato de cocina está construido con precisión, inspeccionados y probados antes de salir de nuestra fábrica. 2. Se garantiza, al comprador original, de estar libres de defectos de fabricación en condiciones de uso normales y las condiciones para un (1) año, cordones excluidos. Esta garantía se aplica sólo al comprador original de este producto. 3. Si necesita cambiar la unidad, devuélvala en su caja original, con el recibo de compra, a la tienda donde lo compró. Si usted está más allá del plazo concedido para el retorno por la política de la tienda, por favor consulte la garantía incluida. 4. Si utiliza el aparato para uso doméstico y de acuerdo con las instrucciones, debería ofrecerle años de servicio satisfactorio. 5. Durante el período de garantía de un año, un producto con un defecto será reparado o reemplazado por un modelo nuevo o reacondicionado (a nuestro criterio) cuando el producto sea devuelto a nuestro Centro de Servicio. (Consulte la sección "Devoluciones" a continuación). 6. El producto reparado o reemplazado estará garantizado por el saldo restante del período de garantía de un año y un plazo adicional de un mes. 7. Esta garantía limitada cubre los aparatos comprados y usados en los 50 estados contiguos y el Distrito de Columbia, y no cubre: - Los daños causados por el uso excesivo, negligencia, uso y desgaste normal, uso comercial, montaje o instalación incorrecta del producto. - Los daños causados durante el envío. - Los daños causados por la sustitución o reposición de fusibles o disyuntores. - Defectos que no sean defectos de fabricación. - Rotura causada por mal uso, abuso, accidente, alteración, falta de cuidado y mantenimiento, o incorrecta de corriente o voltaje. - Pérdida o falta alguna pieza del producto. Las piezas se deben comprar por separado. - Daños de piezas que no sean eléctricos; por ejemplo: agrietado o roto de plástico o de vidrio. - Daños por servicio o reparación por personal no autorizado. - Las garantías extendidas compradas a través de una empresa independiente o revendedor. - Remordimiento del consumidor no es una razón aceptable para devolver un producto a nuestro Centro de Servicio. * Un año de garantía limitada válida solamente en los 50 estados contiguos y el Distrito de Columbia, excluyendo Puerto Rico y las Islas Vírgenes. Esta garantía es válida sólo si el producto es comprado y operado en los EE.UU., el uso del producto que se encuentra en violación de las instrucciones escritas proporcionadas con la unidad anulará esta garantía. Para la garantía internacional, por favor póngase en contacto con el distribuidor local. ** Cualquier instrucción o política incluida en este manual puede estar sujeta a cambios en cualquier momento. MAXI-MATIC, EE.UU. 18401 E. Ave Arenth. City of Industry, CA 91748 Departamento de Atención al Cliente: (626) 912-9877 Ext: 120/107 Lunes a viernes 8am5pm PST Sitio web: www.maxi-matic.com email: [email protected] 17 INSTRUCCIONES DE DEVOLUCIÓN DEVOLUCIONES: A. Cualquier devolución de mercancía defectuosa al fabricante deben ser procesados apropiadamente contactando primero al servicio al cliente (información de contacto se muestra a continuación) para obtener un # RA (Número de autorización de devolución). No se aceptará ninguna devolución de mercancía sin un # RA aplicable. B. INSTRUCCIONES IMPORTANTES DE RETORNO. Su garantía depende que usted siga estas instrucciones si va a devolver la unidad a Maxi-Matic EE.UU.: 1. Empaque cuidadosamente el producto en su caja original o en otra caja adecuada para evitar daños durante el envío. 2. Antes del envío de la devolución unidad, asegúrese de adjuntar: a) Su nombre, dirección completa con código postal, número de teléfono durante el día, y #RA b) U n recibo de compra fechado o COMPROBANTE DE COMPRA, c) El número de modelo de la unidad y el problema que tiene (Encierre en un sobre y pegue directamente a la unidad antes de sellar la caja) y d) T odas las piezas o accesorios relacionados con el problema. 3. Maxi-Matic EE.UU. recomienda enviar el paquete de servicio terrestre de UPS para fines de seguimiento. No podemos asumir la responsabilidad por productos perdidos o dañados devueltos a nosotros durante el transporte entrante. Para su protección, siempre cuidadosamente empaquetar el producto para su envío y asegurarlo con la compañía. Envíos C.O.D no puede ser aceptado. 4. Todos los gastos de envío de devolución debe ser pagado por usted. 5. Marque el exterior del paquete: MAXI-MATIC EE.UU. 18401 E. ARENTH AVE. CITY OF INDUSTRY, CA 91748 6. Una vez que su devolucion ha sido recibida por nuestro almacén, Maxi-Matic EE.UU. se compromete a reparar o sustituir el producto si presenta defectos de materiales o mano de obra, sujeto a las condiciones del apartado B. 7. Maxi-Matic pagará los gastos de envío para enviar el producto reparado o reemplazado de nuevo a usted. 18