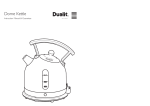
1
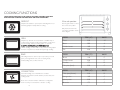
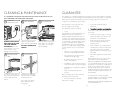
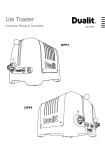
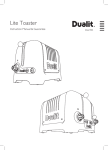
Mini Oven
Instruction Manual and Guarantee
CONTENTS
SAFETY PRECAUTIONS
Safety precautions
3
Know your Mini Oven
6
READ ALL THE
INSTRUCTIONS
Cooking functions
8
Setting up
10
Each use
11
Cleaning & maintenance
12
Guarantee
13
Recipes
14
CAREFULLY BEFORE
USING YOUR DUALIT
MINI OVEN. KEEP THESE
INSTRUCTIONS SAFE
FOR FUTURE
REFERENCE.
All illustrations are for representation only, your model may have a different appearance from illustrations shown.
2
Oversized foods, metal foil packages and
utensils must not be inserted in the
toaster oven grill, as they may cause a
risk of fire or electric shock.
•
Do not insert anything into the
ventilation slots and do not obstruct
them.
•
The door and the outer surface may get
hot when the appliance is operating. Use
handles or knobs.
•
Do not let cord hang over the edge of
the table or countertop where it could
be pulled on inadvertently by children or
pets, or touch hot surfaces which could
damage the cord.
•
Do not place oven on or near a hot gas
or electric burner or in a heated oven.
•
Extreme caution should be exercised
when using containers constructed of
materials other than metal or oven proof
glass in the oven.
•
To avoid burns, use extreme caution
when removing trays, racks or disposing
of hot grease. Always use heatproof
gloves.
•
Use extreme caution when removing
tray or disposing of hot grease.
•
Do not place any of the following
materials in the oven: paper, cardboard,
plastic and similar products.
•
Empty the crumb tray regularly. Do not
cover crumb tray or any part of
the oven with metal foil, this will cause
overheating of the oven.
Always follow these safety precautions when
using your Mini Oven, for your own safety
and to avoid damaging the Mini Oven.
•
Unpack the box with care, keeping all the packaging materials until you are satisfied
everything is present and in working order. Once satisfied remove any tags from the
Mini Oven and recycle the packaging appropriately.
•
To protect against electrical shock, do
not place any part of the oven, or
cordset, in water or any other liquid.
•
Do not operate the appliance with a
damaged cord or plug
•
If the supply cord is damaged, it must be
replaced by the manufacturer, its
service agent or similarly qualified
persons in order to avoid hazard
•
Do not operate after the
appliance has malfunctioned, been
dropped, damaged in any way or if it is
not operating properly. Return the oven
to the nearest Dualit Repair Centre for
examination, repair or mechanical or
electrical adjustment.
•
Do not use outdoors.
•
Do not attempt to dislodge food when
the oven is plugged into electrical outlet.
3
•
A fire may occur if the oven is covered
or touching flammable materials such as
curtains, drapes and walls, when in
operation.
•
The appliance is not intended to be
operated by means of an external
timer or separate remote-control
system
•
The appliance can be used by children
aged from 8 years and above and
persons with reduced physical, sensory
or mental capabilities or lack of
experience and knowledge if they have
been given supervision or instruction
concerning use of the appliance
in a safe way and understand the
hazards involved. Children shall not play
with the appliance. Cleaning and
maintenance shall not be made by
children unless they are older than 8
and supervised
•
Only plates that are being heated
should be left on top of the appliance
when in operation.
•
Only plates that are being heated
should be left on top of the appliance
when in operation.
•
The exterior walls can get very hot
when in use. Keep out of reach of
children.
•
The exterior walls can get very hot
when in use. Keep out of reach of
children.
•
Close supervision is necessary when
any appliance is used near children.
•
Close supervision is necessary when
any appliance is used near children.
•
The appliance must only be used in an
upright position, never lying down, tilted
or upside down.
•
The appliance must only be used in an
upright position, never lying down, tilted
or upside down.
•
Do not use this oven for anything other
than its intended purpose.
•
Do not use this oven for anything other
than its intended purpose.
•
Use oven gloves to remove any object
stored on top of the oven.
•
Use oven gloves to remove any object
stored on top of the oven.
•
Use recommended temperature
settings for baking and roasting.
•
Use recommended temperature
settings for baking and roasting.
•
Do not rest cooking utensils or baking
dishes on glass door.
•
Do not rest cooking utensils or baking
dishes on glass door.
•
Keep the appliance and it’s cord out of
reach of children less than 8 years
•
Turn the timer dial to the OFF position
to turn off the oven.
•
Turn the timer dial to the OFF position
to turn off the oven.
•
WARNING: Do not operate under
wall units or any combustible materials.
•
The use of accessory attachments not
recommended by Dualit may cause
injury.
•
The use of accessory attachments not
recommended by Dualit may cause
injury.
•
Do not store materials other than
manufacturer’s recommended
accessories in this oven.
•
Do not store materials other than
manufacturer’s recommended
accessories in this oven.
•
UNPLUG FROM OUTLET WHEN
NOT IN USE AND BEFORE
CLEANING.
•
UNPLUG FROM OUTLET WHEN
NOT IN USE AND BEFORE
CLEANING.
•
Allow to cool before cleaning
•
Allow to cool before cleaning
•
•
Should any part of the appliance catch
fire, do not attempt to extinguish it
with water. Unplug, smother external
flames with a damp cloth or fire
blanket. Never attempt to open the
oven door if the oven should catch fire.
Warning: To avoid possibility of fire,
NEVER leave the oven unattended
during use.
4
•
Do not clean with metal scouring pads.
Pieces can break off the pad and touch
electrical parts, creating a risk of electric
shock.
•
A short power supply cord is provided
to reduce the risks resulting from
becoming entangled in or tripping over
a longer cord. Longer extension cords
may be used if care is exercised in their
use. If a long extension cord is used,
the marked electrical rating of the
extension cord must be at least as
great as the electrical rating of the
appliance, and the longer cord should
be arranged so that it will not drape
over the countertop or tabletop where
it can be tripped over or pulled on by
children.
SAVE THESE
INSTRUCTIONS
FOR HOUSEHOLD USE ONLY
NOT INTENDED FOR COMMERCIAL USE
THIS IS AN ATTENDED APPLIANCE
In the interest of improving products,
Dualit Ltd. reserves the right to change the
product specification without prior notice.
5
KNOW YOUR MINI OVEN
DOOR HANDLE
PLATE WARMING AREA
TEMPERATURE
INDICATOR LIGHT
TEMPERATURE DIAL
100-230oC
DOUBLE GLAZED
GLASS DOOR
FUNCTION DIAL
For Bake, Defrost, Grill or
Convection
TIMER LIGHT
DRIP TRAY
IIluminates red
FEET
TIMER WITH BELL
0-120 min
ACCESSORIES
GRILLING PAN & RACK
6
WIRE SHELF
PIZZA TRAY
7
COOKING FUNCTIONS
THESE TABLES ARE ONLY TO BE USED AS A GUIDE, COOKING TIMES MAY
VARY. FOLLOW COOKING INSTRUCTIONS ON FOOD PACKAGING
DEFROST
Wire rack position
Only the fan activates to speed up the defrosting time. Food
is thawed gently and evenly without cooking.
Use the guide below to select
the correct rack position.
Only insert the rack in the
oven in the orientation shown
in the diagram.
TEMP (oC)
RACK
Toast
230
A*
Bacon
200
A
GRILL
FOOD
Only the top elements are used, ideal for a healthier way of
cooking meats, sausages and bacon. This function could also be
used for toasting and top browning gratins or casseroles.
ALWAYS LEAVE DOOR AJAR WHEN GRILLING
Chicken breast
180
B
* When toasting use wire shelf on rack position A with grill pan
and rack on top. Turn over bread half way through toasting.
Fish
220
B
BAKE
FOOD
TEMP (oC)
RACK
The baking function is used for any food product you would
put in your large kitchen oven, such as roasting meats,
chicken, baking cakes, cookies and more.
Bread
190
C
Chicken breast
230
C
Cookies
175
B
Thin pizza (fresh)
230
C
TEMP (oC)
RACK
CONVECTION
FOOD
Convection baking uses an internal fan to circulate
heated air around the food. This function produces fast, even
cooking results.
Thick pizza (frozen)
230
B
Sponge cake
180
C
Jacket potato
230
C
Brownies
175
C
Please note convection function will reduce cooking times.
Some foods may not be ideal for convection cooking.
8
9
SETTING UP
EACH USE
TURN THE OVEN ON FOR THE FIRST TIME IN A WELL VENTILATED ROOM, A
“NEW”SMELL MAY BE GIVEN OFF, THIS WILL DISSIPATE AFTER A FEW USES.
THE EXTERIOR WALLS GET VERY HOT WHEN IN USE. USE OVEN GLOVES TO
REMOVE ANY STORED OBJECT ON TOP OR INSIDE OF THE OVEN.
1 POSITION OVEN
Before plugging in your Mini
Oven, place on a flat surface.
Leave at least a 10cm gap
above and to the side of the
oven. Never place on a
heat-sensitive worktop or
below a flammable surface.
2 SPACING
Place the Mini Oven firmly
against the back wall.
3 CRUMB TRAY
Ensure that the crumb tray is
clean and seated in place.
Empty after each use and
keep clean.
4 RACK POSITIONS
5 PLATE WARMING
IMPORTANT: Always use the wire rack in the orientation
shown above.
The rack can be positioned at three different heights. The
ideal position will be effected by the food item, temperature
and setting (refer to page 8 for a guide on cooking rack
positions).
10
When in use, place plates on
top of the oven to warm.
The exterior walls get very
hot when in use. Use oven
gloves to remove any plates
on top of the oven.
1 SELECT
2 SELECT
TEMPERATURE
FUNCTION
Turn the temperature dial to
select the required
temperature.
Turn the function dial to
select grill, defrost, bake or
convection.
4 PREHEAT
Ensure the oven door is
closed. Preheat the oven for
five minutes. The temperature
light will turn off when the
set temperature is reached.
The oven is now ready for
cooking.
5 COOK
Follow cooking instructions
on food packaging or
receipe, always check the
food is cooked properly.
When the timer reaches ‘0’
the bell will ring and the
oven will turn off.
11
3 SET TIMER
The timer is the main
ON/OFF switch. Turn the dial
to the required amount of
time. The red light will
illuminate when the timer is
running.
6 TURN OFF
If you need to turn the oven
off before the timer has
finished, set the function dial
to ‘OFF’ and turn the timer to
‘0’. You will hear the bell.
CLEANING & MAINTENANCE
GUARANTEE
IT IS IMPORTANT TO CLEAN THE OVEN AND ALL PARTS AFTER EACH USE. THIS
WILL PROLONG THE LIFE OF YOUR APPLIANCE.
This appliance is of excellent quality and construction. However, if any defects in materials
or workmanship do appear during the relevant guarantee period, we will, at our discretion,
either repair or replace the defective parts, free of charge, subject to the terms and
conditions of our Guarantee shown below.
1 TURN OFF,
UNPLUG & COOL
ALWAYS SWITCH OFF,
UNPLUG AND ALLOW
TO COOL BEFORE
CLEANING. Never use
harsh abrasives or corrosive
products. These could
damage the oven surface.
4 REMOVE CRUMB
2 WIPE EXTERIOR
Wipe the exterior with a
Wipe the interior walls with a
damp cloth. Dry immediately. damp cloth and a mild liquid
soap solution on a sponge.
DO NOT IMMERSE IN
Dry immediately.
WATER.
5 DISHWASHER
TRAY
To remove crumbs, slide out
the crumb tray and discard
crumbs. Wipe clean and
replace.
3 WIPE INTERIOR
All attachments excluding
the main body are suitable
for dishwasher use.
Use a wash cycle below
40°C. Remove prior to
drying cycle.
12
This Guarantee covers both parts and
labour. Carriage is not included.
•
Your mains electricity supply is
functional
Your guarantee period is as follows:
•
The defect is not due to a blown fuse.
•
If you wish to claim under this Guarantee
you should:
1 year
This Guarantee provides benefits that are
additional to, and do not affect, your
statutory rights. This Guarantee does not
cover the cost of returning the product to
the dealer from whom it was purchased or
to ourselves. This guarantee applies only to
products sold and located in mainland
Great Britain. It does not cover liability in
respect of or replacement of plugs, cables
or fuses and also does not cover defects
due to:
•
Failure to use or maintain product in
accordance with Dualit's instructions.
•
The product being connected to an
unsuitable electricity supply.
•
Accidental damage to or abuse or
misuse of the product.
•
Modification of the product by anyone
other than Dualit or an approved agent.
•
Dismantling of or interference with the
product.
•
Theft or attempted theft of the
product.
•
Send the product, postage or carriage
paid, to the dealer from whom it was
purchased or to Dualit direct
•
Ensure that the product is clean and
packed carefully (preferably in its
original carton)
•
Enclose details of your name, address
and telephone number and when and
where the product was purchased,
together with proof of purchase (e.g. a
till receipt)
•
Give exact details of the nature of the
defect
This Guarantee does not cover any other
claims whatsoever, including, without
limitation, any liability for incidental, indirect
or consequential damage. Nor does it cover
any claims for conversion or modification or
for the costs of repair carried out by any
third party without the prior consent of
Dualit. If replacement parts are fitted to the
product this will not extend the period of
the Guarantee.
Before returning any product under this
Guarantee, please check that:
For further advice contact the Dualit
customer helpline on +44 (0)1293 652 500
(09:00 to 17:00 Monday to Friday).
• You have followed the product
instructions correctly
Alternatively, email Dualit at [email protected]
or visit www.dualit.com
13
Join Club Dualit for more recipe ideas
HOME MADE BREAD
www.dualit.com/recipes
This basic bread recipe is quick and easy and can be adapted to your own taste.
Why not have fun and experiment with your choice of ingredients to vary the flavour and
texture. You can add seeds, nuts, curry pastes, dried fruits or herbs but always use good
quality organic flour from local mills as this produces a much more nutritious and high
quality product.
Access a comprehensive
database of recipes, giving
you lots of ideas for
everyday meals and
entertaining.
500g strong white flour
or 500g strong wholemeal flour
25g butter
11/4 tsp salt
HONEY ROAST CHICKEN
When you are hungry, a tasty roast chicken with a butter, honey, salt and cracked peppercorn
crust is hard to beat. A good quality chicken is essential for a juicy and flavoursome result. A
plump, free range, corn fed chicken is recommended. The result will be meltingly tender.
2 cloves garlic, finely sliced
small bunch tarragon or thyme
1.2 kg (2¾ lb) chicken (not
larger, or it will not cook in time)
30ml (2 tbsp) runny honey
25gm (1oz) unsalted butter,
softened to a dropping consistency
1 tbsp sea salt crystals
1 tbsp coarsely crushed black
peppercorns
Preheat oven to 220C/425F, set to Bake.
Place the garlic and herbs in the chicken’s cavity. Warm the honey and butter and, using your
hands, smear it over the bird thoroughly. With fingers still sticky, rub in the salt and pepper.
Line the oven tray with a silicone mat to prevent any honey drips burning onto the bottom.
Put the grill tray in the oven tray and place the chicken on the top, breasts towards the door.
Cook chicken at 220C/425F for 10 minutes on rack position C, then turn the oven down to
190C/375Fand allow 45 minutes per kg, plus 20 minutes. Make sure it is cooked through (to
do this insert a skewer into the thickest part of the leg: if the juices run clear, the chicken is
cooked.
14
11/2 tsp fast action dried yeast
2 tsp sugar
300ml warm water for the white loaf or
350ml warm water for the wholemeal loaf
In the Dualit food processor large bowl fitted with the dough blade mix together the flour,
salt, yeast, butter and sugar. Process well, slowly adding the water through the feeder tube
until the flour forms a craggy ball – this should take approximately 2 minutes. Leave the
dough in the processor bowl to rise for approximately 20-30 minutes. Keep the lid on for
this process. Pulse 3-4 times to knock the air out of the dough. Remove the dough from
the food processor and place in a greased 1kg bread tin or on an oiled baking sheet and
cover with a cloth. Allow to rise in a warm draught free place for another 1-2 hours or
until doubled in size. Bake in a preheated oven 220ºC om rack position C for 30-35
minutes or until golden brown.
TRADITIONAL SPONGE CAKE
There is nothing nicer than the simplicity of a Traditional Victoria Sponge cake.
This all-in-one method makes a perfectly light sponge for an indulgent afternoon tea - why
not try a filling of whipped cream, blueberry and lemon zest for a contemporary twist.
175g soft butter or margarine
175g caster sugar
4 large eggs
1 tsp baking powder
175g self-raising flour
1 tsp vanilla essence
4 tbsp strawberry jam (to decorate)
icing sugar to dust
Place the butter or margarine, sugar, baking powder and flour in the food processor large
bowl with its chopping blade. Remove the feeder tube to allow as much air into the mix as
possible. Pulse until the mixture is creamed together. Break in the eggs and process for a
further 10-15 seconds. Pour into two 18cm cake tins. The tins should be well buttered and
bases lined with silicone mat or baking parchment. Spread evenly and bake in a preheated
oven 180ºC on rack position B for 15-20 minutes or until risen golden brown and firm to
the touch. Leave to cool. Apply the jam to the top of one cake and sandwich together with
the other. Dust liberally with icing sugar and slice into generous helpings.
15
Dualit Limited County Oak Way Crawley West Sussex RH11 7ST
Telephone: +44 (0) 1293 652 500 Facsimile: +44 (0) 1293 652 555
Email: info @ dualit.com Web: www.dualit.com
GB0911