Transcript
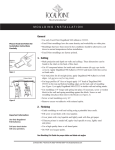
Crown & Cornice Moulding Installation Instructions Tools & Materials Needed Caulking gun Sponge or Clean Cloth Miter Saw Chalk line box and pencil Polyurethane construction adhesive [PL Premium® recommended] Prior to Installation 1. It is recommended to finish moulding before installation. If painting, use an exterior grade acrylic latex or oil based paint. 2. Place moulding in room 2 to 3 days prior to installation. This allows the moulding to adjust to the temperature of the room. 3. Clean the installation surface with a sponge or clean cloth. 4. Make sure that the installation surface is dry before proceeding. Mitering Corners 1. Place moulding in the miter box with the wall side against the side of the miter box opposite you and the ceiling touching side against the bottom of the box. 2. Cut miters and but joints prior to installation. Installation 1. Apply a continuous 1/4" bead of construction adhesive along the top and back of moulding lengths and butt joints. Adhesive should be used to fill any gaps. Press moulding into place. Finishing nails should be used to secure moulding. 2. Apply caulk in remaining gaps and smooth with finger or putty knife. Caulk can be used to fill in holes left from finishing nails. 3. Touch-up moulding as needed.