1
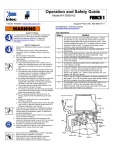
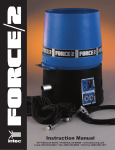
Quick Start Operation and Safety Guide Models – all rev: 20140103 Vendor Website: www.inteccorp.com Support Phone No. 800-666-1611 ____________________________________________________________________________________________________________ Additional system information located at: http://www.inteccorp.com/force2-hp Tool Operation: SAFETY TOPICS To avoid personal injury, do not attempt to operate this equipment until you thoroughly read and completely understand the operator‟s manual. Please visit http://www.inteccorp.com/force2hp for additional information. SAFETY CHECKLIST 1) 2) 3) 4) 5) 6) 7) 8) 9) 10) 1) 2) 3) 4) Read all the instructions before using the insulation blower. To reduce the risk of injury, close supervision is necessary when an insulation blower is used near children. Do not contact moving parts. Only use attachments recommended or sold by the manufacturer. Use of Extension and Power Cord: a) This product requires the use of two power cords. Care should be exercised in the selection and use of an extension cord. b) The extension cord shall be a grounded 3-wire cord. c) The extension cord should be arranged so that it will not drape over the countertop or tabletop where it can be tripped over, snagged, or pulled on unintentionally – especially by children. d) An outdoor rated extension cord should be used with this machine. An outdoor- use extension cord is marked with suffix letter “W” and with a tag stating “Suitable for Use with Outdoor Appliances.” e) The marked electrical rating for each extension cord shall be rated for at least 15 amps. f) To unplug or disconnect: Put the blower and agitator control panel and remote buttons in the stop position before removing plug from outlet. g) Do not unplug by pulling on the power cord. To unplug, (i) pull the male plug out of the wall outlet, then (ii) grasp the female plug, rotate counter clockwise, and pull away from the machine. h) Unplug from outlet when not in use and before servicing or cleaning. i) Do not operate any insulation blower with a damaged cord or plug, or after the machine malfunctions or is dropped or damaged in any manner. In the case of a non-operable or malfunctioning blower, return the insulation blower to the nearest authorized service facility for examination, repair, or electrical or mechanical adjustment. Store insulation blower indoors when not in use. Keep out of the reach of children. Never operate this equipment if the operator or the machine is standing in water, snow or rain. Do not clean this insulation blower with water spray or the like. Connect to a properly grounded outlet only. Wear long sleeve shirt, gloves, a hat, safety glasses or goggles, and a nose & mouth dust mask. Step 1 Action Unload the machine using safe lifting techniques. Position the machine in a dry, hazard free environment to allow for suitable material feed and access to electrical power. Note: At cold temperatures below 35 F, oil thickens and may cause start-up difficulties. To 2 3 4 prevent startup difficulties, leave machine in warm area overnight (8 hours). Secure 100 feet of blowing hose to machine outlet with a hose clamp. You may use up to 200‟ of 3” hose but you will notice a decrease in production as well as the throw out of the end of the hose. It is recommended that if you need to use a hose longer than 150‟, reduce down to 2-1/2” hose. The reduction of hose size will limit the capacity and increase the throw of the material at the end of the hose. Open the material feed gate by removing the locking pin. Attics: pull slide gate outward to the last hole position, and secure gate by placing pin in the last hole. Walls: Refer to the owner‟s manual or Intec‟s website for proper settings. Your FORCE/2 comes with a rubber flap that attaches to one of the agitator paddles: Fasten the rubber flap to your agitator when you are using cellulose. Remove the flap when you are using fiberglass or stonewool. 2 5 4 3 Wired Remote System: The remote cord must be attached at all times in order for the machine to operate (or use the Jumper Plug if not utilizing the wired remote). To connect, locate the keyed positions on both the receptacle (electrical panel) and connector on remote cord. Insert connector into the receptacle and turn clockwise until it clicks in. Wireless Remote System: Place remote selector switch on Electrical Panel to „wireless‟. 6 Ensure all Electrical Panel & remote controls are in the “off” position. 7 Obtain two 12/3 gauge (use 10/3 gauge if over 100’ length is required) heavy duty twist lock power cords. Connect one end of each power cord to a dedicated circuit (115V 15amp for the agitator). Connect the other end of one power cord to the FORCE/2‟s blower receptacle; connect the other power cord to the FORCE/2‟s agitator receptacle. 5&6 7 WARNING 8 Turn Blower & Agitator Electrical Panel circuit breakers to “ON” positions to power system. Never reach into the hopper when system is operating. Keep all foreign materials out of hopper. Stop all motors and disconnect power cord before attempting to remove a foreign object or jam. Never point insulation hose in the direction of people or pets. 9 Next, use the remote switch to first turn the Blower, then Agitator “ON”. When turning machine “off”, turn agitator “off” first, then blower. Note: Blower has to be on for the agitator to come on. 10 Caution: Never let the plastic packaging enter the hopper. Caution: Never push down on the insulation when in hopper. Cellulose: Remove the packaging plastic. Place cellulose bale into the hopper. Fiberglass: Cut bag of insulation in half. Place the open end of ½ bag to the left or right side of the loading platform. Slice the plastic with a cutting tool and let the insulation expand into the hopper. 11 Hose operator takes the hose to the location for insulation blowing. Use the remote to turn the machine on to blow the insulation material. Hopper operator continues to feed material into hopper until job is complete. 12 At completion, use the remote or panel switch to turn machine off. Remove any insulation still in the system, then place the system in storage until next desired use. Para iniciar rápidamente Operación y Guía de Seguridad rev: 20140104 Modelos - todos original language is English sitio web: www.inteccorp.com Soporte Teléfono: 800-666-1611 ____________________________________________________________________________________________________________ Información adicional del sistema ubicado en: http://www.inteccorp.com/force2-nextgen/ Funcionamiento de la herramienta: TEMAS DE SEGURIDAD Para evitar lesiones personales, no intente utilizar este equipo hasta que haya leído y comprendido totalmente el manual del operador. Por favor, visite http://www.inteccorp.com/force2nextgen para obtener información adicional. Paso Acción 1 Descargar la máquina usando técnicas seguras de levantamiento. Coloque la máquina en un entorno libre de seco, peligro para permitir para la alimentación de material adecuado y acceso a energía eléctrica. Nota: En temperaturas frías por debajo de 35 F, aceite se complica y puede causar dificultades de puesta en marcha. Para evitar dificultades de puesta en marcha, deje la máquina en un lugar cálido durante la noche (8 horas). Asegure de 100 pies de manguera sopla en salida de la máquina con una abrazadera. Usted puede utilizar hasta 200 pies de manguera de 3 "pero usted notará una disminución en la producción, así como el lanzamiento del extremo de la manguera. Se recomienda que si es necesario utilizar una manguera más de 150', reducir a 2-1/2 "manguera. La reducción del tamaño de la manguera se limitan la capacidad y aumentar el tiro del material en el extremo de la manguera. Abierto el material alimentado puerta quitando el pasador de bloqueo. Áticos: tire hacia afuera para la última posición del agujero de la puerta de diapositiva y portón de seguridad colocando pin en el último hoyo. Paredes: consulte el manual del propietario o sitio web de Intec para ajustes adecuados. LISTA DE CONTROL DE SEGURIDAD 1) 2) 3) 4) 5) 6) 7) 8) 9) 10) Lea todas las instrucciones antes de usar el soplador de aislamiento. Para reducir el riesgo de lesiones, es necesario supervisar de cerca cuando un soplador de aislamiento se utiliza cerca de niños. No toque las piezas en movimiento. Utilice solamente los accesorios recomendados o vendidos por el fabricante. El uso de la extensión y cable de alimentación: a) Este producto requiere el uso de dos cables de alimentación . Se debe tener cuidado en la selección y el uso de un cable de extensión. b) El cable de extensión deberá ser un cable de 3 hilos con conexión a tierra. c) El cable de extensión debe colocarse de manera que no cuelgue del mostrador o mesa donde pueda tropezar con él , enganchó , o se puso involuntariamente - especialmente por los niños. d) Un cable de extensión al aire libre se debe utilizar con esta máquina. Un cable de extensión de uso al aire libre está marcado con la letra sufijo " W " y con una etiqueta que dice " Adecuado para usarse en aparatos exteriores.” e) El régimen nominal de cada cable de extensión deberá ser clasificado por lo menos 15 amperios. f) Para desenchufar o desconectar : Ponga el ventilador y el panel de control de agitador y botones del control remoto en la posición de parada antes de quitar el enchufe del tomacorriente. g) No desenchufe tirando del cable de alimentación. Para desenchufar, ( i ) tirar del enchufe macho de la toma de corriente , y luego ( ii ) tome el enchufe hembra , gire hacia la izquierda , y alejarse de la máquina. h) Desenchufe del tomacorriente cuando no esté en uso y antes de darle servicio o limpiar. i) No opere ningún ventilador de aislamiento con un cable o enchufe dañado, o después de las averías de la máquina o se ha caído o dañado de alguna manera. En el caso de un ventilador no operable o no funciona correctamente, devuelva el soplador de aislamiento para el distribuidor autorizado más cercano para su revisión, reparación o ajuste eléctrico o mecánico. Aislamiento tienda soplador en el interior cuando no esté en uso. Mantener fuera del alcance de los niños. Nunca opere este equipo si el operador o el equipo está de pie en el agua, la nieve o la lluvia. No limpie este soplador de aislamiento con spray de agua o similar. Conecte solamente a una toma de tierra adecuada. Use camisas de manga larga, guantes, un sombrero, gafas de seguridad y una máscara contra el polvo de la nariz y la boca. ADVERTENCIA 1) 2) 3) 4) Nunca introduzca la mano en la tolva cuando el sistema está en funcionamiento. Mantener todos los materiales extraños fuera de la tolva. Detenga todos los motores y desconecte el cable de alimentación antes de intentar quitar un objeto o mermelada extranjera. Nunca dirija la manguera de aislamiento en la dirección de las personas o los animales domésticos. 2 3 4 Intec’s FORCE/2 viene con una tapa de goma que se adhiere a una de las paletas del agitador: • • Fije la tapa de goma para su agitador cuando esté utilizando la celulosa. Retire la tapa cuando se utiliza fibra de vidrio o stonewool. 2 5 4 3 Sistema de control remoto con cable: El cable de control remoto debe montarse en todo momento en orden para que la máquina funcione (o use el Jumper enchufe si no utilizando el mando a distancia alámbrico). Para conectar, localizar las posiciones clave en tanto el receptáculo (panel eléctrico) y conector de cable de control remoto. Introduzca el conector en el receptáculo y gire hacia la derecha hasta que chasquee pulg Sistema remoto inalámbrico: Lugar remoto selector en el Panel eléctrico a 'wireless'. 6 Sean todos Panel eléctrico y control remoto en la posición "off". 7 Obtener dos 12/3 de calibre (calibre usar 10/3 si se requiere más de 100 length ') cables de alimentación de la cerradura de la torcedura de alta resistencia. Conecte un extremo de cada cable de alimentación a un circuito dedicado (15amp 115V para el agitador). Conecte el otro extremo de un cable de alimentación al receptáculo del ventilador de la FORCE/2; conecte el otro cable de alimentación al receptáculo agitador la FORCE/2. 7 5&6 Wired Remote remoto con Transmisor transmitter conexión de cable Electrical eléctrico Panel Panel Transmisor Wireless Remote remoto transmitter inalámbrico 8 Apague el soplador y el agitador eléctrico Panel interruptores a "ON" posiciones con sistema de poder. 9 A continuación, utilice el interruptor remoto para primero encienda el ventilador, luego agitador "ON". Al girar la máquina "off", la agitador "off" primero y luego soplador. Nota: ventilador tiene que ser para que el agitador a. 10 PRECAUCIÓN: Nunca deje que el envoltorio plástico entrar en la tolva de. PRECAUCIÓN: Nunca empuje hacia abajo sobre el aislamiento en tolva. Celulosa: Quitar el embalaje plástico. Bale celulosa lugar dentro de la tolva. Fibra de vidrio: Bolsa de corte de aislamiento en la mitad. Coloque el extremo abierto del ½ bolsa hacia la izquierda o derecha de la plataforma de carga. Cortar el plástico con una herramienta de corte y deje que el aislamiento expandirse hacia la tolva. 11 Manguera toma la manguera a la situación de aislamiento soplado. Utilice el control remoto para activar la máquina a explotar el material de aislamiento. Operador de tolva continua alimentar el material en la tolva hasta que termine el trabajo. 12 Al finalizar, utilice el control remoto o panel interruptor para encender la máquina libres Retire cualquier aislamiento aún en el sistema, luego coloque el sistema de almacenamiento hasta el próximo uso deseado.