1
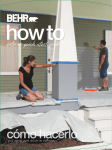
cómo
hacerlo
guía rápida para iniciar en interiores
The Behr Interior Quick Start Guide gives
you the basics to get your project started fast.
Need detailed, step by step instructions and
video? Find them on behr.com.
La Guía Rápida para Iniciar en Interiores de Behr le da las bases
para iniciar su proyecto rápidamente. Necesita instrucciones
detalladas paso a paso y video? Encuéntrelos en behr.com.
plan your project
planee su proyecto
Choose the Right Sheen Elija el Brillo Correcto
FLAT / FLAT ENAMEL :
Best for low to moderate traffic areas and ceilings.
Mate / Esmalte Mate : Bueno en áreas de tráfico moderado y techos
EGGSHELL ENAMEL / SATIN ENAMEL :
Preferred for moderate to high traffic areas or rooms
prone to moisture or repeated washing.
Esmalte Cascarón de Huevo / Esmalte Satinado : Preferido en áreas o
habitaciones con tráfico moderado o tráfico excesivo propensas a la humedad
o lavado frecuente.
SEMI-GLOSS ENAMEL / HI-GLOSS ENAMEL :
Great choice for trim, doors and high-use surfaces
like cabinets.
Esmalte Semi-Brillante / Esmalte Brilloso : La mejor elección para molduras,
puertas y superficies de uso frecuente tales como gabinetes.
See store for sheen availability. Consulte en la tienda para disponibilidad de brillos.
LOWER SHEENS : Hide surface imperfections.
Acabados con Poco Brillo : Ocultan imperfecciones de la superficie.
HIGHER SHEENS : More washable and water resistant.
Acabados con Mayor Brillo : Más lavables y resistentes al agua.
Choose the Right Product
Wall Color Color de Pared
Mushroom Bisque PPU4-7M
Trim Color Color de Moldura
Bleached Linen PPU5-9U
Elija el Producto Correcto
BEHR PREMIUM PLUS ULTRA® Interior Paint and Primer in One is an
advanced formula that provides the best performance in all rooms of your
home - even over stains!
2
¡BEHR PREMIUM PLUS ULTRA® Interior Pintura e Imprimador en Uno, es una fórmula avanzada que
proporciona el mejor desempeño en todas las habitaciones de su hogar – inclusive sobre manchas!
Visualize colors in your room
before you paint with the
COLORSMART BY BEHR™ app!
Visualice colores en su habitación antes
de pintar con la aplicación de
COLORSMART BY BEHR™
How much paint do you need?
Scan below for advice.
¿Cuánta pintura necesita? Escanne aquí
para consejos.
BEHR PREMIUM PLUS® Interior Paint
delivers quality and value in a Self-Priming
and Zero VOC formula.
La Pintura Interior BEHR PREMIUM PLUS® brinda calidad y
un buen precio en una fórmula que no requiere imprimador
y de Cero COV.
3
color selection
Sample One Muestra Uno
Bolero PPU1-12D
Sample Two Muestra Dos
China Silk PPU15-10M
selección de color
Sample Three Muestra Tres
Pesto Green PPU11-5M
Choose Your Color.
Elija su Color.
Family
1 Color
Decide on a color family: red, orange,
Familia de Color
yellow, green, blue, purple or a neutral
like white, brown or gray for your project.
4
Elija una familia de color : rojo, naranja, amarillo, verde,
azul, violeta o un neutral como un blanco, café o gris para
su proyecto.
2
Light or Dark Claros u Oscuros
Do you envision a room that is dark and
dramatic, light and airy or something
in between?
¿Puede imaginar una habitación que sea oscura e intensa,
luminosa y ventilada o algo intermedio?
Scan here to hear how to
apply this year’s trends to
your painting project.
Escanne aquí para saber como
aplicar las nuevas tendencias de este
año en su proyecto de pintura.
3
Bright or Muted Brillante o Sutil
Brighter colors have more
pop and energy, while muted
colors are soft and subdued.
Los colores brillantes resaltan más y
tienen energía, mientras que los colores
sutiles son suaves y tenues.
4
Some bright, clean colors may
require tinted primers or multiple
coats. Check your color chips for
these symbols (†) (§).
Algunos colores brillantes o claros podrían
requerir un imprimador con color o capas
múltiples. Revise su muestra de color y busque
estos símbolos (†) (§).
Combination Combinación
Use COLORSMART BY
BEHR™ in-store or online
for instant, personalized
color combinations.
Utilice COLORSMART POR BEHR™
en la tienda o en internet para
ver combinaciones instantáneas,
personalizadas.
5
Affirmation Afirmación
Behr 8 oz. color samples let
you test your selections in a
room setting.
Las muestras de colores Behr de 8 oz. le
permiten hacer pruebas de sus opciones
en una habitación.
5
Visit behr.com and learn
how to properly load a
brush and roller.
Visite behr.com y aprenda como
saturar correctamente una brocha
y rodillo.
tools checklist
lista de herramientas
6
Brushes Brochas
Roller Covers Rodillos
Use high quality nylon/polyester brushes for
water-based Behr paints. An angled brush
works best for cutting in and edging.
Use high quality, lint free roller covers 3/8” to
1/2” nap for smooth and semi-smooth surfaces;
1/2” or higher for medium to rough surfaces.
Utilice brochas de alta calidad de nylon / poliéster para las pinturas
base agua de Behr. Una brocha angulada funciona mejor para los
recortes y en los bordes.
Utilice rodillos de alta calidad, libres de pelusa de 3/8” a 1/2” para
superficies lisas y semi-lisas; de 1/2“ o mayor para superficies
medianamente rugosas o rugosas.
Supplies Materiales
Bucket / Bucket Grid Recipiente / Maya de Recipiente
Paint Can Opener Abrelatas
Caulking and Caulking Gun Silicón y Pistola para Silicón
Drop Cloths Manta Protectora
Extension Pole Tubo de Extensión
Ladder Escalera
Roller Frame Mango para Rodillo
Paint Tray and Liners Charola para Pintura
Putty Knife Espátula
Paint Scraper Raspador de Pintura
Screwdriver Destornillador
Stir Sticks Agitadores
Masking Paper Papel para Cubrir
Painter’s Tape Cinta para Pintor
Patching Material Material para Reparaciones
Sandpaper Papel de Lija
Cleaning Limpieza
Rags Trapos
Mild Detergent Detergente Suave
Mildew Remover Eliminador de Moho
Scrub Brush Cepillo para Tallar
Sponges Esponjas
Trash Bags Bolsas para Basura
Paint Quantity
Estimator
5’ x 8’
Small Room
12’ x 15’
Medium Room
20’ x 25’
Large Room
Calculador de Cantidades de Pintura
Habitación Pequeña
Habitación Mediana
Habitación Grande
Walls Paredes
Trim Molduras
Doors Puertas
Ceiling Techo
1 Gallon Galón
1 Quart* Litro*
1 Quart* Litro*
1 Quart Litro
2 Gallons Galones
1 Quart* Litro*
1 Quart* Litro*
1 Quart Litro
3 Gallons Galones
1 Quart* Litro*
1 Quart* Litro*
2 Gallons Galones
Paint estimates are based on a one coat application. Please note that additional paint may be required depending on your specific surface,
texture, architectural design and color selected. Los cálculos de pintura se basan en una aplicación de una capa. Por favor recuerde que se podría necesitar
pintura adicional dependiendo de su superficie específica, textura, diseño arquitectónico y el color seleccionado.
*Includes baseboard, door trim, and window trim. *Incluye zoclo, molduras de puertas y ventanas.
7
prepare for painting
prepararse para pintar
8
Visit Behr.com to find more
information on when to use
a primer.
Scan here to learn how
to prepare your room for
painting.
Visite Behr.com para encontrar más
información sobre cuándo utilizar un
imprimador.
Escanee aquí para aprender cómo
preparar su habitación para ser
pintada.
Protect Proteja
Repair Repare
Sand Lije
Clear rugs and furniture from the room
or move items away from the wall and
carefully cover in room center. Remove
light fixtures, outlet covers and other
detachable items from the room. Apply
tape over fixtures that are too difficult to
remove, such as electrical outlets and
door knobs. Protect the entire floor with
drop cloths.
Patch and sand cracks
and small holes. Fill gaps
and seams with caulking.
Scrape loose paint with
a wire brush or scraper
and sand smooth. Scuff
sand or degloss glossy
surfaces.
Despejar alfombras y muebles de la habitación o retire
los artículos de la pared y cuidadosamente cúbralos en el
centro de la habitación. Retire lámparas de la pared, tapas
de enchufes y otras piezas desmontables de la habitación.
Coloque cinta sobre las piezas que sean difíciles de quitar,
como son enchufes eléctricos y manijas de las puertas.
Proteja todo el piso con mantas protectoras.
Repare y lije grietas y agujeros
pequeños. Rellene separaciones y
uniones con sellador de silicón.
Talle la pintura suelta con un cepillo
de alambre o un raspador de pintura
y empareje lijando. Lije superficies
brillosas.
Clean Limpiar
Prime Imprimador
Remove oils, grease, wax and
grime with water and a mild
detergent. Remove any dust
or debris from sanding with a
lightly water-dampened rag.
Remove mildew stains with a
mildew stain removing product,
rinse and allow to dry.
Prime patched and repaired
areas, stained areas and over
glossy or oil-based paint.
Tinted primer is recommended
for drastic color changes.
Elimine aceites, grasa, cera y suciedad
con agua y un detergente suave. Elimine
cualquier polvo o residuos del lijado con
un trapo ligeramente húmedo con agua.
Elimine manchas de moho con un producto
que elimine manchas de moho, enjuague y
permita secar.
Aplique imprimador en áreas reparadas, áreas
manchadas y sobre pintura brillosa o de base
aceite. Se recomienda un imprimador con
color para cambios drásticos de color.
Apply Behr® Paints to
surfaces in this order:
Aplique Pinturas Behr® a las superficies
de las habitaciones en este orden:
1. Ceiling Techo
2. Walls Paredes
3. Windows Ventanas
4. Doors Puertas
5. Trim Molduras
6. Floors Pisos
9
Watch us paint a ceiling
on video at behr.com.
Véanos pintar un techo en vídeo
en behr.com.
paint your ceiling
Visit behr.com to learn
how to cut in a ceiling
with an angled brush.
pinte el techo
Visite behr.com para aprender
como recortar en un techo con
una brocha angulada.
Paint Edges
First Coat : Roll Parallel
Pintando Orillas
Primera Capa: Pintando en paralelo con rodillo
With an angled brush, paint edge in
a 3” to 4” perimeter on your ceiling,
feathering the edge as you work.
Paint around fixed objects such as
overhead lights.
Place a loaded roller in one corner of the room, joining the
feathered edge. Quickly roll in a straight line towards the
opposite end of the room, reloading your roller as needed.
Turn around and start a second parallel line, by starting
at the room edge and rolling towards the opposite wall.
Overlap slightly with the previous pass. Continue until the
ceiling is coated.
Con una brocha angulada, pinte una franja de 3” a
4” en el perímetro del techo, emparejando las orillas
mientras usted trabaja. Pinte alrededor de objetos
fijos, como las luces del techo.
10
Coloque un rodillo saturado en una esquina de la habitación, uniendo las orillas
emparejadas. Rápidamente aplique una línea recta hacia el extremo opuesto de la
habitación con rodillo, volviendo a saturar el rodillo cuando sea necesario. Regrese y
empiece una segunda línea paralela, iniciando en la orilla de la habitación y corriendo
el rodillo hacia la pared opuesta. Empalme ligeramente con la pasada anterior.
Continúe hasta que el techo esté pintado.
Second Coat : Roll Perpendicular
Permita que la primera capa seque completamente antes
de determinar si una segunda capa será necesaria. Si una
segunda capa es necesaria, repita el recorte y aplique con su
rodillo en líneas paralelas. Sin embargo, aplique la segunda
capa perpendicular a la primera.
Escanee aquí para aprender cómo
quitar cinta para pintor.
Primera Capa
Allow the first coat to dry completely before
determining if a second coat is necessary.
If a second coat is needed, repeat cutting
in and rolling in parallel lines. However,
apply the second coat perpendicular to
the first coat.
Scan here to learn how to
remove painter’s tape.
First Coat
Segunda Capa: Pintando perpendicularmente con rodillo
Second Coat
Segunda Capa
Ceiling Sequence
Secuencia del Techo
11
Walls
Paredes
Cut In Recorte
With an angled brush, paint a 3” to 4”
perimeter on your wall, feathering the
edge as you work. Paint around fixed
objects such as outlets.
Con una brocha angulada, pinte una franja de 3” a 4” en
el perímetro de la pared, emparejando las orillas mientras
usted trabaja. Pinte alrededor de objetos fijos, como
enchufes eléctricos.
Roll Rodillo
Place a loaded roller in the top corner of
the wall, joining the outline and feathered
edge. Working in a 3’ x 3’ area, roll a “W”
on the wall to distribute the paint. Roll
and fill in the remainder of the 3’ x 3’ area
completely. Reload your roller. Adjacent
and just below your first area, start a
second “W” allowing the top of the letter
to overlap into the painted area above.
Fill in your second “W” area, evenly
distributing the paint.
Coloque un rodillo saturado en la esquina superior de
la pared, uniendo el recorte con las orillas emparejadas.
Trabajando en un área de 3’ x 3’, pinte con el rodillo una
“W” en la pared para distribuir la pintura. Pinte con el
rodillo y sature el resto del área de 3’ x 3’por completo.
Sature nuevamente el rodillo. Contiguo y justo debajo de
la primera área inicie una segunda “W”, permitiendo que la
parte superior de la letra se empalme sobre el área pintada
arriba. Cubra el área de su segunda “W”, distribuyendo
uniformemente la pintura.
Wet Edge Orilla Húmeda
Joining sections of your painting project
while they are wet prevents unsightly
lines. Once you begin a section of wall,
stop only at natural breaks in the wallnot in the center.
Uniendo secciones de su proyecto de pintura mientras
están húmedos evítarán líneas antiestéticas. Una vez
que inicie una sección de pared, sólo pare en los cortes
naturales en la pared y no en el centro.
12
paint your walls and trim
pinte las paredes y molduras
Trim Molduras
Starting at a corner, brush
paint evenly onto trim using
light pressure. Reload your
brush about every 12”.
Iniciando en una esquina, aplique la pintura
con una brocha de manera uniforme en
la moldura y con ligera presión. Sature su
brocha nuevamente cada 12”.
Doors Puertas
For paneled doors and frames,
use the panel borders as a
break point. Cut in around the
edges and fill the middle from
top to bottom.
Para las puertas con paneles y marcos,
utilice las orillas de los paneles como un
punto de quiebre. Recorte alrededor de
las orillas y rellene el centro de arriba
hacia abajo.
Allow enough time for the
paint to dry fully before
putting doors and windows
back into use.
Permita que la pintura seque por
completo antes de poner las puertas
y ventanas a trabajar nuevamente.
Scan here to see us
demonstrate how to
paint a door.
Escanee aquí para ver una
demostración de cómo pintar
una puerta.
13
enjoy your accomplishment
disfrute su logro
Leftover Paint Pintura Restante
Leftover paint can be stored for future use or touch ups as long as it is packaged properly and
protected from freezing. After 30 days, you can clean your paint project with mild soap and water.
Use only light pressure to avoid creating any shiny spots (burnishing).
14
La pintura restante se puede guardar para uso futuro o para retoques, siempre y cuando se conserve adecuadamente y evitando que se
congele. Después de 30 días, usted puede limpiar las áreas recién pintadas con un jabón suave y agua. Utilice sólo una ligera presión para
evitar crear cualquier área brillante (pulido).
Wall Color Color de Pared
Bolero PPU1-12D
Trim Color Color de Moldura
Cotton Knit PPU7-11U
Ceiling Color Color de Techo
Cork PPU6-5M
Clean up is easy with
Behr paints. Find
detailed information
on behr.com
La limpieza es fácil con
Pinturas Behr. Encuentre
información detallada en
behr.com
For disposal of empty
containers and unused
Behr paint, contact
your household refuse
service.
Para desechar recipientes
vacios y pintura sin usar,
contacte su centro de servicio
local de recolección.
Scan here to learn
the proper way to
store leftover paint
for future use.
Escanee aquí para aprender
cómo se debe guardar
pintura restante para uso
futuro.
15
Wall Color Color de Pared
Bolero PPU1-12D
To speak with a Behr Certified
Coatings Professional, call
1-800-854-0133 Ext 2.
©2012 Behr Process Corporation
3400 W. Segerstrom Avenue
Santa Ana, CA 92704 U.S.A.
Para hablar con un Profesional de Pinturas
Certificado de Behr, llame al
1-800-854-0133 Ext. 2.
Exclusively at:
Exclusivamente en:
CP-BEHR-INT-GD
Item No. 50003048 08/12
Find Us On:
Búsquenos En:
behr.com
6 78885 07073 1