Transcript
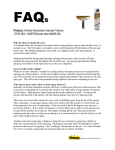
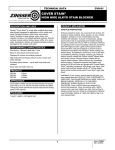
5600 Egress Well Cover
Installation Instructions
Hardware Included:
8”
4 - 3/4” L-Bracket
22”
4 - Dual-Lock Disc
TM
1
1. You will be installing 4 Dual-Lock
discs to your well and cover:
-Both on the inside of the well
-Two 8” from the foundation
-Two 22” from the foundation
(Image 1)
4 - Dual-Lock Pad
TM
8 - 3/4” Screw
4 - Washer
8 - Lock-Washer
8 - Nut
2
2. Use a marker and mark all four locations to drill. (Image 2)
3
3. Attach the L-bracket to the well using a screw, washer, lock-washer, and nut.
Attach the Dual-Lock disc to the top of the bracket using a screw,
lock-washer, and a nut.
Make sure your hole is a 1/2” below the top lip of the well.
This ensures the attachment hardware will be flush with
the top lip. (Image 3)
Ensure you have the lock-washer on the inside of the well.
4
5
4. Place your cover over the well. Use a marker to mark the location of the
Dual-Lock disc. You will use this mark to attach the corresponding
Dual-Lock pad to the underside of your cover.
5. Once you have attached all four self-adhesive Dual-Lock
pads to the underside of your cover place the cover over
your well. Line up the Dual-Lock’s and press down to
secure the cover.
*NOTE: Cover must be at room temperature for adhesive to adhere properly*
CLEANING: Window well covers may be cleaned with a mild solution of window
cleaner and a soft cloth. Do Not Use of harsh chemicals and scouring powders.
For paint splatters use ALCOHOL ONLY. No paint thinners or solvants!