Transcript
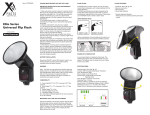
Item # XTDF4500
Elite Series
Universal Flash
designed for
Most Cameras
PLEASE READ BEFORE YOU USE THE FLASH
SLAVE FLASH
FLASH FEATURES
IMPORTANT NOTES FOR FLASH PHOTOGRAPHY
AND MAINTENANCE
XTDF4500 can be used as a slave unit. You can enjoy
creative flash photography with multiple lightings from the
various directions.
XTDF4500 synchronizes to any flash produced by the
master flash (either Camera’s built-in flash or camera
manufactures’ original flash) on the camera. Please make
sure XTDF4500 mode is switch to Slave mode.
• Guide No: 40m/118ft. @ 105
• Bounce construction
• Slave function
1. After each picture, wait for at least 4 -5 seconds for the
flash to be fully charged before taking the next shot even
though the ready light is on. This will help to prolong the
lifespan of the flash tube as well as to attain the full
charging capacity of the flash capacitor for precise flash
photography.
2. For precise flash output, it is best to wait till an
intermittent humming sound is heard before depressing
the shutter.
3. Maintain at least 6.6 ft. away from your subject.
4. In the event that the flash exposure is incorrect (over or
under exposed or green auto check light does not light
up), you may take either one or more of the corrective
action: (1) move closer to the object (2) re-adjust your
bounce angle (3) Increase ISO setting.
5. Bounce should only be used on lighter color ceiling.
Note that when using this feature, 2-3 f/stop of light will be
lost due to reflection.
6. Always use a fresh set of 4 batteries of the same brand
and type when old batteries are depleted. Mix and match
batteries of different types/brands will greatly deteriorate
flash performance.
7. When flash is not being used for extended period of
time (>2 weeks), remove all batteries to prevent battery
leakage. After batteries removal, do not expose the flash
unit and batteries to excessive heat such as fire or sun.
8. Charge up and test fire the flash unit at least once per
month to maintain the optimal performance of the flash
tube and charging capacitor.
BATTERY INSTALLATION
Ensure the ON/OFF is in the OFF position. Insert 4 new
AA size batteries according to the battery polarity
indicated inside the battery chamber.
WARNING
Note: This flash unit may halt and not function when the
battery power is not sufficient or when user operates this
unit inappropriately. Please switch it off by its main switch.
Wait for a few seconds and replace the battery if
necessary before switching it on again. This flash unit
should then work again as normal.
COMPATIBILITY
C - Canon Digital E-TTL, E-TTL II cameras & E-TT film
cameras
N - Nikon Digital TTL, i-TTL Cameras & TTL, i-TTL film
cameras
P - Pentax Digital TTL or film
O - Olympus Digital TTL or film
P - Panasonic Digital TTL or film
SA - Sony Alpha & Minolta Digital ADI, D Lenses cameras
& TTL film cameras
MOUNTING THE FLASH ON THE CAMERA
Ensure the ON/OFF is in the OFF position. Slide the flash
hot shoe base onto the camera’s hot shoe contact and
fasten the lock ring in an anti-clockwise motion. Slide the
ON/OFF Switch to the ON position. When the Ready Light
lights up, the flash is ready to fire. Pressing the Test
Button will test fire the unit.
USING BOUNCE HEAD
DIRECT FLASH
INDIRECT FLASH
Various combination of bounce angle can be used to cut
off unwanted shadow or for special soft effect purposes.
SPECIFICATIONS:
Guide Number: 40m/118ft. @ 105
Circuitry: IGBT (Insulated Gate Bipolar Transistor)
Color Temperature: 5600
Bounce Angle: Up 30-45-60-75-90
Swivel Angle: Left 60-75-90-120-150-180
Right 60-75-90
Flash Duration: 1/700 sec. (Full power)
Recycling Time: 0.5-6 sec.
Number of flashes: 100-300 per set of new batteries
Power Source: 4 AA Batteries (Alkaline, NiCd or NiMH)
Dimension (in): 6.7 x 2.7 x 1.6 (170 x 70 x 40mm)
Weight: 8.8 oz. (250 grams) (w/o batteries & reflector)
* Camera dependent features.
Please check your camera operating instruction
manual.