1
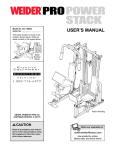
Model No. WESY26330
Serial No.
Write the serial number in the space
above for future reference.
USER'S MANUAL
Serial Number Decal (Under Seat)
QUESTIONS?
As a manufacturer, we are
committed to providing complete
customer satisfaction. If you
have questions, or if there are
missing or damaged parts, we
will guarantee complete satisfaction through direct assistance
from our factory.
TO AVOID UNNECESSARY
DELAYS, PLEASE CALL DIRECT
TO OUR TOLL-FREE CUSTOMER
HOT LINE. The trained technicians on our customer hot line
will provide immediate assistance, free of charge to you.
CUSTOMER HOT LINE:
1-800-999-3756
Mon.–Fri., 6 a.m.–6 p.m. MST
CAUTION
Read all precautions and instructions in this manual before using
this equipment. Save this manual
for future reference.
Visit our website at
www.weiderfitness.com
new products, prizes,
fitness tips, and much more!
TABLE OF CONTENTS
IMPORTANT PRECAUTIONS . . . . . . . . . . . . . . . . . . . . . . . . . . . . . . . . . . . . . . . . . . . . . . . . . . . . . . . . . . . . .3
BEFORE YOU BEGIN . . . . . . . . . . . . . . . . . . . . . . . . . . . . . . . . . . . . . . . . . . . . . . . . . . . . . . . . . . . . . . . . . . .4
ASSEMBLY . . . . . . . . . . . . . . . . . . . . . . . . . . . . . . . . . . . . . . . . . . . . . . . . . . . . . . . . . . . . . . . . . . . . . . . . . . .5
ADJUSTMENTS . . . . . . . . . . . . . . . . . . . . . . . . . . . . . . . . . . . . . . . . . . . . . . . . . . . . . . . . . . . . . . . . . . . . . . .22
WEIGHT RESISTANCE CHART . . . . . . . . . . . . . . . . . . . . . . . . . . . . . . . . . . . . . . . . . . . . . . . . . . . . . . . . . . .24
TROUBLESHOOTING AND MAINTENANCE . . . . . . . . . . . . . . . . . . . . . . . . . . . . . . . . . . . . . . . . . . . . . . . . .25
CABLE DIAGRAMS . . . . . . . . . . . . . . . . . . . . . . . . . . . . . . . . . . . . . . . . . . . . . . . . . . . . . . . . . . . . . . . . . . . .26
ORDERING REPLACEMENT PARTS . . . . . . . . . . . . . . . . . . . . . . . . . . . . . . . . . . . . . . . . . . . . . . . .Back Cover
LIMITED WARRANTY . . . . . . . . . . . . . . . . . . . . . . . . . . . . . . . . . . . . . . . . . . . . . . . . . . . . . . . . . . .Back Cover
Note: A PART IDENTIFICATION CHART and a PART LIST/EXPLODED DRAWING are attached in the center of
this manual. Remove the PART IDENTIFICATION CHART and the PART LIST/EXPLODED DRAWING before
beginning assembly.
WEIDER is a registered trademark of ICON Health & Fitness, Inc.
2
IMPORTANT PRECAUTIONS
WARNING
: To reduce the risk of serious injury, read the following important precautions
before using the weight system.
1. Read all instructions in this manual and in
the accompanying literature before using the
weight system.
12. Always disconnect the lat bar from the
weight system when performing an exercise
that does not use the lat bar.
2. It is the responsibility of the owner to ensure
that all users of the weight system are adequately informed of all precautions.
13. Make sure that the cables remain on the pulleys at all times. If the cables bind while you
are exercising, stop immediately and make
sure that the cables are on all of the pulleys.
3. The weight system is intended for home use
only. Do not use the weight system in any
commercial, rental, or institutional setting.
14. If you feel pain or dizziness at any time while
exercising, stop immediately and begin cooling down.
4. Use the weight system only on a level surface. Cover the floor beneath the weight system to protect the floor.
15. The decals shown here have been attached
to the weight system in the locations shown
on page 4. If a decal is missing or illegible,
please call toll-free 1-800-999-3756 to order a
free replacement decal. Apply the decal in
the location shown.
5. Make sure all parts are properly tightened
each time the weight system is used.
Replace any worn parts immediately.
6. Keep children under 12 and pets away from
the weight system at all times.
! WARNING
7. Keep hands and feet away from moving parts.
8. Always wear athletic shoes for foot protection.
Keep hands and
fingers clear of
this area.
• Misuse of this
product may result in
serious injury.
Decal 1
• Read user’s manual
and follow all warnings
and operating instructions prior to use.
9. The weight system is designed to support a
a maximum user weight of 300 pounds.
10. Always stand on the foot plate when performing an exercise that could cause the
weight system to tip.
• Keep clear of
this area.
Decal 2
11. Never release the press arm, butterfly arms,
leg lever, press plate, lat bar, ab strap, or
handle while weights are raised; the weights
will fall with great force.
• Do not allow children
on or around machine.
• Replace label if
damaged, illegible,
or removed.
Decal 3
WARNING:
Before beginning this or any exercise program, consult your physician. This
is especially important for persons over the age of 35 or persons with pre-existing health problems.
Read all instructions before using. ICON assumes no responsibility for personal injury or property
damage sustained by or through the use of this product.
3
BEFORE YOU BEGIN
Thank you for selecting the versatile WEIDER® PRO
3750 weight system. The weight system offers a selection of weight stations designed to develop every
major muscle group of the body. Whether your goal is
to tone your body, build dramatic muscle size and
strength, or improve your cardiovascular system, the
weight system will help you to achieve the specific
results you want.
Department toll-free at 1-800-999-3756, Monday
through Friday, 6 a.m. until 6 p.m. Mountain Time
(excluding holidays). To help us assist you, please
note the product model number and serial number
before calling. The model number is WESY26330. The
serial number can be found on a decal attached to the
weight system (see the front cover of this manual).
Before reading further, please review the drawing
below and familiarize yourself with the parts that are
labeled.
For your benefit, read this manual carefully before
using the weight system. If you have additional
questions, please call our Customer Service
ASSEMBLED
DIMENSIONS:
Height: 78 in.
Width: 64 in.
Length: 70 in.
High Pulley Station
Lat Bar
Decal 3
Butterfly Arms
Decal 3
Ab Pulley Station
Backrests
Press Arm
Decal1
Leg Press
Plate
Leg Lever
Low Pulley
Station
Foot Plate
Weight Stacks
4
Decal 2
ASSEMBLY
Make sure you have the following tools:
Make Assembly Easier for Yourself
• Two (2) adjustable wrenches
Everything in this manual is designed to
ensure that the weight system can be assembled successfully by anyone. Before beginning assembly, make sure to read the
information on this page; this brief introduction will save you much more time than
it takes to read it.
• One (1) standard screwdriver
• One (1) phillips screwdriver
• One (1) rubber mallet
• You will also need grease or petroleum jelly, a
small amount of soapy water, and clear tape or
masking tape.
Assembly Requires Two Persons
Note: Assembly will be more convenient if you have
a socket set, a set of open-end or closed-end
wrenches, or a set of ratchet wrenches.
For your convenience and safety, assemble the
weight system with the help of another person.
Set Aside Enough Time
How to Identify Parts
Due to the many features of the weight system, the
assembly process will require several hours. By
setting aside plenty of time and by deciding to
make the task enjoyable, assembly will go smoothly.
You may want to assemble the weight system over
a couple of evenings.
To help you identify the small parts used in assembly,
we have included a PART IDENTIFICATION CHART
in the center of this manual. Place the chart on the
floor and use it to easily identify parts during each
assembly step. Note: Some small parts may have
been pre-attached. If a part is not in the parts
bag, check to see if it has been pre-attached.
Select a Location for the Weight System
Because of its weight and size, the weight system
should be assembled in the location where it will be
used. Make sure that there is enough room to walk
around the weight system as you assemble it.
How to Orient Parts
As you assemble the weight system, make sure that
all parts are oriented exactly as shown in the drawings.
How to Unpack the Box
Tightening Parts
To make assembly as easy as possible, we have
divided the assembly process into four stages. The
parts needed for each stage are found in individual
bags. Important: Wait until you begin each stage
to open the parts bag for that stage. Place all
parts of the weight system in a cleared area and
remove the packing materials. Do not dispose of
the packing materials until assembly is completed.
Tighten all parts as you assemble them, unless
instructed to do otherwise.
Questions?
If you have questions after reading the assembly
instructions, please call our Customer Service
Department toll-free at 1-800-999-3756, Monday
through Friday, 6 a.m. until 6 p.m. Mountain Time.
The Four Stages of the Assembly Process
Frame Assembly—You will begin by assembling
the base and the uprights that form the skeleton of
the weight system.
Cable Assembly—During this stage you will
attach the cables and pulleys that connect the
arms to the weights.
Arm Assembly—During this stage you will
assemble the arms and the leg lever.
Seat Assembly—During the final stage you will
assemble the seats and the backrests.
5
1.
1
Before you begin this step, make sure
that you have read all of the information
on page 5. This brief introduction will
save you much more time than it takes
to read it.
58
58
55
14
Locate and open the parts bags labeled
“FRAME ASSEMBLY BAG ONE” and
“FRAME ASSEMBLY BAG TWO.”
13
20
40
Press two 2” Square Outer Caps (58) onto the
Weight Base (14) in the indicated locations.
Press a 2” Square Inner Cap (56) into the end
of the Weight Base.
49
56
49
2
FRAME ASSEMBLY
Insert six 5/16” x 2 1/2” Carriage Bolts (49) up
through the Press Base (13) and the Weight
Base (14).
Attach the Press Base (13) to the Weight
Base (14) with two 5/16” x 2 3/4” Bolts (55),
two 5/16” Washers (20), and two 5/16” Nylon
Locknuts (40). Do not tighten the Locknuts
yet.
2. Slide the Ab Upright (1) onto the indicated
5/16” x 2 1/2” Carriage Bolts (49) in the
Weight Base (14). Hand tighten two 5/16”
Nylon Locknuts (40) onto the Carriage Bolts.
Do not tighten the Locknuts yet.
1
Slide the Leg Press Upright (4) onto the indicated 5/16” x 2 1/2” Carriage Bolts (49) in the
Press Base (13). Hand tighten two 5/16”
Nylon Locknuts (40) onto the Carriage Bolts.
Do not tighten the Locknuts yet.
4
40
40
13
14
49
49
3. Press a 2” Square Inner Cap (56) into each
end of the Top Frame (2). Press a 2” Square
Inner Cap (56) into each side of the Butterfly
Frame (3). Press two 1” Inner Caps (98) into
the top of the Butterfly Frame.
3
56
91
40
Attach the Butterfly Frame (3) to the Top
Frame (2) with a 5/16” x 3” Bolt (92) and a
5/16” Nylon Jamnut (91). Make sure that the
Bolt is on the side shown. Finish attaching
the Butterfly Frame (3) to the Top Frame (2)
with a 5/16” x 2 3/4” Bolt (55), a 5/16” Washer
(20), and a 5/16” Nylon Locknut (40). Do not
tighten the Locknut and Jamnut yet.
6
2
92
20
3
55
56
98 56
56
4. Slide the Front Seat Frame (8) onto the indicated 5/16” x 2 1/2” Carriage Bolts (49) in the
Press Base (13). Hand tighten two 5/16”
Nylon Locknuts (40) onto the Carriage Bolts.
Do not tighten the Locknuts yet.
4
40
55
8
20
56
4
Attach the other end of the Front Seat Frame
(8) to the Leg Press Upright (4) with two 5/16”
x 2 3/4” Bolts (55), two 5/16” Washers (20),
and two 5/16” Nylon Locknuts (40). Do not
tighten the Locknuts yet.
40
13
Press a 2” Square Inner Cap (56) into the
Front Seat Frame (8).
49
5
FRAME ASSEMBLY
5. Insert two Weight Guides (23) into one of the
brackets on the Weight Base (14). Attach the
lower ends of the Weight Guides with a 5/16”
x 6” Bolt (67), two 1/2” x 3/4” Spacers (69),
and a 5/16” Nylon Locknut (40). Do not overtighten the Locknut.
23
23
Attach the other Weight Guides (23) in the
same manner.
40
14
6. Slide a Weight Bumper (27) onto each of the
Weight Guides (23).
67
69
90
6
90
Slide eight Weights (90) onto each set of
Weight Guides (23). Be sure that the pin
grooves are on the indicated side of each
stack of Weights.
Pin
Grooves
Pin
Grooves
27
27
23
23
7. Press a Weight Tube Bumper (26) into each
Weight Tube (25).
7
25
Insert a Weight Tube (25) into each stack of
Weights (90). Be sure that the pins on the
Weight Tubes are in the pin grooves in the
upper Weights.
26
90
7
90
8. Lubricate the insides of the indicated holes in
the Top Weights (24). Slide a Top Weight onto
each set of Weight Guides (23).
8
23
24
Lubricate
23
FRAME ASSEMBLY
Lubricate
9. Attach the Top Frame (2) to the Ab Upright (1)
with two 5/16” x 2 3/4” Bolts (55), two 5/16”
Washers (20), and two 5/16” Nylon Locknuts
(40). Do not tighten the Locknuts yet.
9
55
20
55
Attach the Butterfly Frame (3) to the Leg
Press Upright (4) with two 5/16” x 2 3/4” Bolts
(55), two 5/16” Washers (20), and two 5/16”
Nylon Locknuts (40). Do not tighten the
Locknuts yet.
20
3
2
40 40
1
10. Attach the upper ends of one set of Weight
Guides (23) to the Top Frame (2) with a 5/16”
x 6” Bolt (67), two 1/2” x 3/4” Spacers (69),
and a 5/16” Nylon Locknut (40).
10
4
69
40
23
69
40
67
Attach the upper ends of the other set of
Weight Guides (23) to the Top Frame (2) in
the same manner.
2
Before continuing, firmly tighten all the
5/16” Nylon Locknuts (40) and the 5/16”
Nylon Jamnut (91) used in steps 1–10.
67
23
8
11. Press a 1 3/4” Square Inner Cap (48) into the
Adjustment Tube (10).
11
10
FRAME ASSEMBLY
Attach the Leg Press Plate (11) to the
Adjustment Tube (10) with a 5/16” x 2 1/2”
Bolt (39), two 5/16” Washers (20), and a 5/16”
Nylon Locknut (40). Be sure that the Leg
Press Plate and Adjustment Tube are oriented as shown.
40
20
48
39
11
Angle
12. Attach the Adjustment Tube (10) to the Leg
Press Arm (9) with the Lock Pin (73). Be sure
the Leg Press Plate (11) is oriented as
shown.
12
10
73
Press two 2” Square Inner Caps (56) into the
Leg Press Arm (9).
11
9
56
56
13. Locate and open the parts bag labeled
“ARM ASSEMBLY.”
13
Attach the Leg Press Bumper (53) to the
Front Seat Frame (8) with the 1” Tap Screw
(72).
8
ARM ASSEMBLY
9
Lubricate the 3/8” x 3 1/4” Bolt (71) with
grease. Attach the Leg Press Arm (9) to the
Press Base (13) with the Bolt and a 3/8”
Nylon Locknut (42).
53
42
72
71
13
14. Press a 1” x 7/8” Plastic Bushing (54) onto
each welded spacer on the Press Frame (12).
Slide the Press Frame onto the Press Base
(13) so that the Plastic Bushings are aligned
with the indicated tube. Note: This will be a
tight fit. Make sure that the high hole is on
the side shown.
14
Tube
12 52
High
Hole
Lubricate the 3/8” x 8” Bolt (52) with grease.
Attach the Press Frame (12) to the Press
Base (13) with the Bolt and a 3/8” Nylon
Locknut (42).
13
Welded
Spacers
42
9
Lubricate
Lubricate
54
15. Attach a Press Arm (7) to one side of the
Press Frame (12) with two 5/16” x 2 1/2” Bolts
(39) and two 5/16” Nylon Locknuts (40).
15
Attach the other Press Arm (7) to the
Press Frame (12) in the same manner.
39
7
40
7
12
16. Press a 1” Round Inner Cap (70) into one of
the Press Arms (7). Press a 1 3/4” Square
Inner Cap (48) into the Press Arm.
16
48
70
Repeat this step for the other Press Arm
(not shown).
ARM ASSEMBLY
7
17. Lubricate both axles on the Butterfly Frame (3).
17
Refer to the drawing and identify the Right Fly
Arm (5) and the Left Fly Arm (6).
3
Press a 1 3/4” Square Inner Cap (48) into the
upper end of the Left Fly Arm (6). Slide the
Left Fly Arm onto the indicated axle. Note: Do
not to confuse the Left Fly Arm with the
Right Fly Arm (5). Make sure that the upper
end of the Left Fly Arm is behind the indicated bracket on the Butterfly Frame (3).
Lubricate Axle
5
48
Bracket
45
46
IMPORTANT NOTE: Before assembling the
1” Retainers (45) used in this step, be sure
that you thoroughly understand the step.
The Retainers can be assembled only once.
If they must be removed, you will need to
order new Retainers.
Tap two 1” Retainers (45) and a 1” Round
Outer Cap (46) onto the axle. Be sure that
the teeth on the Retainers bend toward the
Round Outer Cap, as shown in the inset
drawing.
Attach the Right Fly Arm (5) in the same
manner.
6
Axle
45
46
10
ARM ASSEMBLY
18. Press a 1 3/4” Square Inner Cap (48) into the
lower end of the Left Fly Arm (6). Wet the
lower end of the Left Fly Arm with soapy
water. Slide a 10” Pad (22) onto the Left Fly
Arm.
18
6
5
Repeat this step with the Right Fly Arm (5).
48
22
19. Locate and open the parts bags labeled
“CABLE ASSEMBLY” and “PULLEYS.”
19
During steps 19 through 50, refer to the
CABLE DIAGRAMS on pages 26 and 27 of
this manual to verify proper cable routing.
Before beginning this section, fully unwind the
five cables and identify the cables by comparing the lengths and the ends. The approximate length of each cable, in inches, is listed
after the key number in the drawing.
CABLE ASSEMBLY
IMPORTANT: While assembling the cables,
do not overtighten the bolts and locknuts
attaching the pulleys; the pulleys must be
able to turn freely.
87—72”
89—82”
85—101”
86—110”
88—239”
20. Identify the Butterfly Cable (89)—this is the
second shortest Cable. Attach one end of
the Butterfly Cable to the Right Fly Arm (5)
with a 5/16” x 1” Shoulder Bolt (51) and a
5/16” Nylon Jamnut (91).
20
51
89
5
91
11
21. Wrap the Butterfly Cable (89) around a 3 1/2”
Pulley (82) as shown. Attach the Pulley and a
Cable Trap (80) to the bracket on the Leg
Press Upright (4) with a 3/8” x 2” Bolt (50)
and a 3/8” Nylon Locknut (42). The Cable
Trap must be oriented to hold the Cable in
the groove of the Pulley.
21
42
4
82
50
80
89
22. Locate one of the preassembled pairs of
Pulley Plates (31) and 3 1/2” Pulleys (82).
22
CABLE ASSEMBLY
Route the Butterfly Cable (89) under the indicated 3 1/2” Pulley (82). The end of the Pulley
Plates (31) with two holes should be downward. Refer to the inset drawing. Make sure
that the Cable is between the Cable Trap
(80) and the Pulley, and that the Cable Trap
is positioned to hold the Cable in place.
89
89
82
Tighten the 3/8” x 2” Bolt (50) and the 3/8”
Nylon Locknut (not shown).
50
End with
two holes
should be
down
31
23. Wrap the Butterfly Cable (89) around a 3 1/2”
Pulley (82) as shown. Attach the Pulley and a
Cable Trap (80) to the other side of the bracket
on the Leg Press Upright (4) with a 3/8” x 2”
Bolt (50) and a 3/8” Nylon Locknut (42). The
Cable Trap must be oriented to hold the
Cable in the groove of the Pulley.
80
23
80
50
42
82
89
4
24. Note: The Left Fly Arm (6) is shown
removed for easier part identification.
24
51
Attach the Butterfly Cable (89) to the Left Fly
Arm (6) with a 5/16” x 1” Shoulder Bolt (51)
and a 5/16” Nylon Jamnut (91).
89
91
12
6
25. Identify the Rear Cable (87)—this is the
shortest Cable. Slide the Rear Cable onto
the 5/16” x 3” Bolt (92). Thread another 5/16”
Nylon Jamnut (91) onto the Bolt, but do not
fully tighten it. Leave enough room
between the two Jamnuts for the Cable to
pivot.
CABLE ASSEMBLY
26. See the inset drawing. Attach a 3 1/2” Pulley
(82) and a Cable Trap (80) to the upper hole
in a Large “U”-bracket (84) with a 3/8” x 2”
Bolt (50) and a 3/8” Nylon Locknut (42). Be
sure that the Cable Trap is inside the
Large “U”-bracket. Note: This may come
pre-assembled.
25
91
92
87
26
87
Route the Rear Cable (87) through the Large
“U”-bracket (84) and the 3 1/2” Pulley (82).
Make sure that the Cable is in the groove
of the Pulley and that the Cable and Pulley
move smoothly.
80
82
42
50
87
82
84
84
27. Wrap the Rear Cable (87) around a 3 1/2”
Pulley (82). Attach the Pulley to the Top
Frame (2) with a 3/8” x 2” Bolt (50) and a 3/8”
Nylon Locknut (42). The Cable must be
routed from the direction shown.
27
2
42
50
82
87
28. Attach the Rear Cable (87) to a Small “U”bracket (32) with a 1/4” Nylon Locknut (44)
and a 1/4” Washer (37). Do not completely
tighten the Locknut; it should be threaded
onto the end of the Cable only a couple of
turns, as shown in the inset drawing.
Attach the Small “U”-bracket (32) to the indicated Weight Tube (25) with a 5/16” x 1 3/4”
Bolt (68) and a 5/16” Nylon Locknut (40).
28
87
32
68
37
44
25
32
87
37
44
13
40
29. Identify the Press Cable (88)—this is the
longest Cable. Attach the end of the Press
Cable to the Large “U”-bracket (84) with a
1/4” Nylon Locknut (44) and a 1/4” Washer
(37). Do not completely tighten the
Locknut. It should be threaded onto the
end of the Cable so only a couple of
threads are showing above the Locknut,
as shown in the inset drawing.
29
44
37
84
44
88
37
84
88
30
CABLE ASSEMBLY
30. Wrap the Press Cable (88) around a 3 1/2”
Pulley (82). Attach the Pulley and a Cable
Trap (80) to the indicated bracket on the
Press Base (13) with a 3/8” x 2” Bolt (50) and
a 3/8” Nylon Locknut (42). Be sure that the
Cable Trap is turned to hold the Cable in
place.
88
80
42
82
50
31. Wrap the Press Cable (88) around a 3 1/2”
Pulley (82). Attach the Pulley and a Cable
Trap (80) to the other bracket on the Press
Base (13) with a 3/8” x 2” Bolt (50) and a 3/8”
Nylon Locknut (42). Be sure that the Cable
Trap is turned to hold the Cable in place.
13
31
88
42
82
50
14
80
13
32. Route the Press Cable (88) over the indicated
3 1/2” Pulley (82) attached to the Pulley
Plates (31). The Cable must be routed from
the direction shown.
32
31
50
82
88
Refer to the inset drawing. Make sure that
the Press Cable (88) is between the Cable
Trap (80) and the 3 1/2” Pulley (82), and
that the Cable Trap is positioned to hold
the Cable in place.
80
88
Tighten the 3/8” x 2” Bolt (50) and the 3/8”
Nylon Locknut (not shown).
33. Route the Press Cable (88) around a 3 1/2”
Pulley (82). Attach the Pulley and a Cable
Trap (80) to the Leg Press Upright (4) with a
3/8” x 3 3/4” Bolt (76), a 3/8” Washer (38) and
a 3/8” Nylon Jamnut (43). Make sure that the
Cable Trap is turned to hold the Cable in
place.
33
4
38
43
CABLE ASSEMBLY
88
82
76
34. Route the Press Cable (88) over a 3 1/2”
Pulley (82). Attach the Pulley and a Cable
Trap (80) to the indicated hole in the Press
Frame (12) with a 3/8” x 3 1/2” Bolt (66), a
3/8” Washer (38), and the 3/8” Nylon Locknut
(42).
80
34
42
66
82 80
38
88
12
35. Wrap the Press Cable (88) around a “V”-pulley (81). Attach the “V”-pulley to the upper
bracket on the Leg Press Upright (4) with a
3/8” x 2 1/4” Bolt (97) and a 3/8” Nylon
Jamnut (43).
35
97
81
4
88
43
15
36. Route the Press Cable (88) over a 3 1/2”
Pulley (82). Attach the Pulley and a Cable
Trap (80) to the indicated hole in the Press
Frame (12) with a 3/8” x 3 1/2” Bolt (66), a
3/8” Washer (38), and the 3/8” Nylon Locknut
(42).
36
66
88
38
12
82
42 80
37. Wrap the Press Cable (88) around a “V”-pulley (81). Attach the “V”-pulley to the lower
bracket on the Leg Press Upright (4) with a
3/8” x 2 1/4” Bolt (97) and a 3/8” Nylon
Jamnut (43).
37
4
CABLE ASSEMBLY
81
88
43
97
38. Wrap the Press Cable (88) around a 3 1/2”
Pulley (82). Attach the Pulley and a Cable
Trap (80) to the Leg Press Arm (9) with the
3/8” x 5” Bolt (74).
38
Slide another 3 1/2” Pulley (82) with a Cable
Trap (80) onto the 3/8” x 5” Bolt (74). Hand
tighten a 3/8” Nylon Locknut (42) onto the
Bolt. Do not tighten the Locknut until completing step 40.
82
80
9
88
74
39. Wrap the Press Cable (88) around a “V”-pulley (81). Attach the “V”-pulley and a Large
Cable Trap (83) to the bracket on the Front
Seat Frame (8) with a 3/8” x 2 1/2” Bolt (65)
and a 3/8” Nylon Locknut (42). Make sure
that the Large Cable Trap is turned to hold
the Cable in place and that the Cable and
Pulley move smoothly.
42
82
80
39
83
65
81
8
88
42
16
40. Note: The 3 1/2” Pulley (82) used in this
step was attached in step 38. It is shown
removed for easier part identification.
40
Route the Press Cable (88) around the 3 1/2”
Pulley (82). Be sure that the Cable Trap (80)
is turned to hold the Cable in place and
that the Cable is routed as shown. Tighten
the 3/8” x 5” Bolt (74) and the 3/8” Nylon
Locknut (42).
42
9
82
80
88
74
CABLE ASSEMBLY
41. Slide a 5/16” Washer (20) onto a 5/16” x 2 3/4”
Bolt (55). Insert the Bolt into the Front Seat
Frame (8). Fully tighten a 5/16” Nylon Jamnut
(91) onto the Bolt. Slide the end of the Press
Cable (88) onto the Bolt. Thread another
5/16” Nylon Jamnut onto the Bolt, but do not
fully tighten it. Leave enough room
between the two Jamnuts for the Cable to
pivot.
41
88
8
91
55
20
42. Identify the High Cable (85)—this is the
shortest remaining cable. Wrap the High
Cable around a 3 1/2” Pulley (82). Attach the
Pulley to the Top Frame (2) with a 3/8” x 3 3/4”
Bolt (76), a 3/8” Washer (38), and a 3/8”
Nylon Locknut (42). Make sure that the end
of the Cable with the ball is on the indicated side of the Pulley and that the Cable is
between the Pulley and the post.
42
38
2
42
82
Post
76
85
43. Wrap the High Cable (85) around a 3 1/2”
Pulley (82). Attach the Pulley and a Cable
Trap (80) to the Top Frame (2) with a 3/8” x
3 3/4” Bolt (76), a 3/8” Washer (38), and a
3/8” Nylon Jamnut (43). Make sure that the
Cable Trap is positioned to hold the Cable
in place.
43
76
38
2
80
82
43
85
17
44. Locate the remaining preassembled pair of
Pulley Plates (31) and 3 1/2” Pulleys (82).
44
Route the High Cable (85) under the indicated
3 1/2” Pulley (82). The end of the Pulley
Plates (31) with two holes should be downward. Refer to the inset drawing. Be sure
that the Cable is between the Cable Trap
(80) and the Pulley, and that the Cable Trap
is positioned to hold the Cable in place.
85
85
82
50
31
80
End with two
holes should
be down
Tighten the 3/8” x 2” Bolt (50) and the 3/8”
Nylon Locknut (not shown).
45. Wrap the High Cable (85) around a 3 1/2”
Pulley (82). Attach the Pulley to the Top
Frame (2) with a 3/8” x 2” Bolt (50) and a 3/8”
Nylon Locknut (42). The Cable must be
routed from the direction shown.
45
42
2
50
CABLE ASSEMBLY
82
85
46. Attach the High Cable (85) to a Small “U”bracket (32) with a 1/4” Nylon Locknut (44)
and a 1/4” Washer (37). Do not completely
tighten the Locknut. It should be threaded
onto the end of the Cable only a couple of
turns, as shown in the inset drawing.
46
85
40
32
68
37
44
Attach the Small “U”-bracket (32) to the indicated Weight Tube (25) with a 5/16” x 1 3/4”
Bolt (68) and a 5/16” Nylon Locknut (40).
25
85
32
37
44
47. Locate the Low Cable (86). Wrap the Low
Cable over a 3 1/2” Pulley (82). Attach the
Pulley and both Pulley Covers (94) to the Ab
Upright (1) with the 3/8” x 4” Bolt (95), two
3/8” Washers (38), and a 3/8” Nylon Locknut
(42). Do not overtighten the Locknut; the
Pulley should turn easily. Make sure that
the Cable is between the Pulley and the
post, and that the Pulley Covers are turned
so the wide tabs are on the indicated side.
47
94
82
42
38
Wide
tabs
must be
on this
side
95
94
38
86
1
18
Post
48. Wrap the Low Cable (86) around a 3 1/2”
Pulley (82). Attach the Pulley and a Cable
Trap (80) to the Ab Upright (1) with the 3/8” x
3 3/4” Bolt (76) and a 3/8” Nylon Locknut (42).
Be sure that the Cable Trap is in the indicated position.
48
1
86
42
80
82
76
CABLE ASSEMBLY
49. Remove the indicated 3/8” x 2” Bolt (50), the
3/8” Nylon Locknut (42), the 3 1/2” Pulley
(82), and the Cable Trap (80) from the indicated Pulley Plates (31). Wrap the Low Cable
(86) over the Pulley. Reattach the Pulley and
the Cable Trap to the lowest hole in the
Pulley Plates with the Bolt and the Locknut.
Make sure that the Cable Trap is turned to
hold the Cable in place.
49
31
42
50
82
80
86
50. Wrap the Low Cable (86) around a 3 1/2”
Pulley (82). Attach the Pulley to the Ab
Upright (1) with the 3/8” x 3 3/4” Bolt (76), a
3/8” Washer (38), and a 3/8” Nylon Locknut
(42). The ball on the Cable must be on the
indicated side of the Pulley. Make sure that
the Cable and Pulley move smoothly and
that the Cable is between the Pulley and
the post.
50
86
1
42
38
82
76
Post
19
51. Locate and open the parts bag labeled
“SEAT ASSEMBLY.”
51
Attach the Small Backrest (18) to the Ab
Upright (1) with two 1/4” x 2 1/2” Machine
Screws (64) and two 1/4” Washers (37).
1
37
64
18
52. Press a 1 1/2” Square Inner Cap (57) into the
Rear Seat Frame (16).
Insert a 1/4” x 2” Carriage Bolt (61) through
the center hole in a Seat Plate (41). Attach
the Seat Plate to the Seat (17) with two 1/4” x
3/4” Screws (59).
52
17
61
SEAT ASSEMBLY
Insert the 1/4” x 2” Carriage Bolt (61) through
the indicated hole in the Rear Seat Frame
(16). Tighten a 1/4” Nylon Locknut (44) and a
1/4” Washer (37) onto the Carriage Bolt.
57
37
16
Attach the other end of the Seat (17) to the
Rear Seat Frame (16) with a 1/4” Washer (37)
and a 1/4” x 2” Machine Screw (63).
53. Press a 1 1/2” Square Inner Cap (57) into the
Leg Lever (15).
59
41
63
44
53
16
Lubricate the 5/16” x 2 1/4” Bolt (62) with
grease. Attach the Leg Lever (15) to the Rear
Seat Frame (16) with the Bolt and a 5/16”
Nylon Locknut (40). Do not overtighten the
Locknut; the Leg Lever must pivot freely.
40
Lubricate
15
Insert the 3/8” x 2” Eyebolt (79) into the Leg
Lever (15) from the direction shown. Tighten a
3/8” Nylon Locknut (42) and a 3/8” Washer
(38) onto the Eyebolt.
62
38
79
42
57
54. Rest the slot in the Rear Seat Frame (16) on
the indicated post in the Ab Upright (1). Attach
the Rear Seat Frame to the Ab Upright with a
5/16” x 2 3/4” Carriage Bolt (77) and the Seat
Knob (30).
54
30
16
1
77
Post
Slot
20
55. Press two 3/4” Round Inner Caps (78) into
each Pad Tube (28).
55
16
Insert a Pad Tube (28) into the Rear Seat
Frame (16). Slide two Foam Pads (29) onto
the ends of the Pad Tube.
78
29
Insert the other Pad Tube (28) into the Leg
Lever (15). Slide two Foam Pads (29) onto
the ends of the Pad Tube.
28
29
15
56. Attach the Large Backrest (19) to the Leg
Press Upright (4) with two 1/4” x 2 1/2”
Machine Screws (64) and two 1/4” Washers
(37).
78
56
4
SEAT ASSEMBLY
64
57. Insert a 1/4” x 2 1/2” Carriage Bolt (60)
through the center hole in a Seat Plate (41).
Attach the Seat Plate to the Seat (17) with
two 1/4” x 3/4” Screws (59).
19
37
57
17
Insert the 1/4” x 2 1/2” Carriage Bolt (60)
through the indicated hole in the Front Seat
Frame (8). Tighten a 1/4” Nylon Locknut (44)
with a 1/4” Washer (37) onto the Carriage
Bolt.
8
60
41
59
Attach the other end of the Seat (17) to the
Front Seat Frame (8) with a 1/4” Washer (37)
and a 1/4” x 2 1/2” Machine Screw (64).
37
64
44
58. Make sure that all parts have been properly tightened. The use of the remaining parts will be explained
in ADJUSTMENTS, beginning on the following page.
Before using the weight system, pull each cable a few times to be sure that the cables move smoothly
over the pulleys. If one of the cables does not move smoothly, find and correct the problem. IMPORTANT: If the cables are not properly installed, they may be damaged when heavy weight is
used. See the CABLE DIAGRAMS on page 26 and 27 of this manual for proper cable routing. If
there is any slack in the cables, you will need to remove the slack by tightening the cables. See
TROUBLESHOOTING AND MAINTENANCE on page 25.
21
ADJUSTMENTS
The instructions below describe how each part of the weight system can be adjusted. Refer to the exercise
guide accompanying this manual to see how the weight system should be set up for each exercise. IMPORTANT: When attaching the lat bar or nylon strap, make sure that the attachments are in the correct starting position for the exercise to be performed. If there is any slack in the cables or chain as an exercise
is performed, the effectiveness of the exercise will be reduced.
CHANGING THE WEIGHT SETTING
The weight system features two weight stacks. One
weight stack is connected to the ab, upper, and lower
pulley stations. The other weight stack is connected
to the fly and press arms, and the leg press.
93
To change the weight setting of either weight stack,
insert a Weight Pin (93) under the desired Weight
(90). Insert the Weight Pin until the bent end of the
Weight Pin is touching the Weights, and turn the bent
end downward. The weight setting of either weight
stack can be changed from 6.5 pounds to 106.5
pounds, in increments of 12.5 pounds. Note: Due to
the cables and pulleys, the amount of resistance
at each exercise station may vary from the weight
setting. Use the WEIGHT RESISTANCE CHART on
page 24 to find the approximate amount of resistance at each weight station.
90
93
ATTACHING THE LAT BAR OR HANDLE TO THE
HIGH PULLEY STATION
Attach the Lat Bar (36) to the High Cable (85) with a
Cable Clip (33). For some exercises, the Chain (34)
should be attached between the Lat Bar and the High
Cable with two Cable Clips. Adjust the length of the
Chain between the Lat Bar and the High Cable so
the Lat Bar is in the correct starting position for
the exercise to be performed.
34
85
33
36
The Handle (96) can be attached in the same manner.
96
ATTACHING THE LAT BAR OR HANDLE TO THE
LOW PULLEY STATION
33
Attach the Lat Bar (36) to the Low Cable (86) with a
Cable Clip (33). For some exercises, the Chain (34)
should be attached between the Lat Bar and the Low
Cable with two Cable Clips. Adjust the length of the
Chain between the Lat Bar and the Low Cable so
the Lat Bar is in the correct starting position for
the exercise to be performed.
86
36
The Handle (96) can be attached in the same manner.
96
22
34
ATTACHING THE AB STRAP TO THE AB PULLEY
STATION
86
Attach the Ab Strap (35) to the Low Cable (86) at the
ab pulley station with a Cable Clip (33).
33
35
ATTACHING AND REMOVING THE SEAT
30
17
To attach the Seat (17), set the bracket on the Rear
Seat Frame (16) onto the pins on the Ab Upright (1).
Attach the Rear Seat Frame to the Ab Upright with the
5/16” x 2 3/4” Carriage Bolt (77) and the Seat Knob
(30).
77
16
1
For some exercises, the Seat (17) must be removed.
First, be sure that the chain is not attached to the leg
lever (see ATTACHING THE LEG LEVER TO THE
LOW PULLEY STATION below). Next, remove the
Seat Knob (30) and the 5/16” x 2 3/4” Carriage Bolt
(77) from the Rear Seat Frame (16). Lift the Rear Seat
Frame off the Ab Upright (1).
ATTACHING THE LEG LEVER TO THE LOW
PULLEY STATION
33
To use the Leg Lever (15), the seat must be attached
to the front upright (see ATTACHING AND REMOVING
THE SEAT above).
Attach one end of the Chain (34) to the Low Cable
(86) with a Cable Clip (33). Attach the other end of the
Chain to the 3/8” x 2” Eyebolt (79) with another Cable
Clip.
15
34
79
86
ADJUSTING THE LEG PRESS PLATE
Hook
Remove the Lock Pin (73) from the Adjustment Tube
(10).
10
73
Align the holes in the Leg Press Arm (9) with the
desired set of holes in the Adjustment Tube (10). Reinsert the Lock Pin (73) through the holes in the Leg
Press Arm and the holes in the Adjustment Tube.
Make sure that the hook on the Lock Pin is clipped
in place on the Adjustment Tube.
9
23
WEIGHT RESISTANCE CHART
This chart shows the approximate weight resistance at each weight station. “Top” refers to the 6.5 lb. top weight.
The other numbers refer to the 12.5 lb. weight plates. The butterfly arm resistance listed is the resistance for
each butterfly arm.
WEIGHT
PRESS
ARM
BUTTERFLY
ARM
LEG
LEVER
HIGH
PULLEY
LOW
PULLEY
LEG
PRESS
AB
PULLEY
PLATES
(lbs.)
(lbs.)
(lbs.)
(lbs.)
(lbs.)
(lbs.)
(lbs.)
Top
27
20
9
10
10
52
10
1
53
37
18
24
24
94
25
2
79
50
33
40
41
141
40
3
101
65
38
53
53
180
53
4
125
83
48
66
63
228
68
5
148
103
58
80
80
263
83
6
175
120
68
96
91
310
96
7
205
143
76
107
101
358
110
8
240
173
90
123
120
410
124
The actual resistance at each weight station may vary due to differences in individual weight plates, as
well as friction between the cables, pulleys, and weight guides.
24
TROUBLESHOOTING AND MAINTENANCE
Inspect and tighten all parts each time the weight system is used. Replace any worn parts immediately. The
weight system can be cleaned using a damp cloth and mild non-abrasive detergent. Do not use solvents.
TIGHTENING THE CABLES
Woven cable, the type of cable used on the weight system, can stretch slightly when it is first used. If there is
slack in the cables before resistance is felt, the cables should be tightened. If any slack is felt when using the
weight stack closest to the ab upright, both the High Cable (85) and the Low Cable (86) will need to be tightened. If any slack is felt when using the other weight stack, the Rear Cable (87), the Press Cable (88), and the
Butterfly Cable (89) will need to be tightened.
To tighten the cables, first insert the weight pin into the middle of the weight stack. Slack can be removed from these
cables several ways:
•
1
82
80
See drawing 1. Tighten the 1/4” Nylon Locknut (44) that
connects the end of the Press Cable (88) to the Large
“U”-bracket (84).
42
50
84
•
•
See drawing 1. Remove the 3/8” Nylon Locknut (42) and
the 3/8” x 2” Bolt (50) from the Cable Trap (80), 3 1/2”
Pulley (82), and Large “U”-bracket (84). Reattach the
Pulley and Cable Trap to the other hole in the Large “U”bracket. Make sure that the Cable Trap is in the proper
position and that the Cable and Pulley move smoothly.
44
88
87
2
85
32
44
See drawing 2. Tighten the 1/4” Nylon Locknut (44) that
connects the end of the High Cable (85) to the Small “U”bracket (32).
32
The Rear Cable (87) can be tightened in the same
manner.
•
See Drawing 3. If you feel additional slack while using
the weight system, the Low Cable (86) and the Press
Cable (88) can be tightened further.
Remove the 3/8” x 2” Bolts (50), the 3/8” Nylon Locknuts
(42), the 3 1/3” Pulleys (82), and the Cable Traps (80)
from the Pulley Plates (31). Reattach the upper Pulley
without the Cable Trap. Reattach the lower Pulley to the
higher hole in the Pulley Plates without the Cable Trap.
Keep the Cable Traps for future use. Make sure that the
Cable and Pulley move smoothly.
Do not overtighten the cables. If the cables are overtightened, the top weight will be lifted off the weight stack.
44
3
82
42
50
31
82
80
86, 88
If a cable tends to slip off the pulleys often, it may have
become twisted. Remove the cable and re-install it.
If the cables need to be replaced, see ORDERING REPLACEMENT PARTS on the back cover of this manual.
25
CABLE DIAGRAMS
The cable diagrams on this page and the next page show the proper routing of the High Cable (85), the Low
Cable (86), the Rear Cable (87), the Press Cable (88), and the Butterfly Cable (89). Use the diagrams to be sure
that the cables have been assembled correctly. The starting and ending points of each cable have been labeled.
The numbers show the proper route for each cable. IMPORTANT: If the cables have not been correctly routed, the weight system will not function properly and damage may occur.
Press Cable (88)
Low Cable (86)
3
Ab Pulley—1
1—Long “U” Bracket
2
4
4—Low Pulley
Butterfly Cable (89)
5
7
6
4
11
8
5—Left Fly Arm
2
12
2
1—Right Fly Arm
3
9
3
10
Leg Press—13
26
High Cable (85)
Rear Cable (87)
1—Top Frame
4
2
3
High Pulley—1
2
3
4—Weight Stack
Weight Stack—5
27
PART IDENTIFICATION CHART—Model No. WESY26330
1/4" Washer (37)
1" Tap Screw (72)
3/8" x 2" Eyebolt (79)
5/16" Washer (20)
3/8" Washer (38)
1/4" x 3/4" Screw (59)
5/16" x 1" Shoulder Bolt (51)
1/4" Nylon Locknut (44)
5/16" x 1 3/4" Bolt (68)
5/16" Nylon Locknut (40)
3/8" x 2" Bolt (50)
5/16" Nylon Jamnut (91)
1/4" x 2" Machine Screw (63)
1" Retainer (45)
3/8" Nylon Locknut (42)
3/8" Nylon Jamnut (43)
1/4" x 2" Carriage Bolt (61)
5/16" x 2 1/4" Bolt (62)
3/8" x 2 1/4" Bolt (97)
3 1/2" Pulley (82)
(Not shown to scale)
"V" Pulley (81)
(Not shown to scale)
1/4" x 2 1/2" Machine Screw (64)
R1103A
1" x 7/8" Plastic Bushing (54)
1" Inner Cap (98)
1" Round Inner Cap (70)
1 1/8" x 2 1/2" Plastic Bushing (47)
1 1/2" Square Inner Cap (57)
1/2" x 3/4" Spacer (69)
1" Round Outer Cap (46)
3/4" Round Inner Cap (78)
1 3/4" Square Inner Cap (48)
2" Square Outer Cap (58)
2" Square Inner Cap (56)
1/4" x 2 1/2" Carriage Bolt (60)
5/16" x 2 1/2" Carriage Bolt (49)
5/16" x 2 3/4" Bolt (55)
5/16" x 2 3/4" Carriage Bolt (77)
5/16" x 3" Bolt (92)
3/8" x 3 1/2" Bolt (66)
3/8" x 3 3/4" Bolt (76)
3/8" x 4" Bolt (95)
Cable Clip (33)
3/8" x 3 1/4" Bolt (71)
3/8" x 8" Bolt (52)
5/16" x 6" Bolt (67)
3/8" x 2 1/2" Bolt (65)
3/8" x 5" Bolt (74)
5/16" x 2 1/2" Bolt (39)
PART LIST—Model No. WESY26330
Key No.
Qty.
1
2
3
4
5
6
7
8
9
10
11
12
13
14
15
16
17
18
19
20
21
22
23
24
25
26
27
28
29
30
31
32
33
34
35
36
37
38
39
40
41
42
43
44
45
46
47
48
49
50
1
1
1
1
1
1
2
1
1
1
1
1
1
1
1
1
2
1
1
12
4
2
4
2
2
2
4
2
4
1
4
2
4
1
1
1
11
9
5
27
2
22
4
5
4
2
2
7
6
11
Description
Ab Upright
Top Frame
Butterfly Frame
Leg Press Upright
Right Fly Arm
Left Fly Arm
Press Arm
Front Seat Frame
Leg Press Arm
Adjustment Tube
Leg Press Plate
Press Frame
Press Base
Weight Base
Leg Lever
Rear Seat Frame
Seat
Small Backrest
Large Backrest
5/16” Washer
5” Plastic Grip
10” Pad
Weight Guide
Top Weight
Weight Tube
Weight Tube Bumper
Weight Bumper
Pad Tube
Foam Pad
Seat Knob
Pulley Plate
Small “U”-bracket
Cable Clip
Chain
Ab Strap
Lat Bar
1/4” Washer
3/8” Washer
5/16” x 2 1/2” Bolt
5/16” Nylon Locknut
Seat Plate
3/8” Nylon Locknut
3/8” Nylon Jamnut
1/4” Nylon Locknut
1” Retainer
1” Round Outer Cap
1 1/8” x 2 1/2” Plastic Bushing
1 3/4” Square Inner Cap
5/16” x 2 1/2” Carriage Bolt
3/8” x 2” Bolt
R1103A
Key No.
Qty.
51
52
53
54
55
56
57
58
59
60
61
62
63
64
65
66
67
68
69
70
71
72
73
74
75
76
77
78
79
80
81
82
83
84
85
86
87
88
89
90
91
92
93
94
95
96
97
98
#
#
2
1
1
2
10
8
2
2
4
1
1
1
1
5
1
2
4
2
8
2
1
1
1
1
2
5
1
4
1
16
3
21
1
1
1
1
1
1
1
16
6
1
2
2
1
1
2
2
1
1
Description
5/16” x 1” Shoulder Bolt
3/8” x 8” Bolt
Leg Press Bumper
1” x 7/8” Plastic Bushing
5/16” x 2 3/4” Bolt
2” Square Inner Cap
1 1/2” Square Inner Cap
2” Square Outer Cap
1/4” x 3/4” Screw
1/4” x 2 1/2” Carriage Bolt
1/4” x 2” Carriage Bolt
5/16” x 2 1/4” Bolt
1/4” x 2” Machine Screw
1/4” x 2 1/2” Machine Screw
3/8” x 2 1/2” Bolt
3/8” x 3 1/2” Bolt
5/16” x 6” Bolt
5/16” x 1 3/4” Bolt
1/2” x 3/4” Spacer
1” Round Inner Cap
3/8” x 3 1/4” Bolt
1” Tap Screw
Lock Pin
3/8” x 5” Bolt
Press Bushing
3/8” x 3 3/4” Bolt
5/16” x 2 3/4” Carriage Bolt
3/4” Round Inner Cap
3/8” x 2” Eyebolt
Cable Trap
“V”-pulley
3 1/2” Pulley
Large Cable Trap
Large “U”-bracket
High Cable
Low Cable
Rear Cable
Press Cable
Butterfly Cable
Weight
5/16” Nylon Jamnut
5/16” x 3” Bolt
Weight Pin
Pulley Cover
3/8” x 4” Bolt
Handle
3/8” x 2 1/4” Bolt
1” Inner Cap
User’s Manual
Exercise Guide
Note: “#” indicates a non-illustrated part. Specifications are subject to change without notice.
78
15
42 38
29
40
78
62
57
57
29
79
28
59
61
17
41
86
42
29
56
42
78
94
1
76
80
82
29
42
38
30
82
38 94
85
2
76
37
16
38
37
40
63
44
28
18
42
56
42 38
55
20
86
77
82
31
55
58
76
93
69
64
50
32
85
23
49
20
27
90
67
26
25
42
24
68
56
14
40
82
43
67
80
64
37
82
95
40
80
50
76
38
50
40
82
55 91
91
40 20 87
42
69
20
55
40
40
37
44
44
68
87
32
40
69
33
42
58
93
90
27
84
88
80
50
31
80
34
40
43
82
20
98
4
35
97
20
55
40 42
21
97
20
50
50
37
55
82 64
37
82
56
50 42
44
64 37
40
76
82 80
42
69
40
26
25
24
37
23
40
67
67
55
92
19
80
96
36
43
43
38
82
3
56
40
50
70
81
50
40
82
48
89
80
7
21
21
82
46
49
80
47
45
38
42 12
66
39
45
48
91
47
46
22
48
5
91
51
89 51
13
54
40
49
41
52
81
75
20
59
40
74
56
91
73
48
82
56
80
88
72
53
91
37 8
21
60
42
82
55
17
44
80
42
65
83
66
82
38
37
64
40
22
48
6
9
20
48
71
82
7
70
56
42
80
39
42
10
11
20 40
EXPLODED DRAWING—Model No. WESY26330
R1103A
ORDERING REPLACEMENT PARTS
To order replacement parts, simply call our Customer Service Department toll-free at 1-800-999-3756, Monday
through Friday, 6 a.m. until 6 p.m. Mountain Time (excluding holidays). To help us assist you, please be prepared to give the following information:
1. The MODEL NUMBER of the product (WESY26330)
2. The NAME of the product (WEIDER® PRO 3750 weight system)
3. The SERIAL NUMBER of the product (see the front cover of this manual)
4. The KEY NUMBER and DESCRIPTION of the part(s) (see the PART LIST and EXPLODED DRAWING
attached at the center of this manual)
LIMITED WARRANTY
ICON Health & Fitness, Inc. (ICON), warrants this product to be free from defects in workmanship and
material, under normal use and service conditions, for a period of ninety (90) days from the date of purchase. This warranty extends only to the original purchaser. ICON's obligation under this warranty is limited to replacing or repairing, at ICON's option, the product through one of its authorized service centers.
All repairs for which warranty claims are made must be pre-authorized by ICON. This warranty does not
extend to any product or damage to a product caused by or attributable to freight damage, abuse, misuse, improper or abnormal usage or repairs not provided by an ICON authorized service center; products
used for commercial or rental purposes; or products used as store display models. No other warranty
beyond that specifically set forth above is authorized by ICON.
ICON is not responsible or liable for indirect, special or consequential damages arising out of or in connection with the use or performance of the product or damages with respect to any economic loss, loss
of property, loss of revenues or profits, loss of enjoyment or use, costs of removal or installation or other
consequential damages of whatsoever nature. Some states do not allow the exclusion or limitation of incidental or consequential damages. Accordingly, the above limitation may not apply to you.
The warranty extended hereunder is in lieu of any and all other warranties and any implied warranties of
merchantability or fitness for a particular purpose is limited in its scope and duration to the terms set forth
herein. Some states do not allow limitations on how long an implied warranty lasts. Accordingly, the above
limitation may not apply to you.
This warranty gives you specific legal rights. You may also have other rights which vary from state to state.
ICON HEALTH & FITNESS, INC., 1500 S. 1000 W., LOGAN, UT 84321-9813
Part No. 203698 R1103A
Printed in Canada © 2003 ICON Health & Fitness, Inc.