1
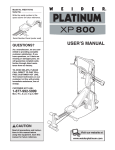
Model No. WEMC07730
QUESTIONS?
As a manufacturer, we are committed to providing complete
customer satisfaction. If you
have questions, or if there are
missing or damaged parts, we
will guarantee complete satisfaction through direct assistance from our factory.
USER’S MANUAL
TO AVOID DELAYS, PLEASE
CALL DIRECT TO OUR TOLLFREE CUSTOMER HOT LINE.
The trained technicians on our
customer hot line will provide
immediate assistance, free of
charge.
CUSTOMER HOT LINE:
1-877-992-5999
Mon.–Fri., 6 a.m.–6 p.m. MST
CAUTION
Read all precautions and instructions in this manual before
using this equipment. Save this
manual for future reference.
Visit our website at
www.weiderplatinum.com
TABLE OF CONTENTS
IMPORTANT PRECAUTIONS . . . . . . . . . . . . . . . . . . . . . . . . . . . . . . . . . . . . . . . . . . . . . . . . . . . . . . . . . . . . . . . .2
BEFORE YOU BEGIN . . . . . . . . . . . . . . . . . . . . . . . . . . . . . . . . . . . . . . . . . . . . . . . . . . . . . . . . . . . . . . . . . . . . . . 3
ASSEMBLY . . . . . . . . . . . . . . . . . . . . . . . . . . . . . . . . . . . . . . . . . . . . . . . . . . . . . . . . . . . . . . . . . . . . . . . . . . . . . . .4
ADJUSTMENTS . . . . . . . . . . . . . . . . . . . . . . . . . . . . . . . . . . . . . . . . . . . . . . . . . . . . . . . . . . . . . . . . . . . . . . . . . . . 9
PART LIST . . . . . . . . . . . . . . . . . . . . . . . . . . . . . . . . . . . . . . . . . . . . . . . . . . . . . . . . . . . . . . . . . . . . . . . . . . . . . . .11
EXPLODED DRAWING . . . . . . . . . . . . . . . . . . . . . . . . . . . . . . . . . . . . . . . . . . . . . . . . . . . . . . . . . . . . . . . . . . . . .11
ORDERING REPLACEMENT PARTS . . . . . . . . . . . . . . . . . . . . . . . . . . . . . . . . . . . . . . . . . . . . . . . . . .Back Cover
LIMITED WARRANTY . . . . . . . . . . . . . . . . . . . . . . . . . . . . . . . . . . . . . . . . . . . . . . . . . . . . . . . . . . . . . . Back Cover
IMPORTANT PRECAUTIONS
WARNING:
To reduce the risk of serious injury, read the following important precautions
before using the resistance system accessory.
1. Read all instructions in this manual before
using the resistance system accessory. Use
the resistance system accessory only as
described in this manual.
5. Make sure that all parts are properly tightened each time the resistance system accessory is used. Replace any worn parts immediately.
2. It is the responsibility of the owner to ensure
that all users of the resistance system accessory are adequately informed of all precautions.
6. The resistance system accessory is
designed to be used with the WEIDER PLATINUM resistance system.
7. Make sure the curl knob is in place and fully
tightened each time the curl pad is used.
3. The resistance system accessory is intended
for home use only. Do not use the resistance
system accessory in any commercial, rental,
or institutional setting.
8. If you feel pain or dizziness while exercising,
stop immediately and begin cooling down.
4. Always wear athletic shoes for foot protection while exercising.
WARNING:
Before beginning this or any exercise program, consult your physician. This
is especially important for persons over the age of 35 or persons with pre-existing health problems.
Read all instructions before using. ICON assumes no responsibility for personal injury or property
damage sustained by or through the use of this product.
WEIDER is a registered trademark of ICON Health & Fitness, Inc.
2
BEFORE YOU BEGIN
Thank you for selecting the innovative WEIDER®
PLATINUM resistance system accessory. The resistance system accessory is designed to be used with
the WEIDER® PLATINUM to develop the muscle
groups of the arms and legs.
Customer Service Department toll-free at
1-877-992-5999, Monday through Friday, 6 a.m. until
6 p.m. Mountain Time (excluding holidays). To help us
assist you, please note the product model number
before calling. The model number is WEMC07730.
For your benefit, read this manual carefully before
using the resistance system accessory. If you have
questions after reading this manual, please call our
Before reading further, please review the drawing
below and familiarize yourself with the parts that are
labeled.
Curl Pad
Curl Bar
Curl Knob
Leg Lever
Leg
3
ASSEMBLY
• As you assemble the resistance system accessory, make sure that all parts are oriented as shown
in the drawings.
Make Things Easier for Yourself
This manual is designed to ensure that the resistance system accessory can be assembled successfully by most people.
The following tools (not included) are required
for assembly:
Before beginning assembly, carefully read the
following information and instructions:
• One adjustable wrench
• Assembly requires two persons.
• One Phillips screwdriver
• Place all parts in a cleared area and remove the
packing materials. Do not dispose of the packing
materials until assembly is completed.
• Two Allen wrenches
(included with the
resistance system)
• One rubber mallet
• Tighten all parts as you assemble them, unless
instructed to do otherwise.
1. Remove the Cotter Pin (A) from the lower Leg
Station Pin (B). Remove the Leg Station Pin from
the original Leg (C). Remove the Cable (S) from
the original Leg Lever (D).
1
E
C
F
Remove the Cotter Pin (A) from the upper Leg
Station Pin (B). Remove the Leg Station Pin from
the Leg (C) and the Leg Lever (D).
D
E
Remove the two Large Foam Pads (E) and the
Pad Tube (F) from the Leg Lever (D). Set the Leg
Lever aside.
E
A
S
B
Remove the two Large Foam Pads (E) and the
Pad Tube (F) from the Leg (C).
A
B
F
2. Slide the two Pad Tubes (F) removed in step 1
into the new Leg Lever (9). Slide the four Large
Foam Pads (E) onto the Pad Tubes.
E
2
9
E
E
F
E
F
E
4
3. Note: If your Leg (C) has a hole for the Curl
Knob (not shown) in the indicated position,
skip to step 11.
3
Hole
Remove the two Bolts (G), the four Washers (H),
and the two Nylon Locknuts (I) attaching the Leg
(C) to the Rail (J).
I
J
H
C
H
G
4. Remove the two Screws (K) used to attach the
Leg Lever Bumper (L) to the Leg (C).
4
K
L
C
5. Remove the two Leg Outer Caps (M) from the
Leg (C).
5
M
C
M
5
6. Remove the Bolt (N), the two Washers (O), the
two Spacers (P), the Nylon Locknut (Q), and the
Pulley (R) from the Leg (C).
6
Q
P
P
O
O
N
R
C
7. Attach Pulley (R) removed in step 6 inside of the
new Leg (14) with the Bolt (N), the two Washers
(O), the two Spacers (P), and the Nylon Locknut
(Q) removed in step 6.
7
Q
P
P
O
O
N
R
14
8. Press the two Leg Outer Caps (M) removed in
step 5 onto the Leg (14).
8
M
14
M
6
9. Attach the Leg Lever Bumper (L) to the Leg (14)
with the two Screws (K) removed in step 4.
9
K
L
14
10. Attach the Leg (14) to the Rail (J) with the two
Bolts (G), the four Washers (H), and the two
Nylon Locknuts (I) removed in step 3.
10
J
I
H
14
H
G
11. Slide the Pad Tube (5) into the Leg (14). Slide the
two Large Foam Pads (7) onto the Pad Tube.
11
5
7
14
7
7
12. Attach the Curl Pad (4) to the Curl Post (3) with
two M6 x 16mm Screws (2).
12
4
3
2
8
ADJUSTMENTS
This section explains how to adjust the resistance system accessory. Make sure all parts are properly tightened
each time the resistance system accessory is used. Replace worn parts immediately. The resistance system
accessory can be cleaned with a damp cloth and a mild, non-abrasive detergent. Do not use solvents.
USING THE LEG LEVER
To use the Leg Lever (9), attach it to the Leg (14) with
a Leg Station Pin (B). Slide a Cotter Pin (A) onto the
Leg Station Pin.
5
9
7
L
Route the hook end of the Leg Lever Cable (S) under
the Pulley (R) in the Leg (14), and attach it to the Leg
Lever (9). Make sure the hook is oriented as
shown when attaching it to the Leg Lever. Insert a
Leg Station Pin (B) into the Leg, under the Cable.
Slide a Cotter Pin (A) onto the Leg Station Pin.
A
14
R
S
B
A
B
See the inset drawing. Attach a long end of the Leg
Lever Cable (S) to one end of the lower cable (T) with
a Cable Clip (U). Attach the other long end of the
Leg Lever Cable to the other end of the low cable
in the same manner.
Hook
To perform the leg extension exercise, the indicated Pad Tube (5) should be inserted through the Leg
(14) as shown.
U
S
T
To perform the leg curl exercise, remove a Large
Foam Pad (7) from the Pad Tube (5). Remove the
Pad Tube and insert it through the hole in the Leg
Lever Bumper (L). Slide the Large Foam Pad back
onto the Pad Tube.
ATTACHING THE CURL PAD
4
To attach the Curl Pad (4), insert the Curl Post (3)
into the Leg (14). Secure the Curl Post with the Curl
Knob (12).
Remove the Curl Pad (3) from the resistance system when performing an exercise that does not
require it.
3
14
9
12
ATTACHING THE CURL BAR
To use the Curl Bar (8), first attach the leg lever to the
leg (see USING THE LEG LEVER on page 9). Attach
the Curl Bar to the hook on the Leg Lever (9) with a
Cable Clip (13).
8
13
9
10
PART LIST—Model No. WEMC07730
Key No. Qty.
1
2
3
4
5
6
7
8
2
2
1
1
1
2
2
1
Description
R0204A
Key No. Qty.
Short Handgrip
M6 x 16mm Screw
Curl Post
Curl Pad
Pad Tube
19mm Round Inner Cap
Large Foam Pad
Curl Bar
9
10
11
12
13
14
#
Description
1
2
1
1
1
1
1
Leg Lever
Leg Lever Bushing
Leg Station Bushing
Curl Knob
Cable Clip
Leg
User’s Manual
Note: “#” indicates a non-illustrated part. Specifications are subject to change without notice. See the back cover
of this manual for information about ordering replacement parts.
EXPLODED DRAWING—Model No. WEMC07730
1
4
1
8
10
13
3
9
7
2
6
11
6
5
7
12
14
11
R0204A
ORDERING REPLACEMENT PARTS
To order replacement parts, simply call our Customer Service Department toll-free at 1-877-992-5999, Monday
through Friday, 6 a.m. until 6 p.m. Mountain Time (excluding holidays). To help us assist you, please be prepared to give the following information:
• The MODEL NUMBER of the product (WEMC07730)
• The NAME of the product (WEIDER® PLATINUM resistance system accessory)
• The SERIAL NUMBER of the product (see the front cover of this manual)
• The KEY NUMBER and DESCRIPTION of the part(s) (see the PART LIST and EXPLODED DRAWING on
page 11 of this manual)
LIMITED WARRANTY
ICON Health & Fitness, Inc. (ICON), warrants this product to be free from defects in workmanship and
material, under normal use and service conditions, for a period of ten (10) years from the date of purchase. This warranty extends only to the original purchaser. ICON's obligation under this warranty is limited to replacing or repairing, at ICON's option, the product through one of its authorized service centers.
All repairs for which warranty claims are made must be pre-authorized by ICON. This warranty does not
extend to any product or damage to a product caused by or attributable to freight damage, abuse, misuse, improper or abnormal usage or repairs not provided by an ICON authorized service center; products
used for commercial or rental purposes; or products used as store display models. No other warranty
beyond that specifically set forth above is authorized by ICON.
ICON is not responsible or liable for indirect, special or consequential damages arising out of or in connection with the use or performance of the product or damages with respect to any economic loss, loss
of property, loss of revenues or profits, loss of enjoyment or use, costs of removal or installation or other
consequential damages of whatsoever nature. Some states do not allow the exclusion or limitation of incidental or consequential damages. Accordingly, the above limitation may not apply to you.
The warranty extended hereunder is in lieu of any and all other warranties and any implied warranties of
merchantability or fitness for a particular purpose is limited in its scope and duration to the terms set forth
herein. Some states do not allow limitations on how long an implied warranty lasts. Accordingly, the above
limitation may not apply to you.
This warranty gives you specific legal rights. You may also have other rights which vary from state to state.
ICON HEALTH & FITNESS, INC., 1500 S. 1000 W., LOGAN, UT 84321-9813
Part No. 204558 R0204A
Printed in China © 2003 ICON Health & Fitness, Inc.