1
VT01-MAN-Rev1
?
Printed in China for: Verilux, Inc.
© Copyright 2005 Verilux, Inc. All rights reserved.
Research Park
9 Viaduct Road
Stamford, CT 06907
(Representatives are available
Monday - Friday, 9 AM - 5 PM Eastern)
1-888-544-4865
Please visit our web site at:
www.VeriluxStore.com
Call our Customer
Service Department at
VT01
9
Due to ongoing improvements, actual product may have slight variations from the product
described in this manual.
Note: Verilux® recommends using a quality surge suppressor on all
electronics equipment. Voltage variations and spikes can damage
electronic components in any system. A quality suppressor can
eliminate the vast majority of failures attributed to surges and may be
purchased at electronics stores.
ATTENTION: When returning a product, be aware that damage during
shipping is the responsibility of the purchaser and will void any warranty
claim. We recommend that you insure the shipment by shipper when
returning this product or any parts. Be sure to return product in original
packaging.
Verilux® warrants this product to be free of defects in materials and
workmanship for a period of one year from the invoice date of original
retail purchase. During the limited warranty period, Verilux® will, at its
option, repair or replace defective parts of this product, at no charge to
you, subject to the following limitations. This warranty does not include
any postage, freight, transportation, insurance, or delivery fee. This
limited warranty does not cover damage, defect, or failure caused by or
resulting from accidents, external destruction, alteration, modification,
abuse, misuse, or misapplication.
Verilux, Inc., Research Park, 9 Viaduct Road, Stamford, CT 06907
This limited warranty is provided by:
One-Year Limited Warranty
WARRANTY
8
WARNING: To prevent risk of shock or personal injury
when cleaning lamp, make sure you have turned off and
unplugged the lamp, and allow sufficient time for the bulb
to cool.
Clean only with a soft dry cloth – DO NOT USE SOLVENTS OR
CLEANERS CONTAINING ABRASIVES OR AMMONIA
Your Verilux® lamp is made from high quality materials that will last for
many years with a minimum of care.
CARE & CLEANING
• Make sure there is power to the wall outlet or try another outlet – not
connected to a dimmer.
• Be sure the bulb is securely seated in the socket. (See page 6)
• Make sure all power connectors, cords, and plugs are inserted fully
and securely.
Before requesting service on your Verilux® lamp please read the
following:
TROUBLESHOOTING
Nicholas Harmon
President and CEO
Have a Bright Day!
1
Many other healthy lighting products are available through our
catalog and online. To request a free copy of our catalog, call
our toll-free number 1-888-544-4865. You may also visit us on
the web at www.VeriluxStore.com to learn more about all our
quality Verilux® products.
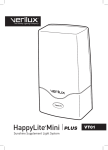
Thank you for purchasing the Verilux® HappyLite® Mini Plus
Mood Enhancement System. You have received an innovative
and quality manufactured product, backed by a one-year limited
warranty. As a Verilux® customer, your satisfaction means
everything to us. We look forward to serving you now and in the
future.
Dear Customer,
2
• Never cover the lamp when it is in operation.
• Use only the type of bulb and maximum wattage indicated by
Verilux®.
• Do not operate the lamp in close proximity to flammable or
combustible vapors, such as aerosol (spray) products or where
oxygen is being administered.
• Do not look directly at the lighted bulb without the diffuser being in
place.
• Light bulbs get HOT quickly! Do not touch the bulb while the lamp
is on.
• Turn off/unplug and allow to cool before replacing bulb or cleaning.
WARNING: TO REDUCE THE RISK OF FIRE, ELECTRIC SHOCK OR
PERSONAL INJURY:
The exclamation point within an equilateral triangle alerts
the user to the presence of important operating and
maintenance instructions in this owner’s guide.
EXPOSE THIS UNIT TO RAIN OR MOISTURE.
• TO REDUCE THE RISK OF FIRE OR ELECTRIC SHOCK, DO NOT
7
D
B
4. To re-install bulb and plastic diffuser, see instructions on page 6
3. Firmly hold the bulb base (B) (Do not hold the glass portion of the
bulb) and pull bulb from the socket in an outward motion (rocking
slightly if needed).
2. To access the bulb, remove the plastic diffuser by depressing the
tabs (D) and lifting it out.
1. Unplug lamp from power source.
• TO REDUCE THE RISK OF ELECTRIC SHOCK, DO NOT
DISMANTLE. THERE ARE NO SERVICEABLE PARTS INSIDE.
Bulb removal and replacement
BULB REPLACEMENT
CAUTION:
IMPORTANT SAFETY INSTRUCTIONS
6
A
B
C
3. Rotate the plastic diffuser and align the side snap tabs (C) into
position – press firmly to snap parts together.
2. Attach the plastic diffuser to the lamp body by first inserting the tab
located at the bottom of the diffuser (A) into the opening of the lamp
base (B).
3
SAVE THESE INSTRUCTIONS
14. If the lamp has been damaged in any way, such as power-supply
cord or plug is damaged, liquid has been spilled or objects have
fallen onto the lamp, the lamp has been exposed to rain or moisture,
does not operate normally, or has been dropped, it should not be
operated. There are no user serviceable parts within this lamp.
13. Unplug this lamp during lightning storms or when unused for long
periods of time.
12. Only use attachments/accessories specified by the manufacturer.
11. Protect the power cord from being walked on or pinched particularly
at plugs, convenience receptacles, and the point where it exits from
the lamp.
10. Do not defeat the safety purpose of the polarized plug. A polarized
plug has two blades with one wider than the other. The wider blade
is provided for your safety. If the provided plug does not fit in your
outlet, consult an electrician for replacement of the obsolete outlet.
9. Do not place near any heat sources such as radiators, heat
registers, stoves, or other apparatus (including amplifiers) that
produce heat.
8. Do not block any ventilation openings.
7. Clean only with dry cloth.
6. For indoor use only.
5. Do not use this lamp in damp/humid or wet locations.
4. Follow all instructions.
3. Heed all warnings.
2. Keep these instructions – for future reference.
1. Insert bulb into lamp by firmly holding bulb base and push into the
socket (See below)
Note: Make sure bulb is fully inserted into the socket. The bottom of
the bulb base should touch the plastic housing of the lamp.
1. Read these instructions – before using this lamp.
IMPORTANT SAFETY INSTRUCTIONS
Bulb & Diffuser installation
SET-UP INSTRUCTIONS
4
Note: This product may cause interference to radio equipment
and should not be installed near maritime safety communications
equipment or other critical navigation or communication equipment
operating between 0.45-30 MHz.
• Consult the dealer or an experienced radio/TV technician for help.
• Move the lamp out of the line of sight of the remote control receiver.
• Connect the lamp into an outlet on a circuit different from that to
which the receiver is connected.
• Increase the separation between the lamp and receiver.
• Reorient or relocate the receiving antenna.
This lamp has been tested and found to comply with Part 18 of the
FCC Rules. These limits are designed to provide reasonable protection
against harmful interference in a residential installation. This lamp
generates, uses, and can radiate radio frequency energy and, if
not used in accordance with the instructions, may cause harmful
interference to radio communications. If interference occurs try to
correct the interference by one or more of the following measures:
This product may cause interference with radios, cordless
telephones, or devices that use a wireless remote control,
such as televisions.
• Close supervision is recommended when this lamp is used by or
near children, or others who may not understand the need for these
precautions. Do not leave the lamp unattended during use.
• Do NOT use lubricating agent in bulb assembly.
Bulb
5
WARNING: DO NOT BLOCK VENTS
Vents are necessary for proper function of the electronic
ballast; blocking them may cause overheating of the
electronics and increase risk of fire.
Note: Avoid placing this lamp in areas that are exposed to direct
sunlight or close to heat-radiating products, such as heaters. Do not
place the lamp on the top of appliances that radiate heat.
• For best performance, place the lamp within two feet of you.
• Place your Verilux® HappyLite® Mini Plus
Mood Enhancement System on a table or other flat surface.
Selecting a location
Diffuser
Lamp
Please remove all packaging material. Check the carton for the items
pictured below:
• Avoid placing the lamp in areas that are dusty, humid/moist, lack
ventilation, or are subject to constant vibration.
• Not for use with light dimmers, timers, motion detectors, voltage
transformers, or extension cords.
Unpacking
SET-UP INSTRUCTIONS
• Do not use with power supply voltage other than 120V AC
GENERAL PRECAUTIONS