1
®
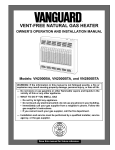
VENT-FREE NATURAL GAS GARAGE HEATER
OWNER’S OPERATION AND INSTALLATION MANUAL
Model: VGN30
— Do not store or use gasoline or other
flammable vapors and liquids in the
vicinity of this or any other appliance.
— WHAT TO DO IF YOU SMELL GAS
• Do not try to light any appliance.
• Do not touch any electrical switch; do
not use any phone in your building.
• Immediately call your gas supplier from
a neighbor’s phone. Follow the gas
supplier’s instructions.
• If you cannot reach your gas supplier,
call the fire department.
WARNING: Improper installation,
adjustment, alteration, service, or
maintenance can cause injury or
property damage. Refer to this
manual for correct installation and
operational procedures. For assistance or additional information
consult a qualified installer, service agency, or the gas supplier.
DESIGN
A
SS
A
— Installation and service must be performed by a qualified installer, service
agency, or the gas supplier.
Save this manual for future reference.
M ERICA N
®
N
WARNING: If the information in this manual
is not followed exactly, a fire or explosion
may result causing property damage, personal injury, or loss of life.
O C IA T IO
CE RTIFIED
CONTENTS
SECTION
PAGE
Safety Information ......................................................................... 2
Product Identification .................................................................... 4
Local Codes ................................................................................... 4
Unpacking ...................................................................................... 4
Product Features ............................................................................ 4
Installing To Wall .......................................................................... 5
Connecting To Gas Supply ............................................................ 10
Checking Gas Connections ............................................................ 11
Operating Heater ........................................................................... 13
Inspecting Burner .......................................................................... 15
Cleaning And Maintenance ........................................................... 17
Troubleshooting ............................................................................. 17
Technical Service .......................................................................... 21
Specifications ................................................................................ 21
Service Hints ................................................................................. 21
Replacement Parts ......................................................................... 22
Accessories .................................................................................... 23
Illustrated Parts List ....................................................................... 24, 25
Warranty Information .................................................................... Back Cover
SAFETY
INFORMATION
! WARNINGS
WARNING ICON
G 001
IMPORTANT: Read this Owner’s Manual carefully and completely
before trying to assemble, operate, or service this heater. Improper
use of this heater can cause serious injury or death from burns, fire,
explosion, electrical shock, and carbon monoxide poisoning.
! DANGER
WARNING ICON
G 001
Carbon monoxide poisoning may lead to death!
Carbon Monoxide Poisoning: Early signs of carbon monoxide poisoning
resemble the flu, with headaches, dizziness, or nausea. If you have these signs, the
heater may not be working properly. Get fresh air at once! Have heater serviced.
Some people are more affected by carbon monoxide than others. These include
pregnant women, persons with heart or lung disease or anemia, those under the
influence of alcohol, and those at high altitudes.
Natural Gas: Natural gas is odorless. An odor-making agent is added to natural
gas. The odor helps you detect a natural gas leak. However, the odor added to
natural gas can fade. Natural gas may be present even though no odor exits.
Make certain you read and understand all Warnings. Keep this manual for
reference. It is your guide to safe and proper operation of this heater.
Safety Information continues on next page
2
SAFETY
INFORMATION
Continued
! WARNINGS Continued
WARNING ICON
G 001
1. Use only natural gas. Do not convert heater to use different fuel type.
2. If you smell gas
• Shut off gas supply.
• Do not try to light any appliance.
• Do not touch any electrical switch; do not use any phone in your building.
• Immediately call your gas supplier from a neighbor’s phone. Follow the
gas supplier’s instructions.
• If you cannot reach your gas supplier, call the fire department.
3. Never install the heater
• in sleeping quarters, a mobile home, or a recreational vehicle
• where curtains, furniture, clothing, or other flammable objects are less than
36 inches from the front, top, or sides of the heater
• as a fireplace insert
• in high traffic areas
• in windy or drafty areas
4. Open window or garage door to admit fresh, outside air when using heater.
Open window one (1) or two (2) inches. When used without fresh, outside air,
heater may give off carbon monoxide gas.
5. Never run heater in small, closed room.
6. If heater shuts off, do not relight until you provide fresh, outside air. If heater
keeps shutting off, have it serviced.
7. Do not run heater
• where flammable liquids or vapors are used or stored
• under dusty conditions
8. Never place any objects on the heater.
9. Surface of heater becomes very hot when running heater. Keep children and
adults away from hot surface to avoid burns or clothing ignition. Heater will
remain hot for a time after shut-down. Allow surface to cool before touching.
10. Make sure grill guard is in place before running heater.
11. Do not alter heater or its controls. Any change may create a safety hazard.
12. Do not use heater if any part of heater has been under water.
13. Turn off and unplug heater and let cool before servicing. Only a qualified
service person should service and repair heater.
14. Do not operate heater above elevations of 4,500 feet.
3
Ignitor Button
Control Knob
PRODUCT
IDENTIFICATION
Grill
Guard
Heat
Shield
Front
Panel
Heater
Cabinet
Figure 1 - Vent-Free Natural Gas Garage Heater
LOCAL CODES
Install and use heater with care. Follow all local codes. In the absence of local
codes, use the latest edition of National Gas Code ANSI Z223.1, also known as
NFPA 54*.
*Available from:
American National Standards Institute, Inc.
1430 Broadway
New York, NY 10018
National Fire Protection Association, Inc.
Batterymarch Park
Quincy, MA 02269
UNPACKING
1. Remove heater from carton.
2. Remove all protective packaging applied to heater for shipment.
3. Check heater for any shipping damage. If heater is damaged, promptly inform
dealer where you bought heater.
PRODUCT
FEATURES
Safety Device
This heater has a pilot with an Oxygen Depletion Sensor Shutoff System (ODS).
The ODS/pilot is a required feature for vent-free garage heaters. The ODS/pilot
shuts off the heater if there is not enough fresh air.
Piezo Ignition System
This heater has a piezo ignitor. This system requires no matches, batteries, or other
sources to light heater.
4
INSTALLING
TO WALL
NOTICE
A qualified service person must install heater. Follow all local codes.
CHECK GAS TYPE
Use only natural gas. If your gas supply is not natural gas, do not install heater. Call
dealer where you bought heater for proper type heater.
INSTALLATION ITEMS
Before installing the heater, make sure you have the items listed below.
•
•
•
•
piping (check local codes)
sealant (resistant to propane gas)
manual shutoff valve *
ground joint union
• test gauge connection * (see
Figure 10, page 11)
• sediment trap
• tee joint
• pipe wrench
* An A.G.A. design certified manual shutoff valve with 1/8" NPT tap is an acceptable
alternative to test gauge connection. Purchase the optional A.G.A. design certified
manual shutoff valve from your dealer. See ACCESSORIES, page 23.
LOCATING HEATER
This heater is designed to be mounted on a wall.
! WARNING
WARNING ICON
G 001
Maintain the minimum clearances shown in Figure 2 (page 6). If
you can, provide greater clearances from floor, ceiling, and joining wall.
! WARNING
WARNING ICON
G 001
Never install the heater
• in sleeping quarters, a mobile home, or a recreational vehicle
• where curtains, furniture, clothing, or other flammable objects
are less than 36 inches from the front, top, or sides of the
heater
• as a fireplace insert
• in high traffic areas
• in windy or drafty areas
NOTICE
Do not install or operate heater in areas where impurities in the air
(such as tobacco smoke) exist. Particles from these impurities may
discolor walls.
Continued
5
! CAUTION
WARNING ICON
G 001
When installing, locate heater where moving vehicle will not hit it.
For convenience and efficiency, install heater
• where there is easy access for operation, inspection, and service
• where strong wind gusts from an open door or garage door can not blow
directly into heater.
An optional fan kit is available from your dealer. See ACCESSORIES, page 23. If
planning to use fan, locate heater near an electrical outlet.
CEILING
36"
Minimum
6"
Minimum
From
Sides Of
Heater
Left
Side
Right
Side
FLOOR
CLEARANCE-Garage heater
16 3/4" Minimum To Top
Surface of
Combustible Material
GRH/PV 009A
Figure 2 - Mounting Clearances As Viewed From Front of Heater
6
INSTALLING HEATER TO WALL
Mounting Bracket
The mounting bracket is located on back panel of heater. It has been taped there for
shipping. Remove mounting bracket from back panel.
Mounting
Bracket
Figure 3 - Mounting Bracket Location
Removing Front Panel Of Heater
1. Remove two screws near bottom corners of front panel.
2. Lift straight up on grill guard until it stops. Grill guard will slide up about 1/4".
3. Pull bottom of front panel forward, then down.
4. Remove cardboard packing from grill and heat shield.
FRONT
REMOVAL G
GRH/OV
003B
Figure
4 -PANEL
Removing
FrontH Panel Of
Heater
Methods For Attaching Mounting Bracket To Wall
Only use last hole on each end of mounting bracket to attach bracket to wall. These
two holes are 16 inches apart from their centers. Attach mounting bracket to wall in
one of two ways.
1. Attaching to wall stud
2. Attaching to wall anchor
Attaching to wall stud This method provides the strongest hold. Insert mounting
screws through mounting bracket and into wall studs.
Attaching to wall anchor This method allows you to attach mounting bracket to
hollow walls (wall areas between studs) or to solid walls (concrete or masonry).
Decide which method better suits your needs. Either method will provide a secure
hold for the mounting bracket.
7
Marking Screw Locations
1. Tape mounting bracket to wall where heater will be located. Make sure mounting bracket is level.
! WARNING
WARNING ICON
G 001
Maintain minimum clearances shown in Figure 5. If you can,
provide greater clearances from floor and joining wall.
2. Mark screw locations on wall (see Figure 5).
Note: Only mark last hole on each end of mounting bracket. Insert mounting
screws through these holes only.
3. Remove tape and mounting bracket from wall.
Adjoining Wall
11"
Min.
16"
Only Insert Mounting 18
32 3/4"
1/2"
Screws Through Last Min.
Hole On Each End
Floor
Figure 5 - Mounting Bracket Clearances
Attaching Mounting Bracket To Wall
Note: Wall anchors, mounting screws, and spacers are in hardware package. The
hardware package is provided with heater.
Attaching to wall stud method
For attaching mounting bracket to wall studs
1. Drill holes at marked locations using 9/64" drill bit.
2. Place mounting bracket onto wall. Line up last hole on each end of bracket with
holes drilled in wall.
3. Insert mounting screws through bracket and into wall studs.
4. Tighten screws until mounting bracket is firmly fastened to wall studs.
Attaching to wall anchor method
For attaching mounting bracket to hollow walls (wall areas between studs) or solid
walls (concrete or masonry)
1. Drill holes at marked locations using 5/16" drill bit. For solid walls (concrete or
masonry), drill at least 1" deep.
2. Fold wall anchor as shown in Figure 6.
Figure 6 - Folding Anchor
8
3. Insert wall anchor (wings first) into hole. Tap anchor flush to wall.
Continued
4. For thin walls (1/2" or less), insert red key into wall anchor. Push red key to
“pop” open anchor wings. IMPORTANT: Do not hammer key!
For thick walls (over 1/2" thick) or solid walls, do not pop open wings.
Figure 7 - Popping Open Anchor Wings For Thin Walls
5. Place mounting bracket onto wall. Line up last hole on each end of bracket with
wall anchors.
6. Insert mounting screws through bracket and into wall anchors.
7. Tighten screws until mounting bracket is firmly fastened to wall.
Placing Heater On Mounting Bracket
1. Locate two horizontal slots on back panel of heater.
2. Place heater onto mounting bracket. Slide horizontal slots onto stand-out tabs on
mounting bracket.
Horizontal Slots
Stand-Out Tab
Mounting Bracket
(attached to wall)
Figure 8 - Mounting Heater Onto Mounting Bracket
Installing Bottom Mounting Screws
1. Locate two bottom mounting holes. These holes are near bottom on back panel
of heater (see Figure 9).
2. Mark screw locations on wall.
3. Remove heater from mounting bracket.
4. If installing bottom mounting screws into hollow or solid wall, install wall
anchors. Follow steps 1 thru 4 under Attaching To Wall Anchor Method, page 8.
If installing bottom mounting screw into wall stud, drill holes at marked locations using 9/64" drill bit.
5. Replace heater onto mounting bracket.
6. Place spacers between bottom mounting holes and wall anchor or drilled hole.
7. Hold spacer in place with one hand. With other hand, insert mounting screw
through bottom mounting hole and spacer. Place tip of screw in opening of wall
anchor or drilled hole.
8. Tighten both screws until heater is firmly secured to wall. Do not over tighten.
Note: Do not replace front panel at this time. Replace front panel after making
gas connections and checking for leaks (see pages 10-12).
Figure 9 - Installing Bottom Mounting Screws
9
CONNECTING
TO GAS
SUPPLY
NOTICE
A qualified service person must connect heater to gas supply.
Follow all local codes.
! WARNING
WARNING ICON
G 001
Never connect heater to private (non-utility) gas wells. This gas is
commonly known as well-head gas.
IMPORTANT: Check gas line pressure before connecting heater to gas line. Gas
line pressure must be no greater than 14 inches of water. If gas line pressure is
higher, heater regulator damage could occur.
! CAUTION
WARNING ICON
G 001
Use only new, black iron or steel pipe. Copper tubing may be used
in certain areas. Check your local codes. Use pipe of 1/2" diameter
or greater to allow proper gas volume to heater. If pipe is too small,
undue loss of pressure will occur.
Installation must include a manual shutoff valve, union, and plugged 1/8" NPT tap.
Locate NPT tap within reach for test gauge hook up. NPT tap must be upstream
from heater (see Figure 10, page 11).
Apply pipe joint sealant lightly to male threads. This will prevent excess sealant
from going into pipe. Excess sealant in the pipe could result in clogged heater
valves.
! CAUTION
WARNING ICON
G 001
Use pipe joint sealant that is resistant to liquid petroleum (LP) gas.
Install sediment trap in supply line as shown in Figure 10. Locate sediment trap
where it is within reach for cleaning. Locate sediment trap where trapped matter is
not likely to freeze. A sediment trap traps moisture and contaminants. This keeps
them from going into heater controls. If sediment trap is not installed or is installed
wrong, heater may not run properly.
10
IMPORTANT: Hold pressure regulator with wrench when connecting it to gas piping
and/or fittings.
Note: Burner bracket
not shown for clarity
Pressure
Regulator
1/2" NPT
Pipe Nipple
Tee Joint
Test
Gauge
Connection *
Reducer
Bushing to
1/8" NPT
Manual
Shutoff
Valve *
1/8" NPT
Plug Tap
From Gas Meter
(4" W.C. to 10.5" W.C. Pressure)
Tee Joint
Sediment
Trap
Heater
Cabinet
Ground Joint
Union
Pipe
Nipple
3" Minimum
Cap
Figure 10 - Gas Connection
* An A.G.A. design certified manual shutoff valve with 1/8" NPT tap is an acceptable
alternative to test gauge connection. Purchase the optional A.G.A. design certified
manual shutoff valve from your dealer. See ACCESSORIES, page 23.
CHECKING
GAS
CONNECTIONS
! WARNING
WARNING ICON
G 001
Test all gas piping and connections for leaks after installing or
servicing. Correct all leaks at once.
! WARNING
WARNING ICON
G 001
Never use an open flame to check for a leak. Apply a mixture of
liquid soap and water to all joints. Bubbles forming show a leak.
Correct all leaks at once.
PRESSURE TESTING GAS SUPPLY PIPING SYSTEM
Test Pressures In Excess Of 1/2 PSIG
1. Disconnect heater and its individual manual shutoff valve from gas supply
piping system. Pressures in excess of 1/2 PSIG will damage heater regulator.
2. Cap off open end of gas pipe where manual shutoff valve was connected.
3. Pressurize supply piping system by either using compressed air or
opening main gas valve located on or near gas meter.
Continued 11
4. Check all joints of gas supply piping system. Apply mixture of liquid soap and
water to gas joints. Bubbles forming show a leak.
5. Correct all leaks at once.
Test Pressures Equal To or Less Than 1/2 PSIG
1. Close manual shutoff valve (see Figure 11).
2. Pressurize supply piping system by either using compressed air or opening main
gas valve located on or near gas meter.
3. Check all joints from gas meter to manual shutoff valve (see Figure 12). Apply
mixture of liquid soap and water to gas joints. Bubbles forming show a leak.
4. Correct all leaks at once.
PRESSURE TESTING HEATER GAS CONNECTIONS
1.
2.
3.
4.
5.
6.
7.
8.
Open manual shutoff valve (see Figure 11).
Open main gas valve located on or near gas meter.
Make sure control knob of heater is in the OFF position.
Check all joints from manual shutoff valve to control valve (see Figure 12).
Apply mixture of liquid soap and water to gas joints. Bubbles forming show a
leak.
Correct all leaks at once.
Light heater (see OPERATING HEATER, pages 13 thru 15). Check the rest of
the internal joints for leaks.
Turn off heater (see TO TURN OFF GAS TO APPLIANCE, page 15).
Replace front panel.
Open
ON
POSITION
Manual
Shutoff
Valve
OFF
Closed
POSITION
Figure 11 - Manual Shutoff Valve
Control Valve Location
Gas Meter
Manual
Shutoff
Valve
12
Figure 12 - Checking Gas Joints
OPERATING
HEATER
FOR YOUR SAFETY READ BEFORE LIGHTING
! WARNING
WARNING ICON
G 001
If you do not follow these instructions exactly, a fire or
explosion may result causing property damage, personal
injury or loss of life.
A. This appliance has a pilot which must be lighted by hand. When lighting the
pilot, follow these instructions exactly.
B. BEFORE LIGHTING smell all around the appliance area for gas. Be sure to
smell next to the floor because some gas is heavier than air and will settle on
the floor.
WHAT TO DO IF YOU SMELL GAS
• Do not try to light any appliance.
• Do not touch any electric switch; do not use any phone in your building.
• Immediately call your gas supplier from a neighbor’s phone. Follow the
gas supplier’s instructions.
• If you cannot reach your gas supplier, call the fire department.
C. Use only your hand to push in or turn the gas control knob. Never use tools. If
the knob will not push in or turn by hand, don’t try to repair it, call a qualified
service technician or gas supplier. Force or attempted repair may result in a fire
or explosion.
D. Do not use this appliance if any part has been under water. Immediately call a
qualified service technician to inspect the appliance and to replace any part of
the control system and any gas control which has been under water.
LIGHTING INSTRUCTIONS
1. STOP! Read the safety information above.
2. Make sure manual shutoff valve is fully open.
3. Turn control knob clockwise
Clockwise
to the OFF position.
Control Knob
Ignitor Button
HIGH
OFF
IGNITOR
PILOT
LOW
Figure 13 - Control Knob In The OFF Position
13
4. Wait five (5) minutes to clear out any gas. Then smell for gas, including near the
floor. If you smell gas, STOP! Follow “B” in the safety information at the top of
page 13. If you don’t smell gas, go to the next step.
5. Press in control knob and turn counterclockwise
to the PILOT position.
Keep control knob pressed in for five (5) seconds (see Figure 13).
Note: You may be running this heater for the first time after hooking up to gas
supply. If so, the control knob may need to be pressed in for 30 seconds. This
will allow air to bleed from the gas system.
• If control knob does not pop up when released, contact a qualified service
person or gas supplier for repairs.
C-clockwise
6. With control knob pressed in, push down and release ignitor button. This will
light pilot. The pilot is attached to the front of burner. The burner and pilot are
located behind the heat shield. If needed, keep pressing ignitor button until pilot
lights.
Note: If pilot does not stay lit, refer to TROUBLESHOOTING, pages 17 thru
20. Also contact a qualified service person or gas supplier for repairs. Until
repairs are made, light pilot with match. To light pilot with match, see
MANUAL LIGHTING PROCEDURE, page 15.
Ignitor Electrode
Thermocouple
Pilot Burner
Pilot Figure 14 - Pilot
GRH/OV 007F
7. Keep control knob pressed in for 30 seconds after lighting pilot. After 30 seconds, release control knob.
Note: If pilot goes out, repeat steps 3 thru 7.
8. Turn control knob counterclockwise
to the LOW position. The main
burner should light. Set control knob to any heat level between HIGH and LOW.
To turn control knob from LOW to a higher setting, press in the control knob
and turn counterclockwise
.
Note: Both HIGH and LOW are locked positions. You must press in control
knob before turning it from these positions.
C-clockwise
C-clockwise
! CAUTION
WARNING ICON
G 001
Do not try to adjust heating levels by using the manual shutoff
valve.
14
Continued
TO TURN OFF GAS TO APPLIANCE
Shutting Off Heater
1. Turn control knob clockwise Clockwise to the PILOT position.
2. Press in control knob and turn clockwise Clockwise to the OFF position.
3. Turn off all electric power to the appliance if service is to be performed.
Shutting Off Burner Only (pilot stays lit)
1. Turn control knob clockwise Clockwise to the PILOT position.
MANUAL LIGHTING PROCEDURE
1.
2.
3.
4.
Remove front panel (see Figure 3, page 7).
Follow steps 1 thru 5 under LIGHTING INSTRUCTIONS, pages 13 and 14.
With control knob pressed in, strike match. Hold match to pilot until pilot lights.
Keep control knob pressed in for 30 seconds after lighting pilot. After 30
seconds, release control knob.
5. Replace front panel.
INSPECTING
BURNER
Check pilot flame pattern and burner flame pattern often.
PILOT FLAME PATTERN
Figure 15 shows a correct pilot flame pattern. Figure 16 shows an incorrect pilot
flame pattern. The incorrect pilot flame is not touching the thermocouple. This will
cause the thermocouple to cool. When the thermocouple cools, the heater will shut
down.
Thermocouple
Pilot Burner
Figure 15 - Correct Pilot Flame Pattern
Thermocouple
Pilot Burner
Figure 16 - Incorrect Pilot Flame Pattern
Continued
15
If pilot flame pattern is incorrect, as shown in Figure 16
• turn heater off (see TO TURN OFF GAS TO APPLIANCE, page 15)
• see TROUBLESHOOTING, pages 17 thru 20
BURNER FLAME PATTERN
Figure 17 shows a correct burner flame pattern. Figure 18 shows an incorrect
burner flame pattern. The incorrect burner flame pattern shows yellow tipping of
the flame. It also shows the flame higher than 1/2 the heat shield height.
! WARNING
WARNING ICON
G 001
If yellow tipping occurs, your heater could produce increased
levels of carbon monoxide. If burner flame pattern shows yellow
tipping, follow instructions at bottom of this page.
NOTICE
Do not mistake orange flames with yellow tipping. Dirt or other fine
particles enter the heater and burn causing brief patches of orange
flame.
1/2 HEAT
SHIELD HEIGHT
CORRECT FLAME PATTERN
AT HIGH POSITION
Figure 17 - Correct Burner Flame Pattern
Yellow
Tipping
1/2 HEAT
SHIELD HEIGHT
INCORRECT FLAME PATTERN
AT HIGH POSITION
Figure 18 - Incorrect Burner Flame Pattern
If burner flame pattern is incorrect, as shown in Figure 18
• turn heater off (see TO TURN OFF GAS TO APPLIANCE, page 15)
• see TROUBLESHOOTING, pages 17 thru 20
16
CLEANING
AND
MAINTENANCE
! WARNING
WARNING ICON
G 001
Turn off heater and let cool before cleaning.
! CAUTION
WARNING ICON
G 001
You must keep control areas, burner, and circulating air passageways of heater clean. Inspect these areas of heater before each use.
Have heater inspected yearly by a qualified service person. Heater
may
need more frequent cleaning due to sawdust, cobwebs, etc.
ODS/PILOT AND BURNER
• Use a vacuum cleaner, pressurized air, or small, soft bristled brush to clean.
CABINET
Air Passageways
• Use a vacuum cleaner or pressurized air to clean.
Exterior
• Use a soft cloth dampened with a mild soap and water mixture. Wipe the
cabinet to remove dust.
TROUBLESHOOTING
! WARNING
WARNING ICON
G 001
Turn off and unplug heater and let cool before servicing. Only a
qualified service person should service and repair heater.
Note: All troubleshooting
items are listed in order of
operation.
! CAUTION
WARNING ICON
G 001
Never use a wire, needle, or similar object to clean ODS/pilot. This
can damage ODS/pilot unit.
OBSERVED
PROBLEM
POSSIBLE
CAUSE
When ignitor button is
pressed, there is no
spark at ODS/pilot
1. Ignitor electrode positioned wrong
2. Ignitor electrode broken
3. Ignitor electrode not connected to ignitor cable
4. Ignitor cable pinched or
wet
5. Piezo ignitor nut is loose
6. Broken ignitor cable
7. Bad piezo ignitor
REMEDY
1. Replace ignitor
2. Replace ignitor
3. Reconnect ignitor cable
4. Free ignitor cable if
pinched by any metal or
tubing. Keep ignitor cable
dry
5. Tighten nut holding piezo
ignitor to heater cabinet.
Nut is located inside
heater cabinet at top
6. Replace ignitor cable
7. Replace piezo ignitor
17
Continued
OBSERVED
PROBLEM
POSSIBLE
CAUSE
When ignitor button is
pressed, there is spark
at ODS/pilot but no
ignition
1. Gas supply turned off or
manual shutoff valve
closed
2. Control knob not in PILOT position
3. Control knob not
pressed in while in PILOT position
4. Air in gas lines when
installed
REMEDY
5. ODS/pilot is clogged
6. Gas regulator setting is
not correct
ODS/pilot lights but
flame goes out when
control knob is
released
1. Control knob not fully
pressed in
2. Control knob not
pressed in long enough
3. Manual shutoff valve
not fully open
4. Thermocouple connection loose at control
valve
5. Pilot flame not touching
thermocouple, which
allows thermocouple to
cool, causing pilot
flame to go out. This
problem could be
caused by one or both of
the following:
A) Low gas pressure
B) Dirty or partially
clogged ODS/pilot
6. Thermocouple damaged
7. Control valve damaged
Burner does not light
after ODS/pilot is lit
18
1. Burner
clogged
orifice
is
Continued
1. Turn on gas supply or
open manual shutoff
valve
2. Turn control knob to PILOT position
3. Press in control knob
while in PILOT position
4. Continue holding down
control knob. Repeat igniting operation until air
is removed
5. Clean ODS/pilot (see
CLEANING
AND
MAINTENANCE,
page 17) or replace
ODS/pilot assembly
6. Replace gas regulator
1. Press in control knob
fully
2. After ODS/pilot lights,
keep control knob
pressed in 30 seconds
3. Fully open manual shutoff valve
4. Hand tighten until snug,
then tighten 1/4 turn
more
5. A) Contact local natural
gas company
B) Clean ODS/pilot (see
CLEANING
AND
MAINTENANCE,
page 17) or replace
ODS/pilot assembly
6. Replace thermocouple
7. Replace control valve
1. Clean burner (see
CLEANING
AND
MAINTENANCE,
page 17) or replace
burner orifice
Continued
OBSERVED
PROBLEM
POSSIBLE
CAUSE
Burner does not light
after ODS/pilot is lit
(continued from page
18)
2. Burner orifice diameter
is too small
3. Inlet gas pressure is too
low
2. Replace burner orifice
Delayed ignition of
burner
1. Manifold pressure is too
low
2. Burner orifice is
clogged
1. Contact local natural gas
company
2. Clean burner (see
CLEANING
AND
MAINTENANCE, page
17) or replace burner orifice
Burner backfiring
during combustion
1. Burner orifice is
clogged or damaged
1. Clean burner (see
CLEANING
AND
MAINTENANCE, page
17) or replace burner orifice
2. Replace burner
3. Replace gas regulator
2. Burner damaged
3. Gas regulator defective
1. Not enough air
REMEDY
3. Contact local natural gas
company
2. Gas regulator defective
1. Check burner for dirt and
debris. If found, clean
burner (see CLEANING
AND MAINTENANCE,
page 17)
2. Replace gas regulator
Slight smoke or odor
during initial operation
1. Residues from manufacturing processes
1. Problem will stop after a
few hours of operation
Heater produces a
whistling noise when
burner is lit
1. Turning control knob to
HIGH position when
burner is cold
2. Air in gas line
1. Turn control knob to
LOW position and let
warm up for a minute
2. Operate burner until air is
removed from line. Have
gas line checked by local
natural gas company
3. Observe minimum installation clearances (see
Figure 2, page 6)
4. Clean burner (see
CLEANING
AND
MAINTENANCE, page
17) or replace burner orifice
Yellow flame during
burner combustion
3. Air passageways on
heater blocked
4. Dirty or partially
clogged burner orifice
Continued
19
! WARNING
WARNING ICON
G 001
If you smell gas
• Shut off gas supply.
• Do not try to light any appliance.
• Do not touch any electrical switch; do not use
any phone in your building.
• Immediately call your gas supplier from a
neighbor’s phone. Follow the gas supplier’s
instructions.
• If you cannot reach your gas supplier, call the
fire department.
OBSERVED
PROBLEM
POSSIBLE
CAUSE
Heater produces a
clicking/ticking noise
just after burner is lit or
shut off
1. Metal expanding while
heating or contracting
while cooling
1. This is common with
most heaters. If noise is
excessive, contact qualified service person
Heater produces unwanted odors
1. Heater burning vapors
from paint, solvents,
glues, etc.
1. Ventilate garage. Stop
using odor causing products while heater is running
2. Locate and correct all
leaks (see CHECKING
GAS CONNECTIONS,
page 11)
2. Gas leak. See Warning statement at
top of page
Heater shuts off in use
(ODS operates)
1. Not enough fresh air is
available
2. Low line pressure
3. ODS/pilot is partially
clogged
Gas odor even when
control knob is in OFF
position
1. Gas leak. See Warning statement at
top of page
2. Control valve defective
Gas odor during combustion
20
1. Foreign matter between
control valve and
burner
2. Gas leak. See Warning statement at
top of page
REMEDY
1. Open window and/or
door for ventilation
2. Contact local natural gas
company
3. Clean ODS/pilot (see
CLEANING
AND
MAINTENANCE, page
17)
1. Locate and correct all
leaks (see CHECKING
GAS CONNECTIONS,
page 11)
2. Replace control valve
1. Take apart gas tubing
and remove foreign matter
2. Locate and correct all
leaks (see CHECKING
GAS CONNECTIONS,
page 11)
TECHNICAL
SERVICE
SPECIFICATIONS
SERVICE
HINTS
You may have further questions about installation, operation, or troubleshooting.
If so, contact DESA International’s Technical Service Department at 1-800-3235190.
B.T.U (Variable)
Type Gas
Ignition
Pressure Regulator Setting
Inlet Gas Pressure (inches of water)
Maximum
Minimum
Dimensions, Inches (H x W x D)
Heater
Carton
Weight (pounds)
Heater
Shipping
15,000/30,000
Natural Only
Piezo
3" W.C.
7"
5"
23.5 x 25.9 x 8.0
25.8 x 28.7 x 10.1
30
35
When gas pressure is too low
• pilot will not stay lit
• burner will have delayed ignition
• heater will not produce specified heat
When gas quality is bad
• pilot will not stay lit
• burner will produce flames and soot
• heater will backfire when lit
You may feel your gas pressure is too low or gas quality is bad. If so, contact your
local natural gas supplier.
21
REPLACEMENT
PARTS
Note: Use only original replacement parts. This will protect your warranty coverage for parts replaced under warranty.
Parts Under Warranty
Contact authorized dealers of this product. If they can’t supply original replacement part(s), call DESA International’s Technical Service Department at 1-800323-5190.
When calling, have ready
• your name
• your address
• model number of your heater
• how heater was malfunctioning
• type of gas used (propane or natural gas)
• purchase date
Usually, we will ask you to return the defective part to the factory.
Parts Not Under Warranty
Contact authorized dealers of this product. If they can’t supply original replacement
part(s), call DESA International’s Parts Department at 1-800-972-7879.
When calling, have ready
• model number of your heater
• the replacement part number
22
ACCESSORIES
Purchase these heater accessories from your local dealer. If they can not supply
these accessories, call DESA International’s Parts Department at 1-800-972-7879.
You can also write to the address listed on the back page of this manual.
FAN KIT - GA2100A
Provides better heat distribution. Makes
heater more efficient. Complete installation
and operating instructions
provided with fan.
FAN ACCESSORY-GRH
A 007
MANUAL SHUTOFF
VALVE - GA5010
Manual shutoff valve with 1/8" NPT tap.
Shutoff Valve
A 014
23
24
21
10-1
22
10-2
(Round)
10-3
(Square)
26
27
8
20
24
11
ODS/Pilot
10
19
12
4
13
8
9
16
14
25
17
18
7
5
3
6
15
2
1
28
23
PARTS LIST
This list contains replaceable parts used in your heater. When ordering parts, follow
the instructions listed under REPLACEMENT PARTS on page 22 of this manual.
KEY
NO.
1
2
3
4
5
6
7
8
9
10
10-1
10-2
11
12
13
14
15
16
17
18
19
20
21
22
23
24
25
26
27
28
PART
NUMBER
098304-01
098742-12
098197-02
098342-01
099001-01BR
M11084-26
098352-02BR
098271-02
098249-01
098244-03
098593-01
098515-01
099126-02
098517-01
098251-06
098250-01
098867-04
099553-01
098519-01
098298-03
098265-01
098246-04
098529-02
097159-01
M11084-26
M11084-38
098268-02
098354-01
098508-01
099066-01
DESCRIPTION
Screw, #10 x 3/8"
Front Panel
Grill Guard
Grill Guard Clip
Heat Shield
Screw, #10 x 3/8"
Deflector Unit
Ignitor Cable
Nut, M5
ODS/Pilot, N.G.
Thermocouple
Ignitor Electrode
Burner
3/16" Pilot Tubing
Injector
Injector Holder
Pressure Regulator
Pilot Shield
3/8" Outlet (Burner) Tubing
3/8" Inlet Tubing
3/8" NPT Male Elbow
Control Valve
Cabinet
Piezo Ignitor
Screw, #10 x 3/8"
Screw, #8 x 3/8"
1/2" NPT Female Elbow
Control Knob
Valve Retainer Nut
Mounting Bracket
QTY.
2
1
1
2
1
4
1
1
2
1
1
1
1
1
1
1
1
1
1
1
1
1
1
1
2
2
1
1
1
1
PARTS AVAILABLE — NOT SHOWN
098306-01
Control Position Label
1
25
NOTES
26
NOTES
27
WARRANTY INFORMATION
KEEP THIS WARRANTY
Model
Serial No.
Date Purchased
Always specify model and serial numbers when communicating with the factory.
We reserve the right to amend these specifications at any time without notice. The only warranty applicable is our
standard written warranty. We make no other warranty, expressed or implied.
LIMITED WARRANTY
VANGUARD VENT-FREE GARAGE HEATERS
DESA International warrants this product and any parts thereof, to be free from defects in material and workmanship for two years from the date of first purchase, provided that the product has been properly installed,
operated, and maintained in accordance with all applicable instructions. To make a claim under this warranty,
the bill of sales or proof of purchase must be presented.
This warranty is extended only to the original retail purchaser. This warranty covers only the cost of parts and
labor required to restore this heater to proper operating condition. Warranty parts must be obtained through
authorized dealers of this product and/or DESA International who will provide original factory replacement
parts. Failure to use original factory replacement parts voids this warranty. The heater must be installed by a
qualified installer in accordance with all local codes and instructions furnished with the unit.
This warranty does not apply to parts that are not in original condition because of normal wear and tear, or parts
that fail or become damaged as a result of misuse, accidents, lack of proper maintenance, alteration, tampering,
contaminated fuels, or defects caused by improper installation. Travel, transportation, and incidental costs
associated with warranty repairs are not reimbursable under this warranty and are the responsibility of the
owner.
To the full extent allowed by the law of the jurisdiction that governs the sale of the product, this express
warranty excludes any and all other expressed warranties and limits the duration of any and all implied warranties, including warranties of merchantability and fitness for a particular purpose to two years from the date of
first purchase; and DESA International’s liability is hereby limited to the purchase price of the product and
DESA International shall not be liable for any other damages whatsoever including indirect, incidental, or
consequential damages.
Some states do not allow a limitation of how long an implied warranty lasts or an exclusion or limitation of
incidental or consequential damages, so the above limitation of implied warranties, or exclusion, or limitation of
damages may not apply to you.
This warranty provides the original retail purchaser with specific legal rights. For specific information regarding
those rights, please consult the applicable state laws.
For information about this warranty write:
®
DESA
INTERNATIONAL
P.O. Box 90004
2701 Industrial Drive
Bowling Green, KY 42102-9004
099579-01
REV. C
4/92