1
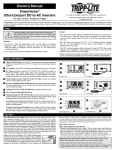
Owner’s Manual
PowerVerter®
Ultra-Compact DC-to-AC Inverters
PV150, PV375, PV500 & PV600
1111 W. 35th Street Chicago, IL 60609 USA • 773.869.1234 • www.tripplite.com
Congratulations! Your new PowerVerter Inverter will give you years of reliable, carefree service. Use it to convert DC (battery) power into 110-120V AC (household) power to run
a variety of electronics: notebook computers, game systems, battery chargers, small TVs/VCRs and more! The Inverter’s PWM (Pulse Width Modulated) sinusoidal wave is suitable
for almost all loads.
Safety
Important Safety Instructions! Save These Instructions!
This manual contains important instructions and warnings that
should be followed during the installation, operation and storage
of all Tripp Lite Inverters.
Warning!
• Do not use a Tripp Lite PowerVerter Inverter in life support or healthcare
applications where a malfunction or failure of a Tripp Lite PowerVerter Inverter
could cause failure or significantly alter the performance of a life support device
or medical equipment.
• Do not operate your Inverter near flammable materials, fumes or gases.
Caution!
• Since the Inverter requires adequate ventilation during operation, do not block fan
or cooling vents or cover the Inverter, and do not operate near vehicle heating
vents or in direct sunlight. Keep the Inverter dry at all times and disconnect when
not in use.
• Since the Inverter case will get hot (130° - 140° F) during continuous extended
use, use care when handling it. Do not place it near surfaces or materials
affected by this level of heat.
• Turn OFF connected equipment before starting your engine. DO NOT plug a surge
suppressor, line conditioner or UPS system into the Inverter. If you attach AC
extension cords, use the heaviest practical gauge.
• Before connecting a battery charger or adapter, check its manual to make sure that the
Inverter’s specifications (including output waveform) fall within its recommendations.
Feature Identification
Lighted ON/OFF Switch: move to ON (“I”) position to power connected equipment;
switch will illuminate. Move to OFF (“O”) position to stop powering connected
equipment.
1
2
AC Outlet(s): accept 120V AC equipment you would normally plug into a wall outlet.
7
3
DC Fuse(s) (externally mounted on PV150 and PV375; internally mounted on
PV500 and PV600): protect vehicle battery from damaging overload. If fuse blows,
replace with standard automotive fuse of equal amperage. CAUTION: installing
non-rated fuses could cause equipment damage and void your warranty.
1
4
Vehicle Lighter/Accessory Plug (PV150 & PV375 only): connects to a standard
12V DC vehicle lighter/accessory outlet.
5
DC Power Terminals (PV500 & PV600 only): directly connect to your battery terminals
with user-supplied cables.
6
Cooling Fan (PV375, PV500 & PV600 only): maintains internal cooling.
7
Ultra-Compact, Lightweight Metal Case
8
Mounting Flanges (PV500 & PV600 only): provide fixed mounting, if desired.
Install and tighten four user-supplied screws through mounting flanges and into a rigid
horizontal surface. Mount Inverter before DC battery connection.
Low Battery Alarm (internal, not shown): detects low voltage and shuts down
Inverter to preserve vehicle battery. If alarm sounds, turn Inverter OFF and run
engine to recharge battery.
Overload Alarm (internal, not shown): detects wattage overload on Inverter outlets
and shuts down Inverter as a protective measure. If alarm sounds, turn Inverter OFF
and reduce wattage load (by unplugging high-wattage devices).
3
4
2
PV150 Rear View
PV150 Front View
1
3
6
7
4
2
PV375 Rear View
PV375 Front View
1
6
7
2
PV500/PV600 Front View
5
8
PV500/PV600 Rear View
8
Operation
Step 1 (PV150 & PV375 models): Plug Inverter into vehicle lighter/accessory outlet.
Step 1 (PV500 & PV600 models): First mount inverter, if desired. With user-supplied
cables,* connect the Inverter’s negative DC terminal directly to your battery’s negative
terminal; connect the Inverter’s positive DC terminal through a UL-listed fuse and fuse
block** and directly to your battery’s positive terminal. CAUTION! Observe proper
polarity. Reversed polarity will blow the PV500’s and PV600’s internal fuses. To access
internal fuses, disconnect equipment and battery from the PV500 or PV600. Then
unscrew and remove end panels to access fuses. Replace blown fuses with an equal
number of new fuses of the same type and amperage. Replace end panels and screws.
Tighten your Inverter’s and battery’s DC terminals to approximately
2.25 Newton-meters (1.85 foot lbs.) of torque to create an efficient
connection and to prevent excessive heating at this connection.
Insufficient tightening of the terminals could void your warranty.
It is recommended that you solder cable ends and insulate the
terminals at the battery. WARNING! Do not connect your Inverter directly to output
from an alternator rather than a battery or battery bank.
* The PV500’s and PV600’s output is limited by the length and gauge of user-supplied cables. See cable sizing guide on back page. Shorter
and heavier gauge cable maximizes output (especially important when operating heavy-draw equipment). An excellent source of cables are
battery jumper cables. ** Required by NEC article 551. Mount within 18 inches of the battery.
Step 2: Turn on Inverter.
Step 3: Plug equipment into the Inverter.
Determine your equipment’s total wattage.* Do not connect more watts than your
Inverter’s Output Power (Maximum Continuous Watts) rating—either 150, 375, 500 or
600, see Specifications. See back page for typical equipment runtimes. Also see back
page for important note concerning the limitations of vehicle electrical systems.
* Wattage ratings are usually listed in equipment manuals or on nameplates. If your equipment is rated in amps, multiply that number
times AC utility voltage to determine watts. (Example: a ¼ in. drill requires 2½ amps. 2½ amps × 120 volts = 300 watts.)
Maintenance & Service
Limited Warranty
Your Inverter requires no maintenance and contains no user-serviceable parts (except for
replaceable DC fuses). If returning your Inverter to Tripp Lite, please pack it carefully
using the ORIGINAL PACKING MATERIAL that came with the unit. Enclose a letter
describing the problem. If the Inverter is within the warranty period, enclose a copy of
your sales receipt. To obtain service you must obtain a Returned Material Authorization
(RMA) number from Tripp Lite or an authorized Tripp Lite service center.
Tripp Lite warrants its Inverters to be free from defects in materials and workmanship for a period of 1 year from the date of initial purchase. Tripp Lite’s obligation
under this warranty is limited to repairing or replacing (at its sole option) any such defective products. To obtain service under this warranty you must obtain a
Returned Material Authorization (RMA) number from Tripp Lite or an authorized Tripp Lite service center. Products must be returned to Tripp Lite or an
authorized Tripp Lite service center with transportation charges prepaid and must be accompanied by a brief description of the problem encountered and
proof of date and place of purchase.
This warranty does not apply to equipment which has been damaged by accident, negligence or misapplication or has been altered or modified in any way,
including opening of the unit’s casing for any reason. This warranty applies only to the original purchaser who must have properly registered the product
within 10 days of purchase.
EXCEPT AS PROVIDED HEREIN, TRIPP LITE MAKES NO WARRANTIES, EXPRESS OR IMPLIED, INCLUDING WARRANTIES OF MERCHANTABILITY
AND FITNESS FOR A PARTICULAR PURPOSE. Some states do not permit limitation or exclusion of implied warranties; therefore, the aforesaid limitation(s)
or exclusion(s) may not apply to the purchaser.
EXCEPT AS PROVIDED ABOVE, IN NO EVENT WILL TRIPP LITE BE LIABLE FOR DIRECT, INDIRECT, SPECIAL, INCIDENTAL OR CONSEQUENTIAL
DAMAGES ARISING OUT OF THE USE OF THIS PRODUCT, EVEN IF ADVISED OF THE POSSIBILITY OF SUCH DAMAGE. Specifically, Tripp Lite is
not liable for any costs, such as lost profits or revenue, loss of equipment, loss of use of equipment, loss of software, loss of data, costs of substitutes,
claims by third parties, or otherwise.
Tripp Lite has a policy of continuous improvement. Specifications are subject to change without notice.
Troubleshooting
Please check the following before sending the Inverter in for service:
Symptom
Alarm sounds.
Problem
Low battery voltage (<10.5 V).
Output overload.
Inverter does not turn ON when power switch is turned ON.
Automatic Inverter shutdown due to low battery voltage (<10V).
Automatic Inverter shutdown due to output overload.
Blown fuse.
Inverter is unable to power connected equipment.
Battery running low. Low battery voltage reduces
Inverter power output.
Connected equipment load exceeds Inverter’s maximum
continuous output power.
Connected equipment experiences audio/video distortion.
Loose connections.
Audio/video interference.
Correction
Turn Inverter OFF and run engine to recharge
vehicle battery.
Turn Inverter OFF and remove overload by unplugging
high-wattage devices. Load should not exceed your
Inverter's maximum continuous output power
(see Specifications).
Turn Inverter OFF and run engine to recharge
vehicle battery.
Turn Inverter OFF and remove overload by unplugging
high-wattage devices. Load should not exceed your
Inverter’s maximum continuous output power
(see Specifications).
Replace fuse with standard automotive fuse of identical
amperage (see Specifications).
Turn Inverter OFF and run engine to recharge
vehicle battery.
Turn Inverter OFF and remove overload by unplugging
high-wattage devices. Load should not exceed your
Inverter's maximum continuous output power
(see Specifications).
Check and secure all connections.
Reposition equipment antennas and Inverter.
Specifications
Model:
Output Power (Maximum Continuous Watts):*
Output Power (Peak Watts):**
Input Voltage (DC):
Output Voltage (AC)/Frequency:
Output Waveform:
Low Battery Voltage Alarm (Volts):
Low Battery Voltage Shutdown (Volts):
AC Outlets:
Circuit Protection (DC Overload):
PV150
PV375
PV500
PV600
150
300
12V nominal (10-15V)
120V / 60 Hz. nominal
PWM Sine Wave
10.5V
10V
1
20-amp fuse (external)
375
600
12V nominal (10.5-15V)
120V / 60 Hz. nominal
PWM Sine Wave
10.5V
10V
2
40-amp fuse (external)
500
1000
12V nominal (10-15V)
120V / 60 Hz. nominal
PWM Sine Wave
10.5V
10V
3
Two 40-amp fuses (internal)
600
1000
12V nominal (10-15V)
120V / 60 Hz. nominal
PWM Sine Wave
10.5V
10V
3
Two 40-amp fuses (internal)
* Maximum output power (continuous or peak) only available when vehicle battery is properly charged. Run vehicle engine often to maintain proper charge. ** Peak Output Power is instantaneous. The policy of Tripp Lite is one of continuous improvement.
Specifications are subject to change without notice.
Typical Runtimes Before Battery Recharge
Although you can operate your Inverter with your vehicle engine off, best results are usually attained
with the engine running. Since the Inverter converts electrical energy (and doesn’t produce it), the
Inverter’s performance is relative to the condition of your vehicle’s electrical system (battery, alternator
and wiring). If other loads (air conditioner, heater, lights, etc.) are also using power, you may get
less runtime.
With Typical
With Typical
With Typical
Compact Vehicle (4 cylinder) Mid-Size Vehicle (6 cylinder) Full-Size Vehicle (8 cylinder)
Battery, Alternator
Battery, Alternator
Battery, Alternator
& Wiring
& Wiring
& Wiring
Model: PV150
1/2 Load (engine on/engine off)
continuous/4-6 hours
continuous/6-8 hours
continuous/8-12 hours
Full Load (engine on/engine off)
continuous/2-3 hours
continuous/3-4 hours
continuous/4-6 hours
1/2 Load (engine on/engine off)
continuous/1-2 hours
continuous/2-3 hours
continuous/3-6 hours
Full Load* (engine on/engine off)
continuous/30 min-1 hour
continuous/1-2 hours
continuous/2-3 hours
1/2 Load (engine on/engine off)
continuous/not recommended
continuous/1 hour
continuous/2 hours
Full Load (engine on/engine off)
1-2 hours/not recommended 2-4 hours/not recommended
Minimum Recommended Cable Sizing Chart (PV500 & PV600 only)
Choose the correct wire gauge based on your equipment’s wattage load.
Watts
100
200
300
400
500
600
10 ga.
24 ft.
12 ft.
8 ft.
6 ft.
not recommended
not recommended
8 ga.
36 ft.
18 ft.
12 ft.
10 ft.
8 ft.
6 ft.
Wire Gauge
Two 10 ga.
48 ft.
24 ft.
16 ft.
12 ft.
10 ft.
8 ft.
6 ga.
56 ft.
28 ft.
20 ft.
14 ft.
12 ft.
10 ft.
4 ga.
100 ft.
48 ft.
30 ft.
24 ft.
18 ft.
15 ft.
Note: acceptable power is directly related to cable length (i.e.: the shorter the cable, the better the performance).
Vehicle Electrical System Limitations
Model: PV375
Models: PV500 & PV600
continuous/1 hour
NOTE: Due to the limitations of certain vehicles’ 12V DC lighter/accessory outlet electrical systems,
you may not be able to continuously run a full load (375 watts) from PV375 models. If you regularly
blow fuses, it may indicate your vehicle is not adequately wired to support a PV375 as it is designed.
In this case, consult vehicle manufacturer recommendations for rewiring from the fuse block or battery
with appropriate wiring (10 - 12 gauge) and fusing (at least 40 amp). All standard vehicle accessory
outlet electrical systems can support full loads for PV150 models without any modifications.
* If vehicle wiring is adequate. See “Vehicle Electrical System Limitations” at right.
Copyright © 2003 Tripp Lite. All rights reserved. PowerVerter is a registered trademark of Tripp Lite.
200301121 93-2112