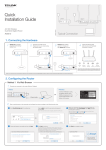
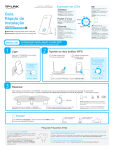
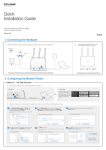
Download TP-Link RE200 Quick Installation Guide

Transcript
LEDs
Power
5G and 2.4G
Quick
Installation
Guide
ON – The Range Extender is powered on.
Red – During boot up, reset, or weak wireless signal.
Green – Strong wireless signal.
OFF – The Range Extender is not connected to any
wireless network.
RE
ON – The Range Extender is connected to the
router.
Blinking – Establishing connection in process.
OFF – No connection established.
Wireless Signal
ON – The wireless is enabled.
OFF – The wireless is disabled.
AC750 WiFi Range Extender
OPTION
ONE: Using a Web Browser
TWO: Using WPS (Wi-Fi Protected Setup)
RESET
ETHERNET port
RESET
ETHERNET
ON – A device is connected via the Ethernet port.
Blinking – The Ethernet port is transmitting data.
OFF – No device is connected via the Ethernet port.
7106505145
Two easy setup options:
1
Ethernet
REV1.0.2
RE200
RESET – This button resets the Range Extender to
its factory default settings.
ETHERNET port – Used to connect an
Ethernet-enabled device to the wireless network.
Using a Web Browser
1 Power On
3
2 Connect
Plug the Range Extender into a wall outlet
close to your router, and wait until the
Wireless LED
is lit and solid green.
Disconnect your Ethernet connection. Click the
Wi-Fi icon on the system tray, select the
Extender’s default wireless network name (e.g.
TP-LINK_Extender_XXGHz). No password is
required to connect the first time.
Login
Launch a web browser and type
http://tplinkrepeater.net in the address field.
Use admin (all lowercase) for both Username
and Password to login.
Not connected
http://tplinkrepeater.net
Connection are available
Wireless Network Connection
Username:
admin
TP-LINK_Extender_XXGHz
Password:
admin
√
Connect automatically
Connect
Login Cancel
4 Configure
Follow the Quick Setup Wizard to manually configure the Range Extender.
B. Choose your region from the Region drop-down
list, and click Next.
A. On the Start screen, click Next.
Note: Per FCC regulations, all Wi-Fi products marketed in the
U.S. must be fixed to the U.S. region only.
Start
Choose Region
Wireless Settings
Review Settings
Start
Choose Region
Wireless Settings
Review Settings
Main Router/AP WiFi Network Name(SSID):
Wi-Fi Network Name_2.4GHz:
N/A
Wi-Fi Network Name_5GHz:
N/A
Connection Status:
Choose
Please click Next to set up the Range Extender or click Exit to go to the Device Management Page.
Choose Region
Main Router/AP Network (2.4GHz)
Main Router/AP WiFi Network Name(SSID):
Main Router/AP MAC Address(BSSID):
WiFi Security Option:
Fill in the WiFi Password of your Main
Router/AP:
Range Extender Network (XXGHz)
Range Extender WiFi Network Name(SSID):
Back
Please Select Your Region
Wireless Settings
Exit
Review Settings
TP-LINK_2.4GHz_XXX
00-0A-EB-74-06-06
Most Secure(WPA-PSK/WPA2-PSK)
123456789
Copy from Main Router/AP TP-LINK_2.4GHz_XXX
TP-LINK_2.4GHz_XXX_EXT
Customize
Next
√
Please select your own region to prevent illegal usage against the local law.
Next
D. Enter the main router’s Wi-Fi password and
either choose Copy from Main Router or
Customize to create a new network name
for the Extender. Click Next.
Start
Start
Choose Region
Wireless Settings
Review Settings
Available Wireless Networks (2.4GHz): 24
Region:
Disconnected
Exit
C. Select your router’s 2.4G wireless network
name (SSID) and click Next. If the SSID is
hidden, select the Set SSID and MAC
manually option.
Next
Choose Region
Main Router/AP Network (5GHz)
Main Router/AP WiFi Network Name(SSID):
Main Router/AP MAC Address(BSSID):
WiFi Security Option:
Fill in the WiFi Password of your Main
Router/AP:
Range Extender Network (XXGHz)
Range Extender WiFi Network Name(SSID):
Back
Wireless Settings
Signal
Review Settings
TP-LINK_5GHz_XXX
00-0A-EB-74-06-06
Most Secure(WPA-PSK/WPA2-PSK)
123456789
Copy from Main Router/AP TP-LINK_5GHz_XXX
TP-LINK_5GHz_XXX_EXT
Customize
Next
MAC
Channel
1
WPA-PSK
0C-72-2C-B3-A5-2C
1
WPA-PSK
Back
Rescan
After moving to a new location, the Extender will
automatically reconnect to your router in
approximately one minute. Make sure both 2.4G
and 5G LEDs are solid green.
YourNetworkName
and password
Next
F. Verify your Wireless Settings and click Finish.
Both 2.4G and 5G LEDs should turn on and stay
solid green.
Start
Choose Region
Wireless Settings
Wireless Setting
Main Router/AP WiFi Network Name (2.4GHz):
Main Router/AP WiFi Network Name (5GHz):
Range Extender WiFi Network Name (2.4GHz):
WiFi Security Option:
WiFi Password:
Range Extender WiFi Network Name (5GHz):
WiFi Security Option:
WiFi Password:
Export Settings
5G
2.4G
Review Settings
TP-LINK_2.4GHz_XXX
TP-LINK_5GHz_XXX
TP-LINK_2.4GHz_XXX_EXT
Most Secure (WPA/WPA2-PSK)
123456789
TP-LINK_5GHz_XXX_EXT
Most Secure (WPA/WPA2-PSK)
123456789
Back
5 Relocate
In general, place your WiFi Range Extender about
halfway between your wireless router/AP and
wireless devices.
Security
00-0A-EB-74-06-06
TP-LINK_XXX
Set SSID and MAC Manually
E. Select your router’s 5GHz wireless network. Click
Next and repeat step D. Click Next to continue.
Start
SSID
TP-LINK_2.4GHz_XXX
YourNetworkName or
YourNetworkName_EXT
and password
Ideal Range Extender Placement
The Range Extender shares your router’s Wi-Fi password for both 2.4GHz and 5GHz networks, but
may have different wireless network names if you customize the names during the configuration.
Finish
To minimize wireless interference, place your Range Extender in an open
space area, away from other bluetooth devices or radioactive devices such
as cordless phone, microwave, etc.
Keep away from
Enjoy!
OPTION
2
Using WPS (Wi-Fi Protected Setup)
Important: In order to use this option, your router must support WPS.
1 Power On
2 Connect
A. Press the WPS button on your router/AP.
Plug the Range Extender into a wall outlet
close to your router, and wait until the
Wireless LED
is lit and solid green.
Note: For more information about using WPS on your
router, please refer to the router manufacturer's user guide.
B. Press the WPS
button on the Range Extender.
Once the connection is established, the RE, 2.4G
and 5G LEDs will turn solid green.
If either the 2.4G or 5G LED is not
on, repeat step 2A and B to
connect the other band.
If the RE LED does not switch
from blinking to a solid green,
please refer to Option 1.
3 Relocate
Refer to Step 5 of Option 1 to relocate your
Range Extender.
YourNetworkName
and password
Enjoy!
5G
2.4G
YourNetworkName
and password
Ideal Range Extender Placement
The Range Extender shares the same wireless network name (SSID) and
wireless password as your router.
Entertainment Adapter
The Range Extender RE200 can be used as a wireless
adapter to connect any Ethernet-enabled device,
such as a Blu-ray player, game console, DVR, or smart
TV, to your wireless network.
First, connect the Range Extender to your Wi-Fi
network following the instructions in Option 1 or
Option 2, then connect an Ethernet-enabled device
to the Range Extender using an Ethernet cable as
shown in the diagram on the right.
Smart TV
Game Console
Desktop
Laptop
Ethernet Connection
Smartphone
Tablet
Wireless Connection
Troubleshooting and Support
1
My router has no WPS button, how do i connect
the Range Extender?
3
Your router does not support WPS, please use Option
1 to setup the Range Extender using a web browser.
2
Why does the RE LED not change from blinking to
solid green after completing Option 2?
• You may have entered the wireless password of your
router incorrectly during the configuration. Please
login to the Extender’s web management page, and
double-check your router’s wireless password.
• If the RE LED still keeps blinking, please reset the
Extender and go through the configuration again.
4
What should I do when the RE LED is on, but
only one band is connected?
5
How do I restore the Range Extender to its
factory default settings?
It depends on your router capabilities, if either the
2.4G or 5G LED is not on while the Extender
connected to your router/network, press the WPS
button on the router and the Range Extender
again to connect the other band.
With the Extender powered on, use a pin to
press and hold the RESET button at the
bottom of the unit, until all LEDs start flashing
once then release the button.
What do I do if I cannot access the Extender’s
web management page?
For detailed troubleshooting instructions, visit:
www.tp-link.com/en/support/faq
• Make sure your computer is connected to the
Extender’s network.
• Change the computer’s fixed IP address to
Obtain an IP Address Automatically.
Technical Support
For all other technical support, please contact us at:
USA / Canada
Toll Free: +1 866 225 8139
E-mail: [email protected] (USA)
[email protected] (Canada)
Support Availability: 24 hours a day, 7 days a week