1
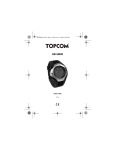
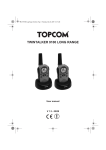
HB 8M00
USER GUIDE
V 1.0, 09/08
UK The CE symbol indicates that the unit complies with the essential
requirements of the directive 89/336/EEC.
UK The features described in this manual are published with reservation to
modifications.
This product is in compliance with the essential requirements and other relevant provisions of the R&TTE directive 89/336/EEC.
The Declaration of conformity can be found on :
http://www.topcom.be/cedeclarations.asp
TOPCOM HB 8M00
1
INTRODUCTION
Congratulations on your purchase of the HB 8M00. We hope that you will
enjoy using the Heart Meter and the benefits of the wireless transmission to
send/receive data to/from the controller or to PC. In exercise or sports, your
heart naturally speeds up in pumping blood to the body in accordance with
the increased energy level. The Heart Meter can calculate this increase
expressed as the number of beats per minute (bpm) to determine a target
heart rate safe for each individual.
More information about the target heart rate zone, maximum
heart rate etc... can be found on:
www.topcom.net/sports/heartbeat.asp
With the data stored on your PC, you can transfer it to programs like
SportTracks, Perfect Session, ...
2
SAFETY NOTES
Using a Heart Monitor is NOT a substitute for professional medical
attention. If you suffer from heart disorder, illness or have recently taken up
fitness training, it is advisable that you seek a doctor or talk to your trainer
and work out a fitness plan that suits you.
The watch should only be used as a guide in maintaining a safe heart beat
rate for exercises. It should NOT be relied upon as a medical heart rate
monitor. If you are uncertain about how your exercise program will impact
on your heart, please consult a physician.
3
CARE AND MAINTENANCE
DO NOT expose the watch to extreme weather conditions or cleaning
agents and solvents. Avoid dropping or rough handling of the watch. Avoid
fastening the strap too tightly. Clean the watch with a dry soft cloth or a soft
cloth moistened with water and mild detergent. Store the watch in a dry
place when not in use.
4
CHANGING THE BATTERY
If you are not confident with electronics, let the battery be changed by a
professional. Do not open the watch yourself.
4
TOPCOM HB 8M00
THIS WATCH HAS ALREADY A BATTERY INSIDE, so no need
to place this battery when you just bought it. To turn the watch
on see “5 Power save mode”.
•
•
•
Remove the back cover of the watch with a
small screwdriver.
Remove the old battery.
Install the new 3V (CR2032) battery with the
positive (+) pole facing up and replace the
cover.
4.2 CHEST BELT
•
•
•
Remove the battery cover from the
bottom of the belt using a small
coin.
Remove the old battery.
Install the new 3V (CR2032) battery
with the positive (+) pole facing the
battery cover and replace the
cover.
5
POWER SAVE MODE
This watch is sold with a power save function so that the battery can last
longer. To turn this watch (display) ON, press an key.
To activate the power save mode press the LAP/RESET key [ ] for
5 seconds in time mode.
5
ENGLISH
4.1 WATCH
TOPCOM HB 8M00
6
BUTTONS
[ESC]
[M]
[
[
Mode Button [M] (MODE/SET)
• To select the current function or menu.
• Hold down to select setting mode. In
]
setting mode: To select among the setting
items.
Escape Button [ESC] (LIGHT/ESC)
• To select between timekeeping and sensor
mode.
]
• To exit from setting mode.
• To go back to previous screen or function
level.
• Hold down to turn on the backlight for a
few seconds.
Up Button [ ] (ST./STP.)
• To scroll the menu upward.
• To activate the 'start' or 'stop' function
under chronograph, timer, pacer mode.
• To increase the setting value during
setting.
Down Button [ ] (LAP/RESET)
• To scroll the menu downward.
• To activate the lap function during
chronograph mode and reset function
during chronograph (hold down), timer
and pacer (hold down) mode.
• To decrease the setting value during
setting.
6.1 MASTER RESET
Press and hold [M], [ ] and [ ] simultaneously to reset the watch.
All set information will be lost, also the time!
6.2 BACK LIGHT
Press and hold the [ESC] key to active the back light of the display for 3
seconds.
6
TOPCOM HB 8M00
TO SET THE GENERAL ITEMS
ENGLISH
7
hold [M]
[ESC]
Current time mode
Change the setting
value
[
[
] or
]
[
]*
[
]*
[
]*
[
]*
[
]*
Setting menu
Change the setting
value faster (for some
settings)
[ESC]
hold [
* Press [
[M]
Setting display
] or [
]
] to move selection in the reverse direction.
Note:
- Time: setting the Second, Minute, Hour and Hour Format.
- Date: setting the Year, Month and Day
- System: setting the LCD (contrast), Sound (key tone and chime),
Light (normal, night and off), Pair (pair the chest strap with the
watch).
- User: setting the Gender, Birthday, Height and Weight.
When Light is set to night mode, every key press will turn on the
backlight.
7
TOPCOM HB 8M00
7.1 TO PAIR THE WATCH WITH THE CHEST BELT
The chest belt is normally paired with the watch when bought. If battery is
replaced or after a reset the chest belt has to be paired again.
[
hold [M]
]
Current time mode
Pair
[M]
[
[M]
]
HR
Pairing completed
chest strap
During the pairing:
The heart rate chest strap MUST be worn on the chest or press the two
contacts (i.e. heart rate signal is sampling).
8
TOPCOM HB 8M00
TIMEKEEPING - HEART RATE MODE MAIN MENU
There are 2 menu’s you can enter by briefly pressing the [ESC] key:
timekeeping menu and heart rate (sensor) menu. To scroll between both
menu’s press the [ESC] key.
Once you are in the selected menu you can scroll with the up/down [ ]/[ ]
keys between the other modes.
[
]
Current time
mode
front page
[
[
]
Daily alarm
mode
front page
Chronograph
mode
front page
]
[
[
Dual time mode
page
]
[
Pacer mode
front page
Heart rate
mode
front page
]
[
] or [
]
[ESC]
]
Timer mode
front page
Timekeeping function mode
Logbook mode
front page
Heart rate function
mode
Note:
- The corresponding operation mode will show after 3 seconds or press
[M] to show the operation mode immediately.
- Press [ ] to move the selection in the reverse direction.
9
ENGLISH
8
TOPCOM HB 8M00
8.1 TIMEKEEPING MENU ITEMS
[
]
[
Current time mode
front page
[
]
Daily alarm mode
front page
Chronograph mode
front page
]
[
[
]
[
Dual time mode
front page
]
]
Pacer mode
front page
Timer mode
front page
Timekeeping function mode
8.1.1 Daily or weekly alarm mode on/off
This watch includes 2 alarms for home time.
When the daily alarm is on, the watch will beep for 30s at the alarm time
every day. When the weekly alarm is on, the watch will beep for 30s at the
alarm time on the set day. When the alarm beeps, press any button to stop
the alarm.
[
]
Alarm 1
Alarm 2
Alarm time
Daily alarm mode
[
]
Daily alarm
Alarm off
Weekly alarm
Alarm on
10
Daily alarm
* Press the [
order.
ENGLISH
TOPCOM HB 8M00
Weekly alarm
] button to move the selection by reverse
hold [M]
[ESC]
daily/weekly
alarm
[M]
hour
Daily alarm
mode
[M]
minute
[
] or [
]
Change the setting
value
hold [
] or [
]
Change the setting
value faster (for some
settings)
8.1.2 Use the chronograph
• The chronograph counts up to 99 hours, 59 minutes and 59
seconds and has a memory of 50 laps.
• Chronograph logs, e.g. lap time, maximum/average/minimum
lap time, etc can be uploaded to PC for review. See “10.3.1
Download /analyse from watch” for more details.
11
TOPCOM HB 8M00
To start and stop the chronograph
Counting
Reset display
elapsed
time
lap no.
Chronograph mode
Stop counting
To take and recall lap times
The lap time
will freeze for
10 seconds
10 seconds
lap no.
Counting
Lap time display
Chronograph mode
hold [M]
[ESC]
The 2nd lap record
The next lap record
Total elapsed time
The last lap record
Lap times recall sequence
* Press the [
12
] button to move the selection by reverse order.
TOPCOM HB 8M00
The maximum counting down time is 99 hours, 59 and minutes
59 seconds. You can set your own count down time (max.
99:59:59) or use one of the preset values (3, 5, 10, 15 or 45
minutes).
To set and use the preset values (3, 5, 10, 15 or 45 minutes)
3 min
5 min
10 min
User preset value
(e.g. 30 minutes)
45 min
15 min
Quick set value
Target time setting
target time
current time
Timer mode
To set your own count down time
Timer mode
hold [M]
[ESC]
[M]
hour
[
]/[
Change setting value
minute
]
[M]
second
hold [
] or [
]
Change setting value faster
(for some settings)
Setting sequence
13
ENGLISH
8.1.3 Use the count down timer
TOPCOM HB 8M00
To start stop the count down timer
Beep for
30 seconds
‘Zero’ display
Beep finish
Target time display
Counting
Stop counting
8.1.4 To use the pacer
A pacer is a kind of metronome that can be used to give a certain rhythm
when you exercise. It can be set in beeps per minute (B/M). You can also
see the counter of the beeps on the screen:
step counter
[
beep
]
counting
beep rate
Pacer mode
Stop beeping
Pacer mode
Beeping
[ ]
hold [
]
stop counting
Pacer mode
Stop beeping
14
TOPCOM HB 8M00
ENGLISH
To set the pacer
The pacer can be set in steps of 5 beeps per minute (30,35,...):
Pacer mode
hold [M]
[
] or [
Change setting value
[ESC]
]
hold [
] or [
]
Change setting
value faster (for
some settings)
Pacer setting sequence
The pacer can also be used in chronograph mode:
beep
Pacer mode activated
beep
Stop counting
Counting
Chronograph mode
15
TOPCOM HB 8M00
8.1.5 Dual time mode
When you need to keep track of the time elsewhere in the world.
Dual time mode
hold [M]
[ESC]
[M]
hour
[
] or [
change setting value
]
minute
hold [
] or [
]
change setting value faster
(for some settings)
Dual time setting sequence
8.2 HEART RATE MODE OVERVIEW
8.2.1 Heartbeat measurement
See “8 Timekeeping - heart rate mode main menu” how to enter the heart
beat measurement menu (HR).
PRECAUTIONS
• Avoid fastening the strap too tight.
• Do not bend or fold the chest belt for preventing damage.
• Wetting the skin, where there is contact with the conductive area of
the chest belt, will improve the conduction and get a more stable signal.
• The physical condition of an individual might effect the intensity of
measured signal.
• Avoid using the heart rate monitor close to a trolley car, a tram stop,
transformer, electric substation and high-tension distribution lines etc.
The radio signal will be affected under influence of the environment
from high voltage and strong electromagnetic fields.
16
TOPCOM HB 8M00
THE CHEST STRAP MUST BE PAIRED WITH THE WATCH.
SEE “7.1 To Pair the watch with THE chest belt” FOR
DETAILED PAIRING OPERATION!
Fasten the fastener at one end. Try the chest belt on your chest and loosen
the stretch band if necessary.
Adjust the length of the stretch band until it feels conformable. The stretch
band must cling to the chest. Fasten the fastener at the other end. Adjust
the sensor to the center of your chest and be sure the backside of the
sensor clings to your chest and touches the skin.
The chest belt has to be worn while using the heart rate function.
Moisten the chest belt conductive pads with saliva of ECG-gel
(available at you local pharmacy) in order to ensure good contact
with the skin at all time.
BACK
connector
contact
battery door
elastic band
FRONT
17
ENGLISH
8.2.2 Using the transmitter belt.
TOPCOM HB 8M00
8.2.3 To get the heart rate measurement
Heart rate
measurement
activated
5
seconds
5 to 8
seconds
sensor activated
radio frequency
signal
heart rate captured
heart beat signal
watch
Note:
- When entering the heart rate mode, the heart rate function (sensor)
will be activated automatically after 5 seconds. Which can be activated manually too, see “8.2.8 To start/stop the sensor, timer and logbook” for the detailed operations.
- When the heart rate function (sensor) is activated, the watch will
aggregate the readings of the exercise into the current ‘session’.
- The data of the current session can be saved (into the ‘daily record’) /
reviewed by the heart rate mode function menu, see “8.2.10 Heart
rate mode function menu” under “ MENU 1: Save” for the detailed
operations.
- The ‘daily record’ can be reviewed by the heart rate mode function
menu too. The watch can store up to 10 daily records.
- See “8.2.8 To start/stop the sensor, timer and logbook” to reset the
current session.
18
TOPCOM HB 8M00
Average heart rate
Calorie expenditure
Minimum heart rate
Total exercise time
Maximum heart rate
In-zone time
ENGLISH
8.2.4 Heart rate function displays
Total exercise time
Heart rate mode function display
Note:
- The exercise timer is counting independently. Switching off to sensor
or changing the screen to another mode will not affect the counting.
- The calorie expenditure is calculated by heart rate, changing the
screen to another mode will not affect the calculation unless the sensor is switched off.
8.2.5 EMHR and %EMHR
Estimated Maximum Heart Rate (EMHR)
EMHR = 220 - age of the user
Percentage of Estimated Maximum Heart Rate (%EMHR)
%EMHR = acquired heart rate / EMHR x 100%
An example of %EMHR:
beats per minute
(= 140 bpm)
percentage of Estimated
Maximum Heart Rate
(= 69%EMHR)
Estimated Maximum Heart Rate (EMHR)
EMHR = 220 - 30 (user’s age) = 190 bpm
19
TOPCOM HB 8M00
Percentage of Estimated Maximum Heart Rate (%EMHR)
acquired heart rate = 131 (by measurement)
%EMHR = 131 / 190 x 100% = 69%
8.2.6 Heart rate zones
Exercise zones are established by setting the Upper and Lower Heart Rate
Limits. You can use the fitness (preset limits = 65% and 85% of the EMHR)
or your own customized limits.
Use the following Heart Rate Zone Chart to select the zone you wish to
exercise in.
You should consult a medical professional when selecting a training
zone, especially if you have a heart condition.
Zone Alert Setting
General
application
Lower limit
Upper limit
Remarks
Fitness
65%EMHR
85%EMHR
CANNOT be
changed by user
Custom
40-239 bpm
41-240 bpm
CAN be changed
by user
bpm or %EMHR
upper limit
The above zone
The in zone
(the target heart rate zone for one
particular application)
lower limit
The below zone
Heart Rate Zone
To set the zone upper or lower limits see “8.2.10 Heart rate mode function
menu” under “ MENU 4: Zone”.
20
TOPCOM HB 8M00
ENGLISH
8.2.7 To turn on/off the zone alert
bpm or %EMHR
upper
limit
lower
limit
The above zone
The in zone
(the target heart rate zone for one
particular application)
Beep sounds and an icon
displays if the acquired heart
rate is above the upper limit
The below zone
Heart rate zone
Beep sounds and an icon
displays if the acquired heart
rate is below the lower limit
zone alert icon
Zone alert off
Zone alert on
21
TOPCOM HB 8M00
8.2.8 To start/stop the sensor, timer and logbook
Sensor function
activated
Timer starts to
count
5 seconds
release
[ ]
Heart
rate
mode
release
[ ]
or
hold
[ ]
Logbook starts to log
(sensor function
activated too)
keep
holding
[ ]
or
release
[ ]
Sensor function
inactivated
keep
holding
[ ]
or
release
[ ]
Timer
inactivated
Logbook stops to log
(sensor function
inactivated too)
• When the heart rate mode is selected, the sensor function will be
activated automatically after 5 seconds.
• The watch includes a count-up timer for timing the accumulative exercise
time. If the timer is started, it will count-up continuously until it is
stopped.
• When the sensor function is activated, the logbook will be started too if
the ‘AUTO’ feature is set ‘ON’ (See “8.2.11 Logbook functions menu”
under “ MENU 5: Auto” for details)
• While the LOG function is started, a ‘LOG’ indicator starts flashing on the
screen.
22
TOPCOM HB 8M00
Heart
rate
mode
keep holding [
hold
[ ]
release
[ ]
]
release
[ ]
Reset the current
screen
ENGLISH
8.2.9 To reset the screen, session and timer
release
[ ]
Reset the current
session
Reset the timer
8.2.10 Heart rate mode function menu
During heart rate measurement you can enter the heart rate mode function
menu to:
• Menu 1: Save To save the current session into today’s record.
• Menu 2: Session To review the statical data of the current session.
• Menu 3: Daily records To review the daily records for the last 10 days.
• Menu 4: Zone To set upper and lower limits for the Zone Alert.
To enter the hear rate mode function menu press and hold [M]:
MENU 1: Save
[
hold [M]
[ESC]
] or [
]
Function menu 1
Heart rate mode
[
]
YES
NO
Save today’s data?
[ESC]
23
TOPCOM HB 8M00
MENU 2: Session
[
hold [M]
[ESC]
Heart rate mode
] or [
]
Function menu 2
[ESC]
[M]
start time
duration
in-zone
exercise time
start time
calorie
expenditure
average/max./
min. heart rate
Data review~
* Press the [ ] button to move selection in the reverse
direction.
~These data can be uploaded to a PC for review. See “10.3.1
Download /analyse from watch” for details.
24
TOPCOM HB 8M00
hold [M]
[ESC]
Heart rate mode
[
] or [
ENGLISH
MENU 3: Daily Rd
]
Function menu 3
[M]
[ESC]
day 1
Heart rate in-zone time
[ESC]
day 2
Average/max./min.
heart rate
Calorie expenditure
Data review~
[M]
day 3
the next available
day
Function menu
* Press the [ ] button to move selection in the reverse
direction.
~These data can be uploaded to a PC for review. See “10.3.1
Download /analyse from watch” for details.
25
TOPCOM HB 8M00
MENU 4: Zone
hold [M]
[ESC]
[
] or [
]
Function menu 4
[ESC]
Heart rate mode
[M]
[M]
Fitness*
(65 - 85%EMHR)
[
[ESC]
Function menu
(setting value)
[
] /[
]
[M]
Function menu
]
Change setting
value
] /[
custom
hold
[ ] /[
]
Fitness zone
[ESC]
[
]
Change setting
value faster
* Press [M] and then the [
] button to confirm the setting.
8.2.11 Logbook functions menu
To enter the log menu (LOG) the watch has to be in Heart rate mode (See
also “8.1 Timekeeping menu items” how to enter this mode.
• Menu 1: View To recall the details of the logged session.
• Menu 2: Start/Stop To start or stop the data logging function.
• Menu 3: PC-link To pair the watch with the ‘Wireless Data Manager’
program and to upload data from the watch to PC. See “10.2 Pairing the
watch and chest with the dongle” and “10.3 Download/analyse and save
data from watch”.
• Menu 4: Log Rate To set the sampling rate for the data logging.
• Menu 5: Auto To set the auto-start log function.
• Menu 6: Erase To erase the logged session.
• Menu 7: Mem To view the free memory capacity.
26
TOPCOM HB 8M00
Press and hold the [M] key to enter the LOG menu:
total
session
current
session
[
] or [
ENGLISH
MENU 1: View
]
hold [M]
View session
[ESC]
Logbook mode~
[M]
[ESC]
Start time
Duration
In-zone time
Calorie expenditure
Average/max./min.
heart rate
Function menu
* Press the [
~Press the [
for review.
] button to move selection in the reverse direction.
] or [ ] button to select a target session (e.g. 1/30, 2/30, ... 30/30)
MENU 2: Start/stop (Start/stop the log book)
hold [M]
[ESC]
[
] or [
]
Start or stop the logging
Logbook mode
[M]
[ESC]
Function menu
or
[
]
Start of stop the log
27
TOPCOM HB 8M00
MENU 3: PC-Link
[
hold [M]
] or [
]
Upload record
[ESC]
[ESC]
Logbook mode
[M]
Sending
Function menu
See also “10.3.1 Download /analyse from watch”.
MENU 4: Log Rate
[
] or [
]
hold [M]
Set log rate
[ESC]
[ESC]
Logbook mode
[M]
Function menu
(sampling rate)
[
]
[
Change the rate by
forward scrolling
]
Change the rate by
backward scrolling
MENU 5: Auto
[
] or [
]
Auto start a log
Logbook mode
[ESC]
[
] or [
[M]
]
Function menu
28
TOPCOM HB 8M00
[
hold [M]
] or [
]
Erase session
[ESC]
[ESC]
Logbook mode
ENGLISH
MENU 6: Erase (Erase one/all session(s))
[
[M]
] or [
]
Function menu
[ESC]
[M]
Function menu
or
[
]
[ESC]
Session XX (e.g. 1) erased
MENU 7: Mem (View free memory)
hold [M]
[ESC]
Logbook mode
[
] or [
]
View free memory
[ESC]
[M]
Function menu
(free memory reading)
29
TOPCOM HB 8M00
9
BATTERY LOW INDICATION
See “4 Changing the battery”.
10 WIRELESS DATA MANAGER
With the wireless data manager program you can download the daily record
and session data from the watch to the PC or from the chest belt directly to
the PC. With the data stored on the PC, you can transfer it to programs like
SportTracks, Perfect Session, ...
10.1 INSTALLING THE SOFTWARE
1.
Insert the bundled CD into the CD drive of
the target PC. The menu will show automatically. If not, open the CD folder and
dubble click ‘CD_start.exe’.
PC
2.
Click the ‘Install Software’ button from
the side menu.
PC
30
3.
ENGLISH
TOPCOM HB 8M00
Follow the instructions to install the program into the target PC.
PC
4.
Reboot your PC after installation
and plug-in the USB dongle into a
free USB port.
USB dongle
PC
5.
After rebooting, Windows will install the proper USB device for the
USB dongle.
31
TOPCOM HB 8M00
10.2 PAIRING THE WATCH AND CHEST WITH THE DONGLE
USB dongle
PC
Note:
- The watch MUST be switched to ‘PC-Link’ display of the logbook
mode, and activate the PC-link function.
- The chest strap MUST be worn on the chest or press the two contacts.
(See “8.2.11 Logbook functions menu” under “ MENU 3: PC-Link”.)
1.
2.
3.
When the installation is completed. Execute the ‘Wireless Data Manager’ program from the Windows program menu bar.
The wizard will guide you to pair the watch, chest strap with the program.
When the pairing is done the ID of the watch, chest strap will be saved
into the program.
For some instance, the watch and the chest strap can be paired
with the program again under the ‘Option’ top menu and the
‘Setting’ option.
32
TOPCOM HB 8M00
WATCH
The watch and chest belt must be within 4 meter from the
dongle, otherwise the PC dongle may not receive data from the
device.
10.3.1 Download /analyse from watch
watch
Watch
HR Strap
PC
USB dongle
Note:
- The watch MUST be switched to ‘PC-Link’ display of the logbook
mode, and activate the PC-link function. (See “8.2.11 Logbook functions menu” under “ MENU 3: PC-Link”.)
1.
2.
3.
4.
Click the ‘Watch’ icon from the side menu to pop the ‘Watch’ page.
Select the ‘Chronograph’, ‘Logbook’ or ‘Daily Stat’ page from the
top menu.
Click ‘Download’ button to download the data from the watch through
the corresponding page. The respective data will be shown on the
screen after a while.
Analyze the data on the PC by the options provided by the program.
Save the data into PC for further analysis.
33
ENGLISH
10.3 DOWNLOAD/ANALYSE AND SAVE DATA FROM
TOPCOM HB 8M00
10.3.2 Real-time data from the chest strap
chest strap
Watch
HR Strap
PC
USB dongle
Note:
- This is functioned with the chest strap.
- The heart rate chest strap MUST be worn on the chest (i.e. heart rate
signal is sampling).
1.
2.
3.
4.
Click the ‘HR Strap’ icon from the side menu to pop the ‘Chest Strap’
page.
The real-time heart rate readings will be shown on that page.
Analyze the data on the PC by the options provided by the program.
Save the data into PC for further analysis.
11 SPECIFICATIONS
Time
- Normal Time with month, day, day of week, hour, minute and second
display
- 12/24 hour format selectable
- Calendar range: 2000 to 2099
- Hourly Chime
34
TOPCOM HB 8M00
ENGLISH
Alarm
- Two independent alarms with daily and weekly selection.
- 30 seconds alarm duration
Chronograph
- Up to 99H59M59.99S, 1/100s resolution
- 50 laps with recall function
Count Down Timer
- Count down timer up to 99H59M59S, 1 second resolution
- Five pre-defined value (3/5/10/15/45 min)
- One user-defined value from 00:00:00 to 99:59:59
Pacer
- Range: 30 to 180 bpm (beep per minute)
- 5 bpm per step
- Maximum count up to 999999
2.4 GHz Wireless Communication
- Wireless communication using 2.4 GHz ISM band
- Carrier: 2.45 GHz
- Modulation: FSK
- Comply with EN300440, EN301489 and FCC Part 15
- Communication Distance: > 4 meters in open area, direct line of sight
2.4 GHz Heart Rate Measurement
- Measuring Range: 40 to 240 BPM
- Heart rate alert
- Heart Rate In-zone timer 00:00:00 to 23:59:59
- 1 Exercise Timer
- 2 Heart rate zone limit selection
- Calorie Expenditure range: 0-99999 kcal
Daily Records and Logbook
- 10 statistical daily records
- Logbook up to 100 sessions, ~ 30000 records
Others
- Full matrix (~ 32 x 46 dot) LCD
- LCD level adjustable: 16 contrast level adjustments
- Electro-Luminescent (EL) back light
35
TOPCOM HB 8M00
System requirement PC
- Pentium II 300MHz or higher
- 128MB free memory
- 20MB hard disk space or more
- Window XP/Vista operation system
- CD-ROM drive
- USB port
12 TOPCOM WARRANTY
12.1 WARRANTY PERIOD
The Topcom units have a 24-month warranty period. The warranty period
starts on the day the new unit is purchased. There is no warranty on
standard or rechargeable batteries (AA/AAA type).
Consumables or defects causing a negligible effect on operation or value of
the equipment are not covered. The warranty has to be proven by
presentation of the original or copy of the purchase receipt, on which the
date of purchase and the unit-model are indicated.
12.2 WARRANTY HANDLING
A faulty unit needs to be returned to a Topcom service centre including a
valid purchase note and a filled in service return card.
If the unit develops a fault during the warranty period, Topcom or its officially
appointed service center will repair any defects caused by material or
manufacturing faults free of charge, by either repairing or exchanging the
faulty units or parts of the faulty units. In case of replacement, colour and
model can be different from the original purchased unit.
The initial purchase date shall determine the start of the warranty period.
The warranty period is not extended if the unit is exchanged or repaired by
Topcom or its appointed service centre.
12.3 WARRANTY EXCLUSIONS
Damage or defects caused by incorrect treatment or operation and damage
resulting from use of non-original parts or accessories are not covered by
the warranty. The warranty does not cover damage caused by outside
factors, such as lightning, water and fire, nor any damage caused during
transportation. No warranty can be claimed if the serial number on the units
has been changed, removed or rendered illegible. Any warranty claims will
be invalid if the unit has been repaired, altered or modified by the buyer.
36
SERVICE RETURN CARD - RÜCKSENDEKARTE CARTE DE RETOUR SERVICE - RETOURFICHE
RETURN WITH YOUR DEFECT PRODUCT
Name/Vorname/Prénom/Naam:
Surname/Familienname/Nom/Familienaam:
Street/Straße/Rue/Straat:
Nr./N°:
Box/Postfach/Boîte/Postbus:
Location/Ort./Lieu/Plaats:
Post code/Postleitzahl/Code Postal/Postcode:
Country/Land/Pays/Land:
Tel./Tél.:
E-mail:
Model name/Modellbezeichnung/Nom du modèle/Modelnaam:
Serial Nr/Seriennummer/N° série/Serienummer:
Purchase date/Kaufdatum/Date d’achat/Aankoopdatum:
(DD/MM/YYYY) - (TT/MM/JJJJ)
Fault description/Beschreibung des Defekts/Description de la panne/Beschrijving defect:
(Original Proof of Purchase has to be attached to this return card to be valid for warranty)
Model name/Modellbezeichnung/Nom du modèle/Modelnaam:
Serial Nr/Seriennummer/N° série/Serienummer:
Purchase date/Kaufdatum/Date d’achat/Aankoopdatum:
(DD/MM/YYYY) - (TT/MM/JJJJ)
Fault description/Beschreibung des Defekts/Description de la panne/Beschrijving defect:
visit our website
www.topcom.net