1
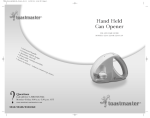
TMR_2246CAN_IB_Cover_29-11-004 11/29/04 6:03 PM Page 1
Under-Cabinet
Can Opener
USE AND CARE GUIDE
MODEL 2246CAN
•E
a
• E sy to
asy
in
•H
pie stall
• R ands f rcing and u
se
ac
em
re
sha ovab e ope tion
• B rpen le cu ratio
o
ttin
n
• H ttle a er
g a , auto
n
i
s
sem mat
• S dden d bag
bly, ic sh
wiv
c
o
o
pen
rd
els
bui
u
s
out
er
lt-in t off
tor
a
of
kni
sigh ge
fe
t fo
r ea
sy s
tor
age
?
Questions
Call toll free 1-800-947-3744
Monday – Friday, 8:00 a.m. - 5:30 p.m. CST
www.maxim-toastmaster.com
2246CAN
TMR_2246CAN_IB_25-11-04 11/25/04 3:42 PM Page 1
IMPORTANT SAFEGUARDS
When using electrical appliances, basic safety precautions should
always be followed including the following:
◆ Read all instructions.
◆ To protect against risk of electrical shock do not put cord, plugs, or
appliance in water or other liquid.
◆ Close supervision is necessary when any appliance is used by or
near children.
◆ Unplug from outlet when not in use, before putting on or taking
off parts, and before cleaning.
◆ Avoid contacting moving parts.
◆ Do not operate any appliance with a damaged cord or plug or after
the appliance malfunctions, or is dropped or damaged in any
manner. Contact Consumer Service for examination, repair or
electrical or mechanical adjustment.
◆ The use of attachments not recommended or sold by the
manufacturer may cause fire, electric shock or injury.
◆ Do not use outdoors.
◆ Do not let cord hang over edge of table or counter.
◆ Do not let cord contact hot surface, including the stove.
◆ Do not open pressurized (aerosol-type) cans.
◆ Do not open cans of flammable liquids such as lighter fluids.
◆ To reduce the risk of fire or electric shock, do not operate any
heating appliance beneath the mounted unit.
◆ Do not mount the storage bracket/unit over or near any portion of
a heating or cooking appliance or a sink or basin.
SAVE THESE INSTRUCTIONS
For Household Use Only
1.
TMR_2246CAN_IB_25-11-04 11/25/04 3:42 PM Page 2
ADDITIONAL IMPORTANT
SAFEGUARDS
◆ All users of this appliance must read and understand this Use and
Care Guide before operating or cleaning this appliance.
◆ The cord to this appliance should be plugged into a 120V AC
electrical outlet only.
◆ Do not leave this appliance unattended during use.
◆ If this appliance begins to malfunction during use, immediately turn
the unit OFF and unplug the cord. Do not use or attempt to repair
the malfunctioning appliance.
◆ IF this appliance falls or accidentally becomes immersed in water,
unplug it immediately. Do not reach into the water! Do not use this
appliance after it has fallen into or becomes immersed in water.
◆ To reduce the risk of injury to persons or property, never use this
appliance in an unstable position.
◆ Do not use this appliance for other than its intended use.
Polarized Plug
This appliance has a polarized plug, (one blade is wider than the
other). This plug is intended to fit in a polarized outlet only one way.
If the plug does not fit fully in the outlet, reverse the plug. If it still
does not fit, contact a qualified electrician. Do not attempt to modify
the plug in any way.
Short Cord Instructions
A short power-supply cord is provided to reduce the risk resulting
from becoming entangled in or tripping over a longer cord.
Do not use an extension cord with this product.
Electric Power
If the electric circuit is overloaded with other appliances, your Toaster
may not operate properly. It should be operated on a separate
electrical circuit from other appliances.
2.
Under-Cabinet Can Opener Use and Care Guide
TMR_2246CAN_IB_25-11-04 11/25/04 3:42 PM Page 3
How To Install Your Under-Cabinet
Can Opener
1. This can opener is designed to be installed under a cabinet
(see Figure 1). The hardware for installation is packaged in a
separate plastic bag. To select a location for installation please
consider the following:
A) An electrical outlet should be within easy reach of the cord so
that it will not drape over heating appliances or get in the way
of your normal work area.
B) Do not install above a cooking or heating area such as a stove.
2. Position the mounting bracket at least 4 inches from the wall and
leave sufficient room behind the can opener to insert a knife for
sharpening. Use the included mounting template to mark the
location of the screw holes.
3. Re-check that the unit is positioned in the desired area before
drilling the holes in the cabinet. Using a 3⁄16 inch drill bit, drill the
4 holes in the cabinet.
NOTE: If the cabinet has an overhang (Figure 1) you must use a
spacer. The spacer should be the same thickness as the amount of
overhang. The outside dimensions of the spacer are provided on
the template. If a spacer is used, longer #8 x 32 machine screws
are required. The screws should be 1 7⁄8 inches under the head plus
the thickness of the spacer.
4. The four screws may be installed from the top down or from the
bottom up (see Figure 2). If installed from the top, be sure the
bottom of the screw does not interfere with the body of the can
opener and prevent assembly. If this occurs you will need to trim
off the excessive screw length or you may place a spacer under the
screw head. Place the hex nuts in the hex shaped recess of the
mounting bracket and hold in place with the end of a pencil until
you engage the threads.
NOTE: Do not tighten the screw all the way until you have inserted all 4
screws. Tighten all four screws. Insert the unit into the bracket
(see Figure 3). Lock can opener into place by turning Removable
Locking Knob clockwise (see Figure 4). Do not over-tighten.
3.
TMR_2246CAN_IB_25-11-04 11/25/04 3:42 PM Page 4
How To Install Your Under-Cabinet
Can Opener (Cont.)
FIGURE 1
Screws
Spacer
Mounting Bracket
FIGURE 2
FIGURE 3
FIGURE 4
UNLOCK
LOCK
4.
Under-Cabinet Can Opener Use and Care Guide
TMR_2246CAN_IB_25-11-04 11/25/04 3:42 PM Page 5
Getting to know your Toastmaster
Under-Cabinet Can Opener
Your product may vary slightly from illustration.
Mounting
Bracket
(P/N 70635)
4 screws
(P/N 70638)
Removable
Locking Knob
(P/N 706336)
FIGURE 5
Removable
Piercing Lever
(P/N 70637)
Cord Storage
(not shown)
Magnetic Lid
Holder
Knife sharpener
Bottle Opener
Bag Opener
How To Use Your Under-Cabinet
Can Opener
1. Attach Piercing Lever as shown in Figure 6.
2. Raise piercing lever and place the rim of a can at an angle behind
the piercing lever.
3. Lower the piercing lever. This starts the cutting action. The lever
will remain down until the lid is completely cut. Then it will stop
automatically.
4. Hold the can and raise the lever to release the can.
5. Carefully slide the lid away from the magnet.
5.
TMR_2246CAN_IB_25-11-04 11/25/04 3:42 PM Page 6
Tips
◆ This can opener is designed to open cans only when mounted
under a cabinet. The motor will operate if the unit is not
mounted, but do not attempt to open cans unless properly
mounted.
◆ If there is a ridge in the rim of the can, open the other end or
begin the cutting action immediately after the ridge.
◆ For extremely large or heavy cans, it is recommended that you
lightly support the can as it is being opened.
To Open Bottles
Insert the top of the bottle so the cap is under the metal hook.
Lightly support the back of the can opener and then press the bottle
down until the cap is removed.
To Open Bags
Hold the plastic bag along the right side, with both hands at the top
corner. Insert the upper edge of the bag into the opener and slide
the bag from left to right.
To Sharpen Knife Blade
Place the blade into rectangular opening and move from front to
back several times.
Tips
◆ Be sure knife is clean and free of grease. Greasy or wet blades may
coat the sharpener and the blade will not sharpen satisfactorily.
◆ Do not attempt to sharpen hollow ground or serrated blades.
◆ Raise the knife handle slightly at the end of each sharpening, if
the knife has a curved tip.
◆ Uneven sharpening may occur if you force the knife blade against
the sharpener.
◆ The can opener/knife sharpener is intended for household use only.
6.
Under-Cabinet Can Opener Use and Care Guide
TMR_2246CAN_IB_25-11-04 11/25/04 3:42 PM Page 7
User Maintenance Instructions
This appliance requires little maintenance. It contains no user
serviceable parts. Do not try to repair it yourself. Any servicing
requiring disassembly other than cleaning must be performed by a
qualified appliance repair technician.
How To Clean Your Can Opener
1. Unplug the unit from the electrical outlet. Remove the can
opener from the mounting bracket
FIGURE 6
by turning the lock clockwise and
sliding the unit back.
2. To remove the piercing lever
assembly, raise assembly up and
pull away from can opener
(see Figure 6).
3. Wash piercing lever in warm soapy
water. Rinse and dry.
4. Replace assembly.
5. To clean unit, wipe with a clean,
damp cloth. Do not immerse in water.
Note: Cord storage is
provided at the back of the
can opener for excess cord
(see Figure 7).
FIGURE 7
7.
TMR_2246CAN_IB_25-11-04 11/25/04 3:42 PM Page 8
How To Use Out-Of-Sight Storage
The can opener has a feature
for out-of sight storage.
1. Loosen the Removable
Locking Knob by turning
counter-clockwise.
2. Swivel can opener upward so
back of can opener is flush
with cabinet (see Figure 8).
3. Lock can opener into place
by turning Removable
Locking Knob clockwise.
Do not over-tighten.
8.
Under-Cabinet Can Opener Use and Care Guide
FIGURE 8
TMR_2246CAN_IB_25-11-04 11/25/04 3:42 PM Page 9
LIMITED ONE-YEAR WARRANTY
Warranty Coverage: This product is warranted to be free from defects in
materials or workmanship for a period of one (1) year from the original
purchase date. This product warranty is extended only to the original
consumer purchaser of the product and is not transferable. For a period of
one (1) year from the date of original purchase of the product, our Repair
Center will, at its option, either (1) repair the product or (2) replace the
product with a reconditioned comparable model. These remedies are the
purchaser's exclusive remedies under this warranty.
Warranty Service: To obtain warranty service, you must call our warranty
service number at 1-800-233-9054 for return instructions on how to deliver
the product, in either the original packaging or packaging affording an
equal degree of protection to the Repair Center specified below. You must
enclose a copy of your sales receipt or other proof of purchase to
demonstrate eligibility for warranty coverage.
To return the appliance, ship to:
ATTN: Repair Center
708 South Missouri Street
Macon, MO 63552 USA
To contact us, please write to, call, or email:
Consumer Relations Department
PO Box 7366
Columbia MO 65205-7366 USA
1-800-233-9054
E-mail:
[email protected]
What Is Not Covered: This warranty does not cover damage resulting
from misuse, accident, commercial use, improper service or any other
damage caused by anything other than defects in material or workmanship
during ordinary consumer use. This warranty is invalid if the serial number
has been altered or removed from the product. This warranty is valid only
in the United States and Canada.
LIMITATION ON DAMAGES: THERE SHALL BE NO LIABILITY FOR ANY
INCIDENTAL OR CONSEQUENTIAL DAMAGES FOR BREACH OF ANY
EXPRESS OR IMPLIED WARRANTY OR CONDITION ON THIS
PRODUCT.
DURATION OF IMPLIED WARRANTIES: EXCEPT TO THE EXTENT
PROHIBITED BY APPLICABLE LAW, ALL IMPLIED WARRANTIES AND
CONDITIONS, INCLUDING, WITHOUT LIMITATION, IMPLIED
WARRANTIES AND CONDITIONS OF MERCHANTABILITY AND
FITNESS FOR A PARTICULAR PURPOSE OR USE ON THIS PRODUCT
ARE LIMITED IN DURATION TO THE DURATION OF THIS WARRANTY.
Some jurisdictions do not allow the exclusion or limitation of incidental or
consequential damages, or allow limitations on how long an implied
warranty lasts, so the above limitations or exclusions may not apply to you.
This warranty gives you specific legal rights and you may have other rights
under the laws of your jurisdiction.
For more information on our products, visit our website: www.maxim-toastmaster.com.
9.
TMR_2246CAN_IB_25-11-04 11/25/04 3:42 PM Page 10
Keep Dated Sales Receipts for Warranty Service.
Keep this booklet. Record the following for reference:
Date purchased _______________________________________________
Model number _______________________________________________
Date code (stamped on bottom)________________________________
EVERYBODY EATS. It’s a fact of life.
But sometimes preparing
meals can become a chore.
That’s why TOASTMASTER has been invited
into millions of kitchens just like yours
so we can HELP YOU MASTER your
mixing, baking, grilling, toasting,
brewing, heating and serving
tasks WITH EASE AND STYLE.
The TOASTMASTER name stands for a
CELEBRATION of INNOVATION designed
to serve your life and keep you
COOKIN’ IN STYLE.
10.
Under-Cabinet Can Opener Use and Care Guide
TMR_2246CAN_IB_Cover_29-11-004 11/29/04 6:03 PM Page 1
Under-Cabinet
Can Opener
USE AND CARE GUIDE
MODEL 2246CAN
•E
a
• E sy to
asy
in
•H
pie stall
• R ands f rcing and u
se
ac
em
re
sha ovab e ope tion
• B rpen le cu ratio
o
ttin
n
• H ttle a er
g a , auto
n
i
s
sem mat
• S dden d bag
bly, ic sh
wiv
c
o
o
pen
rd
els
bui
u
s
out
er
lt-in t off
tor
a
of
kni
sigh ge
fe
t fo
r ea
sy s
tor
age
?
Questions
Call toll free 1-800-947-3744
Monday – Friday, 8:00 a.m. - 5:30 p.m. CST
www.maxim-toastmaster.com
2246CAN