Transcript
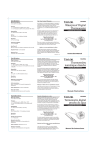
12"
Folds
General Operation
Battery Replacement
1. Sterilize the metal probe by inserting it into an appropriate
solution such as boiling water for several minutes.
2. Press "On/OFF" to turn the unit on. Press "ºF/ºC" to select
temperature scale. Note: To save battery life, this unit has
an AUTO-OFF feature that turns the instrument off after 5
minutes if no buttons are pressed and the temperature
reading is lower than 122°F (50°C).
3. The sensor is located in the probe tip for a quick response
and accurate reading. When ready to test the
temperature, insert thermometer probe into the center of
the product for an accurate temperature measurement.
The LCD will stabilize when reading is complete
(approximately 10 seconds).
4. Hold Feature: Press the "Hold" button and the
temperature will be held (the "HOLD" icon will appear).
Press again to release.
5. Max Feature: Press the "Max/s
" button once to read the
maximum temperature that the probe has reached (the
word “Max” will appear). Press the "Max/s
" button again
to read the minimum temperature that the probe has
reached (the word “Min” will appear). Press "Max/s
"a
third time to return to the current temperature reading.
Otherwise the unit will automatically return to the current
temperature reading after 10 seconds.
6. To avoid burns near heat, snap the pocket sleeve onto the
opposite end of the thermometer and use as a handle.
7. Be sure to sanitize the stem before inserting it into another
product.
The thermometer operates on 1 CR2032 lithium battery. If the
unit does not turn on for first use, remove and then reinstall the
battery. Change the battery when the display becomes dim. To
replace battery:
1. Open the battery compartment by turning the battery
compartment door cover on the back of the thermometer
counterclockwise, using a coin in the slot.
2. Remove used battery and insert new one, with the "+" sign
facing up.
3. Close the compartment. Make sure the o-ring is seated around
the opening to maintain waterproof feature. Note: If battery
door is not closed properly, water can get into the
battery compartment causing the unit to malfunction.
Specifications
Range: -40°F to 450°F (-40°C to 232°C)
Accuracy:
9848EFDA = 140°F to 180°F = .5°F (54°C to 82°C=0.3°C)
All others = 140°F to 180°F = 1°F (54°C to 82°C = 0.5°C)
±2°F or ±1°C outside of above range
Resolution: 0.1ºF or ºC up to 199.9º (above 1ºF and ºC)
Auto Shut-Off: after 5 minutes if no buttons are pressed and
the temperature reading is lower than 122°F (50°C)
Stepdown Probe: 9848EFDA = 1.5mm / all other = 2.5mm
Battery: CR2032 lithium (included)
Calibration
If recalibration is necessary, for best results calibrate within the
temperature range most commonly used. Always utilize a
reliable source as a benchmark when calibrating. If a verified
reference temperature cannot be achieved in the usage range,
then calibrate in an ice bath as described in Step 1.
1. Suspend probe at least 1” into a 'slush' of crushed ice and
water (32°F) for at least 30 seconds. Keep the probe from
touching the container bottom.
2. Press and hold the “SET” button for 5 seconds. The word
“SET” will appear. Then press "Max/s
" and "Hold/t
" at
the same time to enter Temperature Setting mode. The LCD
will turn red. The current temperature blinks.
3. Press "Max/s
" or "Hold/t
" to increase/decrease the
temperature by 1°F (0.5°C)
4. To enter the recalibrated temperature, press and hold the
“SET” button for 5 seconds. The LCD will turn green. A “----”
pattern appears, then “OK”.
5. After 2 seconds, the unit will return to normal mode.
6. To restore the default calibration temperature, remove the
battery for 1 minute and then replace it. (Note: If no
buttons are pressed for 30 seconds, the unit will
automatically return to normal mode.)
Antimicrobial Feature
Taylor's Safe-T-Guard™ sleeve and housing incorporates a nontoxic chemical compound that inhibits the growth of harmful
pathogens, which minimizes cross contamination. It is important to
thoroughly clean and disinfect your thermometer after each use.
One Year Limited Warranty
This product is warranted against defects in materials or workmanship
for one (1) year for the original purchaser from date of original
purchase. It does not cover damages or wear resulting from accident,
misuse, abuse, commercial use, or unauthorized adjustment and/or
repair. Should this product require service (or replacement at our
option) while under warranty, do not return to retailer. Please pack the
item carefully and return it prepaid, along with store receipt showing
date of purchase and a note explaining reason for return. There are no
express warranties except as listed above. This warranty gives you
specific legal rights, and you may have other rights which vary from
state to state. For additional product information, or warranty
information in Canada or elsewhere outside the USA, please contact us
through www.taylorusa.com.
Made to our exact specifications in China.
Garantie limitée d'un an
Taylor® garantit que ce produit est libre de tout défaut de matériaux ou
de main d'œuvre pour une période d'un (1) an pour l'acheteur original à
partir de la date d'achat original. Elle ne couvre pas les dommages ou
l'usure suite à un accident, une mauvaise utilisation, tout abus, utilisation
commerciale ou réglage interdit et/ou réparation interdite. Si ce produit
doit être réparé (ou remplacement à notre discrétion), ne le retournez pas
au détaillant. Veuillez l'emballer avec soin et le retourner à frais prépayés
avec la facture du magasin indiquant la date d'achat et une note
expliquant la raison du retour à l'adresse suivante. Il n'y a aucune
garantie expresse sauf celle indiquée précédemment. Cette garantie vous
donne des droits précis, mais vous pouvez aussi avoir d'autres droits qui
varient d'une juridiction à l'autre. Pour de l'information supplémentaire sur
le produit ou sur la garantie au Canada ou ailleurs à l'extérieur des É.-U.
veuillez nous contacter par www.taylorusa.com
9848E/9848EFDA/806E
Leading the Way in Accuracy®
Waterproof Digital Thermometer
Thermomètre numérique
étanche
Termómetro digital
prueba de agua
Fabriqué en Chine selon nos spécifications exactes.
Instruction Manual
Manuel d'instructions
Manual de instrucciones
Garantía limitada por un año
Taylor® garantiza este producto contra defectos en los materiales y en
la mano de obra durante 1 (un) año a partir de la fecha de compra
original. No cubre daños ni desgastes que sean consecuencia de
accidentes, uso inadecuado, abuso, uso comercial, ni ajustes y/o
reparaciones no autorizadas. Si este producto requiere mantenimiento
(o cambio a nuestro entender), no la devuelva al vendedor minorista.
Sírvase empacar el artículo cuidadosamente y envíelo con el franqueo
pagado, junto con el recibo de la tienda en el que aparezca la fecha de
compra y una nota explicando el motivo de la devolución. No existen
garantías expresas excepto las enunciadas anteriormente. Esta garantía
le otorga derechos legales específicos y es posible que usted tenga
otros derechos que varíen de un estado a otro. Para obtener
información adicional sobre el producto, o información de la garantía
en Canadá o en otro sitio fuera de los EE.UU., sírvase contactarnos a
través de www.taylorusa.com.
Fabricado en China según nuestras especificaciones
exactas.
CP9848ALLV 12.08
Taylor Precision Products
2220 Entrada Del Sol, Suite A
Las Cruces, New Mexico 88001 USA
www.taylorusa.com
If the unit does not turn on during first use, try
removing the battery and then reinstalling it.
Fonctionnement général
Remplacement de pile
Funcionamiento general
Reemplazo de la batería
1. Stérilisez la sonde métallique en l'insérant dans une solution
appropriée, comme de l'eau bouillante, pendant plusieurs minutes.
2. Appuyez sur le bouton «On/Off» (marche/arrêt) pour mettre
l'appareil en marche. Appuyez sur le bouton «ºF/ºC» pour choisir
la plage de température. Remarque : Pour conserver la pile, cet
appareil comprend une fonction «AUTO-OFF» (arrêt
automatique) qui l'appareil s'éteindra automatiquement après
environ 5 minutes si aucune touche n'est enfoncée et la
température est moins élevée que 122°F (50°C).
3. Le capteur se trouve sur le bout de la sonde pour une réponse
rapide et un relevé exact. Lorsque vous êtes prêt à tester la
température, insérez la sonde du thermomètre au centre du
produit pour un relevé de température exact. L'ACL se stabilisera
à la fin du relevé (environ 10 secondes).
4. Fonction de Hold (retenue): Appuyez sur le bouton «HOLD»
(retenue) et la température sera conservée (le icône «HOLD»
apparaîtra). Enfoncez à nouveau pour dégager.
5. Fonction de Max: Appuyez sur le bouton «Max/s
»(maximum)
pour lire la température maximum que la sonde a atteint (le
mot « Max » apparaîtra). Appuyez à nouveau sur le bouton
«Max/s
» pour lire la température minimum que la sonde a
atteint (le mot « Min » apparaîtra). Appuyez à nouveau sur le
bouton «Max/s
» pour revenir à l'affichage de température
actuelle. Sinon l'appareil passera automatiquement à
l'affichage de température actuelle après 10 secondes.
6. Pour éviter les brûlures près de la chaleur, enclenchez le manche
de pochette sur l'extrémité opposée du thermomètre et utilisez
comme poignée.
7. Assurez-vous de désinfecter la tige avant de l'insérer dans tout
autre produit.
Le thermomètre fonctionne avec 1 pile CR2032 au lithium. Si l'appareil
n'allumera pour la première utilisation, retirez et réinsérer la pile.
Changez la pile lorsque l'affichage faiblit. Pour remplacer la pile:
1. Ouvrez le compartiment de piles en tournant le couvercle de la
porte du compartiment de piles à l'arrière du thermomètre dans
le sens antihoraire à l'aide d'une pièce de monnaie dans la fente.
2. Retirez la vieille pile et insérez-en une nouvelle, avec le signe «+»
vers le haut.
3. Fermez le compartiment. Assurez-vous que le joint torique est
assis autour de l'ouverture pour maintenir la fonction étanche.
Remarque: Si la porte de piles n'est pas fermée correctement,
l'eau pourrait pénétrer dans le compartiment et l'appareil
fonctionnerait mal.
1. Esterilice la sonda de metal introduciéndola en una solución
adecuada, tal como agua hirviendo, durante varios minutos.
2. Presione el botón “On/Off” (comenzar/detener) para encender la
unidad. Presione el botón "ºF/ºC" para seleccionar la escala de
temperatura. Nota: para ahorrar vida útil de la batería, esta unidad
cuenta con una característica de apagado automático que la unidad
se apage automáticamente después de 5 minutos si no presiona
ningún botón y la temperatura es menor que 122°F (50°C).
3. El sensor está ubicado en el extremo del termómetro para una
rápida respuesta y una lectura precisa. Cuando esté listo para
tomar la temperatura, introduzca el sensor del termómetro en el
centro del producto para una medición precisa de la temperatura.
LCD se estabilizará cuando la lectura esté completa
(aproximadamente 10 segundos).
4. Función HOLD (mantener): Presione el botón “HOLD” (mantener)
y la temperatura se mantendrá en pantalla (aparecerá el ícona
“HOLD”). Presiónelo nuevamente para volver a medir.
5. Función Max (máxima) Presione el botón “Max/t
” para leer la
temperatura máxima que la sonda ha alcanzado (aparecerá la
palabra “Max”). Presione nuevamente el botón “Max/t
” para leer
la temperatura mínima que la sonda ha alcanzado (aparecerá la
palabra “Min”). Presione nuevamente el botón “Max/t
” para
volver a la pantalla de la lectura actual de la temperatura. De lo
contrario, la unidad cambiará automáticamente a la pantalla de la
lectura actual de la temperatura después de 10 segundos.
6. Para evitar quemaduras cerca del calor, tire la funda hacia el
extremo opuesto del termómetro y utilícela como manija.
7. Asegúrese de desinfectar el vástago antes de introducirlo en otro
producto.
El termómetro funciona con una batería de litio CR2032. Si la unidad
no encenderá para usarla por primera vez, retirez y reinserte la
batería. Cambie la batería cuando la pantalla se vuelva borrosa. Para
reemplazar la batería:
1. Abra el compartimiento de la batería girando hacia la izquierda la
tapa de la puerta del compartimiento de la batería en la parte
trasera del termómetro, usando una moneda en la ranura.
2. Quite la batería e introduzca una nueva, con el signo "+" hacia
arriba.
3. Cierre el compartimiento. Asegúrese de que el anillo en O esté
apoyado alrededor de la abertura para mantener la característica
a prueba de agua. Nota: si la puerta del compartimiento no
está correctamente cerrada, puede entrar agua en el
mismo haciendo.
Spécifications
Plage : -40 °F à 450 °F (-40 °C à 232 °C)
Exactitude :
9848E/806E = 140 °F à 180 °F = 1°F (54 °C à 82 °C = 0,5°C)
9848EFDA = 140 °F à 180 °F = ,5°F (54 °C à 82 °C = 0,3°C)
±2 °F ou ±1 °C à l'extérieur de la plage précédente
Résolution : 0,1 ºF ou ºC jusqu'à 199,9 º(au-dessus de 1ºF etºC)
Arrêt automatique: Après 5 minutes si aucune touche n'est
enfoncée et la température est moins élevée que 122°F (50°C)
Sonde abaissemen:
9848EFDA = 1.5mm / toutes les autres = 2.5mm
Pile : lithium CR 2032 (incluse)
Calibrage
Si recalibrage est nécessaire, pour les meilleurs résultats calibrera
dans une plage de temperature le plus utilisée généralement.
Utilisez toujours une source fiable comme point de référence en
calibrant. Si une température vérifiée de référence ne peut pas être
réalisée dans la plage d'utilisation, calibrez alors dans un bain de
glace tel qu'indiqué à l'étape 1.
1. Suspendez la sonde à au moins 1 po (2,54 cm) dans une
«barbotine» de glace concassée et d'eau (32 °F/0 °C) pendant
au moins 30 secondes.
2. Appuyez et gardez enfoncé sur le bouton «SET» (régler) pendant
5 secondes. Le mot «SET» apparaîtra. Puis appuyez sur
» et «Hold/t
» en même temps pour entrer dans le
«Max/s
mode de réglage de la température. L'ACL tournera le rouge.
L'affichage de température actuelle clignote.
3. Appuyez sur «Max/s
» ou «Hold/t
» pour augmenter/réduire
la température d'un degré °F (0.5°C).
4. Pour entrer la température recalibrera, appuyez et gardez
enfoncé sur le bouton « SET ». L’ACL tournera le vert. Un motif à
(« ---- ») apparaîtra, puis « OK ».
5. Après 2 secondes, l'appareil reviendra à mode normal.
6. Pour revenir à la température recalibrera par défaut, retirez la
pile pour 1 minute et réinsérer la pile. (Remarque: Si aucune
touche n'est enfoncée pendant 30 secondes, l'appareil reviendra
automatiquement à mode normal.)
Fonction antimicrobienne
Le manchon et boîtier Safe-T-Guard™ de Taylor incorpore un
composé chimique non-toxique qui prévient la croissance de
pathogènes dangereux ce qui réduit la contamination croisée. Il est
important de bien nettoyer et désinfecter votre thermomètre après
chaque utilisation.
Especificaciones
Rango: -40°F a 450°F (-40°C a 232°C)
Precisión:
9848EFDA = 140°F a 180°F = .5°F (54°C a 82°C = 0.3°C)
9848E/806E = 140°F a 180°F = 1°F (54°C a 82°C = 0.5°C)
±2°F o ±1°C fuera del rango anterior
Resolución: 0.1ºF o ºC hasta 199.9º (por encima de 1ºF y ºC)
Apaga automáticamente: después de 5 minutos si no presiona
ningún botón y la temperatura es menor que 122°F (50°C)
Sonda reductora: 9848EFDA = 1.5mm / los otros = 2.5mm
Batería: CR2032 litio (incluida)
Calibración
Si es necesario recalibrar, para mejores resultados calibre en el
rango de la temperature más usada. Siempre utilice una fuente
confiable come punto de referencia cuando calibre. Si una
temperature verificada no puede ser obtenida en el rango de
mayor uso, entonces calibre en un baño de hielo según lo descrito
en el paso 1.
1. Suspenda la sonda al menos 1” (2.5 cm) en una mezcla de hielo
y agua (32°F - 0°C) durante al menos 30 segundos. Evite que la
sonda toque el fondo del recipiente.
2. Presiónelo sin soltar durante 5 segundos el botón “SET”
(configurar). Aparecerá la palabra “SET”. Luego presione los
botones "Max/s
" y "Hold/t
" a la vez para ingresar al modo
de definición de la temperature. La pantalla LCD dará vuelta a
rojo. La temperatura actual parpadea.
3. Presione los botones"Max/s
" o "Hold/t
" para aumentar o
disminuir la temperature en 1 grado °F (0.5°C).
4. Para ingresar la temperature recalibra, presiónelo sin soltar
durante 5 segundos el botón “SET”. La pantalla LCD dará vuelta
a verde. Aparecerá un patrón de rayitas (“----”), luego “OK”.
5. Después de 2 segundos, la unidad volverán a modo normal.
6. Para regresar a la temperature recalibra predeterminada, quite
la batería para 1 minuto y después reemplazará. (Nota: Si no
presiona ningún botón en 30 segundos, la unidad volverán
automáticamente a modo normal.)
Característica antimicrobiana
La funda y la carcasa Safe-T-Guard™ de Taylor incorporan un
compuesto químico no tóxico que inhibe el crecimiento de
agentes patógenos nocivos, lo cual minimiza la contaminación
cruzada. Es importante limpiar y desinfectar totalmente su
termómetro después de cada uso.