1
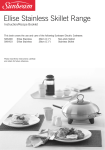
Ellise Stainless
Electric Cookware
Instruction/Recipe Booklet
FP8610 Ellise Stainless Square 30.5cm (12") square frypan
FP8910 Ellise Stainless Banquet 38cm (15") rectangular frypan
Please read these instructions carefully
and retain for future reference.
Contents
Sunbeam’s safety precautions 1
Features of your Sunbeam cookware
Ellise Stainless Square (FP8610) 30.5cm
2
Ellise Stainless Banquet (FP8910) 38cm
4
An introduction to electric frypan cooking 6
Temperature settings of your Sunbeam cookware 7
Using your cookware 9
Care and cleaning 9
Stainless steel cooking surface 10
Cooking with your Sunbeam cookware
11
Recipes
13
Important instructions – retain for
future use.
Sunbeam’s Safety Precautions
SAFETY PRECAUTIONS FOR YOUR SUNBEAM
FRYPAN.
• Use your frypan at least 200mm away from
walls and curtains.
• Do not immerse the control probe in water.
• If using a plastic spatula do not leave in
cooking vessel when hot.
• The frypan must only be used with the control
probe provided.
• Avoid using on metal surfaces e.g. sink,
hotplate.
• Remove the control probe before cleaning
the frypan.
• After cleaning the frypan ensure that the
control probe inlet area is completely dry
before using again.
Sunbeam is very safety conscious when designing
and manufacturing consumer products, but it is
essential that the product user also exercise care
when using an electrical appliance. Listed below are
precautions which are essential for the safe use of
an electrical appliance:
• Read carefully and save all the instructions
provided with an appliance.
• Always turn the power off at the power outlet
before you insert or remove a plug. Remove by
grasping the plug - do not pull on the cord.
• Turn the power off and remove the plug when the
appliance is not in use and before cleaning.
• Do not use your appliance with an extension cord
unless this cord has been checked and tested by
a qualified technician or service person.
• Always use your appliance from a power outlet of
the voltage (A.C. only) marked on the appliance.
• This appliance is not intended for use by persons
(including children) with reduced physical,
sensory or mental capabilities, or lack of
experience and knowledge, unless they have
been given supervision or instruction concerning
use of the appliance by a person responsible for
their safety.
• Children should be supervised to ensure that they
do not play with the appliance.
• The temperature of accessible surfaces may be
high when the appliance is operating.
• Never leave an appliance unattended whilein use.
• Do not use an appliance for any purpose other
than its intended use.
• Do not place an appliance on or near a hot gas
flame, electric element or on a heated oven.
• Do not place on top of any other appliance.
• Do not let the power cord of an appliance hang
over the edge of a table or bench top or touch any
hot surface.
• Do not operate any electrical appliance with a
damaged cord or after the appliance has been
damaged in any manner. If damage is suspected,
return the appliance to the nearest Sunbeam
Appointed Service Centre for examination, repair
or adjustment.
• For additional protection, Sunbeam recommend
the use of a residual current device (RCD)
with a tripping current not exceeding 30mA in
the electrical circuit supplying power to your
appliances.
• Do not immerse the appliance in water or any
other liquid unless recommended.
• Appliances are not intended to be operated by
means of an external timer or separate remote
control system.
• This appliance is intended to be used in
household and similar applications such as: staff
kitchen areas in shops, offices and other working
environments; farm houses; by clients in hotels,
motels and other residential type environments;
bed and breakfast type environments.
If you have any concerns regarding the performance and use of your appliance,
please visit www.sunbeam.com.au or contact the Sunbeam Consumer Service Line.
Ensure the above safety precautions are understood.
1
Features of your Sunbeam
Ellise Stainless Square Frypan
- FP8610
Glass Lid
Stylish glass lid with stainless steel rim
enables you to watch your food while it
cooks.
Stainless Steel Cooking Vessel
Long lasting 25 year guaranteed
18/10 Stainless Steel cooking surface
– essential for the gourmet cook.
Dishwasher Safe
The pan and lid are dishwasher safe and
fully immersible making cleaning a breeze.
Extra Deep Cooking Vessel
Ideal for cooking foods with a liquid base
such as casseroles, pasta, sauces, soups,
custards etc.
Unique 1800 Watt Square Die-Cast Element
The element is completely cast into an
aluminium base which is adhered onto
the stainless frypan providing even heat
distribution.
2
Steam Vent
Fixed steam vent controls the moisture level
during cooking.
Cool Touch Handles
Cool touch handles make it safer when
shifting your frypan from the kitchen to the
table.
Pan tilt lever
When the lever is in the lowered position the
cooking pan is tilted forcing juices to collect
at one end of the pan. Both hands are then
free for basting.
Trigger Release Control Probe
The probe is thermostatically controlled and
incorporates an indicator light which switches
off automatically when the temperature
selected has been reached, and then cycles
on and off to indicate that the selected
temperature is being maintained.
FP8610 – 30.5cm (12”) Square Stainless
3
Features of your Sunbeam
Ellise Stainless Banquet Frypan
- FP8910
Glass lid
Stylish glass lid with stainless steel rim
enables you to watch your food while it
cooks.
Stainless Steel Cooking Vessel
Long lasting 25 year guaranteed
18/10 Stainless Steel cooking surface
– essential for the gourmet cook.
Dishwasher Safe
The pan and lid are dishwasher
safe and fully immersible making
cleaning a breeze.
Extra Deep Cooking Vessel
Ideal for cooking foods with a liquid base
such as casseroles, pasta, sauces, soups,
custards etc.
Unique 2400 Watt Rectangular Die-Cast Element
The element is completely cast into an
aluminium base which is adhered onto
the stainless frypan providing even heat
distribution.
4
Steam Vent
Fixed steam vent controls the moisture level
during cooking.
Cool Touch Handles
Cool touch handles make it safer when
shifting your frypan from the kitchen to the
table.
Pan tilt lever
When the lever is in the lowered position the
cooking pan is tilted forcing juices to collect
at one end of the pan. Both hands are then
free for basting.
Trigger Release Control Probe
The probe is thermostatically controlled and
incorporates an indicator light which switches
off automatically when the temperature
selected has been reached and then cycles
on and off to indicate that the selected
temperature is being maintained.
FP8910 – 38cm (15”) Rectangular Stainless
5
An Introduction to Electric Frypan
Cooking
Congratulations on the purchase of your new
Sunbeam frypan.
Over the years we have introduced many
innovations in electric cookware and we hope
you continue to enjoy cooking meals with
our Ellise Stainless Steel range of electric
cookware.
After reading through this book you will soon
learn how to get the most from your frypan
and how to enjoy the benefits of frypan
cooking.
Versatile
Roast the family dinner, grill steaks, simmer
casseroles and stir fry vegetables etc. All with
minimal mess or fuss.
Economical
Cooks food quickly and uses less power than
an ordinary oven or grill.
6
Total control
The removable control probe has 10 heat
settings to give you total heat control,
whether cooking delicate pikelets or the
family roast.
Easy to clean
Features a fully sealed element, so that the
frypan is dishwasher-safe and can be fully
immersed in water.
Guaranteed reliability
Your new Sunbeam frypan will give you years
of reliable service. It is backed by Sunbeam’s
12 month Replacement Guarantee.
If you have any questions about your Sunbeam
frypan or any other Sunbeam appliance, please
phone the Sunbeam Consumer Service Line on
1300 881 861 (AUS) or 0800 786 232 (NZ).
Temperature Settings of your
Sunbeam Cookware
Trigger Release Control Probe
The probe is thermostatically controlled
and incorporates an indicator light which
switches off automatically when the
temperature selected has been reached
and then cycles on and off to indicate
that the selected temperature is being
maintained. The trigger release makes
removal of the probe easy. See figure 1.
The numbers on the dial represent the following temperatures approximately.
Preheat your frypan on setting 7-8, then change to your desired setting.
DIAL
SETTING
CELSIUS
(approx)
FAHRENHEIT
(approx)
1
100°C
210°F
2
110°C
230°F
3
125°C
260°F
4
140°C
285°F
5
150°C
300°F
6
160°C
320°F
7
175°C
350°F
8
185°C
365°F
9
200°C
390°F
10
210°C
410°F
USES
Keeping food warm
Figure 1
TEMPERATURE
LOW
Simmering, slow cooking
Pan frying
MEDIUM
Shallow frying, baking
Searing and sealing, roasting
Note: The temperature uses are a guide
only and may require adjustment to suit
various foods and individual tastes.
When the dial is set to a low setting, it
is quite normal for food to stop and start
bubbling, as the thermostat maintains the
selected temperature.
HIGH
Glass Lid
With the lid in place, the frypan can be
used as an oven, giving you the versatility
to bake cakes, roast larger pieces of beef,
lamb and chicken.
The lid also retains heat and moisture
when simmering food such as casseroles.
7
Temperature settings of your Sunbeam Cookware continued
Pan tilt lever
The pan tilt lever is positioned under the
inlet where the control probe is inserted. To
tilt the frypan, push the lever down. This
allows the fat and juices to drain from the
food for crisp, low fat cooking. It also makes
it easier to baste food and serve sauces or
gravy. See figure 2.
Figure 2
Cast-in element
The element is completely cast into the
aluminium base for faster superior heating
and a longer element life. See figure 3.
Figure 3
8
The heating element is completely cast into
an aluminium base, which is adhered onto
the stainless frypan providing superior heat
distribution. See figure 4.
Figure 4
Using your Cookware
Before the first use: Wash, rinse and dry your
frypan and lid. ‘Season’ the cooking surface
by applying a thin coat of cooking oil and rub
in with paper towelling.
Note: When using your Ellise Stainless
Cookware for the first time you may notice a
fine smoke haze being emitted from the unit.
This is normal. It is due to the initial heating
of internal components.
1.Insert the control probe into the inlet on
the frypan.
2.Plug the cord into a 230-240V power
outlet and turn the power on.
3.Preheat the frypan on setting 7-8, then
set the control probe dial to the desired
temperature setting. Refer to page 7 for
the temperature guide.
The light on the control probe will illuminate.
This light will remain on until the set
temperature has been reached and then will
cycle on and off throughout cooking, as the
cooking temperature is maintained by the
thermostat.
Hint: On initial heating of the frypan, it
is recommended that the temperature be
allowed to cycle (the light glowing on and
off) several times. This will help the cooking
surface to adjust to a more accurate cooking
temperature.
Note: The frypan must only be used with the
control probe provided.
Care and Cleaning
Always turn the power off and remove the
plug from the power outlet after use and
before cleaning. Allow appliance to cool
before cleaning.
Control Probe
If cleaning is necessary, wipe over with a
damp cloth.
Note: The control probe must be removed
before the frypan is cleaned and the control
probe inlet must be dried before the frypan is
used again.
IMPORTANT: DO NOT IMMERSE THE CONTROL
PROBE IN WATER OR OTHER LIQUID.
Store the control probe carefully. Do not
knock or drop it as this can damage the
probe. If damage is suspected, return the
control probe to your nearest Sunbeam
Appointed Service Centre for inspection.
Refer to the separate warranty and service
centre booklet.
Glass lid
Wash the lid in warm soapy water using a
soft sponge, rinse and dry thoroughly. The
glass lid is dishwasher safe.
Note: Take care when glass lid is hot. Do not
place hot lid under water or on cold surfaces.
This may cause lid to crack.
9
Stainless Steel Cooking Surface
The Sunbeam stainless steel cooking surface
is manufactured from high quality stainless
steel. Stainless steel is hygienic, easy to
care for and extremely durable. To keep your
stainless steel cooking surface looking good
and to achieve the best results, follow these
simple instructions:
Before the first use: ‘Season’ the cooking
surface by applying a thin coat of cooking oil
and rub in with paper towelling. This will also
be necessary after cleaning in a dishwasher.
Use sufficient oil when sautéeing, pan frying
and roasting to prevent food sticking. Two to
three tablespoons is generally sufficient.
Do not use high temperatures to brown and
seal meat as this will cause it to stick. Use
settings 7-8. Food such as steaks, rissoles
and roasts will also stick if turned before
completely browned and sealed.
Note: To prevent food from sticking, maintain
low temperatures, ensure sufficient juices are
in the frypan and season the frypan before
and after each use. This will decrease as the
frypan receives continual use.
Do not use metal utensils: Continued use of
knives, forks or spoons will eventually start to
mark the stainless steel cooking surface. Use
plastic or wooden utensils.
10
To clean after each use: Wash in hot soapy
water. Rinse and dry thoroughly. To remove
cooked-on food, fill the pan with hot water
and allow to stand for a few minutes. This
will soften the food, making cleaning easier.
Note: Never fill a hot frypan with cold water.
Do not use abrasives or scourers: Avoid using
harsh abrasive cleaners or scouring pads as
continued use will scratch the highly polished
surface and make subsequent cleaning more
difficult.
Removing burnt-on food: Fill the pan with
20mm (1”) water, cover and simmer for five
minutes or until the burnt-on food softens
and lifts. For stubborn burnt-on food, leave
the frypan to soak overnight, after first
simmering as described. Then wash and dry
thoroughly.
Removing stubborn stains: These can be
removed by using any brand of stainless
steel powder cleaner. Rubbing a paste of
bicarbonate of soda and water into the
stained area is also helpful in removing
stains. Wash thoroughly.
Note: Re-season the cooking surface after
using any of the above methods to remove
stains.
Dishwasher-safe: Your stainless steel frypan
is completely dishwasher-safe. The heating
element is totally sealed so it is safe to fully
immerse in water.
Cooking with your Sunbeam
Cookware
Baking
Your frypan can be used for baking cakes,
with deliciously moist results.
1.Preheat the frypan to setting 10,
with the lid on.
2.Elevate the cake pan or tray from the base
of the frypan using a small wire rack.
Cooking times will be longer than those of
a conventional oven. Use the recipes in this
book as a guide to the cooking times for your
own recipes.
Basting
The pan tilt lever makes basting easy as it
allows the juices to drain to one side of the
pan. Reduce the temperature to prevent any
fat and juices spattering. Position the pan tilt
lever and spoon the juices over the food as
desired.
Boiling
Pasta
1.Bring 6 cups of water to the boil on
setting 5. Add 1-2 tablespoons of oil to
stop the pasta from sticking together.
2.Add 250g (1½ cups) of pasta and cook
until tender, for approximately 8-12
minutes.
3.Reduce to a lower setting if the water boils
too rapidly.
Note: Cooking times will vary with different
types of pasta.
Rice
1.Bring 6 cups of water to the boil on
setting 5. Add 200g (1 cup) of rice and
position the lid.
2.Cook until tender, approximately 10-12
minutes and then drain.
3.Reduce to a lower setting if the water boils
too rapidly. Stir occasionally so that the
rice does not stick.
Browning and Sealing Meat
It is necessary to brown and seal meat in
many recipes. Meat retains its juices and the
flavours develop after browning and sealing.
This also prevents it from sticking when
baking or roasting. Preferably use meat that
is at room temperature, as this reduces the
cooking time.
1.Preheat the frypan to settings 7-8. Add
approximately 1-2 tablespoons of oil.
2.Brown meat on all sides, with the lid off.
3.After sealing, reduce the temperature to
settings 4-5 and replace the lid until the
meat is cooked as desired. Steaks should
only require turning once or twice.
11
Cooking with your Sunbeam cookware continued
Frying
The frypan is ideal for shallow or dry frying.
Deep frying is not particularly suitable as
the frypan has shallow sides and a greater
surface area, which results in heat loss and
the possible overflow of oil.
Pan Frying: Suitable for eggs, omelettes,
bacon, sausages, steaks and chicken pieces.
Preheat to settings 5-6 with a little oil to add
flavour.
Shallow Frying: Suitable for vegetable pieces
e.g roast pumpkin and potato, and crumbed
food. Preheat on settings 6-8 with sufficient
oil so that the food is half immersed. Cook
food with the lid off.
Sautéeing: Preheat on settings 5-6 with a
little oil to add flavour.
Stir Frying: Food is cooked quickly, over a
high heat and vegetables retain their flavour
and crispness. For best results and even
cooking, cut food into even sized, smaller
pieces.
1.Preheat the frypan on settings 7-8 with a
little oil.
2.Slice meat into strips. Coat meat in a little
oil and stir-fry in batches until browned.
This prevents meat from stewing.
3.Add vegetables and seasoning, stirring
continuously. Vegetables which take longer
to cook, such as carrots, should be cooked
first, adding the other ingredients later.
Cook until the vegetables are still slightly
crisp. Return the meat back into the pan
when the vegetables are almost cooked.
The lid can be in position in the last few
minutes of cooking.
12
Roasting
Meat and poultry: The frypan is ideal for
roasting meat and poultry, as the meat
retains the flavour and juices.
1.Preheat the frypan on settings 7-8. Use
only a small amount of oil for less fatty
joints and no oil for fattier joints of meat.
2.Brown and seal the meat on all sides and
position the lid.
3.After browning, turn the dial to settings 45 to cook the meat as desired. Turn meat
occasionally during cooking to ensure even
cooking.
4.Remove meat from pan and cover with
foil. Allow meat to rest for 5-10 minutes,
meanwhile you can make a gravy from the
juices in the frypan.
Vegetables: Cut into even sized pieces. Add
to the frypan 45-60 minutes before serving.
For crisper vegetables, remove the meat and
increase the heat for the last few minutes of
cooking.
Roasting Times:
Note: These times are for well done. Reduce
the times to suit personal taste.
PORK: 30-40 minutes per 500g after browning.
VEAL: 30-40 minutes per 500g after browning.
LAMB: 25-30 minutes per 500g after
browning.
CHICKEN: 30-35 minutes per 500g after browning.
Recipes
Minestrone
Serves 4-6
1 tablespoon olive oil
1 onion, diced finely
2 cloves garlic, crushed
1 carrot, diced finely
2 trimmed celery stalks, diced finely
1 bacon bone (200g)
800g can chopped tomatoes
6 cups water
1 cup finely chopped savoy cabbage
2 small zucchini, diced
1 x 400g can cannellini beans, rinsed and
drained
¾ cup small pasta
sea salt and freshly ground black pepper
shaved parmesan, to serve
1.Heat oil in frypan on setting 5. Cook onion
and garlic until translucent. Add carrot,
celery and bacon bone and cook, stirring
occasionally for 5 minutes.
2.Add the chopped tomatoes and water and
bring the soup to the boil. Reduce heat
to setting 2-3 and cook, covered for 45
minutes.
3.Add the cabbage, zucchini, beans, pasta
and season with salt and pepper. Cook,
covered for a further 20-25 minutes. Add
a little extra water if necessary.
4.Serve hot with shavings of parmesan on
top.
Pumpkin Soup
Serves 4
1.5 kg pumpkin
2 tablespoons olive oil
20g butter
1 large onion, chopped
1 litre low salt chicken stock
Sea salt & freshly ground black pepper
1
/3 cup cream or sour cream to serve (optional)
1.Remove skin and seeds from pumpkin and
cut into even sized chunks.
2.Heat oil and butter in frypan on setting
4. Add onions and cook, stirring, until the
onions have softened. Add pumpkin and
cook for a further 3-4 minutes, stirring
occasionally.
3.Add the stock and bring to the boil.
Reduce heat to setting 3 and cook,
covered for 30 minutes. Cool before
blending.
4.Blend or process soup until smooth.
Return pureed soup to frypan.
5.Reheat until soup is hot. Serve with cream
and extra ground pepper if desired.
13
Recipes continued
Corn Fritters
Makes about 20
1 cup self raising flour
½ teaspoon bicarbonate of soda
½ teaspoon sweet paprika
½ teaspoon ground coriander
2
/3 cup buttermilk
2 eggs
2 cups corn kernels
1 small red capsicum, diced finely
3 small green onions, sliced
2 tablespoons chopped fresh parsley
1 tablespoon chopped fresh coriander
Sea salt
Freshly ground black pepper
Olive oil
Tomato chilli jam, to serve
Gyoza (Japanese Dumplings) Makes about 50
150g pork mince
150g chicken mince
2 tablespoons kecap manis (sweet soy)
1 teaspoon sugar
1 tablespoon mirin
1 egg
2 teaspoons sesame oil
2½ cups Chinese cabbage, shredded finely
1
/3 cup finely chopped water chestnuts
4 green onions, chopped finely
50 sheets gow gee wrappers
vegetable oil for pan frying
1.Combine flour, soda, paprika in a bowl;
whisk through buttermilk and eggs to form
a batter.
2.Combine corn, capsicum, green onions,
parsley and coriander in a large bowl. Stir
through the batter; season with salt and
pepper.
3.Heat frypan on setting 7. Drizzle a
little olive oil in frypan and spoon
tablespoonfuls of mixture into pan. Cook
fritters for 2-3 minutes on each side until
golden.
4.Serve with tomato chilli jam if desired.
1.Combine all ingredients in a bowl and mix
well.
2.Lay several sheets of gow gee wrappers out
onto a bench top. Have a tray lined with
baking paper ready to place the prepared
gyoza onto.
3.Place a rounded teaspoon of filling into
the centre of the wrapper. Moisten the
edges with a little water. Fold the wrapper
over the filling but before sealing carefully
pleat on one side. The pastry will look
plain on one side but have a small pleat
on the other. Gently press the pastry to
seal. Repeat with remaining wrappers.
4.Heat frypan on setting 6. Heat 1
tablespoon of oil in the frying pan and
place the dumplings, in batches, into
the pan, pleat side up. Cook until the
dumplings are golden on the bottom. Do
not turn. Carefully pour enough water in
the frying pan so that the dumplings are
half covered. Place the lid on the frying
pan and cook, covered for 1 minute.
Remove lid and cook, uncovered, until all
14
Dipping Sauce
2 tablespoons kecap manis
1 tablespoon black vinegar
Recipes continued
the water has evaporated. Remove from
pan, repeat with remaining dumplings.
Note: The water should be simmering
the whole time. If this does not happen
increase the heat.
5.Serve with dipping sauce.
Chilli Crab
Serves 4
6 raw blue swimmer crabs
3 green onions
2 tablespoons peanut oil
3 cloves garlic, chopped
1 large red chilli, chopped
3 teaspoons grated fresh ginger
¹/³ cup tomato sauce
¹/³ cup sweet chilli sauce – smooth paste
variety
1 tablespoon oyster sauce
1 tablespoon fish sauce
½ cup chicken stock
1 tablespoon grated palm sugar
Steamed jasmine rice, to serve
4.Reduce heat to setting 6 and add crabs.
Combine remaining ingredients and pour
over crabs. Stir crabs gently to coat then
cook, covered, stirring occasionally for
about 15 minutes or until the crabs have
gone a deep orange colour and are just
cooked through.
Tip: A good way to see if the crabs are
cooked is to check the joint on the large
nipper. When these have changed colour
your crabs should be cooked through.
5.Remove crabs from pan onto a large
serving platter and spoon over sauce from
pan. Sprinkle with sliced green onions.
6.Serve with steamed jasmine rice.
1.Remove flap from the undersides of crabs
then flip crab over. Place your thumb
under the shell between the two back legs
and slowly pull the shell away from the
body. Discard. Remove the feather like gills
and front feelers and discard. Carefully
rinse the crab if needed – do not put under
running water. Using a sharp knife cut the
body in half. Then cut between the smaller
legs to make 4 pieces. Crack the large
nippers with crab crackers; this will help
the heat get into the shell.
2.Slice green onions and separate the green
ends from the white; set aside.
3.Heat oil in frypan on setting 8. Add whites
of onions, garlic, chilli and ginger to pan
and cook, stirring, until fragrant.
15
Recipes continued
Spanish Paella
Serves 6-8
2 small raw blue swimmer crabs
8 large green prawns
8 small black mussels
3½ cups fish/chicken stock
1 teaspoon saffron threads
180g chorizo sausage, sliced
200g chicken thighs, halved
1 tablespoon extra virgin olive oil
1 medium onion, chopped finely
1 clove garlic, crushed
¼ teaspoon smoked paprika
1 x 400g canned tomatoes
1½ cups Arborio or Spanish rice
300g whole pipis, purged
½ cup frozen peas
1 small roasted red capsicum, sliced
1.Remove flap from the undersides of crabs
then flip crab over. Place your thumb
under the shell between the two back
legs and slowly pull the shell away from
the body. Discard. Remove the feather
like gills and front feelers and discard.
Carefully rinse the crab if needed – do
not put under running water. Using a
sharp knife cut the body in half. Then
cut between the smaller legs to make 4
pieces. Crack the large nippers with crab
crackers; this will help the heat get into
the shell.
2.Peel 4 of the prawns and devein. Leave
the other 4 whole for presentation. Clean
and de-beard mussels.
3.Place stock and saffron in a saucepan
and heat gently to infuse. Cover and keep
warm.
16
4.Heat the frypan on setting 8. Cook chorizo
in pan until golden; drain on paper
towelling.
5.In same pan cook the chicken thighs
and whole prawns in chorizo oil until just
cooked through; set aside.
6.Reduce heat to setting 6. Add extra virgin
olive oil, if needed, and cook onions and
garlic until the onions are translucent; add
paprika and cook for a further 30 seconds.
7.Add tomatoes and cook on setting 6 for
2-3 minutes. Add rice and cook, stirring
until well coated. Add stock and stir to
combine. Reduce heat to setting 3 and
cook, covered for 10 minutes.
8.After 10 minutes check rice, add a little
water if the rice looks too dry. Cook,
covered, for a further 5 minutes if the rice
is still quite hard.
9.Arrange raw seafood, chicken, chorizo,
whole prawns, peas, roasted capsicum,
over rice and cook, covered for a further 5
minutes or until the seafood is cooked and
the rice is tender. Turn heat off and keep
covered for 5 minutes before serving.
Recipes continued
Spicy Dry Lamb Curry
Serves 4-6
2 tablespoons vegetable oil
1kg lamb forequarter chops, trimmed of fat
5-6 fresh curry leaves
1 teaspoon black mustard seeds
1 small onion, roughly chopped
2 cloves garlic, crushed
2 tablespoons grated fresh ginger
1 tablespoon curry paste
2 teaspoons tandoori paste
2 teaspoons ground cumin
1 teaspoon garam masala
2 teaspoons chilli powder
2 tablespoons lemon juice
1 cup water
1 cup roughly chopped fresh coriander
1.Heat oil in a large frypan, cook lamb in
batches until brown. Set aside.
2.To the same pan, fry mustard seeds and
curry leaves until seeds begin to pop. Add
onion and garlic and cook until onion is
soft. Add dry spices and fry 1-2 minutes
until spices are fragrant.
3.Add lamb and remaining ingredients,
except coriander to the frypan. Cover and
cook on setting 4 for about 1 – 1 ½ hours
stirring occasionally.
4.Season to taste and sprinkle with fresh
coriander. Serve with steamed basmati
rice.
Family Beef Casserole with Semi
Dried Tomatoes
Serves 6-8
2 kg chuck steak, cut into 2cm cubes
½ cup flour
3 tablespoons olive oil
2 bunches of spring onion, stalk trimmed,
peeled and left whole
2 cloves garlic, crushed
1
/3 cup tomato paste
½ cup red wine
3 carrots, diced
3 celery stalks, sliced
1 cup beef stock
1 cup water
2 tablespoons fresh thyme, chopped
2 bay leaves
1 cup semi dried tomatoes
Salt and freshly ground black pepper
1.Dust beef in flour, shaking off excess
flour. Heat oil in frypan and cook beef in
batches until brown. Set aside.
2.To the same pan, add onion and garlic,
cook stirring for 1-2 minutes, or until
onion starts to colour. Stir through tomato
paste and cook for 1 minute.
3.Add wine and allow alcohol to evaporate
and liquid to reduce slightly. About 2
minutes.
4.Place beef, vegetables, stock, water,
thyme and bay leaves in frypan. Cover
and cook on setting 4 for 1 hour stirring
occasionally. After 1 hour add tomatoes
and cook for a further 20-30 minutes or
until beef is tender.
5.Season to taste and serve hot with mashed
potatoes or rice.
17
Recipes continued
Pan Fried Chicken Breast with
Salsa Verde
Serves 6
1-2 tablespoons olive oil
6 chicken breast fillets
Salsa Verde
1 cup flat leaf parsley
½ cup dill
½ cup mint leaves
2 cloves garlic
1 tablespoon small capers
1 tablespoon grated lemon rind
Sea salt and freshly ground black pepper
¾ cup extra virgin olive oil
1.Heat frypan on setting 7. Add oil and cook
chicken, uncovered, until browned on both
sides and cooked through. Remove from
heat and serve with Salsa Verde.
2.To make the Salsa Verde, blend or process
all ingredients until a chunky sauce
texture is achieved.
Tip: Salsa Verde also goes very well with
pan fried fish fillets.
18
Pan Fried Fish with Garlic
and Lemon
Serves 4
4 (800g) white fish fillets
2 tablespoons olive oil
2 cloves garlic, crushed
2 tablespoons lemon juice
2 eschalots, minced
¼ cup shredded fresh basil leaves
Sea salt
Freshly ground black pepper
Steamed new potatoes or mash, to serve
Steamed broccolini, to serve
1.Place fish in a shallow baking dish. In
a small bowl combine the garlic, lemon
juice, eschalots, basil, salt and pepper and
mix well.
2.Pour marinade over fish and allow to sit at
room temperature for 20 minutes.
3.Heat frypan on setting 9. Add oil and cook
fish for 3-5 minutes on both sides until
just cooked through.
Note: Cooking time will vary depending on
the thickness of each fillet.
4.Serve fish with potatoes and steamed
broccolini.
Recipes continued
Beef Stroganoff
Serves 4-6
2 tablespoons olive oil
2 tablespoons flour
1 kg beef strips
2 small cloves garlic, crushed
¼ cup tomato paste
1 cup beef stock
250g mushrooms, sliced
150ml sour cream
Salt and freshly ground black pepper
1.Dust beef in flour, shaking off excess flour.
Heat oil in frypan on setting 6; cook beef
in batches until browned.
2.Return all beef to pan and add remaining
ingredients, except sour cream. Cover and
cook on setting 4 for about 45 minutes or
until the beef is tender.
3.Stir through sour cream. Season with salt
and pepper. Serve with buttered noodles.
Steamed Salmon Parcels
Serves 4
4 x 180g Atlantic salmon fillets
1 stalk lemon grass, white only, chopped
finely
4 eschalots, sliced thinly
¹/³ cup coriander leaves
1 large red chilli, seeded and sliced
2 cloves garlic, crushed
2 teaspoons grated fresh ginger
½ cup coconut milk
Sea salt
Freshly ground black pepper
1 tablespoon peanut oil
4-6 baby bok choy, quartered
Steamed jasmine rice, to serve
1.Preheat frypan on setting 8 with the lid on
for 5 minutes.
2.Combine the lemon grass, eschalots,
coriander, chilli, garlic, ginger, coconut
milk and salt and pepper in a bowl and
mix well.
3.Place each piece of salmon on 4 individual
pieces of aluminium foil. Divide the
coconut mixture evenly over the tops of
the salmon. Fold each piece of foil up to
make 4 sealed parcels.
4.Place parcels in frypan and cook, covered,
on setting 6 for about 12-15 minutes or
until cooked as desired. Remove from
heat.
5.Quickly increase heat in frypan and heat
oil; toss bok choy for 1-2 minutes until
wilted; season with salt and pepper.
6.Serve salmon with bok choy and steamed
jasmine rice.
19
Recipes continued
Dhal
Serves 4
1 tablespoon vegetable oil
1 medium onion, finely chopped
1 clove garlic, crushed
3 teaspoons ground cumin
½ teaspoon cumin seeds
1 teaspoon black mustard seeds
2 tablespoons tomato paste
2 cups red lentils, rinsed and drained
2 cups vegetable stock
1 litre water
400g can chopped tomatoes
3 baby eggplants, chopped coarsely
4 hard boiled eggs, optional
salt to taste
1.Heat oil in frypan on setting 4. Add onion
and garlic and cook, stirring, for 2-3
minutes or until onion is soft.
2.Add dried spices and cook a further 1
minute, or until spices are fragrant. Stir
through tomato paste and cook for 2
minutes.
3.Increase heat to setting 9; add lentils,
stock and water and bring mixture to the
boil. Reduce heat to setting 3 and cook,
uncovered, stirring occasionally, until the
mixture thickens slightly.
4.Add the tomatoes, and eggplant and
cook for a further 10 minutes then cook,
covered, for another 10 minutes or until
the dhal has thickened and the eggplant
and potato is soft.
5.Add whole peeled eggs and stir gently
until heated through.
6.Season to taste.
20
Penne Boscaiola
6 rashers bacon
200g sliced button mushrooms
²/³ cup white wine
300ml cream
Freshly ground black pepper
500g penne
shaved parmesan, to serve
Serves 4
1.Have a large pot of boiling water ready.
2.Remove rind from bacon and slice into
5mm pieces.
3.Heat frypan on setting 8. Cook bacon until
golden. Add mushrooms and stir through.
4.Add wine and cook, stirring, until the wine
has reduced by half. Add cream and cook,
stirring occasionally, until the sauce has
thickened slightly.
5.Cook pasta until just tender, drain and add
to sauce and stir through. Season with salt
and pepper and serve immediately.
Recipes continued
Lamb Tagine
Serves 4-6
2 tablespoons olive oil
8 lamb shanks, fat trimmed
1 large onion, sliced thinly
2 cloves garlic, crushed
1½ tablespoons Moroccan dried spice mix
1 tablespoon tomato paste
1 x 400g can chopped peeled tomatoes
1 cup chicken stock
1 cinnamon stick
3 cardamom pods, cracked
Salt and pepper to taste
1 x 400g tin chickpeas, drained and rinsed
1 large sweet potato, peeled and chopped
into 2 cm dice
1 cup fresh coriander, roughly chopped
Cous cous, to serve
Matt’s Meatballs
Serves 6-8
1.2kg lean mince
2
/3 cup packaged breadcrumbs
3 eggs
2 tablespoons Worcestershire sauce
2 teaspoons dried sweet basil
1 teaspoon dried oregano
2 cloves garlic, crushed
salt and pepper
2 tablespoons olive oil
1.Heat oil in frypan on setting 8. Cook lamb
shanks in batches for 3-5 minutes or until
evenly brown all over; remove from heat.
2.Reduce heat to setting 6, and add onion
and garlic to frypan and cook for 5
minutes, or until onion has softened and
coloured. Add spice mix and cook until
fragrant. Stir through tomato paste.
3.Return the lamb shanks to the frypan
with tomatoes, stock, cinnamon, and
cardamom. Cover and cook, on setting
3, turning and stirring occasionally for 2
hours. After 2 hours add chickpeas, sweet
potato and cook, covered until the sweet
potato is tender.
4.Adjust seasoning and stir through chopped
coriander, serve with cous cous.
1.Combine meatball ingredients; roll into
balls slightly smaller than golf balls.
2.Heat half of the oil in frypan on setting 6.
Cook meatballs, in batches, until browned
all over. Remove from pan.
3.Heat remaining oil in frypan on setting
5; cook onions and garlic, stirring, until
the onions are translucent. Add tomato
paste and cook for about 1-2 minutes
or until fragrant. Add capsicums; cook,
stirring occasionally, until tender. Add
sauce and cook for 10 minutes. Reduce
heat to setting 4; add meatballs and cook,
covered, for a further 10 minutes or until
the meatballs are cooked through.
Serve in long crusty bread rolls as a sub
sandwich or with pasta.
Sauce
1 onion, sliced
2 cloves garlic, crushed
2 tablespoons tomato paste
1 green capsicum, sliced
1 red capsicum, sliced
1 litre bottled tomato sauce
21
Recipes continued
Roast Chicken with Stuffing
1.2kg whole fresh chicken
sea salt
freshly ground black pepper
Serves 4
Stuffing
1 onion, chopped finely
2 teaspoons olive oil
3 cups fresh bread crumbs
30g softened butter
1 teaspoon grated lemon rind
2 tablespoons chopped fresh parsley
2 teaspoons chopped fresh thyme
1.Wash and clean chicken thoroughly. Pat
dry with paper towelling.
2.To make stuffing, cook onion in oil until
softened. Add to remaining stuffing
ingredients and mix well.
3.Place the stuffing inside the cavity of the
chicken. Tuck the wings back and tie the
base of the chicken with cooking string
so that the legs are crossed and securely
positioned.
4.Preheat frypan on setting 7. Brush chicken
with a little oil and salt and pepper.
5.Brown chicken on all sides; reduce heat to
setting 5 and cook, covered, with the vent
open, for about 1½ hours or until cooked
through.
Tip: If cooking roast vegetables, place in
frying pan ¾ to 1 hour before the end of
cooking.
22
Mustard Seed Potatoes
1.5kg baby new potatoes
2 tablespoons extra virgin olive oil
2 tablespoons black mustard seeds
1-2 teaspoons sea salt flakes
Serves 8
1.Place potatoes into frypan and pour
enough water in to cover. Cook potatoes,
covered, on Setting 10 until tender. Drain
well for 10 minutes.
2.Heat frypan on Setting 8, add potatoes,
mustard seeds and salt; stir to coat.
Place lid on potatoes and cook, stirring
occasionally, until the potatoes are golden.
Tip: Keep the lid on during cooking as the
mustard seeds pop!
Recipes continued
Individual Sticky Date Puddings
200g coarsely chopped dried dates
1 teaspoon bicarbonate of soda
1¼ cups boiling water
60ml olive oil
1 cup firmly packed brown sugar
1 cup self raising flour
¼ teaspoon mixed spice
2 eggs
Serves 8
Butterscotch sauce
160g butter
2
/3 cup firmly packed brown sugar
1 cup (250ml) thickened cream
1.Preheat frypan on setting 4 with the lid
on. Grease 8 individual 1-cup capacity
metal moulds.
2.Place dates, soda and boiling water into a
blender or food processor. Place lid on and
allow the mixture to stand for 5 minutes.
3.Add oil and sugar and pulse 3 times.
4.Add remaining ingredients and pulse
mixture until just combined. Scrape down
sides of bowl if necessary. Do not over
process.
5.Pour mixture into prepared moulds. Place
moulds in frypan and carefully pour
enough boiling water to come half way up
the sides of the moulds. Cook for about 25
minutes or until cooked when tested with
a wooden skewer. Carefully remove from
frypan; stand for 5 minutes before turning
out onto a wire rack.
6.Serve pudding with butterscotch sauce. To
make sauce, heat all ingredients in a small
saucepan over a low heat until combined.
Tip: Puddings can be made in advance and
then rewarmed in a microwave.
Crème Caramel
1 cup sugar
½ cup water
1
/3 cup caster sugar
3 eggs
2 egg yolks
250ml cream
250ml milk
1 vanilla bean, seeds scraped
Serves 6
1.Combine sugar and water in a small
saucepan. Stir over a low heat until the
sugar has dissolved. Increase heat; boil
without stirring, until the toffee turns a
golden colour.
2.Remove from heat, once the bubbles have
subsided, pour into 6 individual 1-cup
capacity metal moulds. Allow to cool.
3.Beat eggs and sugar until light and
creamy.
4.Heat milk, cream, vanilla bean and seeds
until almost boiling. Whisk hot milk into
egg mixture. Pour mixture through a
strainer.
5.Pour mixture into moulds. Place moulds
into frypan. Pour enough boiling hot
water to come halfway up the sides of the
moulds.
6.Cook, covered, on setting 6 until the
custard is set.
Note: Be careful when removing lid to
check custard that no water from the lid
goes into the moulds.
23
Recipes continued
Buttermilk Pancakes
1 cup sifted self raising flour
2 tablespoons sugar
½ teaspoon bicarbonate of soda
1 egg, lightly beaten
2 tablespoons vegetable oil
1 cup buttermilk
60g butter
Makes 8
1.Sift dry ingredients into a large bowl. Make
a well in the centre.
2.Whisk the combined wet ingredients into
the dry ingredients until smooth.
3.Heat frypan on setting 6. Melt some of the
butter and spoon ¼ cupfuls of mixture at
a time into the frypan. Turn the pancakes
once the bottom is golden and the tops
starts to bubble. Cook until the underside
is golden.
4.Serve with extra butter and maple syrup.
24
Pikelets
1 egg
¼ cup sugar
1 cup self raising flour
¾ cup milk
pinch salt
butter for frying
Makes approx 12
1.Beat egg and sugar with an electric mixer
until light and creamy.
2.Add flour, milk and salt and beat until
smooth.
3.Heat frypan on setting 8. Melt a little
butter in frypan and wipe away any excess
with paper towelling.
4.Spoon heaped spoonfuls of batter in frypan
and cook on both sides until golden.
5.Serve with butter, jam, cream or chocolate
hazelnut spread.
For savoury pikelets: Reduce sugar to 2
tablespoons and stir through chopped
fresh herbs of choice. Top with slices of
prosciutto, goats cheese and rocket or
cream cheese, smoked salmon and capers.
12 Month Replacement Guarantee
In the unlikely event that this appliance develops any malfunction
within 12 months of purchase (3 months commercial use) due to
faulty materials or manufacture, we will replace it for you
free of charge.
Should you experience any difficulties with
your appliance, please phone our customer
service line for advice on 1300 881 861 in
Australia, or 0800 786 232 in New Zealand.
Alternatively, you can send a written claim
to Sunbeam at the address listed below.
On receipt of your claim, Sunbeam will
seek to resolve your difficulties or, if the
appliance is defective, advise you on how
to obtain a replacement or refund.
Your Sunbeam 12 Month Replacement
Guarantee naturally does not cover misuse
or negligent handling and normal wear and
tear.
Similarly your 12 Month Replacement
Guarantee does not cover freight or any other
costs incurred in making a claim. Please
retain your receipt as proof of purchase.
The benefits given to you by this guarantee
are in addition to your other rights and
remedies under any laws which relate to the
appliance.
Our goods come with guarantees that cannot
be excluded under the Australian Consumer
Law and under the New Zealand Consumer
Guarantees Act.
In Australia you are entitled to a
replacement or refund for a major failure and
for compensation for any other reasonably
foreseeable loss or damage. You are also
entitled to have the goods repaired or
replaced if the goods fail to be of acceptable
quality and the failure does not amount to
a major failure.
Should your appliance require repair or
service after the guarantee period, contact
your nearest Sunbeam service centre.
For a complete list of Sunbeam’s authorised
service centres visit our website or call:
Australia
www.sunbeam.com.au
1300 881 861
Units 5 & 6, 13 Lord Street
Botany NSW 2019 Australia
New Zealand
www.sunbeam.co.nz
0800 786 232
26 Vestey Drive, Mt Wellington
Auckland, New Zealand
Need help with your appliance?
Contact our customer service team or visit
our website for information and tips on
getting the most from your appliance.
In Australia
Visit www.sunbeam.com.au
Or call 1300 881 861
In New Zealand
Visit www.sunbeam.co.nz
Or call 0800 786 232
is a registered trademark.
‘Ellise’ is a trademark of Sunbeam Corporation.
Made in China.
Due to minor changes in design or otherwise,
the product may differ from the one shown in this leaflet.
© Copyright. Sunbeam Corporation Limited 2011.
ABN 45 000 006 771
Units 5 & 6, 13 Lord Street
Botany NSW 2019 Australia
Unit 3, Building D
26 Vestey Drive
Mt Wellington Auckland
New Zealand
Sunbeam Corporation is a division of GUD Holdings Ltd.
8/11