1
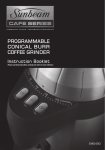
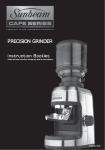
CONICAL BURR
COFFEE GRINDER II
EM0500
EM0490
Heading
2
Contents
Sunbeam’s Safety Precautions
2
Congratulations3
Features of your Cafe Series® Conical Burr
Coffee Grinder II
4
Functions of your Cafe Series Conical Burr
Coffee Grinder II
6
®
Operating your Cafe Series® Conical Burr
Coffee Grinder II
8
Adjusting the Grind Setting
11
Recalibration Guide
13
Care and Cleaning
16
Important instructions – retain for
future use.
Sunbeam’s Safety Precautions
SAFETY PRECAUTIONS FOR YOUR SUNBEAM
COFFEE GRINDER
• Check the hopper for the presence of foreign
objects before using.
• Always operate the grinder with the bean
hopper properly inserted in the grinder.
• Do not place your hand in or near the burrs
while the grinder is in operation.
• Always place the unit on a flat, level surface.
Sunbeam is very safety conscious when
designing and manufacturing consumer products,
but it is essential that the product user also exercise
care when using an electrical appliance. Listed
below are precautions which are essential for the
safe use of an electrical appliance:
• Read carefully and save all the instructions
provided with an appliance.
• Always turn the power off at the power outlet
before you insert or remove a plug. Remove by
grasping the plug - do not pull on the cord.
• Turn the power off and remove the plug when the
appliance is not in use and before cleaning.
• Do not use your appliance with an extension cord
unless this cord has been checked and tested by
a qualified technician or service person.
• Always use your appliance from a power outlet of
the voltage (A.C. only) marked on the appliance.
• This appliance is not intended for use by persons
(including children) with reduced physical,
sensory or mental capabilities, or lack of
experience and knowledge, unless they have been
given supervision or instruction concerning use
of the appliance by a person responsible for their
safety.
• Children should be supervised to ensure that they
do not play with the appliance.
• The temperature of accessible surfaces may be
high when the appliance is operating.
• Never leave an appliance unattended while
in use.
• Switch off and unplug at power point before
cleaning.
• Do not attempt to re-grind ground coffee.
• Switch off the appliance and disconnect from
power supply before touching any part of the
grinder that moves during use.
• Do not use an appliance for any purpose
other than its intended use.
• Do not place an appliance on or near a hot gas
flame, electric element or on a heated oven.
• Do not place on top of any other appliance.
• Do not let the power cord of an appliance hang
over the edge of a table or bench top or touch any
hot surface.
• Do not operate any electrical appliance with a
damaged cord or after the appliance has been
damaged in any manner. If damage is suspected,
return the appliance to the nearest Sunbeam
Appointed Service Centre for examination,
repair or adjustment.
• For additional protection, Sunbeam recommend
the use of a residual current device (RCD with
a tripping current not exceeding 30mA in
the electrical circuit supplying power to your
appliances.
• Do not immerse the appliance in water
or any other liquid unless recommended.
• Appliances are not intended to be operated
by means of an external timer or separate remote
control system.
• This appliance is intended to be used in
household and similar applications such as: staff
kitchen areas in shops, offices and other working
environments; farm houses; by clients in hotels,
motels and other residential type environments;
bed and breakfast type environments.
If you have any concerns regarding the performance and use of your appliance,
please visit www.sunbeam.com.au or contact Sunbeam Customer Care on 1300 881 861
or via email on [email protected]
Ensure the above safety precautions are understood.
2
Congratulations
Congratulations on the purchase of your
Sunbeam Cafe Series® Conical Burr Coffee
Grinder.
The Sunbeam Cafe Series® delivers quality,
style and superior performance capturing
the essence of the commercial kitchen.
Inspired by heavy-duty equipment found in
restaurants, cafes and bars, the Sunbeam
Cafe Series® is built to last. It brings together
a range of appliances designed to expertly
create authentic café food and beverages at
home.
Uncompromising blends of stainless steel,
brass and die-cast alloy characterise the
range. This combined with advanced
technology and functional design, guarantee
the performance, that each product will
surpass expectations.
When making coffee regardless of the
brewing method the flavour of the resulting
brew depends largely on the quality,
freshness and roast of the coffee being used.
Other factors including the purity of the brew
water, condition of the grinder and the actual
design of the burrs within the grinder can
also affect the taste of the final cup.
Another advantage of the conical burr design
is its slow rotating operation. This combined
with a gear-driven motor, minimises heat
transfer to the burrs and thus protects the
aromatic profile of the coffee and ultimately
enhances the quality of the resulting brew.
The Sunbeam Cafe Series® Conical Burr
Coffee Grinder is designed with quality
die-cast metal components and includes
many features that make grinding coffee at
home easy so you can enjoy a lovely fresh
cup of coffee every time. We hope you enjoy
your new coffee grinder and should you need
any further assistance please don’t hesitate
to contact Sunbeam Customer Care on
Australia
1300 881 861
New Zealand
0800 786 232
The Sunbeam Cafe Series® grinder features
tool hardened steel conical burrs for extra
long life. Inherent from the conical burr
design is homogenous grinding so the particle
size of the coffee is consistent and even. This
is especially important for espresso, if the
particle size of the coffee is uniform equal
amounts of the coffee’s aromatic profile will
be extracted. However if the particle size of
the coffee varies some particles will be overextracted and some will be under-extracted,
resulting in a poor tasting coffee.
3
Features of your Cafe Series®
Conical Burr Coffee Grinder
400g Bean hopper
The 400g capacity bean hopper has a hopper closure
arm for easy removal and preventing accidental spills. It
allows the user to transfer any un-used beans
to an ideal storage unit to preserve freshness.
Burr shield
Grind adjustment collar
Large and easy to use, the collar has a wide-range of
40 grind settings. The coffee maker can select a fine
grind to suit commercial espresso or adjust the setting
for other brewing styles – from Turkish to plunger.
With such precise settings the user controls the particle
size and ultimately the quality of the brew.
Group handle locator
In two sizes: for commercial sized group handles
and domestic sized group handles.
Ground coffee container
Preparation mat
Positioned under the grinding spout the preparation
mat is ideal for catching loose coffee grinds while filling
directly into the group handle. The mat can also be used
on the bench as a tamping pad.
Rubber feet
The non-slip rubber feet ensure the grinder remains
stable and prevents slipping on the bench top during use.
Commercial size
group handle locator
4
Domestic size
group handle locator
Conical burrs
The metal conical burr design achieves
excellent grind consistency and minimises
heat transfer to the coffee due to the slowly
rotating burrs.
Hopper closure arm
Grind delivery chamber
The grind delivery chamber is designed to
assist in delivering the ground coffee directly
into the group handle or coffee grind container.
Grind on demand button
Position the group handle into the group
handle locator, push against the button and
freshly ground coffee will flow directly into
the basket, pull the handle away and grinding
will stop.
Die-cast metal housing
Built to last, the heavy-duty die-cast metal
body encases a powerful motor, supported by
a 5 year guarantee and provides a stable base
for the grinder.
Operation switch
Switch to ‘On’ to grind continuous quantities
directly into the storage container, ‘Off’ to
stop or alternatively switch to ‘Auto’ for
grinding directly into the group handle.
Cord wrap
Cord wraps away for safe keeping when not
in use.
Conical burr cleaning brush
Strong bristles help sweep out grinds from
the burrs.
5
Functions of your Cafe Series®
Conical Burr Coffee Grinder II
No Mess Design
The new static reducing design makes light
work of the grinding process. So you can
enjoy the benefits of drinking a true espresso
made from freshly ground coffee beans
without the mess.
Slow speed grinding
The combination of a powerful gear-driven
motor and conical burr design delivers a slow
speed grinding process. This minimises the
heat transferred to the coffee, protecting its
aromatic profile.
Large removable base plate with tamping pad
The large size of the base plate is ideal for
catching any coffee grinds when filling the
coffee handle and is removable for easy
cleaning. Also fitted with a silicon tamping
pad for preparing the coffee handle this
protects both the spouts on the coffee handle
and the bench top surface.
6
Functions of your Cafe Series® Conical Burr Coffee Grinder II
(continued)
Grind on demand
As with commercial bar grinders, the ‘Auto’
function allows coffee beans to be freshly
ground directly into the group handle on
demand as required by the coffee maker,
providing complete dosing control and most
importantly a fresh grind without loss of
aroma and flavour.
7
Operating your Cafe Series®
Conical Burr Coffee Grinder II
Before using the coffee grinder, wipe the
base exterior with a damp cloth. Wash the
bean hopper, hopper lid and ground coffee
container in warm soapy water, then rinse
and dry.
Note: Do not immerse the burrs in water or
any other liquid.
4.Place the hopper lid onto the bean hopper.
5.Plug the power cord into a 230-240V AC
power outlet and switch the power on.
6.Select the grind by turning the grind
adjustment collar to the desired setting,
see figure 2.
Note: Do not place any parts of the coffee
grinder in the dishwasher.
1.Place the coffee grinder on a dry, level
surface.
2.To attach the bean hopper, position bean
hopper onto the top of the motor base,
push down and turn clockwise.
See figure 1.
Figure 2
Refer to the grind setting table on page 11 to
assist you in selecting the correct grind level
for the desired brewing method.
Figure 1
3.Fill the bean hopper with coffee beans.
Tip: Remember to keep the hopper full at
all times. Having an even weight bearing
down on the burrs is important to ensure a
consistent grind.
Note: This coffee grinder is intended to grind
whole coffee beans only.
8
Operating your Cafe Series® Conical Burr Coffee Grinder II
(continued)
For grinding continuous quantities
7.Remove the lid from the ground coffee
container and slide onto the preparation
mat. The coffee container will fit
comfortably into the domestic size group
handle locator, see figure 3.
For grinding into the group handle
10.Position the group handle into the group
handle locator, see figure 5.
Figure 5
Note: There are two group handle locators
provided, a smaller size to fit domestic
handles and a larger size for commercial
handles.
Figure 3
8.To grind coffee, flip the switch to the ‘On’
position, see figure 4.
Figure 4
9.When the desired amount of coffee has
been ground, flip the switch to the ‘Off’
position. Remove the coffee container and
scoop out the ground coffee.
11.Flip the switch to the ‘Auto’ position,
see figure 6.
Figure 6
12.To grind coffee, press the group handle
against the button located in the centre
of the group handle locator, see figure 7.
9
Operating your Cafe Series® Conical Burr Coffee Grinder II
(continued)
Figure 7
Figure 9
13.When the basket is full, pull the group
handle off the button. Collapse the coffee
in the basket by tapping it on the bench
and repeat until the desired amount of
coffee has been ground.
15.Wipe the edge of filter to remove any
coffee grinds.
Figure 8
14.When the desired amount has been
ground, tamp and twist the coffee grinds.
See figure 8.
10
Adjusting the Grind Setting
Grind setting table
SETTING
BREWING METHOD
0 – 7
Turkish
7 – 12
Espresso for Cafe Series®
12 – 20
Espresso for domestic machine with
dual wall filters
10 – 15
Stove Top
18 – 21
Aero Press
25 – 30
Automatic Perculator, Manual Pour Over
30+
Plunger
The wide-range of 40 grind settings allows
for precision adjustment. The coffee maker
has complete control of the particle size and
ultimately the quality of the resulting brew.
Some things to remember when using the
coffee grinder;
• The smaller the particle size the longer it
will take to grind.
• When using the finer settings the coffee
may become stuck, we recommend tapping
on the lid of the bean hopper to dislodge
any clumps of coffee blocking the flow.
• After long periods of using the finer
settings we recommend removing the
upper burr and sweeping away any residual
coffee to avoid clogging. See the Care
and Cleaning section on page 16 for more
details.
2.For drip filter coffee machines, a good
starting point is to use 8 grams (1 scoop)
of coffee for every 4 cups of brew water
as measured with the carafe. Finer grinds
usually require less coffee, but using too
fine a grind will result in a brew that is
bitter in flavour.
3.For those that prefer weaker coffee,
continue to use the recommended amount
of ground coffee and then dilute the
resulting brew with fresh hot water. Doing
this will maximise flavour and minimise
bitterness.
4.Coffee that is ground too fine for a
particular brewing process will result in
over-extraction and the coffee will taste
bitter. On the other hand, coffee that is too
coarse for a particular brewing method will
result in under-extraction and the coffee
will be thin and poor in flavour.
5.Once coffee is ground it quickly loses its
flavour and aroma. For the best results we
recommend you grind beans immediately
prior to brewing.
6.Buy fresh whole coffee beans weekly.
7.To retain freshness, store whole coffee
beans in an airtight container in a cool,
dark, dry place. It is not recommended
that you store beans in the grinder’s bean
hopper for a prolonged period.
8.To ensure the best results from the coffee
grinder clean the bean hopper and conical
burrs regularly.
Tips
1.Select the correct grind for the brewing
method you are using. 40 grind settings
are available to ensure precision
adjustment. Settings 1-7 deliver the finest
grinds, Settings 7-20 return medium grinds
and Settings 20-40 deliver the coarsest
grinds. It is important to experiment with
the grind settings to achieve the ideal brew
that best suits your palate.
11
Adjusting the Grind Setting (continued)
Always Remember
12
PROBLEM
DESCRIPTION
RESULT
OVEREXTRACTION
Over
development of
flavour particles
(sugars etc.)
Sharp,
burnt,
bitter
UNDEREXTRACTION
Under
development of
flavour particles
Thin,
watery,
weak
Recalibration Guide
What is recalibration?
Recalibration is the process of adjusting
the width between burrs which affects the
coarseness or fineness of the coffee grinds
that are produced. The further apart the burrs
are the coarser the final grind, comparatively
the closer the burrs are together the finer the
final grind will be.
How often do I need to recalibrate?
This will depend on how frequently you use
your Cafe Series® Conical Burr Grinder II.
Regular recalibration is key to achieving
consistent grinding results which is an
essential ingredient when brewing espresso.
This will help to ensure that your grinder
continues to produce the ideal coffee grinds
for your palate.
Step 1:
Ensure that the coffee grinder is switched
off and unplugged from the power outlet.
Turn the grinder so the back of the unit is
facing you. Ensure that the two arrows (one
on the motor base and one on the grind
adjustment collar) are aligned and that the
‘UNLOCK’ button is pushed out. Ensure the
hopper closure arm is closed. Remove the
bean hopper from the motor base by pushing
down on the hopper and whilst holding the
grind adjustment collar firmly turn in an anticlockwise direction See figure 10.
Figure 10
Step 2:
To remove the top burr press down on the
‘UNLOCK’ button and align the ‘ALIGN’
arrow on the motor base with the arrow on
the grind adjustment collar. See figure 11.
Figure 11
13
Recalibration Guide (continued)
Step 3:
To remove the top burr from the grind
adjustment collar lift it out using the wire
handle. See figure 12.
Step 5:
With one hand firmly grasp the body of the
top burr. To recalibrate the top burr hold onto
the wire handle and turn in a clockwise or
anti-clockwise direction. See figure 14.
Figure 12
Step 4:
When holding the top burr you will observe
that there are two screws that sit below the
outside rim. You will need to unscrew both
screws using a small sized flat head screw
driver. Unscrew and remove both screws and
set to one side. See figure 13.
Figure 14
NOTE: To achieve a FINER grind rotate
CLOCKWISE. To achieve a COARSER grind
rotate ANTI-CLOCKWISE.
NOTE: Only a slight movement in either
direction is required to achieve your perfect
grind.
Step 6:
Once you have adjusted the position of the
top burr, ensure that the notches in the top
burr and the screw holes are aligned before
screwing both screws into position.
See figure 15.
Figure 13
Figure 15
14
Recalibration Guide (continued)
Step 7:
If you have removed the grind adjustment
collar pick it up and ensure that the
downward pointing arrow on the grind
adjustment collar is aligned with the
“ALIGN” arrow on the motor base. This will
slot into place with ease.
Figure 18
Figure 16
Step 8:
Using the wire handle pick up the top burr
and turn in a clockwise direction until the
two arrows align, you should hear a clicking
noise. Using the wire handle, pick up the top
burr and place it back inside the motor base.
Turn it in a clock-wise direction until it falls
into position. After this is done you should
not be able to turn the top burr any further.
This means you have placed it into the
correct position. Push down on the top burr
to ensure it is secure. Ensure that you push
the wire handle to one side so that it lies flat
and NOT upright. See figure 18.
Step 9:
Pick up the bean hopper and slot it back
into the motor base. Look for the two slots
on either side of the bean hopper, these
correspond with matching grooves inside the
motor base. To lock the bean hopper into
place, hold the top of the bean hopper down
whilst holding the grind adjustment collar
and turn the hopper in a clockwise direction.
See figure 19. Turn the collar clockwise to
your preferred setting.
Figure 19
Figure 17
15
Care and Cleaning
Important Notes:
• Spots and marks on the surface of the
burrs are part of the hardening process.
These marks do not affect the performance
of the grinder or the taste of the coffee.
• Ensure the coffee grinder is switched off
and unplugged from the power outlet prior
to cleaning.
• Do not immerse the motor base of the
coffee grinder in water.
• Do not immerse any part of the burr
assembly in water or any other liquid.
• Do not place any parts of the coffee grinder
in the dishwasher.
• Do not use abrasive cleansers or scouring
pads.
Cleaning the motor base, bean hopper and
coffee container
Figure 20
1.Remove the bean hopper from the motor
base and store unused beans in an airtight
container to preserve their freshness, see
figure 20.
16
2.Wipe the motor base exterior with a damp
cloth and dry.
3.Wash the bean hopper and coffee container
in warm soapy water, then rinse and dry.
Cleaning the burrs
If the coffee grinder is used frequently (every
day), the burrs need to be cleaned every
three weeks to ensure best performance of
the coffee grinder. Regular cleaning helps
the burrs achieve consistent grinding results,
which is especially important when grinding
coffee for espresso.
1.Ensure the coffee grinder is switched off
and unplugged from the power outlet.
Remove the bean hopper from the motor
base, push down and turn anti-clockwise.
See figure 20.
2.To remove the top burr turn the grind
adjustment collar in an anti-clockwise
direction until it stops, see figure 21.
Figure 21
Note: The top burr can only be removed when
the graphic arrow on the grind adjustment
collar is aligned with the arrow on the motor
base.
Care and Cleaning (continued)
3.Press and hold down the ‘UNLOCK’ button
at the rear of the motor base and with the
other hand turn the grind adjustment collar
anti-clockwise until the graphic arrow on
the collar is aligned with the arrow on the
motor base, see figure 22.
Figure 24
6.Clean the bottom burr using the burrcleaning brush, see figure 25.
Figure 22
4.While holding down the ‘UNLOCK’
button lift out the top burr from the grind
adjustment collar using the handle, see
figure 23. Clean using the burr-cleaning
brush.
Figure 25
Figure 23
5.Release the ‘UNLOCK’ button, slightly pull
up the grind adjustment collar away from
the motor base and turn anti-clockwise
until it detaches from the motor base.
See figure 24.
7.Once both burrs are cleaned, return the
grind adjustment collar to its position in
the motor base. The arrow on the grind
adjustment collar is aligned with the
‘ALIGN’ arrow on the motor base. Turn
clockwise until the arrow on the grind
adjustment collar is aligned with ‘UNLOCK’
arrow and the ‘UNLOCK’ button pops
out. See figure 24.
8.With the grind adjustment collar in hand
align the arrow on the collar with the arrow
on the rear of the motor base, press down.
9.Replace the top burr back into position
in the grind adjustment collar and turn
clockwise to the desired grind setting.
17
Care and Cleaning (continued)
Replacing the burrs
To inquire about having the burrs replaced
contact Sunbeam Customer Care on
Australia
1300 881 861
New Zealand
0800 786 232
Figure 26
Adjusting the burrs for wear
The conical burrs are made of tool
hardened steel for extra long life. However
after prolonged use the burrs will require
adjustment to compensate for wear. A sign of
this is when the grinds are not as fine as they
used to be, check by rubbing some of the
grinds between two fingers or for espresso the
extraction will also show signs that the grind
needs adjusting.
18
Notes
The Sunbeam
5 Year Motor
Guarantee
Sunbeam has built its reputation
on manufacturing quality electrical
appliances. Our Cafe Series® Coffee
Grinders (EM0480, EM0500) are
constructed from the highest quality
materials. So much so, we guarantee our
Coffee Grinders' motors for five (5) years
against faulty materials or manufacture.
This guarantee is just another expression
of our confidence in the way we make
appliances at Sunbeam. In order to be
eligible for this guarantee, you must retain
your receipt as proof of purchase.
Sunbeam Customer Service on the number
listed below or send a written claim to
Sunbeam at the address listed below.
On receipt of your claim, Sunbeam
will advise you on how to obtain a
replacement motor if your motor is
defective. Alternatively, you can return the
Cafe Series® Coffee Grinders (EM0480,
EM0500) to any of Sunbeam’s authorised
service centres, together with your receipt.
The service centre will examine the motor
and if it is faulty or defective, the motor will
be replaced free of charge.
Your Cafe Series® Coffee Grinders
(EM0480, EM0500) are covered for the first
year against faulty material or manufacture
by the Sunbeam 12 Month Replacement
Guarantee. Should you experience any
difficulties with your appliance within
this 12 Month period, please phone our
customer service line for advice on 1300
881 861 in Australia, or 0800 786 232 in
New Zealand.
For a complete list of Sunbeam’s authorised
service centres visit our website or call:
The Sunbeam five (5) year motor guarantee
begins from date of purchase and extends
for four years beyond the 12 Month
Replacement Guarantee. It covers only
the motor, guaranteeing it against faulty
materials or manufacture. It does not cover
damage caused by accident, misuse or
being used in a manner not in accordance
with the Instruction Book. Similarly, this
motor guarantee does not cover freight or
any other costs incurred in making a claim.
If a fault should develop with the motor
after the period covered by the 12 Month
Replacement Guarantee, please call
Sunbeam Corporation Ltd.
Australia
www.sunbeam.com.au
1300 881 861
Units 5 & 6, 13 Lord Street
Botany NSW 2019 Australia
Sunbeam Corporation Ltd.
New Zealand
www.sunbeam.co.nz
0800 786 232
Level 6, Building 5, Central Park
660-670 Great South Road
Greenlane, Auckland
In Australia, the benefits given to you by
this guarantee are in addition to your other
rights and remedies under any laws which
relate to the appliance.
Our goods come with guarantees that
cannot be excluded under the Australian
Consumer Law and under the New Zealand
Consumer Guarantees Act. In Australia you
are entitled to a replacement or refund for
a major failure and for compensation for
any other reasonably foreseeable loss or
damage. You are also entitled to have the
goods repaired or replaced if the goods fail
to be of acceptable quality and the failure
does not amount to a major failure.
In New Zealand, depending on the nature
of the goods, you may have various rights
under the Consumer Guarantees Act 1993
and this 12 Month Replacement Guarantee
does not affect such rights. You agree that
this Act will not apply where you acquire, or
hold yourself out as acquiring, our goods for
the purposes of a business.
IMPORTANT NOTE
Sunbeam agrees to replace the motor in
the event of the motor developing a fault or
defect, within the four years after the
12 Month Replacement Guarantee.
As your Cafe Series® Coffee Grinders
(EM0480, EM0500) needs to be assessed
at a Sunbeam authorised service centre, it
will not be accepted through retail stores.
If using the Cafe Series® Coffee Grinders
(EM0480, EM0500) for commercial use this
motor guarantee is limited to 12 months
from the date of purchase.
12 Month Warranty
This Sunbeam product is covered by a 12 month replacement or repair
warranty, which is in addition to your rights under the Australian Consumer
Law (if your product was purchased in Australia) or New Zealand Consumer
Guarantees Act (if your product was purchased in New Zealand).
Should you experience any difficulties with your product
during the warranty period, please contact our customer
service line for advice on 1300 881 861 in Australia,
or 0800 786 232 in New Zealand.
Alternatively, you can send a written claim to Sunbeam
to:
Australia
Units 5 & 6, 13 Lord Street
Botany NSW 2019 Australia
New Zealand
Level 6, Building 5, Central Park
660-670 Great South Road
Greenlane, Auckland
Upon receipt of your claim, Sunbeam will seek to
resolve your difficulties or, if the product is defective,
advise you on how to obtain a replacement or refund.
To assist us in managing warranty claims, we
recommend you register your product as soon as
practicable after purchase by creating a MySunbeam
account on our website and send a copy of your original
receipt to Sunbeam.
In order to make a claim under our warranty, you must
have the original proof of purchase documentation for
the product and present it when requested .
Should your product develop any defect within
12 months of purchase because of faulty materials
or workmanship, we will replace or repair it, at our
discretion, free of charge. A product presented for repair
may be replaced by a refurbished product
of the same type rather than being repaired.
Refurbished parts may be used to repair the product.
Our replacement or repair warranty only applies
where a defect arises as a result of faulty material
or workmanship during the warranty period. Your
warranty does not cover misuse or negligent handling
(including damage caused by failing to use the product
in accordance with this instruction booklet), accidental
damage, or normal wear and tear.
Your warranty does not:
• cover freight or any other costs incurred in making a
claim, consumable items, accessories that by their
nature and limited lifespan require periodic renewal
(such as filters and seals) or any consequential loss
or damage; or
• cover damage caused by:
- power surges, power dips, voltage supply problems,
or use of the product on incorrect voltage;
- servicing or modification of the product other than by
Sunbeam or an authorised Sunbeam service centre;
- use of the product with other accessories,
attachments, product supplies, parts or devices
that do not conform to Sunbeam specifications; or
- exposure of the product to abnormally corrosive
conditions; or
• extend beyond 3 months if the product is used
in commercial, industrial, educational or rental
applications.
The benefits given to you by our warranty are in addition
to other rights and remedies under law in relation to the
product.
In Australia our goods come with guarantees that cannot
be excluded under the Australian Consumer Law. You are
entitled to a replacement or refund for a major failure
and for compensation for any other foreseeable loss or
damage. You are also entitled to have the goods repaired
or replaced if the goods fail to be of acceptable quality and
the failure does not amount to a major failure.
Our goods also come with guarantees that cannot be
excluded under the New Zealand Consumer Guarantees Act.
If your warranty claim is not accepted, we will inform
you and if requested to do so by you, repair the product
provided you pay the usual charges for such repair. You
will also be responsible for all freight and other costs.
Should your product require repair or service after
the warranty period, contact your nearest Sunbeam
service centre. For a complete list of Sunbeam’s service
centres, visit our website or call our customer service
line for advice on 1300 881 861 in Australia,
or 0800 786 232 in New Zealand.
Need help with your appliance?
Contact our customer service team or visit
our website for information and tips on
getting the most from your appliance.
In Australia
Visit www.sunbeam.com.au
Or call 1300 881 861
In New Zealand
Visit www.sunbeam.co.nz
Or call 0800 786 232
is a registered trademark.
‘Cafe Series’ is a trademarks of Sunbeam Corporation.
Made in China.
Due to minor changes in design or otherwise,
the product may differ from the one shown in this leaflet.
© Copyright. Sunbeam Corporation Limited 2013.
ABN 45 000 006 771
Sunbeam Corporation is a division of GUD Holdings Ltd.
Units 5 & 6, 13 Lord Street
Botany NSW 2019 Australia
Level 6, Building 5, Central Park
660-670 Great South Road
Greenlane, Auckland
New Zealand
Sunbeam Corporation is a division of GUD Holdings Ltd.
11/13