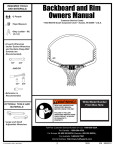
1
REQUIRED TOOLS
AND MATERIALS:
• Two (2) Capable
Adults
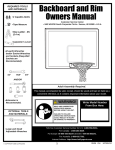
Backboard and Rim
Owners Manual
Customer Service Center
• N53 W24700 South Corporate Circle • Sussex, WI 53089 • U.S.A.
• Tape Measure
• Step Ladder - 8ft.
(2.4 m)
• (2 each) Wrenches
and/or Socket Wrenches
and Sockets (Deep-Well
Sockets are
Recommended).
1/2"
9/16"
3/4"
AND/OR
1/2"
9/16"
3/4"
• Extension is
Recommended.
OPTIONAL TOOLS
AND MATERIALS:
• Large and Small
Adjustable Wrenches
Adult Assembly Required.
This manual, accompanied by sales receipt, should be saved and kept on hand as a
convenient reference, as it contains important information about your model.
WARNING!
READ AND UNDERSTAND
OPERATOR'S MANUAL
BEFORE USING THIS UNIT.
Write Model Number
From Box Here:
FAILURE TO FOLLOW
OPERATING
INSTRUCTIONS COULD
RESULT IN INJURY OR
DAMAGE TO PROPERTY.
Toll-Free Customer Service Number for U.S: 1-800-558-5234,
For Canada: 1-800-284-8339,
For Europe: 00 800 555 85234 (Sweden: 009 555 85234),
For Australia: 1800 632 792
Internet Address: www.huffysports.com
www.spalding.com
© COPYRIGHT 2006 by SPALDING
1
06/06
ID# M7900111
SAFETY INSTRUCTIONS
FAILURE TO FOLLOW THESE SAFETY INSTRUCTIONS MAY RESULT IN SERIOUS INJURY
OR PROPERTY DAMAGE AND WILL VOID WARRANTY.
Owner must ensure that all players know and follow these rules for safe operation of the
system.
To ensure safety, do not attempt to assemble this system without following the instructions
carefully. Check entire box and inside all packing material for parts and/or additional instruction
material. Before beginning assembly, read the instructions and identify parts using the hardware
identifier and parts list in this document. Proper and complete assembly, use, and supervision are
essential for proper operation and to reduce the risk of accident or injury. A high probability of
serious injury exists if this system is not installed, maintained, and operated properly.
•
•
•
•
•
If using a ladder during assembly, use extreme caution.
Two (2) capable adults are recommended for this operation.
Climate, corrosion, or misuse could result in system failure.
Minimum operational height is 6' 6" (1.98 m) to the bottom of backboard.
This equipment is intended for home recreational use only and NOT excessive
competitive play.
• The life of your basketball pole depends on many conditions. The climate,
placement of the pole, location of the pole, exposure to corrosives such as
pesticides, herbicides, or salts are all important.
• If technical assistance is required, contact Customer Service.
Most injuries are caused by misuse and/or not following instructions.
Use caution when using this system.
NOTICE TO ASSEMBLERS
Adult Assembly Required. Dispose of ALL packaging materials promptly. As with all products, periodically
inspect for loose small parts.
ALL basketball systems, including those used for DISPLAYS, MUST be assembled and installed according
to instructions. Failure to follow instructions could result in SERIOUS INJURY. It is NOT acceptable to
devise a makeshift support system.
WARNING
Read and understand warnings listed
below before using this product.
Failure to follow these warnings may
result in serious injury and/or property
damage.
9
IMPORTANT!
Remove all contents from boxes.
Be sure to check inside pole sections;
hardware and additional parts are packed inside.
Owner must ensure that all players know and follow these rules
for safe operation of the system.
• DO NOT HANG on the rim or any part of the system including
backboard, support braces or net.
• During play, especially when performing dunk type activities,
keep player's face away from the backboard, rim and net.
Serious injury could occur if teeth/face come in contact with
backboard, rim or net.
• During play, do not wear jewelry (rings, watches, necklaces,
etc.). Objects may entangle in net.
• Check system before each use for loose hardware, excessive
wear and signs corrosion and repair before use.
• Never play on damaged equipment.
• See instruction manual for proper installation and
maintenance.
In the U.S.: 1-800-334-9111
In the U.S.: 1-800-558-5234
In Canada: 1-800-284-8339
In the U.S.: 1-800-558-5234
In Canada: 1-800-284-8339
In the U.S.: 1-888-713-5488
ID#: 579800
05/05
PRODUCT REGISTRATION:
Please remember to complete your product registration form online at:
www.huffysports.com/customer_support/product_registration.
ID# M7900111
06/06
2
PARTS LIST - See Hardware Identifier
HARDWARE IDENTIFIER
(Not Actual Size)
Item
Qty.
Part No.
Description
1
2
3
4
5
6
7
8
9
10
11
12
13
14
15
16
17
18
19
20
21
22
23
4
4
2
6
6
6*
4
2
1
1
4*
1
1
1
4
4*
1
1
1
1
1
6
4
200580
200837
203071
203326
203228
203100
203104
90096401
579800
203470
203063
“L” Bracket
Spacer, Plastic
Bolt, Hex Head, 1/4-20 x 1-1/2 Long
Washer, Lock, 1/4
Nut, 1/4-20
Hex Flange Nut 5/16-18
Bolt, Hex Flange, 5/16-18 x 2 Long
Bracket, Backboard Support
Label, Warning
Washer, Flat, 1.5” O.D.
Nut, 3/8-16
Rim
Backboard
Net
Bolt, Hex Flange, 5/16-18 x 1 Long
Washer, Flat
Bracket, Slam Jam
Bolt, Tee, 3/8-16, 5” Long
Bracket, Reinforcement, Slam Jam
Spring, Rim
Nut, Special, 3/8-16
Bolt, Hex Head, 1/4-20 x 1/2 Long
Bolt, Hex Head, 3/8-16 x 5/8 Long
205528
203309
900033
203796
200318
203472
203795
201107
204961
#19 (1)
#17 (1)
#12 (1)
#14 (1)
#20 (1)
#1 (4)
#2 (4)
HARDWARE IDENTIFIER (BOLTS)
#13 (1)
#3 (6)
#7 (4)
OR
#22 (6)
#15 (4)
#8 (2)
#23 (4)
#8 (2)
#18 (1)
HARDWARE IDENTIFIER (NUTS, WASHERS & SPACERS)
#6 (6)*
#4 (6)
#5 (6)
#16 (4)*
#11 (4)*
#10 (1)
#21 (1)
3
06/06
ID# M7900111
1.
ASSEMBLE THE BACKBOARD AND RIM
This is what your system will look like
when you’ve finished this section:
WARNING!
IF YOUR SYSTEM IS EQUIPPED WITH AN ACRYLIC BACKBOARD, EXAMINE BACKBOARD FOR ANY DAMAGE
THAT MAY HAVE OCCURRED DURING SHIPMENT. CRACKS IN THE BACKBOARD COULD RESULT IN
SUDDEN BREAKAGE. IF BACKBOARD IS DAMAGED IN ANY WAY PRIOR TO OR AFTER ASSEMBLY, CALL
TOLL-FREE NUMBER:
U.S. 1-800-558-5234; CANADA: 1-800-284-8339; http://www.huffysports.com
TOOLS REQUIRED
1/2"
9/16"
3/4"
AND/OR
1/2"
ID# M7900111
06/06
9/16"
4
3/4"
NOTE:
EXTENSION ARM MOUNT
We recommend mounting backboard to a solid
material (steel) behind rim area.
A
5
1
4
1
3
6
15
7
18
17
17
16
6
2
OR
5
1
B
4
1
22
6
15
7
18
17
17
16
6
2
5
06/06
ID# M7900111
POLE, ROOF, OR WALL MOUNT
Model 8406 Universal Mounting Bracket is available for purchase
by calling this number: 1-800-558-5234
POLE MOUNT
Model 8406
Universal Mounting
Bracket is available
for purchase by
calling this number:
1-800-558-5234
Model 8406 Universal
Mounting Bracket
(Not Supplied)
5
4
22
22
5
4
18
17
15
17
6
ID# M7900111
06/06
6
WALL MOUNT
5
22
18
4
17
15
22
22
17
6
22
5
4
7
06/06
ID# M7900111
ROOF MOUNT
OR
22
4
5
Top View
5
4
3
4
18
3
17
5
15
17
6
16
Model 8406 Universal Mounting Bracket
(not supplied) is available for purchase
by calling this number: 1-800-558-5234
ID# M7900111
06/06
8
ELEVATOR MOUNTS
IMPORTANT!
All Elevator mounts will require this initial step of attaching brackets (8) to the backboard.
IMPORTANT!
It is necessary for all parts to be
installed properly for this mechanism
to work safely and properly.
11
11
NOTE:
BRACKET STYLE
MAY VARY
23
#8 (2)
8
8
NOTE ORIENTATION
8
23
OR
11
#8 (2)
23
NOTE ORIENTATION
8
8
8
11
23
9
06/06
ID# M7900111
A
SPRING STYLE ELEVATOR MOUNT
6
6
NOTE:
Use existing elevator
components.
8
18
17
15
SPRING STYLE ELEVATOR MOUNT (continued)
NOTE:
Use existing elevator
components.
8
ID# M7900111
06/06
10
17
B
BRONZE RATCHET ELEVATOR MOUNT
NOTE:
Use existing elevator
components.
NOTE:
Use existing elevator
components.
11
06/06
ID# M7900111
BRONZE RATCHET ELEVATOR MOUNT (continued)
6
6
8
18
17
17
15
ID# M7900111
06/06
12
C
STAMPED RATCHET ELEVATOR MOUNT
NOTE:
Use existing elevator
components.
8
13
06/06
ID# M7900111
STAMPED RATCHET ELEVATOR MOUNT (continued)
NOTE:
Use existing elevator
components.
6
18
17
17
15
ID# M7900111
06/06
14
D
APOLLO ELEVATOR MOUNT
NOTE:
IMPORTANT!
Use existing elevator
components.
Remove Y-frame from elevator portion.
STRAIGHT ON VIEW
8
Upper Tube
Upper Tube
Lower Tube
Lower Tube
½
6
17
15
18
17
15
06/06
ID# M7900111
2.
Install Slam Jam Rim to Backboard
A Fit rim (12) securely into bracket (17) as shown. Allow T-bolt (18) to slip through center hole in
rim (12).
B Install reinforcement bracket (19) onto T-bolt (18) as shown.
C Install spring (20) onto T-bolt (18) as shown.
D Install special nut (21) and washer (10) onto T-bolt (18).
E Tighten nut (21) until flush with end of T-bolt (18).
B
A
19
12
18
18
17
21
C
D
20
18
18
10
E
21
ID# M7900111
06/06
16
10
3.
Install net (14).
2.
1.
14
4.
3.
4.
NOTE:
Peel protective
film from surface
of acrylic
backboard prior
to use.
Place warning
label (9) in
location clearly
visible within
playing area.
WARNING
Read and understand warnings listed
below before using this product.
Failure to follow these warnings may
result in serious injury and/or property
damage.
Owner must ensure that all players know and follow these rules
for safe operation of the system.
• DO NOT HANG on the rim or any part of the system including
backboard, support braces or net.
• During play, especially when performing dunk type activities,
keep player's face away from the backboard, rim and net.
Serious injury could occur if teeth/face come in contact with
backboard, rim or net.
• During play, do not wear jewelry (rings, watches, necklaces,
etc.). Objects may entangle in net.
• Check system before each use for loose hardware, excessive
wear and signs corrosion and repair before use.
• Never play on damaged equipment.
• See instruction manual for proper installation and
maintenance.
10 ft.
(3.05M)
In the U.S.: 1-800-334-9111
In the U.S.: 1-800-558-5234
In Canada: 1-800-284-8339
In the U.S.: 1-800-558-5234
In Canada: 1-800-284-8339
In the U.S.: 1-888-713-5488
ID#: 579800
05/05
REGULATION RIM HEIGHT
IS 10 FEET (3.05M).
17
06/06
ID# M7900111