1
REQUIRED TOOLS
AND MATERIALS:
• Two (2) capable
adults
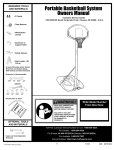
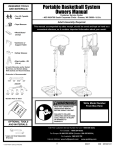
Portable Basketball System
Owners Manual
Customer Service Center
• N53 W24700 South Corporate Circle • Sussex, WI 53089 • U.S.A.
Adult Assembly Required.
• Tape Measure
This manual, accompanied by sales receipt, should be saved and kept on hand as a
convenient reference, as it contains important information about your model.
• Wood Board
(scrap)
• Sawhorse or
Support Table
• Safety Glasses
• Step Ladder - 8ft.
(2.4 m)
• (2 each) Wrenches and/or Socket
Wrenches and Sockets (DeepWell Sockets are Recommended).
• Extension is Recommended.
7/16"
1/2"
9/16"
3/4"
AND/OR
7/16"
1/2"
9/16"
3/4"
• Garden Hose or Sand
SA
ND
(3
(1 60
63 lb
kg .)
)
WARNING!
OPTIONAL TOOLS
AND MATERIALS:
READ AND UNDERSTAND
OPERATOR'S MANUAL
BEFORE USING THIS UNIT.
Write Model Number
From Box Here:
FAILURE TO FOLLOW
OPERATING INSTRUCTIONS
COULD RESULT IN INJURY
OR DAMAGE TO
PROPERTY.
Toll-Free Customer Service Number for U.S: 1-800-558-5234,
For Canada: 1-800-284-8339,
For Europe: 00 800 555 85234 (Sweden: 009 555 85234),
• Large and Small Adjustable
Wrenches
© COPYRIGHT 2005 by SPALDING
For Australia: 1-800-632 7921
Internet Address: http://www.huffysports.com
1
05/06
ID# M770134
Assemblage exclusivement réservé à un adulte.
Zusammenbau nur durch Erwachsene ALLE Verpackungsmaterialien
sofort wegwerfen.
Il montaggio va eseguito da persone adulte.
Système portable - Manuel de
l'utilisateur
Service clientèle
• N53 W24700 South Corporate Circle • Sussex, WI 53089 • É.-U.
Gebrauchsanleitung für tragbare
Systeme
Kundendienstzentrale
• N53 W24700 South Corporate Circle • Sussex, WI 53089 • U.S.A.
Manual del Propietario del Sistema
Portátil
Centro de Servicio al Cliente
• N53 W24700 South Corporate Circle • Sussex, WI 53089 • EE.UU.
Ce manuel, accompagné du justificatif d'achat, devra être conservé pour
référence ultérieure, dans la mesure où il contient des informations
importantes sur votre modèle.
Diese Anleitung sollte zusammen mit dem Kaufbeleg griffbereit
aufbewahrt werden, da sie wichtige Informationen über Ihr Modell enthält.
Il presente manuale, accompagnato dallo scontrino, deve essere
conservato e tenuto a portata di mano come documento di facile
consultazione, in quanto contiene informazioni importanti su questo
modello.
Inscrivez ici le numéro de modèle qui apparaît sur la
boîte:
Die Modellnummer vom Verpackungskarton hier
eintragen:
Escriba aquí el número de modelo que viene en la caja:
AVERTISSEMENT!
WARNUNG!
¡ADVERTENCIA!
LISEZ CE MANUEL D'UTILISATION AVANT
D'UTILISER CET APPAREIL
SOUS PEINE DE BLESSURES OU DE
DÉGÂTS MATÉRIELS.
DAS BENUTZERHANDBUCH VOR
GEBRAUCH DIESES PRODUKTS
SORGFÄLTIG DURCHLESEN.
EIN MISSACHTEN DIESER
BETRIEBSANLEITUNG KANN
VERLETZUNGEN ODER SACHSCHÄDEN
ZUR FOLGE HABEN.
LEA Y ENTIENDA EL MANUAL DEL
OPERADOR ANTES DE USAR ESTA
UNIDAD.
SI NO SE SIGUEN LAS INSTRUCCIONES DE
OPERACIÓN SE PODRÍA OCASIONAR UNA
LESIÓN O DAÑOS A LA PROPIEDAD.
Numéro vert du Service clientèle - États-Unis : 1-800-558-5234, Canada : 1-800-2284-8339,
Europe : 00 800 555 85234 (Suède : 009 555 85234), Australie : 1-800-632 7921 Adresse Internet : http://www.huffysports.com
Gebührenfreie Telefonnummer für die USA: 1-800-558-5234, für Kanada: 1-800-284-8339, für Europa: 00 800 555 85234 (Schweden: 009
555 85234), für Australien: 1-800-632 7921 Internet-Adresse: http://www.huffysports.com
Número telefónico sin costo del Departamento de Servicio al Cliente en EE.UU.: 1-800-558-5234,
Para Canadá: 1-800-284-8339, Para Europa: 00 800 555 85234 (Suecia: 009 555 85234), Para Australia: 1-800-632 7921 Dirección en
Internet: http://www.huffysports.com
ID# M770134
05/06
2
OUTILS ET MATÉRIEL
REQUIS:
• Deux (2) adultes
capables
BENÖTIGTE WERKZEUGE
UND MATERIALIEN:
HERRAMIENTAS Y
MATERIALES REQUERIDOS:
• Zwei (2) zur Ausführung dieser
Arbeit fähige Erwachsene
• Dos (2) adultos
capaces
• Maßband
• Cinta de medir
• Holzstück (Ausschuß)
• Tabla de madera (un
trozo)
• Mètre
• Planche en bois (chute)
• Chevalet de sciage ou
table
• Sägebock oder Stütztisch
• Lunettes de sécurité
• Schutzbrille
• Caballete o mesa de
apoyo
• Gafas de seguridad
• Échelle de 2,4 m
• Deux clés et/ou clés à douilles et
deux douilles (douilles longues
recommandées).
• Escalera de mano de 8
pies (2.4 m)
• Stufenleiter, 2,4 m (8 Fuß)
• (je 2) Schrauben - und/oder Steckschlüssel
(tiefe Einsätze empfohlen).
• Verlängerung wird empfohlen
• (2 de cada una) llaves de tuercas
y/o llaves de tuercas de boca
tubular y casquillos (se
recomiendan casquillos profundos).
• Une extension est recommandée.
• Se recomienda una extensión
9/16"
3/4"
9/16"
3/4"
7/16"
1/2"
SA
OUTILS ET MATÉRIEL
FACULTATIFS:
• Petites et grandes clés anglaises
9/16"
3/4"
• Gartenschlauch oder Sand
Y/O
7/16" 1/2"
WEITERE NÜTZLICHE
WERKZEUGE UND MATERIALIEN:
• Große und kleine verstellbare
Schraubenschlüssel
3
9/16"
3/4"
• Manguera de jardín o arena
E
B
(3
LE
(1 60
63 lb
kg .)
)
• Tuyau d'arrosage ou sable
7/16" 1/2"
3/4"
NA
(3
(1 60
63 lb
kg .)
)
3/4"
9/16"
AR
9/16"
1/2"
UND/ODER
ET/OU
7/16" 1/2"
7/16"
ND
(3
(1 60
63 lb
kg .)
)
1/2"
SA
7/16"
HERRAMIENTAS Y
MATERIALES OPCIONALES:
• Llaves de tuercas ajustables
grandes y pequeñas
05/06
ID# M770134
BEFORE YOU START!
AVANT DE COMMENCER!
VORBEREITENDE MASSNAHMEN
¡ANTES DE COMENZAR!
ALTO!
STOP! HALT! ¡ALTO!
WARNING
Read and understand warnings listed
below before using this product.
¡L
Failure to follow these warnings may
result in serious injury and/or property
damage.
(N
STOP! HALT! ¡ALTO!
Owner must ensure that all players know and follow these rules
for safe operation of the system.
• DO NOT HANG on the rim or any part of the system including
backboard, support braces or net.
• During play, especially when performing dunk type activities,
keep player's face away from the backboard, rim and net.
Serious injury could occur if teeth/face come in contact with
backboard, rim or net.
• Do not slide, climb, shake or play on base and/or pole.
• After assembly is complete, fill system completely with water
or sand and stake to the ground. Never leave system in an
upright position without filling base with weight, as system
may tip over causing injuries.
• When adjusting height or moving system, keep hands and
fingers away from moving parts.
• Do not allow children to move or adjust system.
• During play, do not wear jewelry (rings, watches, necklaces,
etc.). Objects may entangle in net.
• Surface beneath the base must be smooth and free of gravel or
other sharp objects. Punctures cause leakage and could cause
system to tip over.
• Keep organic material away from pole base. Grass, litter, etc.
could cause corrosion and/or deterioration.
• Check pole system for signs of corrosion (rust, pitting,
chipping) and repaint with exterior enamel paint. If rust has
penetrated through the steel anywhere, replace pole
immediately.
• Check system before each use for proper ballast, loose
hardware, excessive wear and signs corrosion and repair
before use.
• Check system before each use for instability.
• Do not use system during windy and/or severe weather
conditions; system may tip over. Place system in the storage
position and/or in an area protected from the wind and free
from personal property and/or overhead wires.
• Never play on damaged equipment.
• See instruction manual for proper installation and
maintenance.
• When moving system, use caution to keep mechanism from
shifting.
• Keep pole top covered with cap at all times.
• Do not allow water in tank to freeze. During sub-freezing
weather add 2 gallons of non-toxic antifreeze, sand or empty
tank completely and store. (Do not use salt.)
• While moving system, do not allow anyone to stand or sit on
base or have added ballasting on base.
• Do not leave system unsupervised or play on system when
wheels are engaged for moving.
• Use Caution when moving system across uneven surfaces.
System may tip over.
• Use extreme caution if placing system on sloped surface.
System may tip over more easily.
To ensure optimal playability of backboard system, a close tolerance fit between
the elevator components and hardware is required. Test-fit large bolts into large
holes of elevator tubes, backboard brackets, and triangle plates. Carefully rock
them in a circular motion to ream out any excess paint from holes if necessary.
Not all items pictured are included with every model.
Pour garantir l'utilisation optimale du panneau, les composants du système
élévateur et la visserie doivent être bien ajustés (serrés). À titre d'essai, insérez
les gros boulons dans les gros trous des tubes du système élévateur, des
supports du panneau et des plaques triangulaires. Basculez-les avec précaution
en imprimant un mouvement circulaire pour éliminer l'excédent de peinture des
trous, si nécessaire.
Les composants illustrés ici ne sont pas tous fournis avec chaque modèle.
Um sicherzustellen, dass das Korbwandsystem optimal für den Spielbetrieb
geeignet ist, müssen die Komponenten der Verlängerungsvorrichtung und die
verschiedenen Befestigungsteile fest miteinander verschraubt werden. Große
Schrauben zur Probe in die großen Löcher der Verlängerungsrohre,
Korbwandklammern und Dreiecksplatte stecken und diese vorsichtig in einer
Kreisbewegung hin- und herbewegen, um eventuelle Farbrückstände aus den
Bohrungen zu entfernen.
Nicht jedem Modell sind alle abgebildeten Teile beigepackt.
In the U.S.: 1-800-xxx-xxxx
Canada: 1-800-xxx-xxxx
In the U.S.: 1-800-xxx-xxxx
Canada: 1-800-xxx-xxxx
Para asegurar el óptimo rendimiento del sistema del respaldo en el juego, se
requiere un ajuste de tolerancia estrecha entre los componentes del elevador y el
herraje. Pruebe el ajuste de los pernos grandes en los orificios grandes de los
tubos elevadores, soportes del respaldo y placas triangulares. Cuidadosamente
muévalos en círculos para eliminar cualquier exceso de pintura de los orificios, si
es necesario.
In the U.S.: 1-800-xxx-xxxx
Canada: 1-800-xxx-xxxx
No todos los artículos ilustrados se incluyen con cada modelo.
ID# M770134
05/06
4
In the U.S.: 1-800-xxx-xxxx
Canada: 1-800-xxx-xxxx
ID#: 556790
01/05
5
05/06
ID# M770134
ACHTUNG
Aux États-Unis : 1-888-713-5488
Réf.: FR556790
05/05
In the U.S.: 1-800-558-5234
Au Canada: 1-800-284-8339
Aux États-Unis : 1-800-334-9111
In den USA: 1-888-713-5488
In den USA: 1-800-772-5346
Kanada: 1-800-284-8339
Bestell-Nr.: GE556790
05/05
In den USA: 1-800-558-5234
Kanada: 1-800-284-8339
In den USA: 1-800-334-9111
• NICHT am Korbrand oder irgendeinem anderen Teil des Systems,
einschl. Korbwand, Stützstreben oder Netz HÄNGEN.
• Während des Spielbetriebs, besonders bei Slam-Dunk-Manövern,
müssen die Spieler ihr Gesicht von Korbwand, Korbrand und Netz fern
halten. Der Kontakt von Zähnen/Gesicht mit der Korbwand, dem
Korbrand oder dem Netz kann schwere Verletzungen zur Folge haben.
• Nicht auf dem Sockel und/oder der Stange herumrutschen, klettern,
daran rütteln oder damit spielen.
• Nach dem Zusammenbau das System ganz mit Wasser oder Sand
füllen. Das System niemals in aufrechter Position stehen lassen, ohne
den Sockel zu beschweren, da es andernfalls umkippen und
Verletzungen verursachen kann.
• Beim Einstellen der Höhe oder beim Transport des Systems Hände und
Finger von beweglichen Teilen fern halten.
• Kindern darf das Verschieben oder Einstellen des Systems nicht
gestattet werden.
• Beim Spielen keinen Schmuck (Ringe, Armbanduhren, Halsketten usw.)
tragen. Gegenstände dieser Art können sich im Netz verfangen.
• Die Oberfläche unter dem Sockel muss glatt und frei von Kies oder
anderen scharfkantigen Gegenständen sein. Löcher verursachen Lecks
und können ein Umkippen des Systems zur Folge haben.
• Organische Materialien vom Stangensockel fern halten. Gras, Abfälle
usw. können Korrosion und/oder Abbauerscheinungen verursachen.
• Das Stangensystem auf Anzeichen von Korrosion (Rost,
Narbenbildung, Abblättern) untersuchen und mit Emailaußenfarbe neu
lackieren. Wenn sich an irgendeiner Stelle Rost durch den Stahl
hindurch gefressen hat, muss die Stange sofort ersetzt werden.
• Das System vor jeder Benutzung auf den richtigen Ballast, lose
Befestigungsteile, übermäßige Abnutzungserscheinungen und
Anzeichen von Korrosion untersuchen; vor jedem Einsatz
entsprechende Korrekturmaßnahmen bzw. Reparaturen durchführen.
• Die Stabilität des Systems vor jedem Gebrauch überprüfen.
• Das System nicht bei windigen und/oder unwirtlichen
Witterungsverhältnissen benutzen, da es unter diesen Umständen
umkippen kann. Das System in seine Lagerposition versetzen und/oder
in einen windgeschützten Bereich bringen, in dem sich weder
Sachwerte noch oberirdische Kabel befindend.
• Niemals an bzw. mit einer beschädigten Ausrüstung spielen.
• Beim Transport des Systems darauf achten, dass sich der
Mechanismus nicht verschiebt.
• Das obere Stangenende muss jederzeit mit einer Kappe abgedeckt sein.
• Das Wasser im Tank darf keinesfalls gefrieren. Bei Gefriertemperaturen
den Tank mit 7,5 l eines ungiftigen Gefrierschutzmittels oder Sand
füllen oder ihn völlig entleeren und lagern. (Kein Salz verwenden.)
• Beim Verschieben des Systems darf niemand auf dem Sockel stehen
oder sitzen oder diesen mit zusätzlichem Ballast beschwert haben.
• Das System nicht unbeaufsichtigt lassen oder damit spielen, wenn die
Räder zum Transport eingestellt sind.
• Beim Transport des Geräts über unebene Flächen vorsichtig vorgehen.
Das System kann umkippen.
• Beim Aufstellen des Systems auf einer geneigten Fläche mit großer
Vorsicht vorgehen. Das System kann unter diesen Bedingungen
leichter umkippen.
• Die ordnungsgemäße Installation und Wartung ist dem
Gebrauchshandbuch zu entnehmen.
• NE VOUS SUSPENDEZ PAS sur le cerceau ou sur une autre partie
du système, y compris le panneau, les supports ou le filet.
• Durant le jeu, en particulier lorsque vous faites un smash, gardez le
visage à l'écart du panneau, du cerceau et du filet. Risque de
blessures graves si les dents ou le visage viennent heurter le
panneau, le cerceau ou le filet.
• Ne glissez et ne montez pas sur le socle et/ou le poteau, ne les
secouez pas et ne jouez pas dessus.
• Une fois le montage terminé, remplissez complètement le système
d'eau ou de sable. Ne laissez jamais le système à la verticale sans
lester le socle, car le système risque de basculer et de causer des
blessures.
• Lorsque vous réglez la hauteur ou que vous déplacez le système,
gardez les mains et les doigts à l'écart des pièces en mouvement.
• Interdisez aux enfants de déplacer ou de régler le système.
• Avant le jeu, retirez vos bijoux (bagues, montres, colliers, etc.). Ces
objets peuvent se prendre dans le filet.
• La surface située sous le socle doit être lisse, sans gravier ou
autres objets coupants. Les perforations causent des fuites et
risquent de faire basculer le système.
• Maintenez les substances organiques à l'écart du socle du poteau.
L'herbe, les ordures, etc. risquent de causer la corrosion et/ou la
détérioration du système.
• Vérifiez l'état du système (signes de corrosion comme rouille,
piqûres, écaillage) et repeignez avec de la peinture émail pour
extérieur. Si de la rouille a piqué l'acier en tout point, remplacez
immédiatement le poteau.
• Vérifiez le système avant chaque utilisation (lest, visserie mal
serrée, usure excessive et signes de corrosion) et réparez avant
utilisation.
• Vérifiez la stabilité du système avant chaque utilisation.
• N'utilisez pas le système les jours de vent fort et/ou de tempête ; le
système risque de se renverser. Placez le système dans sa position
de stockage et/ou dans un lieu protégé du vent et loin de biens
personnels et/ou câbles suspendus.
• Ne jouez jamais sur du matériel abîmé.
• Lorsque vous déplacez le système, soyez prudent pour empêcher
le mécanisme de se déséquilibrer.
• Maintenez le poteau bouché à tout moment.
• Ne laissez pas geler l'eau du socle. Par moins de 0 degré Celcius,
ajoutez 8 litres d'antigel non toxique ou du sable, ou bien videz
complètement et stockez. (N'utilisez pas de sel.)
• Durant le déplacement du système, personne ne doit se tenir
debout ou assis sur son socle, ni surlester le socle.
• Ne laissez pas le système sans supervision et ne jouez pas sur le
système lorsque les roues se sont enclenchées pour le
déplacement.
• Soyez prudent lorsque vous déplacez le système sur des surfaces
irrégulières, car il risque de basculer.
• Soyez extrêmement prudent si vous placez le système sur une
déclivité. Il risque de se renverser plus facilement.
• Pour les instructions d'installation et d'entretien, reportez-vous au
guide fourni.
Aux États-Unis : 1-800-772-5346
Der Eigentümer muss sicherstellen, dass alle Spieler diese Regeln für
einen sicheren Betrieb des Systems kennen und befolgen.
Ein Missachten dieser Warnung kann zu
schweren Verletzungen und/oder Sachschäden
führe
Vor Gebrauch dieses Produkts die
nachstehenden Warnhinweise lesen und
beachten.
Le propriétaire doit s'assurer que tous les joueurs connaissent et
suivent ces règles d'utilisation sûre du système.
sous peine d'encourir des blessures
graves et/ou des dégâts matériels.
Lisez les avertissements indiqués cidessous avant d'utiliser ce produit.
AVERTISSEMENT
ADVERTENCIA
En EE.UU.: 1-888-713-5488
En EE.UU.: 1-800-772-5346
En Canadá: 1-800-284-8339
N/P: SP556790
05/05
En EE.UU.: 1-800-558-5234
En Canadá: 1-800-284-8339
En EE.UU.: 1-800-334-9111
• NO SE CUELGUE del borde ni de ninguna parte del sistema,
inclusive el respaldo, las abrazaderas de apoyo y la red.
• Durante el juego, especialmente cuando se realizan actividades de
tipo clavada (dunk), el jugador debe mantener la cara alejada del
respaldo, el borde y la red. Si los dientes o la cara entran en
contacto con el respaldo, el borde o la red, se puede sufrir una
lesión grave.
• No se deslice, suba, sacuda ni juegue en la base y/o en poste.
• Cuando complete el montaje, llene completamente el sistema con
agua o arena. Nunca deje el sistema en posición vertical sin llenar la
base con un peso, ya que el sistema se podría caer y causar
lesiones.
• Al ajustar la altura o mover el sistema mantenga las manos y los
dedos alejados de las partes movibles.
• No permita que los niños muevan o ajusten el sistema.
• Durante el juego, no use joyería (anillos, relojes, collares, etc.). Estos
objetos se podrían atorar en la red.
• La superficie debajo de la base se debe mantener lisa y sin grava ni
otros objetos filosos. Las perforaciones pueden causar fugas y
provocar que el sistema se caiga.
• Mantenga los materiales orgánicos alejados de la base del poste. El
césped, la basura, etc. podrían causar corrosión y/o deterioro de la
base del poste.
• Revise que el sistema del poste no tenga señales de corrosión
(oxidación, picaduras, desconchaduras) y si las tiene vuelva a
pintarlo con pintura de esmalte para exteriores. Si la corrosión
penetró a través del acero en cualquier área, reemplace
inmediatamente el poste.
• Antes de cada uso revise el sistema para verificar que esté
adecuadamente equilibrado, que no tenga herraje suelto, desgaste
excesivo ni signos de corrosión, y repárelo si es necesario.
• Verifique la estabilidad del sistema antes de cada uso.
• NO use el sistema durante condiciones climáticas severas y/o con
mucho viento, ya que el sistema se podría caer. Coloque el sistema
en posición de almacenamiento y/o en un área protegida del viento y
sin propiedad personal y/o cables suspendidos.
• Nunca juegue en equipo dañado.
• Cuando mueva el sistema, tenga cuidado para evitar que el
mecanismo cambie de lugar.
• Siempre mantenga la parte superior del poste cubierta con la tapa.
• No permita que el agua del tanque se congele. En clima con
temperaturas de congelamiento añada dos galones de
anticongelante no tóxico, arena, o vacíe completamente el tanque y
almacénelo. (No use sal.)
• Al mover el sistema no permita que nadie se pare o siente en la base
o añada lastre adicional en la base.
• No deje el sistema sin supervisión ni juegue en el sistema cuando
las ruedas estén embragadas para rodar.
• Tenga cuidado al mover el sistema sobre superficies irregulares. El
sistema se podría ladear.
• Use extremado cuidado si va a colocar el sistema en una superficie
inclinada. El sistema se podría caer más fácilmente.
• Consulte el manual de instrucciones para ver la instalación y el
mantenimiento adecuados.
El propietario debe asegurarse de que todos los jugadores
conozcan y obedezcan estas reglas para la operación segura del
sistema.
Si no se observan estas advertencias se
podrían causar lesiones graves y/o daños
materiales.
Lea y entienda las advertencias que se
encuentran a continuación antes de usar este
producto.
SAFETY INSTRUCTIONS
FAILURE TO FOLLOW THESE SAFETY INSTRUCTIONS MAY RESULT IN SERIOUS INJURY OR
PROPERTY DAMAGE AND WILL VOID WARRANTY.
Owner must ensure that all players know and follow these rules for safe operation of the system.
To ensure safety, do not attempt to assemble this system without following the instructions carefully.
Check entire box and inside all packing material for parts and/or additional instruction material. Before
beginning assembly, read the instructions and identify parts using the hardware identifier and parts list in
this document. Proper and complete assembly, use, and supervision are essential for proper operation and
to reduce the risk of accident or injury. A high probability of serious injury exists if this system is not
installed, maintained, and operated properly.
•
•
•
•
•
•
•
•
•
•
•
If using a ladder during assembly, use extreme caution.
Two (2) capable adults are recommended for this operation.
Check base regularly for leakage. Slow leaks could cause system to tip over unexpectedly.
Seat the pole sections properly (if applicable). Failure to do so could allow the pole sections
to separate during play and/or transport of the system.
Climate, corrosion, or misuse could result in system failure.
Minimum operational height is 6' 6" (1.98 m) to the bottom of backboard.
This equipment is intended for home recreational use only and NOT excessive competitive
play.
Read and understand the warning label affixed to pole.
The life of your basketball pole depends on many conditions. The climate, placement of the
pole, location of the pole, exposure to corrosives such as pesticides, herbicides, or salts are
all important.
If technical assistance is required, contact Customer Service.
Adult supervision is recommended when adjusting height.
Most injuries are caused by misuse and/or not following instructions.
Use caution when using this system.
CONSIGNES DE SÉCURITÉ
SUIVEZ CES CONSIGNES DE SÉCURITÉ SOUS PEINE DE PROVOQUER DES BLESSURES GRAVES, DES DÉGÂTS
MATÉRIELS ET L'ANNULATION DE LA GARANTIE.
Le propriétaire doit s'assurer que tous les joueurs connaissent et suivent ces règles d'utilisation sûre du système.
Par mesure de sécurité, n'essayez pas de monter ce système sans suivre scrupuleusement les
instructions. Vérifiez le carton et l'intérieur de tout le matériel d'emballage pour y trouver les
pièces et/ou d'autres instructions. Avant de commencer le montage, lisez les instructions et
identifiez les pièces à l'aide de la liste d'identification et de la liste des pièces de ce document.
Un montage, une utilisation et une supervision corrects et complets sont indispensables à un
bon fonctionnement et à la réduction des risques d'accident ou de blessure. Il existe un haut
risque de blessures graves si ce système n'est pas correctement installé, entretenu et utilisé..
• Si vous utilisez une échelle en cours de montage, soyez extrêmement prudent.
• Il est recommandé de s’y prendre à deux (2) (adultes) pour réaliser cette opération.
• Vérifiez régulièrement le socle pour vous assurer qu'il ne fuit pas. Les petites fuites risquent d'entraîner le
basculement intempestif du système.
• Emboîtez correctement les sections de poteau (le cas échéant). Elles risquent sinon de se déboîter en
cours de jeu et/ou de transport du système.
• Les conditions climatiques, la corrosion ou une mauvaise utilisation risquent de provoquer la panne du
système.
• La hauteur minimale d'utilisation est de 1,98 m jusqu'à la base du panneau.
• Ce matériel est réservé à un but récréatif à domicile et NON PAS à un jeu extrêmement compétitif.
• Lisez et comprenez l'étiquette d'avertissement fixée au poteau.
• La durée de vie de votre poteau de basket-ball dépend de bien des facteurs. Le climat, la position du
poteau, son emplacement, son exposition à des agents corrosifs tels que des pesticides, des herbicides
ou des sels sont tous des facteurs importants.
• Pour toute assistance technique, contactez le service clientèle.
• La supervision d'un adulte est recommandée pour le réglage de la hauteur.
La plupart des blessures sont causées par une utilisation impropre et/ou le non-respect des instructions.
Soyez prudent lorsque vous utilisez ce système.
ID# M770134
05/06
6
SICHERHEITSHINWEISE
EIN MISSACHTEN DIESER SICHERHEITSHINWEISE KANN ZU SCHWEREN VERLETZUNGEN ODER SACHSCHÄDEN FÜHREN UND
MACHT DIE GARANTIE UNWIRKSAM.
Der Eigentümer muss sicherstellen, dass alle Spieler diese Regeln für einen sicheren Betrieb des Systems kennen und befolgen.
Aus Sicherheitsgründen darf dieses System nur unter sorgfältiger Beachtung der Anleitung zusammengebaut
werden. Den ganzen Karton und alle darin befindlichen Verpackungsmaterialien auf Bauteile und/oder zusätzliche
Anleitungen inspizieren. Vor Beginn des Zusammenbaus die Anleitung durchlesen und anhand des Schlüssels
zur Identifizierung der Befestigungsteile und der Teileliste in diesem Dokument die einzelnen Bauteile bestimmen.
Eine ordnungsgemäße und vollständige Montage, Verwendung und Aufsicht sind für den richtigen Betrieb und zur
Reduzierung des Unfall- oder Verletzungsrisikos absolut erforderlich. Bei einer unsachgemäßen Installation und
Wartung und bei einem falschen Betrieb dieses Systems besteht ein hohes Risiko schwerer Verletzungen.
• Bei Gebrauch einer Leiter während des Zusammenbaus extrem vorsichtig vorgehen.
• Diese Arbeit sollte von zwei (2) dazu fähigen Erwachsenen ausgeführt werden.
• Den Sockel regelmäßig auf Leckstellen untersuchen. Langsam austretende Füllmittel können ein
unerwartetes Umkippen des Systems verursachen.
• Die einzelnen Stangenteile richtig zusammenfügen (falls anwendbar), Andernfalls können sich die
Stangenteile beim Spielbetrieb und/oder während des Transports des Systems voneinander lösen.
• Klimatische Bedingungen, Korrosion oder Fehlgebrauch kann zu Systemdefekten führen.
• Die Mindestspielhöhe beträgt 1,98 m (6,5 Fuß) bis zum unteren Rand der Korbwand.
• Diese Vorrichtung ist nur für den Freizeitgebrauch zu Hause, NICHT aber für ein übermäßig
wettkampfbetontes Spiel vorgesehen.
• Den an der Stange angebrachten Warnaufkleber aufmerksam lesen.
• Die Nutzungsdauer Ihrer Basketballstange hängt von zahlreichen äußeren Umständen ab.
Klimabedingungen, Platzierung und Aufstellort der Stange, Angriffe durch korrodierende Substanzen wie
Ungeziefer- und Pflanzenvernichtungsmittel oder Salz - all das sind wichtige Faktoren.
• Technische Unterstützung kann vom Kundendienst angefordert werden.
• Alle Höhenverstellungen sollten von Erwachsenen beaufsichtigt werden.
Die meisten Verletzungen werden durch einen Fehlgebrauch bzw. ein Missachten der Anleitungen
verursacht. Bei der Verwendung dieses Systems vorsichtig vorgehen.
INSTRUCCIONES DE SEGURIDAD
EL INCUMPLIMIENTO DE ESTAS INSTRUCCIONES DE SEGURIDAD PUEDE DAR COMO RESULTADO LESIONES GRAVES O DAÑOS
MATERIALES Y ANULARÁ LA GARANTÍA.
El propietario debe asegurarse de que todos los jugadores conozcan y obedezcan estas reglas para la operación segura del sistema.
Por su seguridad, no intente montar este sistema sin seguir cuidadosamente las instrucciones.
Revise toda la caja y el interior de todo el material de embalaje para encontrar todas las piezas y/o
material instructivo adicional. Antes de comenzar el montaje, lea las instrucciones e identifique las
piezas usando el identificador de herraje y la lista de piezas contenidos en este documento. Es
esencial el montaje completo, y el uso y la supervisión adecuados para la operación correcta del
sistema y para reducir el riesgo de accidentes o lesiones. Existe una alta probabilidad de sufrir
lesiones graves si este sistema no se instala, mantiene y opera adecuadamente.
• Si utiliza una escalera de mano durante el montaje, tenga mucho cuidado.
• Se recomienda que dos (2) adultos capaces realicen esta operación.
• Revise regularmente la base para detectar fugas. Las fugas lentas podrían causar que el sistema se
cayera inesperadamente.
• Asiente correctamente las secciones del poste (si aplica). Si no lo hace, las secciones del poste podrían
separarse durante el juego y/o durante el transporte del sistema.
• El clima, la corrosión y el mal uso podrían ocasionar la falla del sistema.
• La altura mínima de operación es de 6 pies y 6 pulgadas (1.98 m) hasta la parte inferior del respaldo.
• Este equipo está diseñado únicamente para uso recreativo en el hogar y NO para juego competitivo
excesivo.
• Lea y entienda la etiqueta de advertencia adherida en el poste.
• La vida útil de su poste de baloncesto depende de muchas condiciones. El clima, la colocación del
poste, la ubicación del poste, la exposición a sustancias corrosivas tales como pesticidas, herbicidas o
sales son factores importantes.
• Si requiere asistencia técnica, comuníquese con el Departamento de Servicio al Cliente.
• Se recomienda que el ajuste de la altura se realice bajo la supervisión de un adulto.
La mayoría de las lesiones son causadas por el uso inadecuado y/o por el incumplimiento de las
instrucciones. Tenga cuidado cuando use este sistema.
7
05/06
ID# M770134
25
HEIGHT ADJUSTMENT
TO ADJUST BACKBOARD:
1. TO RAISE BACKBOARD:
Slowly push up on the rim with broom
handle or wooden dowel,
3/4”- 7/8” (19mm - 22mm) diameter
as shown to engage locking
mechanism at desired height.
1
2. TO LOWER BACKBOARD:
Push lever up to unlock and
carefully lower backboard to lowest
position.
2
MOVING SYSTEM
1. Adjust basketball backboard
height to lowest position.
1
2. While holding pole, rotate
basketball system forward
until wheels engage with
ground.
3. Move basketball system to
desired location.
2
4. Carefully rotate basketball
system upright.
3
4
5. Check system for stability.
501720
01/06
1
1
1
2
2
2
1
1
1
2
2
2
3
3
3
4
4
4
GE501720 01/06
FR501720 01/06
ID# M770134
05/06
8
SP501720 01/06
IMPORTANT!
Remove all contents from boxes.
Be sure to check inside pole sections,
hardware and additional parts are packed inside.
IMPORTANT!
Videz entièrement les boîtes.
Veillez à vérifier l'intérieur des sections de poteau.
La quincaillerie et des pièces supplémentaires sont emballées à
l'intérieur.
WICHTIG!
Die Kartons vollständig auspacken.
Den Hohlraum in den Stangenteilen inspizieren.
Dort sind Befestigungs- und andere Kleinteile verpackt.
¡IMPORTANTE!
Saque todo el contenido de las cajas.
Asegúrese de revisar el interior de las secciones del poste.
Ahí se han empacado herraje y piezas adicionales.
WARNING: IF YOUR SYSTEM IS EQUIPPED WITH AN ACRYLIC
BACKBOARD, EXAMINE BACKBOARD FOR ANY DAMAGE THAT MAY
HAVE OCCURRED DURING SHIPMENT. CRACKS IN THE BACKBOARD
COULD RESULT IN SUDDEN BREAKAGE. IF BACKBOARD IS DAMAGED
IN ANY WAY PRIOR TO OR AFTER ASSEMBLY, CALL TOLL-FREE
NUMBER:
U.S. 1-800-558-5234; CANADA: 1-800-284-8339; http://www.huffysports.com
AVERTISSEMENT: SI VOTRE SYSTÈME EST ÉQUIPÉ D'UN PANNEAU EN
ACRYLIQUE, EXAMINEZ-LE BIEN POUR VOUS ASSURER QU'IL N'A PAS
ÉTÉ ENDOMMAGÉ EN COURS DE TRANSPORT. S'IL EST FISSURÉ, IL
RISQUE DE SE CASSER SUBITEMENT. SI LE PANNEAU EST
ENDOMMAGÉ D'UNE QUELCONQUE MANIÈRE AVANT OU APRÈS
L'ASSEMBLAGE, APPELEZ LE NUMÉRO SANS FRAIS:
États-Unis 1-800-558-5234 ; CANADA : 1-800-284-8339 ;
http://www.huffysports.com
WARNUNG: BEI EINEM MIT EINER ACRYL-RÜCKWAND
AUSGESTATTETEN SYSTEM DIE KORBWAND AUF EVENTUELLE
SCHÄDEN UNTERSUCHEN, DIE WÄHREND DES VERSANDS
EINGETRETEN SEIN KÖNNEN. SPRÜNGE IN DER KORBWAND KÖNNEN
ZU DEREN PLÖTZLICHEM BRUCH FÜHREN. WENN DIE KORBWAND
VOR ODER NACH DEM ZUSAMMENBAU IN JEGLICHER WEISE
BESCHÄDIGT WIRD, RUFEN SIE DIE FOLGENDE GEBÜHRENFREIE
TELEFONNUMMER AN:
Innerhalb der USA: 1-800-558-5234; innerhalb KANADAS: 1-800-284-8339;
http://www.huffysports.com
ADVERTENCIA: SI SU SISTEMA ESTÁ EQUIPADO CON UN RESPALDO
DE ACRÍLICO, EXAMINE EL RESPALDO PARA VERIFICAR QUE NO HAYA
SUFRIDO DAÑOS DURANTE EL TRANSPORTE. LA PRESENCIA DE
GRIETAS EN EL RESPALDO PODRÍA OCASIONAR SU ROMPIMIENTO
REPENTINO. SI EL RESPALDO SE DAÑA DE ALGUNA MANERA ANTES
O DESPUÉS DE SU MONTAJE, LLAME AL NÚMERO TELEFÓNICO SIN
COSTO:
EE. UU. 1-800-558-5234; CANADÁ: 1-800-284-8339;
http://www.huffysports.com
9
STOP!
HALT!
STOP!
¡ALTO!
ALTO!
HALT!
Des questions ou des
pièces manquantes ?
NE RETOURNEZ PAS au magasin !
Appelez le numéro du service clientèle
(NUMÉRO GRATUIT) qui figure en première page!
Fragen oder fehlende Teile?
Gehen Sie NICHT zum Laden zurück!
Rufen Sie die GEBÜHRENFREIE Telefonnummer
(in den USA und Kanada) auf der Vorderseite an!
¿Tiene preguntas o le faltan piezas?
¡NO regrese a la tienda!
¡Llame al número telefónico GRATUITO de Servicio
al Cliente que se indica en la primera página!
¡ALTO!
PRODUCT REGISTRATION:
Please remember to complete your product registration form online at:
www.huffysports.com/customer_support/product_registration.
ENREGISTREMENT DU PRODUIT :
Rappelez-vous de remplir votre formulaire d'inscription du produit
en ligne sur la page
www.huffysports.com/customer_support/product_registration.
PRODUKTREGISTRIERUNG:
Bitte vergessen Sie nicht, das Produktregistrierungsformular
online unter
www.huffysports.com/customer_support/product_registration
auszufüllen.
REGISTRO DEL PRODUCTO:
Por favor recuerde completar en línea el formulario de registro de
su producto en:
www.huffysports.com/customer_support/product_registration.
05/06
ID# M770134
NOTICE TO ASSEMBLERS
Adult Assembly Required. Dispose of ALL packaging materials promptly. As with all products,
periodically inspect for loose small parts.
ALL basketball systems, including those used for DISPLAYS, MUST be assembled and installed
according to instructions. Failure to follow instructions could result in SERIOUS INJURY. It is
NOT acceptable to devise a makeshift support system.
AVIS AUX PERSONNES CHARGÉES DU MONTAGE
Assemblage exclusivement réservé à un adulte. Jetez TOUT le matériel d'emballage dans les
plus brefs délais. Comme pour tous les produits pour enfants, inspectez périodiquement le
serrage des pièces de petite taille.
TOUS les systèmes de basket-ball, y compris ceux utilisés en EXPOSITION, DOIVENT être
assemblés et installés conformément aux instructions. Suivez ces instructions sous peine
d’encourir des BLESSURES GRAVES. Il est INACCEPTABLE de composer un système de
soutien de fortune.
HINWEIS FÜR DIE PERSONEN, DIE DEN ZUSAMMENBAU DURCHFÜHREN
Zusammenbau nur durch Erwachsene. ALLE Verpackungsmaterialien sofort wegwerfen. Wie
alle Produkte muss auch dieses regelmäßig auf lose Kleinteile inspiziert werden.
ALLE Basketballsysteme, einschließlich der zu AUSSTELLZWECKEN benutzten Systeme,
MÜSSEN gemäß den Anleitungen zusammengebaut und aufgestellt werden. Ein Missachten
dieser Anleitungen kann SCHWERE VERLETZUNGEN zur Folge haben.Zum Beschweren darf
NICHT zu irgendwelchen Notbehelfsmaßnahmen gegriffen werden.
AVISO PARA LAS PERSONAS QUE REALIZAN EL MONTAJE
Es necesario que el montaje sea realizado por adultos. Deseche inmediatamente TODOS los
materiales de embalaje. Al igual que con cualquier producto, inspeccione periódicamente para
verificar que todas las piezas pequeñas estén firmemente apretadas.
TODOS los sistemas de baloncesto, inclusive los de EXHIBICIÓN, DEBEN estar montados e
instalados de acuerdo con las instrucciones. Si no se siguen las instrucciones se podría
ocasionar una LESIÓN SERIA. NO es aceptable improvisar un sistema de soporte temporal.
ID# M770134
05/06
10
Get to know the basic parts of your basketball system...
Apprenez à connaître les composants de base de votre système de basket-ball...
Machen Sie sich mit den wichtigsten Teilen Ihres Basketballsystems vertraut…
Conozca las piezas básicas de su sistema de baloncesto…
FRONT VIEW
VUE DE FACE
ANSICHT VON VORNE
VISTA FRONTAL
BACKBOARD
PANNEAU
KORBWAND
RESPALDO
RIM
CERCEAU
KORBRAND
BORDE
SUPPORT STRUT
POLE
CONTREFICHE DE SOUTIEN
POTEAU
STÜTZSTREBE
STANGE
PUNTAL DE APOYO
POSTE
BASE
SOCLE
SOCKEL
BASE
11
05/06
ID# M770134
PARTS LIST - See Hardware Identifier
Item Qty. Part No.
1
2
3
4
5
6
7
8
9
10
11
12
13
14
15
16
17
18
19
20
21
22
23
24
25
1
1
2
1
1
1
2
4
5*
2
1
6
1
5
2
8
2
2
1
1
1
1
4
1
1
26
1
600046
205424
266200
FR908242
FR908246
FR928328
203679
201642
203063
906410
201625
203218
203099
206340
205528
203100
206938
206303
20062701
202587
206219
900184
266300
501720
FR501720
Item Qty. Part No.
Description
Description
Tank, (Black)
27
1
201160 Pawl Lever
Wheel Axle
28
1
201159 Ratchet
Wheel, 4“ (Black)
29
2 90096401 Backboard Bracket
Top Pole Section
30
1
206305 Clevis Pin 1/4 x 2-9/32 Long
Middle Pole Section
31
4
203113 Bolt, Hex Flange , 5/16-18 x 2-1/2 Long
Bottom Pole Section
32
4
204961 Bolt, Hex 3/8-16 x .625 Long
Bolt, Hex 3/8-16 x 2 Long
33
2
201129 Spacer .402 I.D. x.50 O.D. x 1.8 Long
Spacer .50 I.D. .75 O.D. x 0.63 Long
34
1
Board
Nylon Insert Lock Nut, 3/8-16
35
1*
206360 Bolt, Hex 3/8-16 x 2.65 Long
Tank Strut
36
5
206304 Bolt 1/2-13 x 6-5/16 Long
Bolt,Yellow Dichromate, 5/16-18 X 3.60" Long
37
1
201125 Return Ratchet Spring
Washer, Flat, 5/16 I.D.
38
2*
201651 Spacer, Plastic, .50 I.D. x1.13 O.D. x .25 Long
Nylon Insert Lock Nut, 5/16-18
39
1
203472 Spring, Black, Slam Jam
Nut 1/2-13
40
1
203470 Washer, Flat, Slam Jam
Bolt, Hex Flange, 5/16-18 x 1 Long
41
1
200318 Bracket, Reinforcement, Slam Jam
Nut, Hex Flange, 5/16-18
42
1
203796 T-Bolt, 3/8-16 x 5” Long
Pushnut, Black
43
1
900033 Bracket Slam Jam
Washer 1/4 Flat
44
1
203795 Nut, Special, Slam Jam
Wheel Bracket
Spacer, Plastic, 1" Long
NOTE: Hardware kit is designed for more than one style of basketball system.
Rim
Not all hardware will be used.
Cap, Pole Top 3”
Elevator Tubes
* You may have extra parts with this model.
Plug Cap
Label, Height Adjustment and Moving
Net
LISTE DES PIÈCES - Voir légende
Légende
Légende
Qté No. de réf. Description
1
2
3
4
5
6
7
8
1
1
2
1
1
1
2
4
600046
205424
266200
FR908242
FR908246
FR928328
203679
201642
9
10
11
12
13
14
15
5*
2
1
6
1
5
2
203063
906410
201625
203218
203099
206340
205528
16
17
18
19
20
21
22
23
24
25
8
2
2
1
1
1
1
4
1
1
203100
206938
206303
20062701
202587
26
1
206219
900184
266300
501720
Réservoir (noir)
Axe des roues
Roue, 10 cm (noire)
Section de poteau supérieure
Section de poteau centrale
Section de poteau inférieure
Boulon, six pans, 3/8-16 x 5 cm (long.)
Entretoise, D.I. 12,7 mm x D.E. 19 mm
x 16 mm (long.)
Contre-écrou en nylon, 3/8-16
Contrefiche de réservoir
Boulon, jaune, 5/16-18 x 9 cm long.
Rondelle, plate, D.E. 7,9 mm
Contre-écrou en nylon, 5/16-18
Écrou, 1/2-13
Boulon, bride, six pans, 5/16-18 x 2,5
cm (long.)
Écrou, bride à six pans, 5/16-18
Écrou, noir
Rondelle, plate, 6 mm
Support des roues
Entretoise, plastique, 2,5 cm (long.)
Cerceau
Capuchon, haut du poteau 7,5 cm
Tubes du système élévateur
Bouchon
Étiquette, réglage de hauteur et
déplacement
ID# M770134
27
28
29
30
1
1
2
1
201160
201159
90096401
206305
31
4
203113
32
4
204961
33
2
201129
34
35
36
37
38
1
1*
5
1
2*
206360
206304
201125
201651
39
40
41
42
43
44
1
1
1
1
1
1
203472
203470
200318
203796
900033
203795
REMARQUE:
FR501720
Qté No. de réf. Description
Levier de cliquet
Cliquet
Support de panneau
Axe d’épaulement, 6 mm x 2-9/32
(long.)
Boulon, bride à 6 pans, 5/16-18 x 6,3
cm (long.)
Boulon, six pans, 3/8-16 x 15,8 mm
(long.)
Entretoise, D.I. 10 mm x D.E. 12 mm x
4,5 cm (long.)
Panneau
Boulon, six pans, 3/8-16 x 6,7 cm (long.)
Boulon, 1/2-13 x 16 cm (long.)
Ressort, retour de cliquet
Entretoise, plastique, 12 mm D.I. x 28
mm D.E. x 6 mm (long.)
Ressort, noir, Slam Jam
Rondelle, plate, Slam Jam
Support de renforcement, Slam Jam
Boulon à T, 3/8-16 x 12,7 cm (long.)
Support, Slam Jam
Écrou, spécial, Slam Jam
Le kit de visserie est conçu pour plus d'un style de système de
basket-ball. Toute la visserie ne sera pas nécessairement utilisée.
* Il est possible que vous ayez d'autres pièces avec ce modèle.
Filet
05/06
12
TEILELISTE - Siehe Teileschlüssel
Nr. Anz. Teilenummer Beschreibung
1
2
3
4
5
6
7
8
1
1
2
1
1
1
2
4
600046
205424
266200
FR908242
FR908246
FR928328
203679
201642
9
10
11
5*
2
1
203063
906410
201625
12
13
14
15
6
1
5
2
203218
203099
206340
205528
16
17
18
19
20
21
22
23
24
25
8
2
2
1
1
1
1
4
1
1
203100
206938
206303
20062701
202587
26
1
206219
900184
266300
501720
FR501720
Tank (schwarz)
Radachse
Rad, 4 Zoll (schwarz)
Oberes Stangenteil
Mittleres Stangenteil
Unteres Stangenteil
Sechskantschraube 3/8-16 x 2 Länge
Abstandsstück 0,50 ID x 0,75 AD x 0,63
Länge
Nylon-Einschraubgegenmutter, 3/8-16
Tankverstrebung
Schraube, gelb, Dichromat, 5/16-18 X
3,60 Zoll Länge
Unterlegscheibe, flach, 5/16 ID
Nylon-Einschraubgegenmutter, 5/16-18
Mutter, 1/2-13
Sechskant-Flanschschraube, 5/16-18 x 1
Länge
Sechskant-Flanschmutter, 5/16-18
Feder, schwarz
Unterlegscheibe, flach 1/4
Radhalterung
Abstandsstück, Kunststoff, 1 Zoll Länge
Korbrand
Stangenendkappe 3 Zoll
Verlängerungsrohre
Verschlusskappe
Höheneinstell- und Transportaufkleber
Nr. Anz. Teilenummer Beschreibung
27
28
29
30
31
1
1
2
1
4
201160
201159
90096401
206305
203113
32
33
4
2
204961
201129
34
35
36
37
38
1
1*
5
1
2*
206360
206304
201125
201651
39
40
41
42
43
44
1
1
1
1
1
1
203472
203470
200318
203796
900033
203795
HINWEIS:
Sperrhebel
Ratsche
Korbwandklammer
Lastösenbolzen 1/4 x 2-9/32 Länge
Sechskant-Flanschschraube, 5/16-18 x 21/2 Länge
Sechskantschraube 3/8-16 x 625 Länge
Abstandsstück, 0,402 ID x 0,50 AD x 1,8
Zoll Länge
Korbwand
Sechskantschraube 3/8-16 x 2,65 Länge
Schraube, 1/2-13 x 6-5/16 Zoll Länge
Ratschenrückholfeder
Abstandsstück, Kunststoff, 0,50 ID x 1,13
AD x 0,25 Zoll Länge
Slam-Jam-Feder, schwarz
Slam-Jam-Unterlegscheibe, flach
Halterung, Verstärkung, Slam Jam
T-Nutenschraube, 3/8-16 x 5 Zoll Länge
Slam-Jam-Halterung
Slam-Jam-Spezialmutter
Die beiliegenden Befestigungsteile sind für mehr als eine Ausführung
des Basketballsystems vorgesehen. Es werden nicht alle
Befestigungsteile benötigt.
* Diesem modell können zusätzliche teile beigepackt sein.
Netz
LISTA DE PIEZAS - Vea el identificador de herraje
Artículo
Artículo
Cant. Pieza N.º Descripción
1
2
3
4
5
6
7
8
1
1
2
1
1
1
2
4
9
10
11
5*
2
1
12
13
14
15
6
1
5
2
16
17
18
19
20
21
22
23
24
25
8
2
2
1
1
1
1
4
1
1
26
1
Cant. Pieza N.º Descripción
600046
205424
266200
FR908242
FR908246
FR928328
203679
201642
Tanque, (Negro)
27
1
201160 Palanca con fiador
Eje de la rueda
28
1
201159 Trinquete
Rueda, 4” (10,2 cm) (negra)
29
2
90096401 Soporte del respaldo
Sección superior del poste
30
1
206305 Pasador de horquilla 1/4 x 2-9/32 de
Sección media del poste
largo
Sección inferior del poste
31
4
203113 Perno, brida hexagonal, 5/16-18 x 2-1/2
Perno, hexagonal, 3/8-16 x 2 de longitud
de longitud
Separador .50 D.I. x .75 D.E. x 0.63 de
32
4
204961 Perno, hexagonal, 3/8-16 x .625 de
longitud
longitud
203063 Contratuerca de nilón del inserto, 3/8-16
33
2
201129 Separador .402 D.I. x .50 D.E. x 1.8 de
906410 Puntal del tanque
longitud
201625 Perno, dicromato amarillo, 5/16-18 x 3.60”
34
1
Respaldo
de longitud
35
1*
206360 Perno, hexagonal, 3/8-16 x 2.65 de
203218 Arandela plana, 5/16 D.E.
longitud
203099 Contratuerca de nilón del inserto, 5/16-18
36
5
206304 Perno cabeza de carro, 1/2-13 x 6-5/16
206340 Tuerca,1/2-13
de longitud
205528 Perno, brida hexagonal, 5/16-18 x 1” de
37
1
201125 Resorte de retorno del trinquete
longitud
38
2*
201651 Separador, plástico, .50 D.I. x 1.13 D.E. x
203100 Tuerca, brida hexagonal, 5/16-18
.25 de longitud
206938 Tuerca dentada, negra
39
1
203472 Resorte, negro, Slam Jam
206303 Arandela, 1/4 plana
40
1
203470 Arandela, plana, Slam Jam
20062701 Soporte de la rueda
41
1
200318 Soporte, refuerzo, Slam Jam
42
1
203796 Perno en T, 3/8-16 x 5" de longitud
202587 Separador de plástico, 1" de longitud
43
1
900033 Soporte, Slam Jam
Borde
44
1
203795 Tuerca especial, Slam Jam
206219 Tapa, parte superior del poste 3"
900184 Tubos elevadores
266300 Tapa
501720 Etiqueta, ajuste de la altura y movimiento NOTA: El juego de herraje está diseñado para más de un estilo de sistemas de
FR501720
baloncesto. No se usará todo el herraje.
Red
* Puede haber piezas adicionales en este modelo.
13
05/06
ID# M770134
HARDWARE IDENTIFIER (BOLTS AND SCREWS)
IDENTIFICATION DES PIÈCES (BOULONS ET VIS)
BEFESTIGUNGSTEILESCHLÜSSEL (BOLZEN UND SCHRAUBEN)
IDENTIFICADOR DE HERRAJE (PERNOS Y TORNILLOS)
#7 (2)
#32 (4)
#36 (5)
#11 (1)
#15 (2)
#35 (1)*
#31 (4)
#42 (1)
HARDWARE IDENTIFIER (NUTS AND WASHERS)
IDENTIFICATION DES PIÈCES (ÉCROUS ET RONDELLES)
BEFESTIGUNGSTEILESCHLÜSSEL (MUTTERN UND UNTERLEGSCHEIBEN)
IDENTIFICADOR DE HERRAJE (TUERCAS Y ARANDELAS)
#12 (6)
#18 (2)
#44 (1)
#40 (1)
#13 (1)
#16 (8)
ID# M770134
05/06
#9 (5)*
14
#14 (5)
HARDWARE IDENTIFIER (STEEL SPACERS)
IDENTIFICATION DES PIÈCES (ENTRETOISES EN ACIER)
BEFESTIGUNGSTEILESCHLÜSSEL (ABSTANDSSTÜCKE AUS STAHL)
IDENTIFICADOR DEL HERRAJE (ESPACIADORES DE ACERO)
#33 (2)
HARDWARE IDENTIFIER (PLASTIC SPACERS, CAPS, CLIPS AND OTHER)
IDENTIFICATION DES PIÈCES (ENTRETOISES EN PLASTIQUE, CAPUCHONS, PINCES ET AUTRES)
BEFESTIGUNGSTEILESCHLÜSSEL (ABSTANDSSTÜCKE, KAPPEN UND CLIPS AUS KUNSTSTOFF UND SONSTIGE TEILE)
IDENTIFICADOR DEL HERRAJE (ESPACIADORES DE PLÁSTICO, TAPAS, SUJETADORES Y OTROS)
#30 (1)
#20 (1)
#37 (1)
#8 (4)
#43 (1)
#17 (2)
#41 (1)
#38 (2)*
#39 (1)
* You may have extra parts with this model.
15
05/06
ID# M770134
SECTION A: ASSEMBLE THE BASE
SECTION A: ASSEMBLAGE DU SOCLE
BAUABSCHNITT A: ZUSAMMENBAU DES SOCKELS
SECCIÓN A: MONTAJE DE LA BASE
This is what your system will look like
when you’ve finished this section.
Voici à quoi ressemblera votre système
lorsque vous en aurez fini avec cette
section.
ITEMS REQUIRED FOR THIS SECTION
OUTILS REQUIS POUR CETTE SECTION
FÜR DIESEN BAUABSCHNITT BENÖTIGTE GEGENSTÄNDE
ARTÍCULOS REQUERIDOS PARA ESTA SECCIÓN
(2) 1/2” and (2) 9/16" Wrenches
(2) clés 1/2" et (2) clés 9/16"
(2) 1/2 und (2) 9/16-Zoll-Schraubenschlüssel
(2) Llaves de 1/2" y (2) de 9/16"
So sieht das System aus, wenn Sie mit
diesem Bauabschnitt fertig sind.
Así es como se verá su sistema cuando
haya terminado esta sección.
AND/OR
ET/OU
UND/ODER
Y/O
(2) Socket Wrenches and Sockets
(2) clés à douille et douilles
(2) Steckschlüssel und Einsätze
(2) Llaves de tuercas de boca tubular y casquillos de
1/2”
1.
9/16”
Correctly identify each pole section. Poles have an identification sticker that will be used as a reference point in the
next step.
Identifiez correctement chaque section de poteau. Les poteaux ont une étiquette d'identification qui servira de point
de repère à l'étape suivante.
Jedes Stangenteil richtig identifizieren. Die Stangenteile
sind mit Aufklebern markiert, die als Orientierungshilfe für
den nächsten Schritt dienen.
Identifique correctamente cada sección del poste. Los
postes tienen una calcomanía de identificación que
se usará como punto de referencia en el paso
siguiente.
IDENTIFICATION STICKER
ÉTIQUETTE D'IDENTIFICATION
MARKIERUNGSAUFKLEBER
CALCOMANÍA DE IDENTIFICACIÓN
4
TOP / SUPÉRIEURE / OBEN / SUPERIOR
5
MIDDLE / CENTRALE / MITTE / MEDIA
6
BOTTOM / INFÉRIEURE / UNTEN / SECCIÓN INFERIOR
ID# M770134
05/06
16
2.
While maintaining alignment, bounce middle pole section (5) into top section (4) using a wood scrap as shown until
the top pole no longer moves toward the pole identification sticker on the middle pole.
Tout en maintenant l'alignement, entrechoquez les sections de poteau supérieure (4) et centrale (5) en utilisant une
chute de bois, comme illustré, jusqu'à ce qu'elles ne bougent plus vers le repère de référence (ruban adhésif).
Redressez l'ensemble.
Unter Wahrung der korrekten Ausrichtung das mittlere Stangenteil (5) wie gezeigt mit einem Holzstück in das obere
Stangenteil (4) hineinklopfen, bis sich das obere Stangenteil nicht mehr auf die mit Klebeband markierte Stelle am
mittleren Stangenteil zubewegt. Den Stangenaufbau aufrichten.
Mientras mantiene la alineación, golpee la sección media el poste (5) en la sección superior (4) usando un recorte de
madera, como se muestra, hasta que la sección superior del poste ya no se mueva hacia la marca de referencia de
cinta que se encuentra en la sección media del poste. Coloque el conjunto en posición vertical.
IMPORTANT!
IMPORTANT!
WICHTIG!
¡IMPORTANTE!
L'ÉTIQUETTE D'IDENTIFICATION SE
SITUE À 12,7 CM DE L'EXTRÉMITÉ DU
POTEAU. LORSQU'ELLES SONT
CORRECTEMENT EMBOÎTÉES LES UNES
DANS LES AUTRES, LES SECTIONS DE
POTEAU DOIVENT SE CHEVAUCHER DE 9
CM MINIMUM, EN LAISSANT 3,8 CM
ENTRE LA SECTION QUI CHEVAUCHE ET
L'ÉTIQUETTE D'IDENTIFICATION.
DER MARKIERUNGSAUFKLEBER IST IN
EINER ENTFERNUNG VON CA. 12,7 CM
VOM STANGENENDE ANGEBRACHT.
WENN DIE STANGENTEILE RICHTIG
ZUSAMMENGESTAUCHT WURDEN,
SOLLTEN SIE EINANDER UM
MINDESTENS 9 CM ÜBERLAPPEN. DER
ABSTAND ZWISCHEN DEM
ÜBERLAPPENDEN STANGENTEIL UND
DEM MARKIERUNGSAUFKLEBER SOLLTE
ALSO 3,8 CM BETRAGEN.
5
5”
(12.7 cm)
5
Dimple
Renfoncement
Einbuchtung
Concavidad
4
5
ID STICKER
4
middle pole
THE IDENTIFICATION STICKER IS
LOCATED 5" FROM THE END OF THE
POLE. WHEN PROPERLY POUNDED
TOGETHER, THE POLE SECTIONS
SHOULD HAVE A 3-1/2" MINIMUM
OVERLAP, LEAVING 1-1/2" BETWEEN THE
OVERLAPPING POLE AND THE
IDENTIFICATION STICKER.
Trough
Gorge
Rinne
Depresión
middle pole
CAUTION!
ATTENTION!
VORSICHT!
¡PRECAUCIÓN!
Align dimple of top
pole section (4) into
trough of middle pole
section (5) as shown.
ÉTIQUETTE
D'IDENTIFICATION
1.5”
(3.81 cm)
MARKIERUNGSAUFKLEBER
CALCOMANÍA DE
IDENTIFICACIÓN
Alignez le petit creux
de la section de poteau
supérieure (4) dans la
gorge de la section de
poteau centrale (5),
comme illustré.
Die Ausbuchtung im
oberen Stangenteil (4)
wie gezeigt mit der
Rinne im mittleren
Stangenteil (5)
ausrichten.
Alinee la concavidad
de la sección superior
del poste (4) con la
depresión de la
sección media del
poste (5) como se
muestra.
DIMPLE
RENFONCEMENT
EINBUCHTUNG
CONCAVIDAD
LA CALCOMANÍA DE IDENTIFICACIÓN
ESTÁ COLOCADA A 12.7 CM (5") DEL
EXTREMO DEL POSTE. CUANDO ESTÁN
ADECUADAMENTE EMBRAGADAS, LAS
SECCIONES DEL POSTE DEBEN TENER
UN TRASLAPE MÍNIMO DE 8.9 CM (3 1/2"),
DEJANDO 3.8 CM (1 1/2") ENTRE EL
POSTE TRASLAPADO Y LA CALCOMANÍA
DE IDENTIFICACIÓN.
HOLE
TROU
LOCH
ORIFICIO
Wood Scrap (NOT SUPPLIED)
Chute de bois (NON FOURNIE)
Holzstück (NICHT IM LIEFERUMFANG ENTHALTEN)
Trozo de madera (NO SE SUMINISTRA)
17
05/06
ID# M770134
3.
Bounce top and middle pole assembly (4 and 5) onto bottom pole section (6) using a wood scrap as shown. Bounce
until the top and middle pole assembly no longer moves toward the pole identification mark on the bottom pole.
Entrechoquez l'ensemble sections supérieure (4) et centrale (5) avec la section inférieure (6) à l'aide d'une chute de
bois, comme illustré. Entrechoquez-les jusqu'à ce que l'ensemble sections supérieure et centrale ne bougent plus
vers le repère de référence (ruban adhésif) sur la section de poteau inférieure.
Den oberen (4) und mittleren Stangenaufbau (5) wie gezeigt mit
einem Holzstück in das obere Stangenteil (6) hineinklopfen. Die
Baugruppen zusammenstauchen, bis sich der obere und mittlere
Stangenaufbau nicht mehr auf die mit Klebeband markierte Stelle
am unteren Stangenteil zubewegen.
Golpee el conjunto de la sección superior del poste (4) y la
sección media del poste (5) en la sección inferior del poste (6)
usando un trozo de madera como se muestra. Siga golpeando
hasta que el conjunto de las secciones superior y media del
poste ya no se mueva hacia la marca de referencia de cinta que
se encuentra en la sección inferior del poste.
NOTE:
REMARQUE:
HINWEIS:
NOTA:
POLE SECTIONS SHOULD HAVE A
3-1/2" (9 CM) MINIMUM OVERLAP.
LES SECTIONS DE POTEAU DOIVENT SE
CHEVAUCHER DE 9 CM MINIMUM.
DIE STANGENTEILE MÜSSEN EINANDER UM
MINDESTENS 9 CM (3 ½ ZOLL) ÜBERLAPPEN.
LAS SECCIONES DEL POSTE SE DEBEN
TRASLAPAR UN MÍNIMO DE 3-1/2" (9 CM).
IMPORTANT! / IMPORTANT!
WICHTIG! / ¡IMPORTANTE!
Align dimple of middle pole section (5) into trough of bottom
pole section (6) as shown.
4
Alignez le petit creux de la section de poteau centrale (5) sur la
gorge de la section de poteau inférieure (6), comme illustré.
Die Ausbuchtung im mittleren Stangenteil (5) wie gezeigt mit der
Rinne im unteren Stangenteil (6) ausrichten.
Alinee la concavidad de la sección media del poste (5) con la
depresión de la sección inferior del poste (6) como se muestra.
5
Dimple
Renfoncement
Einbuchtung
Concavidad
Trough
Gorge
Rinne
Depresión
1.5” (3.81 cm)
Bottom pole
5”
(12.7 cm)
ID STICKER
ÉTIQUETTE
D'IDENTIFICATION
6
MARKIERUNGSAUFKLEBER
Bottom pole
CALCOMANÍA DE
IDENTIFICACIÓN
Wood Scrap (NOT SUPPLIED)
Chute de bois (NON FOURNIE)
Holzstück (NICHT IM LIEFERUMFANG ENTHALTEN)
Trozo de madera (NO SE SUMINISTRA)
ID# M770134
05/06
18
4.
Install wheel axle (2) through wheel carriage (19) and secure wheels (3) onto wheel axle (2) with pushnuts (17) as
shown. Insert pole assembly into tank assembly as shown. Secure pole (6) to tank and wheel carriage as shown. A
deep socket is recommended.
Enfilez l’axe des roues (2) dans le train de roulement (19) et installez les roues (3) sur l’axe (2) avec les écrous (17), comme
illustré. Insérez l’ensemble du poteau dans le réservoir, comme illustré. Fixez le poteau (6) au réservoir et au support de
roues, comme illustré. L’utilisation d’une douille longue est recommandée.
Die Radachse (2) durch das Räderfahrzeug (19) schieben und die Räder (3) wie gezeigt mit Druckmuttern (17) an der
Radachse (2) installieren. Den Stangenaufbau wie gezeigt in die Tankbaugruppe stecken. Das untere Stangenteil (6) wie
gezeigt am Tank und an der Radhalterung befestigen; dazu wird ein tiefer Schraubenschlüsseleinsatz empfohlen.
Instale el eje de la rueda (2) a través del carro portamuela (19) e instale las ruedas (3) en el eje de la rueda (2) con tuercas
dentadas (17) como es muestra. Introduzca el conjunto del poste en el conjunto del tanque como se muestra. Asegure el
poste (6) en el tanque y el carro portamuela como se muestra. Se recomienda un receptáculo profundo.
6
1
IMPORTANT!
IMPORTANT!
WICHTIG!
¡IMPORTANTE!
The Warning Label should be
facing towards the front.
L'étiquette d'avertissement doit être
tournée vers l'avant.
Der Warnaufkleber sollte zur
Vorderseite hin zeigen.
La etiqueta de advertencia debe
quedar orientada hacia el frente.
7
17
17
2
19
3
3
WARNING!
AVERTISSEMENT!
WARNUNG!
¡ADVERTENCIA!
TWO CAPABLE ADULTS REQUIRED FOR THIS PROCEDURE. FAILURE TO
FOLLOW THIS WARNING COULD RESULT IN SERIOUS INJURY AND/OR
PROPERTY DAMAGE.
IMPORTANT!
IMPORTANT!
WICHTIG!
¡IMPORTANTE!
DEUX ADULTES CAPABLES REQUIS POUR CETTE PROCÉDURE. SUIVEZ CET
AVERTISSEMENT SOUS PEINE D’ENCOURIR DES BLESSURES GRAVES ET/OU
DES DÉGÂTS MATÉRIELS.
DIESER VERFAHRENSSCHRITT MUSS VON ZWEI DAZU IN DER LAGE
BEFINDLICHEN PERSONEN AUSGEFÜHRT WERDEN. EIN MISSACHTEN DIESER
WARNUNG KANN ZU SCHWEREN VERLETZUNGEN UND/ODER SACHSCHÄDEN
FÜHREN.
SE REQUIEREN DOS ADULTOS CAPACES PARA REALIZAR ESTE
PROCEDIMIENTO. SI NO SE OBSERVA ESTA ADVERTENCIA SE PODRÍA
OCASIONAR UNA LESIÓN GRAVE Y/O DAÑOS A LA PROPIEDAD.
DO NOT OVER TIGHTEN.
NE SERREZ PAS TROP.
NICHT ZU FEST ANZIEHEN.
NO APRIETE EXCESIVAMENTE.
19
05/06
ID# M770134
5.
Secure flat end of tank struts (10) to pole using bolt (11), washers
(12), and nut (13), as shown.
10
Fixez l'extrémité plate des contrefiches du réservoir (10) au poteau à l’aide
du boulon (11), des rondelles (12) et de l’écrou (13), comme illustré.
10
12
Das flache Ende der Tankverstrebungen (10) mit Schraube (11),
Unterlegscheiben (12) und Mutter (13) wie gezeigt an der Stange
befestigen.
12
13
11
Fije el extremo plano de los puntales del tanque (10) en el poste usando
un perno (11), arandelas (12) y una tuerca (13), como se muestra.
WARNING!
AVERTISSEMENT!
WARNUNG!
¡ADVERTENCIA!
6
TIGHTEN BOLT (11) IN LOCK NUT (13) UNTIL FLUSH (EVEN) WITH LOCK NUT’S
OUTER EDGE.
SERREZ LE BOULON (11) DANS LE CONTRE-ÉCROU (13) JUSQU'À CE QU'IL SE
TROUVE AU MÊME NIVEAU QUE LE BORD EXTÉRIEUR DU CONTRE-ÉCROU.
DIE SCHRAUBE (11) IN DER GEGENMUTTER (13) SO WEIT ANZIEHEN, BIS SIE
BÜNDIG MIT DER AUSSENKANTE DER GEGENMUTTER ABSCHLIESST.
APRIETE EL PERNO (11) EN LA CONTRATUERCA (13) HASTA QUE QUEDE AL
RAS (AL NIVEL) DEL BORDE EXTERNO DE LA CONTRATUERCA.
6.
Rotate the non-secured angled ends of the struts (10) and secure tank struts (10) to the base using
bolt (15), washers (12), and nut (16).
Tournez les extrémités non fixées des contrefiches et fixez les contrefiches (10) sur le socle à l'aide du
boulon (15), des rondelles (12) et de l'écrou (16).
Die ungesicherten Winkelenden der Verstrebungen (10) drehen und die Tankverstrebungen (10) mit Schraube (15),
Unterlegscheiben (12) und Mutter (16) am Sockel
befestigen.
Gire los extremos angulares no asegurados de los
puntales (10) y asegure los puntales del tanque (10) en
la base usando un perno (15), arandelas (12) y tuerca
(16).
6
10
10
12
6
10
15
1
10
15
1
12
12
12
16
ID# M770134
05/06
20
16
SECTION B: ATTACH THE BACKBOARD
SECTION B: FIXATION DU PANNEAU
BAUABSCHNITT B: ANBRINGEN DER KORBWAND
SECCIÓN B: CONECTE EL RESPALDO
This is what your system will look like when
you’ve finished this section.
Voici à quoi ressemblera votre système lorsque
vous en aurez fini avec cette section.
So sieht das System aus, wenn Sie mit diesem
Bauabschnitt fertig sind.
Así es como se verá su sistema cuando haya
terminado esta sección.
ITEMS REQUIRED FOR THIS SECTION
OUTILS REQUIS POUR CETTE SECTION
FÜR DIESEN BAUABSCHNITT BENÖTIGTE GEGENSTÄNDE
ARTÍCULOS REQUERIDOS PARA ESTA SECCIÓN
(2) 7/16", (2) 1/2", (2) 9/16" AND (2) 3/4" Wrenches
(2) clés 7/16", (2) clés 1/2", (2) clés 9/16" ET (2) clés 3/4"
(2) 7/16, (2) 1/2, (2) 9/16 UND (2) 3/4-Zoll-Schraubenschlüssel
(2) Llaves de 7/16", 1/2", (2) de 9/16" Y (2) de 3/4"
AND/OR
ET/OU
UND/ODER
Y/O
(2) Socket Wrenches and Sockets
(2) clés à douille et douilles
(2) Steckschlüssel und Einsätze
(2) Llaves de tuercas de boca tubular y casquillos de
7/16” 1/2”
21
9/16”
3/4”
05/06
ID# M770134
1.
Assemble backboard brackets (29) using bolts (32), and nuts (9) as shown.
Assemblez les supports de panneau (29) à l'aide des boulons (32) et des écrous (9), comme illustré.
Die Korbwandklammern (29) wie gezeigt mit Schrauben (32) und Muttern (9) zusammenbauen.
Monte los soportes del respaldo (29) usando pernos (32) y tuercas (9) como se muestra.
9
9
NOTE
ORIENTATION
NOTEZ
L'ORIENTATION.
32
DIE KORREKTE
AUSRICHTUNG
BEACHTEN.
NOTE LA
ORIENTACIÓN.
29
32
29
ID# M770134
05/06
22
2.
Fit spacer (33) into pawl (27). Then insert pawl assembly between backboard brackets (29) and secure with bolt (35)
and nut (9).
Installez l'entretoise (33) dans le cliquet (27). Ensuite, insérez le cliquet entre les supports du panneau (29) et fixez
avec le boulon (35) et l'écrou (9).
Das Abstandsstück (33) in die Klinke (27) einpassen. Dann die Sperrklinkengruppe zwischen die Korbwandklammern
(29) einsetzen und mit Schraube (35) und Mutter (9) befestigen.
Ajuste el separador (33) en el fiador (27). Luego, introduzca el conjunto del fiador entre los soportes del respaldo
(29) y asegure con pernos (35) y tuercas (9).
NOTE: Completed Assembly
REMARQUE: Assemblage terminé
HINWEIS: Fertige Montage
NOTA: Conjunto completado
29
9
29
35
33
35
27
33
3.
27
Identify elevator tubes (23).
Identifiez les tubes du système élévateur (23).
Die Verlängerungsrohre (23) zurechtlegen.
Identifique los tubos elevadores (23).
Toward
Pole
Toward
Board
23
Vers le
poteau
Vers le
panneau
Elevator Tubes
Tubes d'élévateur
Verlängerungsrohre
Tubos elevadores
Zur Korbwand
hin
Hacia el
tablero
23
Zur
Stange hin
Hacia el
poste
05/06
ID# M770134
4.
Attach lower elevator tubes (23) to backboard brackets (29) using spacers (38, 8, 20), bolts (36) ratchet (28), and
nuts (14) as shown.
Attachez les tubes inférieurs (23) du système élévateur aux supports de panneau (29) à l’aide des entretoises (38, 8,
20), des boulons (36), du cliquet (28) et des écrous (14), comme illustré.
Die unteren Verlängerungsrohre (23) mit Abstandsstücken (38, 8, 20), Schrauben (36), Ratsche (28) und Muttern
(14) wie gezeigt an den Korbwandklammern (29) befestigen.
Instale los tubos elevadores inferiores (23) a los soportes del respaldo (29) usando separadores (38, 8, 20), pernos
(36) trinquete (28) y tuercas (14) como se muestra.
WARNING!
29
STOP TIGHTENING NUT
(14) WHEN FLUSH WITH
END OF THE BOLT (36).
20
27
14
8
14
23
38
8
38
36
28
36
23
IMPORTANT!
IMPORTANT!
WICHTIG!
¡IMPORTANTE!
TIGHTEN ALL HARDWARE FROM STEP 1-4 AFTER THIS
ASSEMBLY IS COMPLETED.
UNE FOIS CE MONTAGE TERMINÉ, SERREZ TOUTES
LES PIÈCES DE FIXATION DES ÉTAPES 1 À 4.
NACH ABSCHLUSS DIESES MONTAGESCHRITTS ALLE
IN DEN SCHRITTEN 1-4 ANGEBRACHTEN
BEFESTIGUNGSTEILE ANZIEHEN.
APRIETE TODO EL HERRAJE DEL PASO 1 AL 4
DESPUÉS DE COMPLETAR ESTE CONJUNTO.
ID# M770134
05/06
24
5.
Secure pawl (27) in place with clevis pin (30) and washers (18) as shown.
Fixez le cliquet (27) en position avec l'axe à épaulement (30) et les rondelles (18), comme illustré.
Die Klinke (27) wie gezeigt mit dem Lastösenbolzen (30) und den Unterlegscheiben (18) in der Einbauposition
sichern.
Fije el fiador (27) en su lugar con un pasador de horquilla (30)
y arandelas (18) como se muestra.
18
27
30
18
Stretch spring (37) into position with pliers.
6.
Tendez le ressort (37) en position avec une pince.
Die Feder (37) mit einer Zange in die benötigte Position
strecken.
Estire el resorte (37) hasta su posición con pinzas.
WARNING!
AVERTISSEMENT!
WARNUNG!
¡ADVERTENCIA!
USE EYE PROTECTION WHEN INSTALLING
SPRINGS.
23
PROTÉGEZ-VOUS LES YEUX LORSQUE VOUS
INSTALLEZ DES RESSORTS.
BEIM ANBRINGEN DER FEDERN
AUGENSCHUTZ TRAGEN!
29
CUANDO INSTALE LOS RESORTES UTILICE
PROTECTORES OCULARES.
37
23
25
05/06
ID# M770134
7.
Insert T bolt (42) through Slam-Jam bracket (43) as shown. Attach Slam-Jam bracket (43) to backboard (34) using
bolts (31) and nuts (16) as shown.
Insérez le boulon à T (42) dans le support Slam Jam (43), comme illustré. Attachez le support Slam-Jam (43) au
panneau (34) à l’aide des boulons (31) et des écrous (16), comme illustré.
Die T-Nutenschraube (42) wie gezeigt durch die Slam Jam-Halterung stecken. Slam Jam-Halterung (43) wie gezeigt mit
Schrauben (31) und Muttern (16) an der Korbwand (34) befestigen.
Introduzca un perno “T” (42) a través del soporte Slam Jam (43) como se muestra. Conecte el soporte Slam-Jam (43) en el
respaldo (34) usando pernos (31) y tuercas (16) como se muestra.
16
34
33
29
42
43
31
WARNING!
AVERTISSEMENT!
WARNUNG!
¡ADVERTENCIA!
TWO CAPABLE ADULTS REQUIRED FOR THIS PROCEDURE. FAILURE TO
FOLLOW THIS WARNING COULD RESULT IN SERIOUS INJURY AND/OR
PROPERTY DAMAGE.
DEUX ADULTES CAPABLES REQUIS POUR CETTE PROCÉDURE. SUIVEZ CET
AVERTISSEMENT SOUS PEINE D’ENCOURIR DES BLESSURES GRAVES ET/OU
DES DÉGÂTS MATÉRIELS.
DIESER VERFAHRENSSCHRITT MUSS VON ZWEI DAZU IN DER LAGE
BEFINDLICHEN PERSONEN AUSGEFÜHRT WERDEN. EIN MISSACHTEN DIESER
WARNUNG KANN ZU SCHWEREN VERLETZUNGEN UND/ODER SACHSCHÄDEN
FÜHREN.
SE REQUIEREN DOS ADULTOS CAPACES PARA REALIZAR ESTE
PROCEDIMIENTO. SI NO SE OBSERVA ESTA ADVERTENCIA SE PODRÍA
OCASIONAR UNA LESIÓN GRAVE Y/O DAÑOS A LA PROPIEDAD.
ID# M770134
05/06
26
8.
Attach upper elevator tubes (23) to backboard support brackets (29) using spacers (8), bolt (36), and nut (14)
as shown.
Attachez les tubes supérieurs du système élévateur (23) aux supports du panneau (29) à l'aide des
entretoises (8), du boulon (36) et de l'écrou (14), comme illustré.
Die oberen Verlängerungsrohre (23) wie gezeigt mit Abstandsstücken (8), Schraube (36) und Mutter (14) an
den Korbwandstützklammern (29) befestigen.
Conecte los tubos elevadores superiores (23) en los soportes del respaldo (29) usando espaciadores (8),
pernos (36) y tuercas (14) como se muestra.
23
23
8
14
36
8
29
IMPORTANT!
IMPORTANT!
WICHTIG!
¡IMPORTANTE!
Test fit bolts into holes of brackets and
carefully rock them in a circular motion to
ream out paint from holes if necessary.
Testez l'ajustement des boulons dans les
trous des supports et basculez-les en
tournant doucement pour retirer la peinture
des trous si nécessaire.
Die Schrauben zur Probe in die Bohrungen
der Klammern stecken und sie vorsichtig in
einer Kreisbewegung hin- und herbewegen,
um eventuelle Farbreste aus den
Bohrungen zu entfernen.
Pruebe el ajuste de los pernos en los
orificios de los soportes y cuidadosamente
hágalos girar para quitar la pintura de los
orificios, si es necesario.
27
05/06
ID# M770134
9.
Support pole on sawhorse. Attach upper and lower elevator tubes (23) to upper pole section (4) using
bolts (36) and nuts (14) as shown. Attach pole cap (22) as shown.
Appuyez le poteau sur le banc de sciage. Attachez les tubes supérieurs et inférieurs de l'élévateur (23) à
la section de poteau supérieure (4) à l'aide des boulons (36) et des écrous (14), comme illustré. Placez le
capuchon (22) sur le poteau, comme illustré.
Die Stange auf einen Sägebock legen. Die oberen und unteren Verlängerungsrohre (23) wie gezeigt mit
Schrauben (36) und Muttern (14) am oberen Stangenteil (4) befestigen. Die Stangenkappe (22) wie
gezeigt aufsetzen.
Apoye el poste en un caballete de aserrar. Conecte los tubos elevadores superiores e inferiores (23) en
la sección superior del poste (4) usando pernos (36) y tuercas (14) como se muestra. Conecte la tapa del
poste (22) como se muestra.
14
14
23
4
23
22
23
WARNING!
AVERTISSEMENT!
WARNUNG!
¡ADVERTENCIA!
TWO CAPABLE ADULTS REQUIRED FOR THIS PROCEDURE. FAILURE TO
FOLLOW THIS WARNING COULD RESULT IN SERIOUS INJURY AND/OR
PROPERTY DAMAGE.
DEUX ADULTES CAPABLES REQUIS POUR CETTE PROCÉDURE. SUIVEZ CET
AVERTISSEMENT SOUS PEINE D’ENCOURIR DES BLESSURES GRAVES ET/OU
DES DÉGÂTS MATÉRIELS.
DIESER VERFAHRENSSCHRITT MUSS VON ZWEI DAZU IN DER LAGE
BEFINDLICHEN PERSONEN AUSGEFÜHRT WERDEN. EIN MISSACHTEN DIESER
WARNUNG KANN ZU SCHWEREN VERLETZUNGEN UND/ODER SACHSCHÄDEN
FÜHREN.
SE REQUIEREN DOS ADULTOS CAPACES PARA REALIZAR ESTE
PROCEDIMIENTO. SI NO SE OBSERVA ESTA ADVERTENCIA SE PODRÍA
OCASIONAR UNA LESIÓN GRAVE Y/O DAÑOS A LA PROPIEDAD.
ID# M770134
05/06
28
23
36
36
10. A
Install Slam Jam Rim to Backboard
A. Fit rim (21) securely into bracket (43) as shown. Allow T-bolt (42) to slip through center hole
in rim (21).
B. Install reinforcement bracket (41) onto T bolt (42) as shown.
C. Install spring (39) onto T bolt (42) as shown.
D. Install special nut (44) and washer (40) onto T bolt (42).
E. Tighten nut (44) until flush with end of T bolt (42).
Installez le cerceau Slam Jam sur le panneau.
A. Calez bien le cerceau (21) dans le support (43), comme illustré. Laissez glisser le boulon à T (42) à
travers le trou central du cerceau (21).
B. Installez le support de renforcement (41) sur le boulon à T (42), comme illustré.
C. Installez le ressort (39) sur le boulon à T (42), comme illustré.
D. Installez l'écrou spécial (44) et la rondelle (40) sur le boulon à T (42).
E. Serrez l'écrou (44) jusqu'à ce qu'il se trouve au même niveau que l'extrémité du boulon à T (42).
Den Slam Jam-Korbrand an der Korbwand befestigen.
A. Den Korbrand (21) wie gezeigt in die Halterung (43) einsetzen. Die T-Nutenschraube (42) gleitet durch
das mittlere Loch im Korbrand (21).
B. Die Verstärkungshalterung (41) wie gezeigt über die T-Nutenschraube (42) schieben.
C. Die Feder (39) wie gezeigt auf der T-Nutenschraube (42) anbringen.
D. Die Spezialmutter (44) und Unterlegscheibe (40) auf der T-Nutenschraube (42) anbringen.
E. Die Mutter (44) anziehen, bis sie bündig mit dem Ende der T-Nutenschraube (42) abschließt.
Instale el borde Slam Jam en el respaldo
A. Ajuste el borde (21) seguramente en el soporte (43) como se muestra. Permita que el perno
en T (42) se deslice a través del orificio central del borde (21).
B. Instale el soporte de refuerzo (41) en el perno T (42) como se muestra.
C. Instale el resorte (39) en el perno T (42) como se muestra.
D. Instale la tuerca especial (44) y la arandela (40) en el perno T (42).
E. Apriete la tuerca (44) hasta que quede al ras del extremo del perno T (42).
29
05/06
ID# M770134
NOTE: / REMARQUE:
HINWEIS: / NOTA:
10. B
ORIENTATION OF BRACKET
ORIENTATION DU SUPPORT
41
AUSRICHTUNG DER HALTERUNG
ORIENTACIÓN DEL SOPORTE
A
B
21
42
43
41
42
C
D
40
39
42
44
E
42
40
44
ID# M770134
05/06
30
11.
Instructions for filling with water:
Roll completed assembly to desired position. Fill tank with water
(approx. 31 gallons / 117 Liters) Tighten cap (24) securely into place.
Instruction de remplissage avec de l'eau :
Faites rouler l’ensemble jusqu’à la position désirée. Remplissez le
réservoir d'eau (117 litres environ). Serrez le bouchon (24) à fond en
position.
1
24
Anleitung zum Befüllen mit Wasser:
Den fertigen Aufbau an die gewünschte Position rollen. Den Tank mit
Wasser (ca. 117 l) füllen. Den Schraubverschluss (24) fest
verschließen.
Instrucciones para llenar la base con agua:
Ruede el conjunto terminado hasta la posición deseada. Llene el
tanque con agua (aprox. 31 galones / 117 litros). Apriete firmemente
la tapa (24).
CAUTION! / ATTENTION!
VORSICHT! / ¡PRECAUCIÓN!
ADD TWO GALLONS (7.6 LITERS) OF NON-TOXIC ANTIFREEZE IN SUB-FREEZING CLIMATES.
Check water level BEFORE each use!
AJOUTEZ 7,6 LITRES (2 GALLONS) D'ANTIGEL NON TOXIQUE EN PRÉVISION DE
TEMPÉRATURES EN DESSOUS DE 0. Vérifiez le niveau d'eau AVANT chaque utilisation!
DEN TANK MIT 7,6 L (2 GAL) EINES UNGIFTIGEN GEFRIERSCHUTZMITTELS FÜLLEN, UM IN
KLIMAZONEN MIT FROSTTEMPERATUREN EIN GEFRIEREN ZU VERHINDERN. Den
Wasserstand VOR jedem Gebrauch überprüfen!
AÑADA 7.6 LITROS (DOS GALONES) DE ANTICONGELANTE NO TÓXICO SI EL CLIMA
ALCANZA TEMPERATURAS DE CONGELAMIENTO. ¡Revise el nivel del agua ANTES de cada
uso!
NOTE
REMARQUE
HINWEIS
NOTA
47
WARNING!
AVERTISSEMENT!
WARNUNG!
¡ADVERTENCIA!
DO NOT LEAVE ASSEMBLY UNATTENDED
WHEN EMPTY; IT MAY TIP OVER.
TWO CAPABLE ADULTS REQUIRED FOR THIS
PROCEDURE. FAILURE TO FOLLOW THIS
WARNING COULD RESULT IN SERIOUS
INJURY AND/OR PROPERTY DAMAGE.
NE LAISSEZ PAS L'ENSEMBLE SANS
SURVEILLANCE LORSQU'IL EST VIDE, CAR
IL RISQUE DE BASCULER.
DEUX ADULTES CAPABLES REQUIS POUR
CETTE PROCÉDURE. SUIVEZ CET
AVERTISSEMENT SOUS PEINE D’ENCOURIR
DES BLESSURES GRAVES ET/OU DES
DÉGÂTS MATÉRIELS.
DIE VORRICHTUNG IM LEEREN ZUSTAND
NICHT UNBEAUFSICHTIGT LASSEN, DA SIE
UMKIPPEN KÖNNTE.
DIESER VERFAHRENSSCHRITT MUSS VON
ZWEI DAZU IN DER LAGE BEFINDLICHEN
PERSONEN AUSGEFÜHRT WERDEN. EIN
MISSACHTEN DIESER WARNUNG KANN ZU
SCHWEREN VERLETZUNGEN UND/ODER
SACHSCHÄDEN FÜHREN.
IF USING SAND: 2 GALLONS OF
ANTIFREEZE IS NOT REQUIRED.
NO DEJE EL CONJUNTO DESATENDIDO
CUANDO ESTÉ VACÍO, YA QUE SE PUEDE
LADEAR.
SE REQUIEREN DOS ADULTOS CAPACES
PARA REALIZAR ESTE PROCEDIMIENTO. SI
NO SE OBSERVA ESTA ADVERTENCIA SE
PODRÍA OCASIONAR UNA LESIÓN GRAVE
Y/O DAÑOS A LA PROPIEDAD.
AVEC DU SABLE: LES HUIT LITRES
D'ANTIGEL SONT INUTILES.
BEI VERWENDUNG VON SAND: KEINE
ZUSÄTZLICHEN 7,6 l (2 gal)
GEFRIERSCHUTZMITTEL EINFÜLLEN.
SI SE USA ARENA: NO SE REQUIERE
EL USO DE 2 GALONES DE
ANTICONGELANTE.
31
05/06
ID# M770134
WARNING! / AVERTISSEMENT!
WARNUNG! / ¡ADVERTENCIA!
Cap (24) MUST be tightened COMPLETELY and SECURELY to prevent leakage. CHECK WATER LEVEL BEFORE EACH USE!
Le bouchon (24) DOIT être serré À FOND pour éviter les fuites. VÉRIFIEZ LE NIVEAU D'EAU AVANT AVANT CHAQUE UTILISATION !
Der Schraubverschluss (24) MUSS VOLLSTÄNDIG und FEST aufgeschraubt werden, um Lecks zu verhindern.
DEN WASSERSTAND VOR JEDEM GEBRAUCH ÜBERPRÜFEN!
La tapa (24) DEBE estar COMPLETA y SEGURAMENTE apretada para evitar fugas.
REVISE EL NIVEL DEL AGUA ANTES DE CADA USO.
12.
Install net (26) as shown.
B.
A.
Installez le filet (26)
comme illustré.
Das Netz (26) wie
gezeigt anbringen.
26
21
Instale la red (26) como
se muestra.
D.
C.
13.
Apply the height adjustment and moving
label (25) to the front of the pole as
shown.
Collez l'étiquette d'échelle de hauteur et
de déplacement (25) sur l'avant du poteau,
comme illustré.
Höhenverstell- und Transportaufkleber
(25) wie gezeigt an der Vorderseite der
Stange anbringen.
Aplique la etiqueta de ajuste de la altura y
de movimiento (25) en la parte frontal del
poste, como se muestra.
ID# M770134
05/06
WARNING!
AVERTISSEMENT!
WARNUNG!
¡ADVERTENCIA!
DO NOT ALLOW CHILDREN TO ADJUST
HEIGHT.
INTERDISEZ À UN ENFANT DE RÉGLER
LA HAUTEUR.
KINDERN DARF DAS VERSTELLEN DER
HÖHE NICHT GESTATTET WERDEN.
NO PERMITA QUE LOS NIÑOS
AJUSTEN LA ALTURA.
32
25
10 ft.
(3.05 m)