1
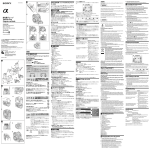
4-286-549-01 (1) 5 使用上のご注意 本機はSLT-A77V、SLT-A77専用です。他の機器には使用しないでください。 カメラの液晶モニターの位置によっては本機と干渉することがありますのでご注 意ください。 本機は防塵防滴に配慮した構造となっていますが、ホコリや水滴の浸入を完全に防 ぐものではありません。 バッテリー残量表示について 図のような表示がでます。 液晶モニター ファインダー 6 *InfoLITHIUM(インフォリチウム)バッテリーとは 縦位置グリップ Vertical Grip Poignée verticale “インフォリチウム”バッテリーに対応した機器との間で、バッテリーの使用状況に 関するデータ通信をする機能を持った新しいタイプのリチウムイオンバッテリー ロゴ表記がある“インフォ です。 “インフォリチウム”バッテリーには、 リチウム”対応機器との組み合わせをおすすめいたします。 置いてはいけない場所 取扱説明書 Operating Instructions Mode d’emploi Manual de instrucciones 使用中、保管中にかかわらず、次のような場所に置かないでください。故障の原因 になります。 ˎ 異常に高温になる場所 ダッシュボードの上など直射日光の当たる場所や、熱器具の近くには置かないで ください。炎天下や夏場の窓を閉め切った自動車内は特に高温になります。放置 すると変形したり、故障したりすることがあります。 ˎ 激しい振動のある場所 ˎ 強力な磁気のあるところや放射線のある場所 ˎ 砂やほこりの舞っている場所 VG-C77AM その他のご注意 ˎ 本機の使用温度範囲は0℃∼40℃です。 ˎ 急激な温度変化を与えると内部に水滴を生じる危険性があります。 スキー場のような寒い屋外から暖かい室内に持ち込む場合は、屋外でビニール袋 に入れ、袋の中の空気を絞り出して密閉します。その後室内に持ち込み、周囲の温 度になじませてから取り出してください。 ˎ 本機のお手入れには、柔らかい布で汚れを軽くふき取ってください。シンナー、ベ ンジンなどの有機溶剤を含むクリーナーは絶対に使用しないでください。 ˎ 本機には、カメラと電気的に接続される信号接点があります。 本機をカメラに取り付けない状態でバッテリーを装填していると、接点のショー トなどにより故障したり不具合が発生する可能性があります。 本機をカメラに取り付け、取りはずしする場合や、本機のみで保管する場合は、必 ずバッテリーを取り出した状態にしてください。 ˎ 三脚を取り付けるときは、ネジの長さが5.5 mm未満の三脚をお使いください。 ネジの長さが5.5 mm以上の三脚ではしっかり固定できず、本機を傷つけること があります。 © 2011 Sony Corporation 電気製品は安全のための注意事項を守らないと、火災や人身事故になるこ とがあります。 この取扱説明書には、事故を防ぐための重要な注意事項と製品の取り扱いかたを示して います。この取扱説明書をよくお読みのうえ、製品を安全にお使いください。お読みに なったあとは、いつでも見られるところに必ず保管してください。 7 各部の名前 この説明書は、古紙70%以上の再生紙と、VOC (揮発性有機化合物)ゼロ植物油型インキを 使用しています。 安全のために Printed on 70% or more rectcled paper using VOC (Volatile Organic Compound) -free vegetable oil based ink. ソニー製品は安全に充分配慮して設計されています。しかし、まちがった使いかた をすると、火災などにより人身事故になることがあり危険です。事故を防ぐために 次のことを必ずお守りください。 ˎ 安全のための注意事項を守る ˎ 故障したら使わずに、ソニーの相談窓口に修理を依頼する ˎ 万一、異常が起きたら Printed in China 1 変な音やにおい、 煙が出た場合は 2 3 警告表示の意味 13 12 11 10 14 4 7 56 電源を切る バッテリーをはずす ソニーの相談窓口に修理を依頼する 8 取扱説明書では、次のような表示をしています。表示の内容をよく理解してか ら本文をお読みください。 この表示の注意事項を守らないと極めて危険な状況が起こり、そ の結果大けがや死亡にいたる危害が発生します。 この表示の注意事項を守らないと、火災・感電などにより死亡や 大けがなど人身事故の原因となります。 9 この表示の注意事項を守らないと、感電やその他の事故によりけ がをしたり周辺の家財に損害を与えたりすることがあります。 注意を促す記号 18 行為を禁止する記号 14 15 16 1 2 すぐに火気より遠ざけてください。漏れた液や気体に引火して発火、破裂の恐 れがあります。 液が目に入った場合は、こすらず、すぐに水道水などきれいな水で充分に洗った あと、医師の治療を受けてください。 液を口に入れたり、なめた場合は、すぐに水道水で口を洗浄し、医師に相談して ください。 液が身体や衣服についたときは、水でよく洗い流してください。 下記の注意事項を守らないと、火災・ 感電により死亡や大けがの原因と なります。 火災や感電の原因となることがあります。 内部の点検や修理はソニーの相談窓口にご相談ください。 製品および同梱物を、幼児・子供の手の届く範囲に放置しない。 幼児・子供の近くでご使用になる場合は、細心の注意を払ってください。 4 落下や損傷により内部が露出した場合は、すみやかにバッテリーを 抜き、使用を中止する。 感電や火傷の恐れがあります。また内部に手を触れないでください。 万一、使用中に高熱、焦げ臭い、煙が出る等の異常を感じたら、 すみやかにバッテリーを抜き、使用を中止する。 下記の注意事項を守らないと、けがや 財産に損害を与えることがあります。 湿気やほこり、油煙、湯気の多い場所では使わない。 5 上記のような場所で使うと、火災や感電の原因となることがあります。 ぬれた手でバッテリー、縦位置グリップをさわらない。 感電の原因となることがあります。 不安定な場所に置かない。 ぐらついた台の上や傾いたところに置いたり、不安定な状態で三脚を設置 すると、製品が落ちたり倒れたりして、けがの原因となることがあります。 長時間使用しないときはバッテリーをはずす。 長時間使用しないときは、バッテリーを本体からはずして保管してくださ い。火災の原因となることがあります。 1 バッテリーについての安全上のご注意 2 漏液、発熱、発火、破裂などを避けるため、下記のことを必ずお守 りください。 ˎ 指定されたバッテリー以外は使わないでください。 ˎ バッテリーを火中へ投入したり、充電、ショート、分解、加熱をしないでください。 ˎ バッテリーは使い切ってから廃棄してください。また廃棄するときは、テープな どで接点部を絶縁してください。 バッテリー容量が残っていたり、他の金属と接触したりすると、発熱・破裂・発火 の恐れがあります。 お住いの自治体の規則にしたがって正しく廃棄するかリサイクルしてください。 お願い 3 4 再生時: (拡大)ボタン 12 撮影時:AEL(AEロック)ボタン/ SLOW SYNC(スローシンクロ)ボタン 13 14 再生時: (一覧表示)ボタン カメラバッテリーカバー収納部 ストラップ取り付け部 ストラップを取り付けにくい場合は、カメラを取り付ける前にストラップを装着し てください。 15 シャッターボタン 16 前ダイヤル 17 三脚ネジ穴 18 バッテリーストッパー 19 バッテリートレイ カメラへの取り付けかた 1 カメラの電源スイッチをOFFにする。 2 カメラからバッテリーを取り出す。 3 本機の電源信号接点部の端子カバーを取りはずす。 19 分解や改造をしない。 3 7 8 9 10 11 撮影時:Fnボタン 再生時: (再生画像回転)ボタン マルチセレクター 後ダイヤル 縦位置コントロールON/OFFスイッチ (露出補正)ボタン 撮影時:AF/MF (オートフォーカス/マニュアルフォーカス)ボタン ˎ 本機にバッテリーが入っている場合は、取り出してください。 万一、電池の液漏れが起きたら 17 電源信号接点部 カメラ電源室挿入部 取り付けネジ 電池室OPEN/CLOSEつまみ (スマートテレコンバーター)ボタン/ピント拡大ボタン 1 2 3 4 5 6 リチウムイオン電池 リチウムイオン電池は、リサイクルで きます。不要になったリチウムイオン 電池は、金属部にセロハンテープなど の絶縁テープを貼ってリサイクル協力 店へお持ちください。 充電式電池の回収・リサイクルおよびリサイクル協力店については 一般社団法人JBRCホームページ http://www.jbrc.net/hp/contents/index.html を参照してください。 ˎ 使用後は接点部保護のため、端子カバーを元通りにかぶせてください。 4 以下の各部がそれぞれ合うようにはめ込む。 【本機】カメラ電源室挿入部 【カメラ】バッテリー挿入部 【本機】カメラバッテリーカバー収納部 【カメラ】バッテリーカバー 【本機】取り付けネジ 【カメラ】三脚ネジ穴 5 取り付けネジを回して、しっかりと固定する。 ˎ 使用中、取り付けネジが緩んでいないことをときどき確認してください。 バッテリーの入れかた バッテリー NP-FM500H 1個または2個 ˎ NP-FM55H、NP-FM50、NP-FM30、NP-FW50、NP-FH50は使用できません。 ˎ バッテリーは必ず指定の充電器で充電してからお使いください。 1 本機をカメラに装着したままバッテリーを入れ換える場合、カメラの 電源スイッチをOFFにする。 2 電池室OPEN/CLOSEつまみを「OPEN」のほうに回す。 3 図のように指をあてて、バッテリーストッパー(青)を矢印の方向へ押 し上げる。 ˎ ロックがはずれるとバッテリートレイが押し出されてきますので、注意して操 作してください。 4 バッテリートレイを取り出す。 5 バッテリートレイの表示にしたがってバッテリーを取り付ける。 ˎ バッテリーを1個入れるときは、どちらに入れても構いません。 ˎ バッテリートレイの端子には触れないでください。 ˎ バッテリーがバッテリートレイにしっかりと取り付けられていることを確認 してください。 (イラスト-5-参照) ˎ 誤った取り付け状態でバッテリートレイを押し込むとバッテリーストッパー を指で押し上げることができなくなります。 その場合は先の細いペン状のものでバッテリーストッパーを押し上げてバッ テリートレイを取り出してください。 ˎ バッテリートレイには、バッテリー NP-FM500Hしか取り付けられません。 他のバッテリーを取り付けないでください。 ˎ バッテリートレイは絶対に分解しないでください。 ˎ バッテリーを2個入れた場合は、容量が少ないほうから使用を開始し、使用中 のバッテリーがなくなると自動的にもう一方のバッテリーに切り替わります。 6 バッテリートレイを「カチッ」と音がするまで、しっかりと元の位置ま で押し込む。 ˎ バッテリーストッパーがバッテリートレイを確実にロックしていることを確 認してください。 ˎ バッテリーを装着していない状態で、バッテリートレイを斜めに傾けて無理や り本機に差し込むと、途中まではめ込むことができますが、そのまま差し込む と破損の原因となります。 バッテリートレイは、必ず正しい方向で水平に本機に挿入してください。 (イラ スト-6-参照) 7 電池室のカバーを閉め、電池室OPEN/CLOSEつまみを「CLOSE」のと ころまで回す。 ˎ つまみの向きが図の位置に来るまでに確実に回してください。 縦位置での撮影 本機のダイヤルやボタンの操作方法はカメラ本体と同じです。 ご使用の際、お使いのカメラの取扱説明書もご覧ください。 使用するときは、本機の縦位置コントロールON/OFFスイッチをONにします。 ˎ 本機の縦位置コントロールON/OFFスイッチは、本機のダイヤルやボタンの機能 をON/OFFするものです。 ˎ 縦位置コントロールON/OFFスイッチの位置には関係なく、カメラの操作ボタン は常に動作します。 ˎ 電源のON/OFFはカメラの電源スイッチで行います。縦位置コントロールON/ OFFスイッチでは電源はON/OFFしません。 Before operating the product, please read this manual thoroughly and retain it for future reference. Owner’s Record The model and serial numbers are located inside of the unit. Record the serial number in the space provided below. Refer to them whenever you call upon your Sony dealer regarding this product. バッテリーについて 本機は“インフォリチウム”バッテリー *NP-FM500H専用です。同時に2個まで装 着できます。他の”インフォリチウム”バッテリー *は使用できません。 ˎ 長期間使用しないときは、バッテリーを抜き取って保管してください。 ˎ 必ずソニー製純正バッテリーをお使いください。また指定のバッテリーチャー ジャー以外で充電をしないでください。 ˎ 本機はバッテリーチャージャーの機能はありません 。 5 Rotate the attachment screw to lock it. NP-FM500Hを2個入れたときは、カメラの液晶モニターまたはファインダーに下 Model No. VG-C77AM Serial No. WARNING To reduce fire or shock hazard, do not expose the unit to rain or moisture. 2個のバッテリーのうち、容量の少ないほうから使用します。 その際、使用中のマークが明るく、もう一方のマークは暗く表示されます。 使用されているバッテリーの残量が「%」で表示されます。 使用中のバッテリー表示マークは、下図のように変化して、バッテリーが消耗する と、自動的にもう一方のバッテリーに切り替わります。 残量 多 少 マークが出てしばらく撮影を続けているとバッテリーが消耗し、自動的 にもう一方のバッテリーに切り替わります。 Tape over lithium battery contacts to avoid short-circuit when disposing of batteries, and follow local regulations for battery disposal. Keep batteries or things that could be swallowed away from young children. Contact a doctor immediately if an object is swallowed. Immediately remove the batteries and discontinue use if... ˎˎ the product is dropped or subjected to an impact in which the interior is exposed. ˎˎ the product emits a strange smell, heat, or smoke. Do not disassemble. Electric shock may occur if a high voltage circuit inside the product is touched. CAUTION レンズ使用時の注意 Replace the battery with the specified type only. Otherwise, fire or injury may result. ˎ カメラに本機を装着し、70-200mm F2.8G、300mm F2.8G、70-400mm F45.6G SSMの三脚座付きのレンズをご使用される場合は、レンズの三脚座を操作の 妨げにならない位置に回転させてご使用ください。 ˎ カメラに本機を装着し、三脚に70-200mm F2.8G、70-400mm F4-5.6G SSM レ ンズの三脚座を取り付けてご使用される場合は、縦位置での撮影時に以下のレン ズスイッチが操作できないことがありますので、あらかじめ横位置にて設定を 行ってください。 ˋ フォーカスモードスイッチ ˋ DMFモード切り替えスイッチ ˋ フォーカスレンジ切り替えスイッチ Do not expose the batteries to excessive heat such as sunshine, fire or the like. 故障かな?と思ったら こんなときは つぎのようにしてください 本機をカメラに取り付け、バッテリー を入れてカメラの電源スイッチをON にしてもカメラが動作しない ˎ 取り付けネジがしっかり締まっている か確認してください。 ˎ バッテリーが充電されているか確認し てください。 ˎ バッテリートレイを一旦取り出して、 取り付け直してください。 シャッターボタン、その他の操作ボタ ンが効かない ˎ 縦位置コントロールON/OFFスイッチ がOFFになっていないか確認してくだ さい。 ˎ バッテリートレイを一旦取り出して、 取り付け直してください。 ˎ カメラの電源スイッチをOFFにし、本 機からバッテリーを抜いて、本機をは ずし、再度取り付けてください。 ソニー純正バッテリーを使用している のに「“インフォリチウム”バッテリー をお使いください」と表示される ˎ バッテリートレイを一旦取り出して、 取り付け直してください。 ˎ カメラの電源スイッチをOFFにし、本 機からバッテリーを抜いて、本機をは ずし、再度取り付けてください。 主な仕様 使用電池 撮影枚数 NP-FM500H DC7.2V NP-FM500H 2個使用時 約1,060枚 (“メモリースティック PRO デュオ”、液晶モニターモード使用時) 約940枚 (“メモリースティック PRO デュオ”、ファインダーモード使用時) ˎ 測定方法はCIPA規格による。 ˎ ご使用の状況によって記載より少ない数値になることがあります。 ˎ 詳しくは、SLT-A77V、SLT-A77の取扱説明書をご覧ください。 (幅/高さ/奥行き) 外形寸法(約) 139 mm × 125 mm × 87 mm 質量 約 335 g (バッテリートレイのみを含む、電池含まず) 動作温度 0 ℃ ∼ 40 ℃ 同梱物 縦位置グリップ(1)、バッテリートレイ(1)、端子カバー(1)、 印刷物一式 仕様および外観は、改良のため予告なく変更することがありますが、ご了承くださ い。 “Memory Stick PRO Duo”、 、 “メモリースティック PRO デュオ”および InfoLITHIUM(インフォリチウム)はソニー株式会社の商標です。 保証書とアフターサービス 保証書 ˎ この製品には保証書が添付されていますので、お買い上げの際お買い上げ店でお 受け取りください。 ˎ 所定事項の記入および記載内容をお確かめのうえ、大切に保存してください。 ˎ 保証期間は、お買い上げ日より1年間です。 アフターサービス 調子が悪いときはまずチェックを この取扱説明書をもう一度ご覧になってお調べください。 それでも具合が悪いときは ソニーの相談窓口にご相談ください。 保証期間中の修理は 保証書の記載内容に基づいて修理させていただきます。 詳しくは保証書をご覧ください。 保証期間経過後の修理は 修理によって機能が維持できる場合は、ご要望により有償修理させていただきま す。 部品の保有期間について 当社では本機の補修用性能部品(製品の機能を維持するために必要な部品)を、製造 打ち切り後最低7年間保有しています。この部品保有期間を修理可能の期間とさせ ていただきます。保有期間が経過したあとも、故障箇所によっては修理可能の場合 がありますので、ソニーの相談窓口にご相談ください。 ご相談になるときは、次のことをお知らせください。 ˎ 品名:VG-C77AM ˎ 故障の状態:できるだけ詳しく ˎ 購入年月日 For the Customers in the U.S.A. CAUTION You are cautioned that any changes or modifications not expressly approved in this manual could void your authority to operate this equipment. NOTE This equipment has been tested and found to comply with the limits for a Class B digital device, pursuant to Part 15 of the FCC Rules. These limits are designed to provide reasonable protection against harmful interference in a residential installation. This equipment generates, uses, and can radiate radio frequency energy and, if not installed and used in accordance with the instructions, may cause harmful interference to radio communications. However, there is no guarantee that interference will not occur in a particular installation. If this equipment does cause harmful interference to radio or television reception, which can be determined by turning the equipment off and on, the user is encouraged to try to correct the interference by one or more of the following measures: ˋˋReorient or relocate the receiving antenna. ˋˋIncrease the separation between the equipment and receiver. ˋˋConnect the equipment into an outlet on a circuit different from that to which the receiver is connected. ˋˋConsult the dealer or an experienced radio/TV technician for help. For the Customers in Europe Disposal of Old Electrical & Electronic Equipment (Applicable in the European Union and other European countries with separate collection systems) This symbol on the product or on its packaging indicates that this product shall not be treated as household waste. Instead it shall be handed over to the applicable collection point for the recycling of electrical and electronic equipment. By ensuring this product is disposed of correctly, you will help prevent potential negative consequences for the environment and human health, which could otherwise be caused by inappropriate waste handling of this product. The recycling of materials will help to conserve natural resources. For more detailed information about recycling of this product, please contact your local Civic Office, your household waste disposal service or the shop where you purchased the product. ˎˎPeriodically confirm that the attachment screw is not loose while in use. Inserting the battery packs Battery pack NP-FM500H (1 or 2 required) ˎˎ NP-FM55H, NP-FM50, NP-FM30, NP-FW50, NP-FH50 are not available with this unit. ˎˎ Be sure to charge the battery packs with the specified battery charger before use. 1 When replacing the battery packs with this unit attached to the camera, set the POWER switch of the camera to OFF. 2 Rotate the battery chamber OPEN/CLOSE knob to “OPEN.” 3 Press up the battery stopper (blue) with your finger in the direction of the arrow as illustrated. ˎˎWhen releasing the lock of the battery pack stopper, be careful to pop up the battery pack tray. 4 Remove the battery pack tray. 5 Attach the battery packs to the battery pack tray according to the display on the battery pack tray. ˎˎWhen attaching a battery pack, attach it to either side. ˎˎDo not touch the terminal of the battery pack tray . ˎˎCheck that the battery pack is firmly attached on the battery pack tray. (See illustration -5-.) ˎˎIf the battery pack tray is inserted incorrectly, you cannot push up the battery stopper with your finger. In this case, push up the battery stopper with a finetipped object such as a pen to remove the battery pack tray. ˎˎAttach the battery pack NP-FM500H only to the battery pack tray. Do not attach the other battery packs. ˎˎDo not disassemble the battery pack tray. ˎˎWhen inserting two battery packs, start by using the one that has less power. When the battery capacity of the used battery pack runs out, the unit will automatically switch to the other battery pack. 6 Insert the battery pack tray into the original position by pressing it until it clicks. ˎˎMake sure that the battery pack stopper locks the battery pack tray. ˎˎIf you force the battery pack tray into the unit at an angle with no battery pack installed, it will go in partly, but you will damage the unit if you insert it further. Insert the battery pack tray in the horizontal position to the unit and in right direction. (See illustration -6-.) 7 Close the battery chamber door and rotate the battery chamber OPEN/CLOSE knob to “CLOSE.” ˎˎRotate the battery chamber OPEN/CLOSE knob properly to the position as illustrated. Shooting vertical images The operations of the unit’s dials and buttons are same as those for the camera main body. When using this unit, also refer to the operating instructions supplied with your camera. When using this unit in vertical orientation, set the grip control ON/OFF switch to “ON.” ˎˎ The grip control ON/OFF switch switches the dial and button functions ON and OFF. ˎˎ Regardless of the position of the grip control ON/OFF switch, the camera operating button always operates. ˎˎ Switch the power ON and OFF with the POWER switch of the camera. The grip control ON/OFF switch can not switch the power ON and OFF. Remaining battery power indicator When inserting the two battery packs, the following indicator will be displayed on the LCD monitor or viewfinder of the camera. LCD monitor Viewfinder <Notice for the customers in the countries applying EU Directives> The manufacturer of this product is Sony Corporation, 1-7-1 Konan Minato-ku Tokyo, 108-0075 Japan. The Authorized Representative for EMC and product safety is Sony Deutschland GmbH, Hedelfinger Strasse 61, 70327 Stuttgart, Germany. For any service or guarantee matters please refer to the addresses given in separate service or guarantee documents. Notes on Use This unit is a Vertical Grip for use with the SLT-A77V and SLT-A77. Do not use it with other devices. Note that the position of the camera’s LCD monitor may affect this unit. Although this unit is designed with dust-proofness and splash-proofness in mind, it may not keep dust or splashes completely out. Battery packs Only “InfoLITHIUM” battery pack(s)* NP-FM500H can be used. You can attach up to two battery pack to this unit simultaneously. Other “InfoLITHIUM” battery packs* cannot be used with this unit. ˎˎ Remove the battery packs when storing this unit for an extended period of time. ˎˎ Always use a genuine Sony battery pack with this unit. Only charge the battery with the specified battery charger. ˎˎ This unit does not have a battery charger function. * What is “InfoLITHIUM” ? The “InfoLITHIUM” is a lithium ion battery pack which can exchange data with compatible electronic equipment about its battery consumption. Sony recommends that you use the “InfoLITHIUM” battery pack with electronic equipment having the logo. Places to avoid for unit use and storage Regardless of whether this unit is in use or in storage, do not leave it where it can be exposed to: ˎˎ Extremely high temperatures Do not leave this unit where it might be exposed to direct sunlight; Avoid places like vehicle dashboards or near heat sources. The inside of a vehicle can become extremely hot if the vehicle windows are closed in the summer or if the vehicle is under direct sunlight. The unit can become deformed or experience malfunctions if left inside a vehicle. ˎˎ Excessive vibrations ˎˎ Strong electromagnetism or rays ˎˎ Excessive sand or dust Other cautions ˎˎ This unit is designed for use from 0 °C to 40 °C (32 °F to 104 °F). ˎˎ A rapid and dramatic rise in temperature causes condensation to form. Therefore, seal the unit in a plastic bag and remove as much of the air inside of the bag as you can before attempting to bring this unit inside after being in the cold for any extended period of time. Once the temperature in the bag has had a change to rise gradually to the temperature in the room, you can safely remove the unit from the bag. These procedures will prevent the unit from changing temperatures rapidly, thereby prevent condensation from forming. ˎˎ When dirty, this unit may be cleaned with a clean, dry cloth. Do not allow this unit to come in contact with alcohol or other chemicals. ˎˎ This unit has an electrically-connected signal contact point with the camera. If you load the battery pack(s) while this unit is not attached to the camera, the unit could malfunction or be damaged by a shorting of the contact point. When attaching this unit to the camera, detaching this unit from the camera or storing this unit separately, be sure to remove the battery pack(s) from this unit. ˎˎ When attaching a tripod to this unit, use one with a screw no longer than 5.5 mm. This unit cannot be firmly fastened on a tripod using long screws. Attempting to do so will damage this unit. Identifying the Parts 1 Electrical contacts 2 Guide bar 3 Attachment screw 4 Battery chamber OPEN/CLOSE knob (Smart teleconverter) button/Focus Magnifier button 5 6 For shooting: Fn (Function) button For viewing: (Image rotation) button 7 Multi-selector 8 Rear control dial 9 Grip control ON/OFF switch 10 (Exposure) button 11For shooting: AF/MF (Auto focus/manual focus) button For viewing: (Enlarge) button 12For shooting: AEL (AE lock) button/SLOW SYNC button (Image index) button For viewing: 13Camera battery cover slot 14Strap hook ˎˎ If it is difficult to attach the strap to the strap hook, do so before attaching this unit to the camera. 15Shutter button 16Front control dial 17Tripod receptacle 18Battery pack stopper 19Battery pack tray Attaching this unit to the camera 1 Set the POWER switch of the camera to “OFF.” ˎˎIf the battery pack(s) is in this unit, remove the battery pack(s) from this unit. 2 Remove the battery pack from the camera. 3 Remove the terminal cover of this unit’s electrical contacts. ˎˎAfter use, put the terminal cover back on to protect the electrical contacts. 4 Align the following part to attach this unit to the camera. [This unit] Guide bar [Camera] Battery chamber [This unit] Camera battery cover slot [Camera]Battery chamber door [This unit] Attachment screw [Camera] Tripod receptacle Of the two battery packs, the one that has less power will be used first. At that time, the mark of the battery pack in use is bright and the mark of the other battery pack is dark. The remaining battery level of the battery pack in use is displayed as a percentage (%). The mark of the battery pack in use changes as shown below. When the power of battery in use runs out, the unit automatically switches to the other battery pack. Remaining battery capacity high low If images are still being shot for a short time after the mark appears, the power of that battery will run out, but the unit will automatically switch to the other battery pack. Notes relating to the lens ˎˎ When using this unit attached to the camera with the 70-200mm F2.8G, 300mm F2.8G or 70-400mm F4-5.6G SSM lens attached to the tripod-mounting collar, rotate tripod-mounting collar to the position that allows the grip to be used. ˎˎ When using this unit attached to the camera with 70-200mm F2.8G or 70-400mm F4-5.6G SSM lens attached to the tripod-mounting collar, the following lens switches may not operate at the vertical shooting. Before vertical shooting, set them at the horizontal position. ˋˋFocus-mode switch ˋˋDMF-mode switch ˋˋFocus-range limiter Troubleshooting Symptom Remedy The camera does not work even after the ˎˎ Check that the unit attachment screw is securely tightened. unit is attached to the camera, the battery pack(s) are inserted into the unit and the ˎˎ Check that the battery pack(s) are charged. camera POWER switch is set to ON. ˎˎ Reattach the battery pack tray to the unit. Shutter button or other operating buttons do not work. ˎˎ Check that the grip control ON/OFF switch is not set to OFF. ˎˎ Reattach the battery pack tray to the unit. ˎˎ Set the camera POWER switch to OFF, remove the battery pack(s), and reattach the unit to the camera. “For “InfoLITHIUM” battery only” is displayed even though genuine Sony battery pack(s) are being used. ˎˎ Reattach the battery pack tray to the unit. ˎˎ Set the camera POWER switch to OFF, remove the battery pack(s), and reattach the unit to the camera. Specifications Battery pack NP-FM500H DC7.2V Recording performance With two NP-FM500H battery packs Approx. 1,060 shots (using “Memory Stick PRO Duo” and LCD monitor mode) Approx. 940 shots (using “Memory Stick PRO Duo” and viewfinder mode) ˎˎ The measuring method conforms to CIPA standard. ˎˎ Depending on the condition of use, recording performance may be lower less than what was listed. ˎˎ For details, refer to the operating instructions supplied with SLT-A77V, SLT-A77. Dimensions (Approx.) 139 mm × 125 mm × 87 mm (w/h/d) (5 1/2 × 5 × 3 1/2 in.) Mass Approx. 335 g (11.9 oz) (including the battery pack tray, excluding the battery packs) Operating temperature 0 °C to 40 °C (32 °F to 104 °F) Included items Vertical grip (1), Battery pack tray (1), Terminal cover (1), Set of printed documentation Design and specifications are subject to change without notice. , “Memory Stick PRO Duo” and “InfoLITHIUM” are trademarks of Sony Corporation. 1 Avant de faire fonctionner ce produit, lisez attentivement ce mode d’emploi et conservez-le pour toute référence ultérieure. Aide-mémoire 2 3 13 12 11 10 14 4 7 56 8 18 14 15 16 Fixation de cet accessoire à l’appareil photo No de modèle VG-C77AM No de série 1 Réglez le commutateur POWER de l’appareil photo sur « OFF ». AVERTISSEMENT Recouvrez les contacts de la batterie au lithium de bande adhésive pour éviter tout court-circuit lors de la mise au rebut des batteries et respectez la réglementation locale en vigueur applicable à la mise au rebut des batteries. 19 Conservez les batteries hors de la portée des enfants, ainsi que tout objet qu’ils risqueraient d’avaler. En cas d’ingestion d’un objet, consultez immédiatement un médecin. Retirez immédiatement les batteries et arrêtez de les utiliser si... ˎˎ le produit est tombé ou a subi un choc qui mis à nu ses composants internes ; ˎˎ le produit dégage de la fumée, une odeur ou une chaleur ou inhabituelle. 17 Ne démontez pas cet accessoire. Sinon, vous risquez de vous électrocuter en touchant un circuit haute tension situé à l’intérieur du produit. 1 2 ATTENTION Remplacez la batterie par une batterie correspondant au type spécifié uniquement. Sinon vous risquez de provoquer un incendie ou des blessures. N’exposez pas les batteries à une chaleur excessive, notamment aux rayons directs du soleil, à une flamme, etc. Pour les clients aux É.-U. AVERTISSEMENT Par la présente, vous êtes avisé du fait que tout changement ou toute modification ne faisant pas l’objet d’une autorisation expresse dans le présent manuel pourrait annuler votre droit d’utiliser l’appareil. 3 4 5 Note L’appareil a été testé et est conforme aux exigences d’un appareil numérique de Classe B, conformément à la Partie 15 de la réglementation de la FCC. Ces critères sont conçus pour fournir une protection raisonnable contre les interférences nuisibles dans un environnement résidentiel. L’appareil génère, utilise et peut émettre des fréquences radio; s’il n’est pas installé et utilisé conformément aux instructions, il pourrait provoquer des interférences nuisibles aux communications radio. Cependant, il n’est pas possible de garantir que des interférences ne seront pas provoquées dans certaines conditions particulières. Si l’appareil devait provoquer des interférences nuisibles à la réception radio ou à la télévision, ce qui peut être démontré en allumant et éteignant l’appareil, il est recommandé à l’utilisateur d’essayer de corriger cette situation par l’une ou l’autre des mesures suivantes : ˋˋRéorienter ou déplacer l’antenne réceptrice. ˋˋAugmenter la distance entre l’appareil et le récepteur. ˋˋBrancher l’appareil dans une prise ou sur un circuit différent de celui sur lequel le récepteur est branché. ˋˋConsulter le détaillant ou un technicien expérimenté en radio/téléviseurs. Pour les clients en Europe Traitement des appareils électriques et électroniques en fin de vie (Applicable dans les pays de l’Union Européenne et aux autres pays européens disposant de systèmes de collecte sélective) Ce symbole, apposé sur le produit ou sur son emballage, indique que ce produit ne doit pas être traité avec les déchets ménagers. Il doit être remis à un point de collecte approprié pour le recyclage des équipements électriques et électroniques. En s’assurant que ce produit est bien mis au rebut de manière appropriée, vous aiderez à prévenir les conséquences négatives potentielles pour l’environnement et la santé humaine. Le recyclage des matériaux aidera à préserver les ressources naturelles. Pour toute information supplémentaire au sujet du recyclage de ce produit, vous pouvez contacter votre municipalité, votre déchetterie ou le magasin où vous avez acheté le produit. 1 2 < Avis aux consommateurs des pays appliquant les Directives UE > Le fabricant de ce produit est Sony Corporation, 1-7-1 Konan Minato-ku Tokyo, 108-0075 Japon. Le représentant agréé pour la compatibilité électromagnétique et la sécurité du produit est Sony Deutschland GmbH, Hedelfinger Strasse 61, 70327 Stuttgart, Allemagne. Pour toute question relative à la garantie ou aux réparations, reportez-vous à ľadresse que vous trouverez dans les documents ci-joints, relatifs à la garantie et aux réparations. Remarque sur l’emploi 3 4 Cet accessoire est une poignée verticale destinée aux SLT-A77V et SLT-A77. Ne l’utilisez pas avec d’autres appareils. Notez que la position de l’écran LCD de l’appareil photo peut affecter cet accessoire. Bien que cet accessoire soit de conception étanche à la poussière et aux projections de liquide, il peut ne pas être parfaitement étanche à la poussière ou aux projections. Batteries Seules des batteries « InfoLITHIUM »* NP-FM500H peuvent être utilisées. Vous pouvez rattacher jusqu’à deux batteries en même temps à cet accessoire. Les autres batteries « InfoLITHIUM »* ne peuvent pas être utilisées avec cet accessoire. 5 ˎˎ Lorsque vous rangez cet accessoire pendant une période prolongée, retirez les batteries. ˎˎ Utilisez toujours une batterie d’alimentation Sony d’origine avec cet accessoire. Chargez uniquement la batterie avec le chargeur de batterie spécifié. ˎˎ Cet accessoire ne possède pas de fonction de chargeur de batterie. * Que signifie « InfoLITHIUM »? Les batteries « InfoLITHIUM » sont des batteries au lithium-ion qui peuvent échanger des informations sur leur consommation avec des appareils électroniques compatibles. Sony vous recommande d’utiliser des batteries « InfoLITHIUM » avec des appareils électroniques portant le logo . Endroits à éviter pour l’utilisation et le rangement de l’accessoire 6 N’utilisez et ne rangez jamais cet accessoire dans des endroits où il risquerait d’être exposé aux éléments suivants: ˎˎ Températures extrêmement élevées Ne laissez pas cet accessoire dans un endroit où il peut être exposé aux rayons directs du soleil. Évitez notamment de le placer sur le tableau de bord d’un véhicule ou près d’une source de chaleur. L’intérieur d’un véhicule peut devenir extrêmement chaud si les vitres sont fermées en plein été, ou si le véhicule est exposé aux rayons directs du soleil. Si vous laissez cet accessoire à l’intérieur d’un véhicule, il risque d’être déformé ou de ne pas fonctionner correctement. ˎˎ Vibrations excessives ˎˎ Champs ou rayons électromagnétiques puissants ˎˎ Sable ou poussière excessive Autres mises en garde 7 Spécifications Les numéros de modèle et de série se situent à l’intérieur de l’accessoire. Notez le numéro de série dans l’espace prévu ci-dessous. Reportez-vous y chaque fois que vous communiquez avec un revendeur Sony au sujet de ce produit. Afin de réduire les risques d’incendie ou de décharge électrique, n’exposez pas cet appareil à la pluie ou à l’humidité. 9 15Déclencheur 16Molette de commande avant 17Logement du trépied 18Butée de la batterie 19Plateau pour batterie ˎˎ Cet accessoire est conçu pour une utilisation entre 0 °C et 40 °C (32 °F et 104 °F). ˎˎ Une augmentation rapide et considérable de la température entraîne la formation de condensation. Par conséquent, si cet accessoire est resté dans un environnement froid pendant une période prolongée, mettez-le dans un sac plastique fermé et éliminez autant d’air que possible du sac avant de l’amener à l’intérieur. Lorsque la température dans le sac a augmenté graduellement jusqu’à la température de la pièce, vous pouvez retirer l’accessoire du sac en toute sécurité. Cette procédure permet d’éviter un changement de température trop rapide de l’accessoire, empêchant ainsi toute formation de condensation. ˎˎ Lorsqu’il est sale, l’accessoire peut être nettoyé avec un linge propre et sec. Évitez tout contact entre l’accessoire et de l’alcool ou d’autres produits chimiques. ˎˎ Cet accessoire possède un point de contact de signal raccordé électriquement à l’appareil photo. Si vous chargez la (les) batterie(s) alors que cet accessoire n’est pas raccordé à l’appareil photo, il risque de ne pas fonctionner correctement ou d’être endommagé à la suite d’un court-circuit du point de contact. Lors que vous raccordez cet accessoire à l’appareil photo, que vous le débranchez de l’appareil ou que vous le rangez séparément, n’oubliez pas de retirez sa (ses) batterie(s). ˎˎ Quand vous attachez un trépied à l’accessoire, utilisez un trépied avec une vis d’une longueur inférieure à 5,5 mm. Cet accessoire ne peut pas être fixé solidement sur un trépied utilisant une longue vis. Essayer de le fixer sur un tel trépied peut endommager cet accessoire. Nomenclature des pièces 1 Contacts électriques 2 Barre de guidage 3 Vis de fixation 4 Bouton OPEN/CLOSE du compartiment pour batteries (Téléconvertisseur intelligent)/Touche Loupe de mise au point 5 Touche 6 Pour la prise de vue : Touche Fn (Fonction) Pour la visualisation : Touche (Rotation de l’image) 7 Multi-sélecteur 8 Molette de commande arrière 9 Commutateur ON/OFF de commande de la poignée 10Touche (Exposition) 11Pour la prise de vue : Touche AF/MF (Mise au point automatique/manuelle) Pour la visualisation : Touche (Agrandissement) 12Pour la prise de vue : Touche AEL (Verrouillage AE)/Touche SLOW SYNC (Index d’images) Pour la visualisation : Touche 13Fente du couvercle des batteries de l’appareil photo 14Crochet pour dragonne ˎˎ S’il est difficile d’attacher la lanière au crochet de lanière, faites-le avant de fixer cet accessoire à l’appareil photo. ˎˎSi une ou plusieurs batteries se trouvent dans cet accessoire retirez-les. 2 Retirez la batterie de l’appareil photo. 3 Retirez le cache des bornes des contacts électriques de cet accessoire. ˎˎAprès utilisation, remettez le cache des bornes en place pour protéger les contacts électriques. 4 Alignez l’élément suivant pour fixer cet accessoire à l’appareil photo. [Cet accessoire] Barre de guidage [Appareil photo] Compartiment pour batteries [Cet accessoire] Fente du couvercle des batteries de l’appareil photo [Appareil photo] Porte du compartiment pour batteries [Cet accessoire] Vis de fixation [Appareil photo] Logement du trépied 5 Tournez la vis de fixation pour verrouiller l’accessoire. ˎˎVérifiez régulièrement que la vis de fixation ne s’est pas desserrée en cours d’utilisation. Insertion des batteries Batteries NP-FM500H (1 ou 2 requises) ˎˎ Les batteries NP-FM55H, NP-FM50, NP-FM30, NP-FW50, NP-FH50 ne peuvent pas être utilisées avec cet accessoire. ˎˎ Avant l’emploi, veillez à charger les batteries à l’aide du chargeur de batterie spécifié. Batterie NP-FM500H 7,2V CC Performances d’enregistrement Avec deux batteries NP-FM500H Environ 1 060 photos (avec un « Memory Stick PRO Duo » et le mode Écran LCD) Environ 940 photos (avec un « Memory Stick PRO Duo » et le mode Viseur) ˎˎ La méthode de mesure est conforme à la norme CIPA. ˎˎ Les performances d’enregistrement peuvent être inférieures à celles indiquées, en fonction des conditions d’utilisation. ˎˎ Pour plus d’informations, reportez-vous au mode d’emploi qui accompagne le SLT-A77V, SLT-A77. Dimensions (environ) 139 mm × 125 mm × 87 mm (l/h/p) (5 1/2 × 5 × 3 1/2 po.) Poids environ 335 g (11,9 oz) (tiroir des batteries compris, batteries non comprises) Température de fonctionnement 0 °C à 40 °C (32 °F à 104 °F) Articles inclus Poignée verticale (1), Tiroir des batteries (1), Cache des bornes (1), Jeu de documents imprimés La conception et les spécifications peuvent être modifiées sans préavis. Antes de utilizar el producto, lea cuidadosamente este manual y consérvelo para futuras referencias. ADVERTENCIA 3 Poussez la butée des batteries (bleue) vers le haut avec le doigt dans le sens de la flèche, de la manière illustrée. RECUERDE QUE UN MAL USO DE SU APARATO PODRÍA ANULAR LA GARANTÍA. 6 Insérez le tiroir des batteries dans sa position d’origine en appuyant dessus jusqu’à ce qu’il émette un déclic. ˎˎAssurez-vous que la butée de la batterie bloque le tiroir des batteries. ˎˎSi vous insérez le tiroir des batteries de façon oblique en forçant alors qu’aucune batterie n’est installée vous pouvez l’insérer partiellement, mais ceci endommagera l’accessoire si vous insistez. Insérez le tiroir des batteries dans la position horizontale dans l’accessoire et dans la bonne direction. (Voir illustration -6-.) Adhiera cinta adhesiva sobre los contactos de la batería de litio para evitar cortocircuitos cuando se deshaga de ésta y siga la normativa local para este fin. Mantenga las baterías y cualquier elemento que pudiera ingerirse lejos del alcance de los niños. Póngase en contacto con un médico inmediatamente en el caso de ingestión de algún objeto. Extraiga las baterías inmediatamente y deje de utilizar la unidad si... ˎˎ el producto se ha caído o se ha sometido a golpes que han ocasionado la exposición de su interior. ˎˎ el producto desprende un olor extraño, o genera calor o humo. No desmonte la unidad, ya que podría sufrir una descarga eléctrica al tocar el circuito de alto voltaje de su interior. PRECAUCIÓN Sustituya la batería únicamente por otra del tipo especificado. De lo contrario, es posible que se produzcan incendios o lesiones. No exponga las pilas a fuentes de calor excesivo, como la luz solar directa, el fuego o similares. Para los clientes en Europa Tratamiento de los equipos eléctricos y electrónicos al final de su vida útil (aplicable en la Unión Europea y en países europeos con sistemas de recogida selectiva de residuos) Este símbolo en el equipo o el embalaje indica que el presente producto no puede ser tratado como residuos domésticos normales, sino que debe entregarse en el correspondiente punto de recogida de equipos eléctricos y electrónicos. Al asegurarse de que este producto se desecha correctamente, Ud. ayuda a prevenir las consecuencias negativas para el medio ambiente y la salud humana que podrían derivarse de la incorrecta manipulación en el momento de deshacerse de este producto. El reciclaje de materiales ayuda a conservar los recursos naturales. Para recibir información detallada sobre el reciclaje de este producto, póngase en contacto con el ayuntamiento, el punto de ecogida más cercano o el establecimiento donde ha adquirido el producto. 7 Fermez le volet du logement de batteries et mettez son bouton OPEN/CLOSE en position « CLOSE ». ˎˎTournez le bouton OPEN/CLOSE du logement de batteries pour le mettre à la position illustrée. Enregistrement d’images verticales Les fonctions des molettes et des touches de l’accessoire sont identiques à celles du corps principal de l’appareil photo. Lors de l’utilisation de cet accessoire, reportez-vous aussi au mode d’emploi fourni avec votre appareil photo. Si vous utilisez cet accessoire en orientation verticale, réglez le commutateur ON/OFF de la commande de la poignée sur « ON ». ˎˎ Le commutateur ON/OFF de la commande de la poignée active (ON) et désactive (OFF) les fonctions des touches et de la molette. ˎˎ Quelle que soit la position du commutateur ON/OFF de la commande de la poignée, les touches de commande de l’appareil photo sont toujours opérationnelles. ˎˎ Mettez l’accessoire sous tension (ON) et hors tension (OFF) à l’aide du commutateur POWER de l’appareil photo. Le commutateur ON/OFF de la commande de la poignée ne peut pas commander la mise sous tension (ON) et hors tension (OFF). Témoin d’autonomie des batteries Lorsque deux batteries sont insérées, l’indicateur suivant s’affiche sur l’écran LCD ou dans le viseur de l’appareil photo. Écran LCD Viseur 3 Retire la tapa de los terminales de los contactos eléctricos de la unidad. ˎˎDespués de su utilización, vuelva a colocar la tapa para proteger los contactos eléctricos. 4 Alinee la siguiente pieza para colocar la unidad en la cámara. [Esta unidad] Barra de guía [Cámara] Compartimiento de la batería [Esta unidad] Ranura de la tapa del compartimiento de la batería de la cámara [Cámara] Cubierta del compartimiento de la batería [Esta unidad] Tornillo de sujeción [Cámara] Rosca para trípode Inserción de las baterías POR FAVOR LEA DETALLADAMENTE ESTE MANUAL DE INSTRUCCIONES ANTES DE CONECTAR Y OPERAR ESTE EQUIPO. ˎˎLors de l’insertion d’une batterie, fixez-la de part et d’autre. ˎˎNe touchez pas la borne du tiroir des batteries . ˎˎVérifiez que la batterie est solidement installée sur le tiroir des batteries. (Voir illustration -5-.) ˎˎSi le tiroir des batteries est inséré incorrectement, vous ne pouvez pas pousser vers le haut la butée des batteries avec le doigt. Dans ce cas, poussez la butée des batteries en utilisant un objet pointu tel qu’un stylo pour retirer le tiroir des batteries. ˎˎN’insérez que la batterie NP-FM500H dans le tiroir des batteries. N’insérez aucun autre type de batterie. ˎˎNe démontez pas le tiroir des batteries. ˎˎLors de l’insertion de deux batteries, commencez par utiliser la moins chargée des deux. Lorsque la capacité de celle-ci est épuisée, l’accessoire passe automatiquement sur l’autre batterie. ˎˎSi hay baterías instaladas en la unidad, extráigalas. 2 Extraiga la batería de la cámara. Nombre del producto: Mango vertical Modelo: VG-C77AM 2 Tournez le bouton OPEN/CLOSE du compartiment pour batteries sur « OPEN ». 5 Installez les batteries dans leur tiroir en vous conformant au schéma indiqué dans ce dernier. 1 Ajuste el selector POWER de la cámara en la posición “OFF”. 5 Gire el tornillo de sujeción para fijarlo. Para reducir el riesgo de incendio o descarga eléctrica, no exponga la unidad a la lluvia ni a la humedad. 4 Retirez le tiroir des batteries. Instalación de la unidad en la cámara , « Memory Stick PRO Duo » et « InfoLITHIUM » sont des marques commerciales de Sony Corporation. 1 Si vous remplacez les batteries alors que cet accessoire est fixé à l’appareil photo, réglez le commutateur POWER de l’appareil photo sur OFF. ˎˎLorsque vous relâchez le verrou de la butée des batteries, veillez à extraire leur tiroir. 13Ranura de la tapa del compartimiento de la batería de la cámara 14Gancho para la correa ˎˎ Si es difícil fijar la correa al gancho para la correa, hágalo después de fijar esta unidad a la cámara. 15Disparador 16Selector de control frontal 17Rosca para el trípode 18Tope de baterías 19Bandeja de las baterías < Aviso para los clientes de países en los que se aplican las directivas de la UE > El fabricante de este producto es Sony Corporation, 1-7-1 Konan Minato-ku Tokyo, 108-0075, Japón. El representante autorizado en lo referente al cumplimiento de la directiva EMC y a la seguridad de los productos es Sony Deutschland GmbH, Hedelfinger Strasse 61, 70327 Stuttgart, Alemania. Para resolver cualquier asunto relacionado con el soporte técnico o la garantía, consulte las direcciones que se indican en los documentos de soporte técnico y garantía suministrados por separado. Notas sobre la utilización Esta unidad es un mango vertical para utilizarse con la SLT-A77V y la SLT-A77. No la utilice con otros dispositivos. Tenga en cuenta que la posición del monitor LCD puede afectar esta unidad. Aunque esta unidad ha sido diseñada teniendo en cuenta la resistencia al polvo y a las salpicaduras, es posible que no quede completamente resguardada contra el polvo y las salpicaduras. ˎˎCompruebe regularmente que el tornillo de sujeción no esté flojo mientras utilice la unidad. Batería NP-FM500H (se requieren 1 o 2) ˎˎ Las baterías NP-FM55H, NP-FM50, NP-FM30, NP-FW50, y NP-FH50 no pueden utilizarse con esta unidad. ˎˎ Asegúrese de cargar las baterías con el cargador de baterías especificado antes de utilizarlas. 1 Cuando sustituya las baterías con esta unidad instalada en la cámara, ajuste el selector POWER de la cámara en la posición OFF. 2 Gire el selector OPEN/CLOSE del compartimiento de las baterías hacia la posición “OPEN”. 3 Presione el tope de baterías (azul) con el dedo en el sentido de la flecha como se indica en la ilustración. ˎˎCuando libere el bloqueo del tope de baterías, procure que no se expulse la bandeja de las baterías. 4 Retire la bandeja de las baterías. 5 Coloque las baterías en la bandeja de las baterías según las indicaciones de la bandeja. ˎˎCuando coloque una batería, instálela en cualquiera de los dos lados. ˎˎNo toque el terminal de la bandeja de las baterías . ˎˎCompruebe que las baterías estén firmemente instaladas en la bandeja de las baterías. (Consulte la ilustración -5-.) ˎˎSi inserta incorrectamente las baterías, no podrá levantar el tope de baterías con el dedo. En este caso, levante el tope de baterías con un objeto puntiagudo como un bolígrafo para extraer la bandeja de las baterías. ˎˎSólo debe instalar baterías NP-FM500H en la bandeja de las baterías. No coloque otros modelos. ˎˎNo desmonte la bandeja de las baterías. ˎˎCuando inserte dos baterías, se utilizará primero la que disponga de menos energía. Cuando se agote la energía de la batería que esté utilizándose, la unidad cambiará automáticamente a la otra batería. 6 Inserte la bandeja de las baterías en la posición original presionándola hasta que encaje. ˎˎAsegúrese de que el tope de baterías haya bloqueado la bandeja de las baterías. ˎˎSi fuerza la bandeja de las baterías con cierto ángulo cuando no haya baterías instaladas, podrá insertarla parcialmente, pero dañará la unidad si la inserta más. Inserte la bandeja de las baterías en posición horizontal con respecto a la unidad y en la dirección correcta. (Consulte la ilustración -6-.) 7 Cierre la tapa del compartimiento de las baterías y gire el selector OPEN/CLOSE del compartimiento de las baterías hasta “CLOSE”. ˎˎGire el selector OPEN/CLOSE del compartimiento de las baterías correctamente hacia la posición indicada en la ilustración. Toma de imágenes verticales Las operaciones de los mandos y botones de la unidad son las mismas que permiten realizar los del cuerpo de la cámara. Cuando utilice esta unidad, consulte también el manual de instrucciones suministrado con su cámara. Si utiliza esta unidad en posición vertical, ajuste el interruptor ON/OFF de control del mango en la posición “ON”. ˎˎ El selector ON/OFF de control del mango permite activar (ON) y desactivar (OFF) las funciones de los mandos y los botones. ˎˎ Independientemente de la posición de interruptor ON/OFF de control del mango, el botón de operación de la cámara siempre funciona. ˎˎ Conecte (ON) y desconecte (OFF) la alimentación con el selector POWER de la cámara. El selector ON/OFF de control del mango no puede conectar (ON) ni desconectar (OFF) la alimentación. Indicador de energía restante de las baterías Cuando inserte dos baterías, en el monitor LCD o en el visor de la cámara se visualizará el indicador siguiente. Monitor LCD Visor Baterías Solamente podrán utilizarse baterías “InfoLITHIUM”* NP-FM500H. Puede fijar simultáneamente dos baterías a esta unidad. Con esta unidad no podrán utilizarse otras baterías “InfoLITHIUM”*. Lorsque deux batteries sont en place, celle qui est la moins chargée est utilisée en premier. Le repère de la batterie utilisée est alors lumineux et celui de l’autre batterie est estompé. Le niveau d’énergie restant de la batterie utilisée est affiché sous la forme d’un pourcentage (%). Le repère de la batterie utilisée change de la manière illustrée ci-dessous. Lorsque la capacité de la batterie utilisée est épuisée, l’accessoire bascule automatiquement vers l’autre batterie. Autonomie restante des batteries haute basse Si vous continuez à prendre des photos alors que le repère est affiché, cette batterie s’épuise, mais l’accessoire bascule automatiquement vers l’autre batterie. Remarques relatives à l’objectif ˎˎ Lors de l’utilisation de cet accessoire attaché à un appareil photo muni d’un objectif 70-200mm F2.8G, 300mm F2.8G ou 70-400mm F4-5.6G SSM fixé au collier de montage du trépied, faites tourner le collier de montage du trépied dans une position qui permet d’utiliser la poignée. ˎˎ Lors de l’utilisation de cet accessoire attaché à un appareil photo muni d’un objectif 70-200mm F2.8G ou 70-400mm F4-5.6G SSM fixé au collier de montage du trépied, il se peut que les commutateurs d’objectif suivants ne puissent pas être utilisés pour une prise de vue verticale. Réglez-les en position horizontale puis faites la prise de vue en position verticale. ˋˋCommutateur de mise au point ˋˋCommutateur du mode DMF ˋˋLimiteur de plage de mise au point ˎˎ Antes de almacenar esta unidad durante mucho tiempo, extráigale las baterías. ˎˎ Utilice siempre una batería Sony genuina con esta unidad. Cargue la batería solamente con el cargador de baterías especificado. ˎˎ Esta unidad no dispone de función de carga de baterías. * ¿Qué es “InfoLITHIUM”? “InfoLITHIUM” es una batería de iones de litio que puede intercambiar datos con equipos electrónicos compatibles acerca de su consumo de batería. Sony le recomienda que utilice la batería “InfoLITHIUM” con equipos electrónicos que posean el logotipo . Ubicaciones que deben evitarse para la utilización y almacenamiento de la unidad Independientemente de si la unidad está utilizándose o almacenada, no la deje en lugares donde pueda quedar expuesta a: ˎˎ Temperaturas extremadamente altas No deje la unidad en lugares donde pueda quedar expuesta a la luz solar directa. Evite ubicaciones como el salpicadero del automóvil o cercanas a fuentes de calor. El interior de un vehículo puede alcanzar temperaturas muy elevadas si las ventanas se dejan cerradas en verano o si se encuentra bajo la luz solar directa. La unidad puede deformarse o sufrir fallos de funcionamiento si se deja en el interior de un vehículo. ˎˎ Vibraciones excesivas ˎˎ Electromagnetismo o rayos potentes ˎˎ Arena o polvo excesivos Otras precauciones L’appareil photo ne fonctionne pas ˎˎ Vérifiez si la vis de fixation de l’accessoire est serrée solidement. alors que l’accessoire est raccordé, que la (les) batterie(s) sont insérée(s) dans ˎˎ Vérifiez si la (les) batterie(s) est (sont) chargée(s). l’accessoire et que le commutateur POWER de l’appareil photo est réglé sur ˎˎ Réinstallez le tiroir des batteries dans l’accessoire. ON. ˎˎ Esta unidad ha sido diseñada para utilizarse de 0 °C a 40 °C ˎˎ Los aumentos de temperatura repentinos y excesivos provocan la formación de condensación. Por lo tanto, selle la unidad dentro de una bolsa de plástico y absorba el máximo posible de aire de su interior antes de trasladarla a un lugar cálido después de haber estado expuesta a bajas temperaturas durante mucho tiempo. Cuando la temperatura de la bolsa ascienda para adaptarse gradualmente a la temperatura ambiente, podrá extraer la unidad de la bolsa con seguridad. Este procedimiento impedirá que la unidad sufra cambios bruscos de temperatura y evitará de este modo que se forme condensación. ˎˎ En caso de que se ensucie, puede limpiar la unidad con un paño limpio y seco. No permita que esta unidad entre en contacto con alcohol u otros productos químicos. ˎˎ Esta unidad dispone de un punto de contacto de señal conectado eléctricamente a la cámara. Si inserta la(s) baterías(s) mientras la unidad no esté fijada a la cámara, puede producirse un fallo de funcionamiento o daños en ésta producidos por un cortocircuito en el punto de contacto. Cuando instale esta unidad en la cámara, la separe de la cámara, o la almacene de manera independiente, asegúrese de extraer la(s) batería(s) de la unidad. ˎˎ Cuando fije un trípode a esta unidad, utilice solamente uno con tornillo no más largo de 5,5 mm Esta unidad no podrá fijarse firmemente a un trípode utilizando tornillos largos. Si lo intentase, podría dañar esta unidad. Le déclencheur ou d’autres touches ne fonctionnent pas. Identificación de los componentes Dépannage Symptôme « Pour batterie “InfoLITHIUM” seulement » s’affiche même si vous utilisez une (des) batterie(s) Sony d’origine. Solution ˎˎ Vérifiez que le commutateur ON/OFF de la commande de la poignée n’est pas réglé sur OFF. ˎˎ Refixez le tiroir des batteries sur l’accessoire. ˎˎ Réglez le commutateur POWER de l’appareil photo sur OFF, retirez la (les) batterie(s) et refixez l’accessoire sur l’appareil photo. ˎˎ Réinstallez le tiroir des batteries dans l’accessoire. ˎˎ Réglez le commutateur POWER de l’appareil photo sur OFF, retirez la (les) batterie(s) et refixez l’accessoire sur l’appareil photo. 1 Contactos eléctricos 2 Barra de guía 3 Tornillo de sujeción 4 Selector OPEN/CLOSE del compartimiento de las baterías (Teleconvertidor inteligente)/Botón de Amplificador Enfoque 5 Botón 6 Para tomar imágenes: Botón Fn (Función) Para visualizar: Botón (Rotación de imagen) 7 Multiselector 8 Selector de control posterior 9 Selector ON/OFF de control del mango 10Botón (Exposición) 11Para tomar imágenes: Botón AF/MF (Enfoque automático/manual) Para visualizar: Botón (Ampliar) 12Para tomar imágenes: Botón AEL (Bloqueo AE)/Botón SLOW SYNC (Índice imágenes) Para visualizar: Botón De las dos baterías, se utilizará primero la que tenga menos energía. En este caso, la marca correspondiente a la batería utilizada aparecerá iluminada, y la correspondiente a la otra batería aparecerá atenuada. El nivel de energía restante de la batería que esté utilizándose se mostrará en forma de porcentaje (%). La marca correspondiente a la batería que esté utilizándose cambiará como se muestra a continuación. Cuando se agote la energía de la batería que esté utilizándose, la unidad cambiará automáticamente a la otra batería. Energía restante de la batería alta baja Si se siguen tomando imágenes durante unos instantes después de que aparezca la marca , la energía de tal batería se agotará, pero la unidad cambiará automáticamente a la otra batería. Notas relacionadas con el objetivo ˎˎ Cuando utilice esta unidad instalada en la cámara con un objetivo 70-200mm F2.8G, 300mm F2.8G o 70-400mm F4-5.6G SSM fijado al collar de montaje en trípode, gire dicho collar hasta la posición que permita utilizar el mango. ˎˎ Cuando utilice esta unidad instalada en la cámara con un objetivo 70-200mm F2.8G o 70-400mm F4-5.6G SSM fijado al collar de montaje en trípode, los interruptores siguientes pueden no funcionar en el fotografiado vertical. Antes de fotografiar verticalmente, ajústelos a la posición horizontal. ˋˋInterruptor del modo de enfoque ˋˋSelector del modo DMF ˋˋLimitador del rango de enfoque Solución de problemas Síntoma Solución La cámara no funciona incluso después de colocar la unidad en ésta, insertar la(s) batería(s) en la unidad, y colocar el selector POWER en la posición ON. ˎˎ Compruebe que el tornillo de sujeción de la unidad esté firmemente apretado. ˎˎ Compruebe que la(s) batería(s) esté(n) cargada(s). ˎˎ Vuelva a colocar la bandeja de las baterías en la unidad. El disparador u otros botones de operación no funcionan. ˎˎ Compruebe que el selector ON/OFF de control del mango no esté ajustado en la posición OFF. ˎˎ Vuelva a colocar la bandeja de las baterías en la unidad. ˎˎ Coloque el selector POWER de la cámara en la posición OFF, extraiga la(s) batería(s), y vuelva a instalar la unidad en la cámara. El mensaje “Sólo para batería ˎˎ Vuelva a colocar la bandeja de las baterías en la unidad. “InfoLITHIUM”” se muestra aunque se esté(n) utilizando batería(s) originales de ˎˎ Coloque el selector POWER de la cámara en la posición OFF, extraiga Sony. la(s) batería(s), y vuelva a instalar la unidad en la cámara. Especificaciones Batería NP-FM500H cc de 7,2 V Rendimiento de grabación Con dos baterías NP-FM500H Aprox. 1 060 tomas (utilizando “Memory Stick PRO Duo” y el modo de monitor LCD) Aprox. 940 tomas (utilizando “Memory Stick PRO Duo” y el modo de visor) ˎˎ El método de medición cumple con la norma de la CIPA. ˎˎ Dependiendo de las condiciones de utilización, el rendimiento de grabación puede ser inferior al especificado. ˎˎ Con respecto a los detalles, consulte el manual de instrucciones suministrado con el modelo SLT-A77V, SLT-A77. Dimensiones (Aprox.) 139 mm × 125 mm × 87 mm (an/al/prf) Peso Aprox. 335 g (Incluida la bandeja de las baterías, sin incluir las baterías) Temperatura de funcionamiento 0 °C a 40 °C Elementos incluidos Mango vertical (1), Bandeja de las baterías (1), Tapa de los terminales (1), Juego de documentación impresa El diseño y las especificaciones están sujetos a cambio sin previo aviso. , “Memory Stick PRO Duo” e “InfoLITHIUM” son marcas comerciales de Sony Corporation.