1
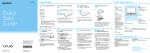
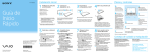
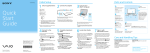
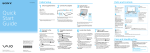
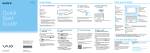
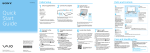
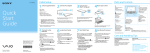
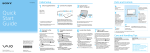
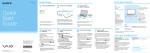
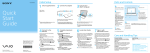
4-470-538-11 (1) Initial Setup 1 Check supplied items Parts and Controls 2 Connect AC adapter AC adapter1 Quick Start Guide 4 Raise LCD screen 1 Power cord B Pen hook VGA adapter (Back) Micro SIM card slot 2 1 The USB port on the AC adapter is intended exclusively for battery charging. Do not use it for any other purpose. 2 Not supplied with all models. Availability depends on your computer’s specifications. Features and specifications may vary and are subject to change without notice. 2 Plug the power cord and the AC adapter into an AC outlet and the computer. Be sure to connect the AC adapter to your computer when using it for the first few times to ensure the battery becomes fully charged. Place your fingers on the projection of the LCD screen and gently raise it. Before using your computer, make sure the screen is secured to the computer with the metal hooks on the computer. 8 Connect to the Internet to automatically activate Windows. Perform Windows Update and An introductory version of the User Guide is available on your computer. To update to the complete version, connect to the Internet and follow the steps below. To download and use apps from Windows Store, you need to use a Microsoft account instead of a local account. You can create a Microsoft account by following the steps below. right corner of the screen, then move the pointer down and click the Settings charm. (the network icon). 2Click 3 Select the desired network (SSID) and click Connect. For details on the security key and other settings, refer to the manual of the network device or the information from your Internet service provider. Search charm and Settings, then search Windows Update. Search charm and Apps, Click the then search VAIO Update. Click the Create your Recovery Media Press the ASSIST button to start VAIO Care, then click Advanced Tools. Recovery Media are not supplied with your computer. Refer to the supplied Recovery, Backup and Troubleshooting Guide before creating the Recovery Media. Register your computer Printed in Japan © 2013 Sony Corporation HDMI output port 7 VAIO Update Press the ASSIST button to start VAIO Care, then click About your VAIO. 1 Open the charms by pointing to the top right corner of the screen, then move the pointer down and click the Search charm. 2Click Apps, enter “VAIO Manual” in the search box, and then click the icon. The User Guide appears. 3 Close the User Guide, and after a while, open again by following the same steps. The complete version will be available. Be sure to use VAIO Update before updating. Touch pad Press the bottom left of the touch pad to click. H C G Sign in with Microsoft account 1 Open the charms by pointing to the top right corner of the screen, then move the pointer down and click the Settings charm. 2Click Change PC settings, Users, and Switch to a Microsoft account. 3 Follow the on-screen instructions. When app updates are available, a number appears on the Store tile on the Start screen. Click the tile to start Store and update Windows Store apps. USB port x 2 (Compliant with the USB 3.0 standard. The port with the mark supports USB charging.) Headset compatible headphone jack DC IN port Charge indicator C G Pen stand D “Memory Stick Duo” / SD memory card combined slot The startup process will take a few minutes. No action is required until the setup window appears. Locate User Guide B Battery off button Press and hold down the power button. 6 Complete important tasks Windows button A Internal dual microphones 5 1 Open the charms by pointing to the top Please read this manual and Safety Regulations carefully before using the product. Keep them in a safe place. Built-in front camera / indicator Ambient light sensor Digitizer stylus H A LCD screen / touch screen Connect to the Internet Personal Computer VAIO Duo 13 SVD132 3 Turn on your VAIO® computer F E F (Bottom) Touch mark Built-in rear camera / indicator D Internal stereo speaker A hole for the pen hook E ASSIST button Starts VAIO Care while your computer is on easily tune-up and self support the computer. Internal stereo speaker VOL (Volume) buttons Power button On selected models only. Care and Handling Tips Computer Handling Do not exert pressure on your computer, especially the LCD/touch screen or the AC adapter cable. Liquid Damage Protect your computer from contact with liquids. Ventilation Place your computer on hard surfaces such as a desk or table. Proper air circulation around vents is important to prevent overheating. Support websites http://esupport.sony.com/US/VAIO/ (USA) http://www.sony.ca/support/ (Canada: English) http://fr.sony.ca/support/ (Canada: French) http://esupport.sony.com/LA/VAIO/ (Latin American area) http://esupport.sony.com/BR/VAIO/ (Brazil) Configuration initiale 1 Vérifier les articles fournis Guide de Démarrage Rapide 4 Soulever l'écran ACL 1 Cordon d'alimentation Adaptateur VGA B (Retour) Fente pour carte micro SIM Microphones doubles internes Bouton d'arrêt de la batterie Fente combinée pour « Memory Stick Duo »/ carte mémoire SD Port de sortie HDMI 2 1 Le port USB de l'adaptateur c.a. doit uniquement servir à recharger la batterie. Ne l'utilisez pas à d'autres fins. 2 Non fournie avec tous les modèles. La disponibilité dépend des spécifications de votre ordinateur. Les fonctions et les caractéristiques techniques peuvent varier et sont modifiables sans préavis. 2 Branchez le cordon d'alimentation et l'adaptateur c.a. dans une prise c.a., puis à votre ordinateur. Durant vos premières utilisations, assurez-vous que l'adaptateur c.a. est branché à votre ordinateur de manière à garantir que la batterie se charge complètement. Appuyez sur le bouton d'alimentation et maintenez-le enfoncé. Le processus de démarrage demandera quelques minutes. Aucune action n'est nécessaire jusqu'à ce que la fenêtre d'installation s'affiche. Placez vos doigts sur la saillie de l'écran ACL et soulevez doucement l'écran. Avant d'utiliser votre ordinateur, assurez-vous que l'écran est fixé à l'ordinateur à l'aide des crochets en métal se trouvant sur l'ordinateur. 5 6 7 8 Connectez-vous à Internet afin d'activer automatiquement Windows. Appliquer Windows Update et Une version d'introduction au Guide de l'utilisateur est disponible sur votre ordinateur. Pour vous procurer la version complète, connectez-vous à Internet et respectez la marche à suivre. Pour télécharger et utiliser des applications de Windows Store, il faut utiliser un compte Microsoft au lieu d'un compte local. Vous pouvez créer un compte Microsoft en suivant les étapes suivantes. 1 Ouvrez les icônes en pointant dans le coin 1 Ouvrez les icônes en pointant dans le coin supérieur droit de l'écran, puis déplacez le pointeur vers le bas et cliquez sur l'icône Paramètres. (icône du réseau). 2 Cliquez sur 3 Sélectionnez le réseau désiré (SSID) et cliquez sur Connecter. Pour obtenir de plus amples renseignements sur le code de sécurité et autres paramètres, reportez-vous au manuel du périphérique réseau ou aux renseignements fournis par votre fournisseur de services Internet. Caméra avant/témoin intégrés Écran ACL/tactile Crochet pour stylet Effectuer des tâches importantes VAIO Update Rechercher, puis sur Paramètres et recherchez Windows Update. Rechercher, Cliquez sur l'icône puis sur Applications et recherchez VAIO Update. Cliquez sur l'icône Créer un Média de Réinstallation Appuyez sur le bouton ASSIST pour lancer VAIO Care, puis cliquez sur Outils avancés. Aucun Média de Réinstallation n'est fourni avec cet ordinateur. Reportez-vous au Guide de réinstallation, sauvegarde et dépannage avant de créer des Média de Réinstallation. Enregistrement de votre ordinateur Appuyez sur le bouton ASSIST pour lancer VAIO Care, puis cliquez sur À propos de votre VAIO. Repérer le Guide de l'utilisateur supérieur droit de l'écran, puis déplacez le pointeur vers le bas et cliquez sur l'icône Rechercher. 2 Cliquez sur Applications et saisissez « Manuel VAIO » dans le champ de recherche, puis cliquez sur l'icône. La fenêtre d'Guide de l'utilisateur s'affiche. 3 Fermez le Guide de l'utilisateur, puis rouvrez-le après quelques instants en suivant les mêmes étapes. La version complète est alors disponible. Assurez-vous d'utiliser VAIO Update avant de procéder à la mise à jour. Ouvrir une session avec un compte Microsoft supérieur droit de l'écran, puis déplacez le pointeur vers le bas et cliquez sur l'icône Paramètres. 2 Cliquez sur Modifier les paramètres du PC, Utilisateurs, et Passer à un compte Microsoft. 3 Suivez les instructions affichées à l'écran. Lorsque des mises à jour des applications sont disponibles, un numéro apparaît sur la vignette du Windows Store de l'écran d'Accueil. Cliquez sur la vignette pour ouvrir le Windows Store et mettre à jour les applications du Windows Store. H A Capteur de lumière ambiante Stylet numériseur 1 Ouvrez les icônes en pointant dans le coin Ordinateur personnel VAIO Duo 13 SVD132 3 Mettre en marche votre ordinateur VAIOMD Adaptateur c.a.1 Connexion à Internet Veuillez lire attentivement ce manuel ainsi que les Réglementations de sécurité avant d'utiliser ce produit. Conservez-les dans un endroit sûr. 2 Brancher l'adaptateur c.a. Pièces détachées et contrôles Port USB x 2 (Conformes à la norme USB 3.0. Le port avec l'image prend en charge le chargement USB.) Prise casque compatible avec casque d'écoute Port d'entrée en c.c. Témoin de charge C Bouton d'alimentation Bouton Windows A B Pavé tactile Appuyez dans l'angle inférieur gauche du pavé tactile pour cliquer. H C G G Support pour stylet D F E F (Dessous) Marque tactile Caméra arrière/témoin intégrés D Haut-parleur stéréo interne Un trou pour le crochet pour stylet E Bouton ASSIST Lance VAIO Care lorsque votre ordinateur est en marche - règle et auto - supporte l'ordinateur aisément. Haut-parleur stéréo interne Boutons VOL (Volume) Sur les modèles sélectionnés uniquement. Conseils sur l'entretien et la manipulation Manipulation de l'ordinateur N'exercez pas de pression sur votre ordinateur, en particulier sur l'écran ACL/tactile ou le câble de l'adaptateur c.a. Dommages causés par les liquides Évitez que des liquides entrent en contact avec votre ordinateur. Ventilation Placez l'ordinateur sur une surface dure comme un bureau ou une table. Une circulation d'air adéquate autour des grilles d'aération permet d'éviter une surchauffe. Site web de support http://esupport.sony.com/US/VAIO/ (États-Unis) http://www.sony.ca/support/ (Canada : Anglais) http://fr.sony.ca/support/ (Canada : Français) http://esupport.sony.com/LA/VAIO/ (Amérique latine) http://esupport.sony.com/BR/VAIO/ (Brésil)