1
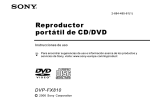
English
Precautions
On safety
• As the laser beam used in the CD player
section is harmful to the eyes, do not
attempt to disassemble the casing. Refer
servicing to qualified personnel only.
• Should any solid object or liquid fall into
the player, unplug the player, and have it
checked by qualified personnel before
operating it any further.
• Discs with non-standard shapes (e.g.,
heart, square, star) cannot be played on
this player. Attempting to do so may
damage the player. Do not use such discs.
Cleaning the cabinet
• Clean the cabinet, panel and controls with
a soft cloth slightly moistened with a mild
detergent solution. Do not use any type of
abrasive pad, scouring powder, or solvent,
such as alcohol or benzine.
Español
On operation
• If the player is brought directly from a
cold to a warm location, or is placed in a
very damp room, moisture may condense
on the lenses inside the CD player section.
Should this occur, the player will not
operate properly. In this case, remove the
CD and wait about an hour for the
moisture to evaporate.
• If the player has not been used for a long
time, set it in the playback mode to warm
it up for a few minutes before inserting a
cassette.
Notes on cassettes
• Break off the cassette tab from side A or B
to prevent accidental recording. If you
want to reuse the tape for recording, cover
the broken tab with adhesive tape.
On placement
• Do not leave the player in a location near
heat sources, or in a place subject to direct
sunlight, excessive dust or mechanical
shock.
• Do not place the player on an inclined or
unstable place.
• Do not place anything within 10 mm of
the side of the cabinet. The ventilation
holes must be unobstructed for the player
to operate properly and prolong the life of
its components.
• If the player is left in a car parked in the
sun, be sure to choose a location in the car
where the player will not be subjected to
the direct rays of the sun.
• Since a strong magnet is used for the
speakers, keep personal credit cards using
magnetic coding or spring-wound watches
away from the player to prevent possible
damage from the magnet.
General
The power does not come on.
• Make sure the batteries are inserted correctly.
• Replace all the batteries with new ones if they
are weak.
• You cannot turn on the player with the remote
when you operate the player on batteries.
The power is not on, and "bAttErY"
and “Error” are displayed alternately.
• Make sure the batteries are inserted correctly.
• Replace all the batteries with new ones if they
are weak.
There is no audio.
• Adjust the volume.
• Unplug the headphones when listening
through speakers.
The tape does not move when you
press an operation button.
• Close the cassette compartment securely.
The REC z button does not function
or the tape does not play or record.
• Make sure the safety tab on the cassette is in
place.
Poor or distorted playback, recording
or erasing quality.
• Clean the heads, pinch roller and capstan with
a cleaning swab slightly moistened with
cleaning fluid or alcohol.
• Replace all the batteries with new ones if they
are weak.
• TYPE II (high position) or TYPE IV (metal)
tape is being used. Use TYPE I (normal) tape
only.
• Demagnetize the heads using a commercially
available tape head demagnetizer.
Noise is heard.
Side A
On power sources
• For AC operation, check that the player's
operating voltage is identical with your
local power supply (see "Specifications")
and use the supplied mains lead; do not
use any other type.
The voltage selector is located at the
bottom of the player (Saudi Arabian
model only).
• The player is not disconnected from the
AC power source (mains) as long as it is
connected to the wall outlet, even if the
player itself has been turned off.
• For battery operation, use six R20 (size D)
batteries.
• When the batteries are not to be used,
remove them to avoid damage that can be
caused by battery leakage or corrosion.
• The nameplate indicating operating
voltage, power consumption, etc. is
located at the bottom.
Troubleshooting
Tape Player
Tab for side A
Tab for side B
• The use of a cassette with more than 90
minutes of play time is not recommended
except for long, continuous recording or
playback.
Notes on CDs
• Before playing, clean the CD with a
cleaning cloth. Wipe the CD from the
center out.
• Someone is using a portable telephone or
other equipment that emits radio waves near
the player. tMove the portable telephone,
etc., away from the player.
If you have any questions or problems
concerning your player, please consult your
nearest Sony dealer.
System
Compact disc digital audio system
Laser diode properties
Material: GaAlAs
Wave length: 780 nm
Emission duration: Continuous
Laser output: Less than 44.6 µW
(This output is the value measured at a distance
of about 200 mm from the objective lens surface
on the optical pick-up block with 7 mm
aperture.)
Spindle speed
200 r/min (rpm) to 500 r/min (rpm)
(CLV)
Number of channels
2
Frequency response
20 - 20 000 Hz +1/–2 dB
Wow and flutter
Below measurable limit
Frequency range
CFD-S400
The CD does not play or “no dISC”
lights in the display even when a CD
is in place.
• Place the CD with the label surface up.
• Clean the CD.
• Take out the CD and leave the CD
compartment open for about an hour to dry
moisture condensation.
• The CD-R/CD-RW was not finalized. Finalize
the CD-R/CD-RW with the recording device.
• There is a problem with the quality of the CDR/CD-RW, recording device or application
software.
• Reduce the volume.
• Clean the CD, or replace it if the CD is badly
damaged.
• Place the player in a location free from
vibration.
• Clean the lens with a commercially available
blower.
• The sound may drop out or noise may be
heard when using poor quality CD-Rs/CDRWs or if there is a problem with the
recording device or application software.
Radio
Reception is poor.
• Reorient the aerial to improve FM reception.
Pinch roller
Erase head
• Replace all the batteries in the remote with
new ones if they are weak.
• Make sure that you are pointing the remote at
the remote sensor on the player.
• Remove any obstacles in the path of the
remote and the player.
• Make sure the remote sensor is not exposed to
strong light such as direct sunlight or
fluorescent lamp light.
• Move closer to the player when using the
remote.
• Reorient the player itself to improve AM or
MW/LW reception.
The audio is weak or has poor quality.
• Replace all the batteries with new ones if they
are weak.
• Move the player away from the TV.
The picture of your TV becomes
unstable.
• If you are listening to an FM program near the
TV with an indoor aerial, move the player
away from the TV.
Sony MDR headphone series
• Puesto que el haz láser utilizado en la
sección del reproductor de CD es
perjudicial para los ojos, no intente
desmontar la caja. Solicite asistencia
técnica únicamente a personal
especializado.
• Si se introduce algún objeto sólido o
líquido en el reproductor, desenchúfelo y
haga que sea examinado por personal
especializado antes de volver a utilizarlo.
• Los discos con formas no estándar (p.ej.,
corazón, cuadrado, estrella) no pueden
reproducirse en este reproductor. Si lo
intenta, puede dañar el reproductor. No
utilice tales discos.
Limpieza del exterior
• Limpie el exterior, el panel y los controles
con un paño suave ligeramente
humedecido con una solución detergente
poco concentrada. No utilice estropajos
abrasivos, detergente en polvo ni
disolventes, como alcohol o bencina.
Fuentes de alimentación
AM
531 - 1 611 kHz (9 kHz step)
530 - 1 610 kHz (10 kHz step)
• Cuando lo alimente con CA, compruebe
que la tensión de funcionamiento del
reproductor coincide con la del suministro
eléctrico local (consulte
“Especificaciones”) y utilice el cable de
corriente suministrado; no emplee otro
tipo de cable.
El selector de tensión está situado en la
parte inferior del reproductor (Sólo en el
modelo de Arabia Saudí).
• El reproductor no estará desconectado de
la fuente de alimentación de CA (toma de
corriente) mientras esté conectado a la
toma mural, aunque haya apagado el
propio reproductor.
• Para alimentar la unidad con pilas, utilice
seis pilas R20 (tamaño D).
• Cuando no vaya a utilizar las pilas,
extráigalas para evitar daños que pueden
producirse por la fuga o corrosión de las
mismas.
• La placa de características que indica la
tensión de funcionamiento, consumo de
energía, etc. está situada en la parte
inferior.
FM
87.5 - 108 MHz
MW
531 - 1 611 kHz (9 kHz step)
530 - 1 610 kHz (10 kHz step)
LW
153 - 279 kHz
FM: 10.7 MHz
AM/MW/LW: 450 kHz
Aerials
FM: Telescopic aerial
AM/MW/LW: Built-in ferrite bar aerial
Remote
The remote does not function.
Optional accessories
Seguridad
87.5 - 108 MHz
IF
Capstan
Record/playback head
Design and specifications are subject to change
without notice.
Precauciones
FM
CFD-S400L
After trying the above remedies, if you still have
problems, unplug the mains lead and remove all
the batteries. After all the indications in the
display disappear, plug the power cord and
insert the batteries again. If the problem persists,
please consult your nearest Sony dealer.
About CD-Rs/CD-RWs
This player can play CD-Rs/CD-RWs
recorded in the CD-DA format*, but
playback capability may vary depending on
the quality of the disc and the condition of
the recording device.
* CD-DA is the abbreviation for Compact
Disc Digital Audio. It is a recording
standard used for Audio CDs.
CD player section
Radio section
CD Player
The sound drops out.
• Do not use solvents such as benzine,
thinner, commercially available cleaners
or anti-static spray intended for vinyl LPs.
• Do not expose the CD to direct sunlight or
heat sources such as hot air ducts, nor
leave it in a car parked in direct sunlight as
there can be a considerable rise in
temperature inside the car.
• Do not stick paper or sticker on the CD,
nor scratch the surface of the CD.
• After playing, store the CD in its case.
If there is a scratch, dirt or fingerprints on the
CD, it may cause tracking error.
Lens
Specifications
Dimensions
Approx. 386 × 166 × 252 mm (w/h/d)
(15 1⁄4 × 6 5⁄8 × 10 inches) (incl. projecting parts)
Mass
Approx. 3.3 kg (7 lb. 4 oz) (incl. batteries)
Supplied accessory
Mains lead (1)
Remote control (1)
Cassette-corder section
Recording system
4-track 2 channel stereo
Fast winding time
Approx. 120 s (sec.) with Sony cassette C-60
Frequency response
TYPE I (normal): 80 - 10 000 Hz
General
Speaker
Full range: 10 cm dia., 3.2 Ω, cone type (2)
Outputs
Headphones jack (stereo minijack)
For 16 - 68 Ω impedance headphones
Maximum power output
4.6 W
Power requirements
For CD radio cassette-corder:
Saudi Arabian model:
110 - 127V, 220 - 240V AC
selectable, 50/60 Hz
Argentine model:
220 - 230 V AC, 50 Hz
Korean model:
220 V AC, 60 Hz
Other models:
230 V AC, 50 Hz
9 V DC, 6 R20 (size D) batteries
For remote control:
3 V DC, 2 R6 (size AA) batteries
Power consumption
AC 20 W
Battery life
For CD radio cassette-corder:
FM recording
Sony R20P: approx. 13.5 h
Sony alkaline LR20: approx. 20 h
Tape playback
Sony R20P: approx. 7.5 h
Sony alkaline LR20: approx. 15 h
CD playback
Sony R20P: approx. 2.5 h
Sony alkaline LR20: approx. 7 h
Ubicación
• No deje el reproductor cerca de fuentes de
calor, ni en lugares sujetos a la luz solar
directa, polvo excesivo o golpes
mecánicos.
• No coloque el reproductor en lugares
inclinados ni inestables.
• No coloque nada a una distancia inferior a
10 mm del lateral del sistema. Los
orificios de ventilación no deben
bloquearse con el fin de que el reproductor
funcione correctamente y prolongar la
duración de sus componentes.
• Si deja el reproductor en un automóvil
aparcado al sol, elija un lugar dentro de
dicho automóvil en el que el reproductor
no quede expuesto a los rayos directos del
sol.
• Puesto que los altavoces utilizan un imán
potente, mantenga las tarjetas personales
de crédito que utilicen codificación
magnética o los relojes de cuerda alejados
del reproductor para evitar posibles daños
producidos por dicho imán.
English
Utilización
• Si traslada el reproductor directamente de
un lugar frío a uno cálido, o si lo instala en
una sala muy húmeda, es posible que se
condense humedad en las lentes del
interior de la sección de reproductor de
CD. Si esto ocurre, el reproductor no
funcionará correctamente. En este caso,
extraiga el CD y espere una hora
aproximadamente hasta que se evapore la
humedad.
• Si no ha utilizado el reproductor durante
mucho tiempo, ajústelo en el modo de
reproducción para que se caliente durante
unos minutos antes de insertar un casete.
Notas sobre los casetes
• Rompa la lengüeta de la cara A o B del
casete para evitar grabaciones
accidentales. Si desea utilizar la cinta de
nuevo para grabar, cubra el orificio de la
lengüeta rota con cinta adhesiva.
Cara A
Solución de
problemas
General
La alimentación no se activa.
• Asegúrese de que las pilas están insertadas
correctamente.
• Sustituya todas las pilas por unas nuevas si
disponen de poca energía.
• No es posible encender el reproductor con el
mando a distancia al utilizar dicho reproductor
con pilas.
La alimentación no se activa y
“bAttErY” y “Error” aparecen
alternativamente.
• Asegúrese de que las pilas están insertadas
correctamente.
• Sustituya todas las pilas por unas nuevas si
disponen de poca energía.
Ausencia de sonido.
• Ajuste el volumen.
• Desenchufe los auriculares cuando escuche el
sonido a través de los altavoces.
Reproductor de cintas
La cinta no se mueve al pulsar un
botón de funcionamiento.
• Cierre firmemente el compartimiento de
cassettes.
El botón REC z no funciona o la cinta
no se reproduce ni se graba.
• Compruebe que el cassette dispone de
lengüeta de seguridad.
Reproducción, grabación o borrado
de mala calidad o distorsionados.
• Limpie los cabezales, el rodillo de apriete y el
cabrestante con un bastoncillo ligeramente
humedecido con un líquido limpiador o con
alcohol.
• Sustituya todas las pilas por unas nuevas si
disponen de poca energía.
• Utiliza una cinta TYPE II (posición alta) o
TYPE IV (de metal). Utilice solamente cintas
TYPE I (normales).
• Desmagnetice los cabezales con un
desmagnetizador de cabezales de cinta
disponible en el mercado.
Lente
Lengüeta de
la cara B
• No se recomienda el uso de casetes de
duración superior a 90 minutos, excepto
para realizar grabaciones o reproducciones
largas y continuas.
Notas sobre los discos compactos
• Antes de realizar la reproducción, limpie
el CD con un paño de limpieza. Hágalo
desde el centro hacia los bordes.
• No utilice disolventes como bencina,
diluyente, limpiadores disponibles en el
mercado ni aerosoles antiestáticos para
discos de vinilo.
• No exponga el CD a la luz solar directa ni
a fuentes de calor, como conductos de aire
caliente, ni lo deje en un automóvil
aparcado bajo la luz solar directa, ya que
puede producirse un considerable aumento
de temperatura en el interior del mismo.
• No adhiera papel ni pegatinas en el CD, ni
arañe su superficie.
• Después de la reproducción, guarde el CD
en su caja.
Si el CD está arañado, sucio o hay huellas
dactilares en el mismo, pueden producirse
errores de lectura.
Si desea realizar alguna consulta o solucionar
algún problema referente al reproductor,
consulte con el proveedor Sony más
próximo.
Sistema
Sistema de audio digital de discos compactos
Propiedades del diodo láser
Material: GaAlAs
Longitud de onda: 780 nm
Duración de la emisión: Continua
Salida de láser: Inferior a 44,6 µW
(Esta salida es el valor medido a una distancia de
unos 200 mm de la superficie de la lente objetiva
del bloque de recogida óptica con una apertura
de 7 mm.)
Velocidad del eje
200 r/min (rpm) a 500 r/min (rpm)
(CLV)
Número de canales
2
Respuesta de frecuencia
20 - 20 000 Hz +1/–2 dB
Fluctuación y trémolo
Inferior al límite medible
Rodillo de apriete
Cabezal de
borrado
Cabrestante
Cabezal de grabación/reproducción
Mando a distancia
El mando a distancia no funciona.
• Reduzca el volumen.
• Limpie el CD, o sustitúyalo si está gravemente
dañado.
• Coloque el reproductor en un lugar sin
vibraciones.
• Limpie la lente con un soplador disponible en
el mercado.
• Pueden producirse pérdidas de sonido o ruido
si se utilizan discos CD-R/CD-RW de mala
calidad o si existe algún problema con el
dispositivo de grabación o el software de
aplicación.
• Sustituya todas las pilas del mando a distancia
por unas nuevas si disponen de poca energía.
• Cerciórese de que orienta el mando a distancia
hacia el sensor de control remoto del
reproductor.
• Elimine los obstáculos que haya entre el
mando a distancia y el reproductor.
• Compruebe que el sensor de control remoto no
esté expuesto a iluminaciones intensas, como
a la luz solar directa o a lámparas
fluorescentes.
• Acérquese al reproductor cuando utilice el
mando a distancia.
• Cambie la orientación de la antena para
mejorar la recepción de FM.
• Cambie la orientación del reproductor para
mejorar la recepción de AM o de MW/LW.
El sonido es débil o de mala calidad.
• Sustituya todas las pilas por unas nuevas si
disponen de poca energía.
• Aleje el reproductor del TV.
FM
87,5 - 108 MHz
AM
531 - 1 611 kHz (intervalo de 9 kHz)
530 - 1 610 kHz (intervalo de 10 kHz)
FM
87,5 - 108 MHz
MW
531 - 1 611 kHz (intervalo de 9 kHz)
530 - 1 610 kHz (intervalo de 10 kHz)
LW
153 - 279 kHz
IF
Se producen pérdidas de sonido.
La recepción es de mala calidad.
Auriculares Sony de la serie MDR
Si sigue teniendo problemas tras intentar las
anteriores soluciones sugeridas, desenchufe el
cable de corriente y extraiga todas las pilas.
Cuando hayan desaparecido todas las
indicaciones del visor, enchufe el cable de
alimentación e inserte las pilas de nuevo. Si el
problema persiste, consulte con el proveedor
Sony más próximo.
FM: 10,7 MHz
AM/MW/LW: 450 kHz
Antenas
FM: Antena telescópica
AM/MW/LW: Antena de barra de ferrita
incorporada
To avoid electrical shock, do not open
the cabinet. Refer servicing to
qualified personnel only.
A moulded plug complying with BS 1363 is
fitted to this equipment for your safety and
convenience.
Should the fuse in the plug supplied need to be
replaced, same rating fuse approved by ASTA
or BSI to BS 1362, (i.e. marked with
mark) must be used.
or
If the plug supplied with this equipment has a
detachable fuse cover, be sure to attach the fuse
cover after you change the fuse. Never use the
plug without the fuse cover. If you should lose
the fuse cover, please contact your nearest Sony
service station.
Information
For customers in Europe
ADVERTENCIA
Para evitar el riesgo de incendios o
electrocución, no exponga el
reproductor a la lluvia ni a la
humedad.
Para evitar descargas eléctricas, no
abra el aparato. Solicite asistencia
técnica únicamente a personal
especializado.
Información
Para clientes en Europa
Operating Instructions
Manual de instrucciones
This Compact Disc player is classified as a
CLASS 1 LASER product.
The CLASS 1 LASER PRODUCT mark is
located at the bottom.
Este reproductor de discos compactos está
clasificado como producto LÁSER DE
CLASE 1.
La etiqueta CLASS 1 LASER PRODUCT se
encuentra en la parte inferior.
WARNING
Do not install the appliance in a confined space,
such as a bookcase or built-in cabinet.
CFD-S400L
El CD no se reproduce o “no dISC” se
ilumina en el visor aunque haya un
CD insertado.
Radio
Accesorios opcionales
CD Radio
CassetteCorder
CFD-S400
Reproductor de CD
• Coloque el CD con la superficie de la etiqueta
hacia arriba.
• Límpielo.
• Extraiga el CD y deje el compartimiento
abierto durante una hora aproximadamente
hasta que se seque la condensación de
humedad.
• El CD-R/CD-RW no está finalizado. Finalice
el CD-R/CD-RW con el dispositivo de
grabación.
• Existe un problema con la calidad del CD-R/
CD-RW, el dispositivo de grabación o el
software de aplicación.
El diseño y las especificaciones están sujetos a
cambios sin previo aviso.
To prevent fire or shock hazard, do
not expose the player to rain or
moisture.
Sección de la radio
• Alguien está utilizando un teléfono móvil u
otro equipo que emite ondas de radio cerca del
reproductor. t Aleje el teléfono móvil, etc.,
del reproductor.
Acerca de discos CD-R/CD-RW
Este reproductor puede reproducir CD-R o
CD-RW grabados en formato CD-DA*, pero
la capacidad de reproducción puede variar en
función de la calidad del disco y el estado del
dispositivo de grabación.
* CD-DA es la abreviatura de Compact Disc
Digital Audio, que es un estándar de
grabación utilizado para los CD de audio.
Sección del reproductor de CD
Español
Notice for customers in the United
Kingdom
WARNING
Margen de frecuencias
Se oye ruido.
Lengüeta de
la cara A
Especificaciones
Dimensiones
Aprox. 386 × 166 × 252 mm (an/al/prf)
(partes salientes
incluidas)
Peso
Aprox. 3,3 kg (pilas incluidas)
Accesorio suministrado
Cable de corriente (1)
Mando a distancia (1)
CFD-S400
CFD-S400L
ADVERTENCIA
To prevent fire or shock hazard, do not place
objects filled with liquids, such as vases, on the
appliance.
No instale el aparato en un espacio cerrado,
como una estantería para libros o un armario
empotrado.
Para evitar el peligro de incendio o descarga
eléctrica, no coloque objetos con líquido, como
jarrones, sobre el aparato.
Sony Corporation ©2002
3-238-274-41 (1)
Sección de la grabadora de casetes
Sistema de grabación
4 pistas y 2 canales estéreo
Tiempo de bobinado rápido
Aprox. 120 s (seg.) con casetes Sony C-60
Respuesta de frecuencia
TYPE I (normal): 80 - 10 000 Hz
Power Sources/Fuentes de alimentación
D
B
C
Generales
Altavoz
Gama completa: 10 cm de diámetro, 3,2 Ω,
tipo cónico (2)
Salidas
Toma de auriculares (minitoma estéreo)
Para auriculares de impedancia de 16 a 68
Ω
Salida de potencia máxima
4,6 W
Requisitos de alimentación
Para la grabadora de casetes, radio y CD:
Modelo de Arabia Saudí:
110 - 127 V, 220 - 240 V CA
seleccionable, 50/60 Hz
Modelo argentino:
220 - 230 V CA, 50 Hz
Modelo coreano:
220 V CA, 60 Hz
Otros modelos:
230 V CA, 50 Hz
9 V CC, 6 pilas R20 (tamaño D)
Para el mando a distancia:
3 V CC, 2 pilas R6 (tamaño AA)
Consumo de energía
CA 20 W
Duración de las pilas
Para la grabadora de casetes, radio y CD:
A
1 to AC IN
a AC IN
Connect the mains lead A or insert six R20 (size D) batteries (not supplied) into the battery
compartment B .
Alcalinas Sony LR20: aprox. 20 h
a la toma de corriente
Conecte el cable de corriente A o inserte seis pilas R20 (tamaño D) (no suministradas) en el
compartimiento correspondiente B.
Notes
Notas
• Replace the batteries when the OPR/BATT indicator dims or when the player stops operating.
Replace all the batteries with new ones. Before you replace the batteries, be sure to take out the CD
from the player.
• To use the player on batteries, disconnect the mains lead from the player.
• When you operate the player on batteries, you cannot turn on the player using the remote.
• Sustituya las pilas cuando el indicador OPR/BATT se atenúe o el reproductor deje de funcionar.
Sustituya todas las pilas por otras nuevas. Antes de sustituir las pilas, asegúrese de extraer el CD del
reproductor.
• Para utilizar el reproductor con pilas, desconecte el cable de corriente de dicho reproductor.
• Al utilizar el reproductor con pilas, no es posible encenderlo con el mando a distancia.
Saudi Arabian model only: Adjusting the voltage C
Sólo en el modelo de Arabia Saudí: Ajuste de la tensión C
Be sure to set the VOLTAGE SELECTOR (at the bottom) to your local power supply.
Asegúrese de ajustar el selector de tensión (VOLTAGE SELECTOR) (situado en la parte
inferior) de acuerdo con la tensión del suministro eléctrico local.
Tip
Only for the customers supplied with an AC plug adaptor:
Use the supplied AC plug adaptor if the plug of the main lead does not match your outlet.
Grabación de FM
Sony R20P: aprox. 13,5 h
2 to the mains
Preparing the remote D
Sugerencia
Sólo para los clientes a los que se haya suministrado un adaptador de enchufe de CA:
Utilice el adaptador de enchufe de CA suministrado si el enchufe del cable de corriente no encaja en la
toma de alimentación.
Insert two R6 (size AA) batteries (not supplied).
Preparación del mando a distancia D
Sony R20P: aprox. 7,5 h
Replacing batteries
Inserte dos pilas R6 (tamaño AA) (no suministradas).
Alcalinas Sony LR20: aprox. 15 h
With normal use, the batteries should last for about six months. When the remote no longer
operates the player, replace all the batteries with new ones.
Sustitución de las pilas
La imagen del TV es inestable.
Reproducción de cintas
• Si escucha un programa de FM cerca de un
TV con una antena interior, aleje el
reproductor de dicho TV.
Reproducción de CD
Sony R20P: aprox. 2,5 h
Alcalinas Sony LR20: aprox. 7 h
Con un uso normal, las pilas deben durar aproximadamente seis meses. Cuando el reproductor
no responda al mando a distancia, sustituya todas las pilas por unas nuevas.
English
Location of controls/Ubicación de los controles
Inserting a cassette
Inserción de casetes
With the side you want to play
facing you
Con la cara que desee reproducir
mirando hacia usted
SLEEP
OPERATE
(POWER)
FUNCTION
Number buttons
Botones numéricos
With the labeled side up
Con la cara etiquetada hacia arriba
OPERATE
(POWER)
*
u*
., >
TUNE –, +
BAND
CD
Press u.
The player plays all the tracks once.
x
go back to the previous track
remove the CD
>
.
SOUND
MEGA Xpand
Press Z PUSH OPEN/CLOSE to close the CD compartment.
go to the next track
TUNE –, +
X
VOL +*, –
i
RADIO BAND
AUTO PRESET
TAPE
MEGA BASS
Load a CD in the CD compartment.
VOL +*, –
.,>
SLEEP
1
Press CD (direct power-on).
Press
x
MEGA Xpand
N
1
2
3
4
To
stop playback
pause playback
MODE
Z PUSH
OPEN/CLOSE
x
Listening to the radio
Playing a CD
Remote Control
Mando a distancia
Loading a CD
Carga de un CD
Español
MEGA BASS
2
locate a specific track directly*
locate a point while listening
to the sound
locate a point while observing
the display
> (forward) or . (backward) while playing until you
find the point.
> (forward) or . (backward) in pause until you find
the point.
* You cannot locate a specific track if "SHUF" or "PGM" is lit in the display. Turn off the indication by
pressing x.
Tip
To locate a track numbered over 10, press >10 first, then the corresponding number buttons.
Example:To play track number 23, press >10 first, then 2 and 3.
Using the display
*The button has a tactile dot.
*El botón tiene un punto táctil.
OPR/BATT
Display
Visor
Number buttons
Botones numéricos
Remote sensor
Sensor de control remoto
To check the total track number and playing time
Press DISPLAY•ENT•MEMORY in stop mode (see fig. E).
MODE
To check the remaining time
DISPLAY
ENT
MEMORY
SOUND MODE
Display/Visor
E
Total track number
Número total de pistas
Total playing time
Tiempo total de reproducción
F
Programmed track
Pista programada
Playing order
Orden de reproducción
Press DISPLAY•ENT•MEMORY repeatedly while playing a CD. The display changes as
follows:
t the current track number and playing time
r
the current track number and the remaining time on the current track*
r
the number of tracks left and remaining time on the CD
* For a track whose number is more than 20, the remaining time appears as “- -:- -” in the display.
Selecting the play mode
To turn on/off the power
To reinforce the bass sound
CFD-S400L: Press OPERATE.
CFD-S400: Press POWER.
Press MEGA BASS.
“MEGA BASS” appears in the display.
To return to normal sound, press the button
again.
To adjust the volume
Press VOL +, –.
To listen through headphones
Connect the headphones to the i
(headphones) jack.
Adjusting the sound emphasis
To get the MEGA Xpand effect
Press MEGA Xpand.
"MEGA Xpand" appears in the display.
You can get the effect of expansion of the
sound field.
To return to normal sound, press the button
again.
Para activar/desactivar la
alimentación
CFD-S400L: Pulse OPERATE.
CFD-S400: Pulse POWER.
Para ajustar el volumen
Para escuchar el sonido mediante
auriculares
Conecte los auriculares a la toma i
(auriculares).
Ajuste del énfasis de sonido
Press one of the SOUND MODE buttons to
select the audio emphasis you want.
(On the remote, press SOUND repeatedly.)
Para seleccionar las características
del sonido
POP
To get
powerful, clean sounds,
emphasizing low and high range
audio
light, bright sounds emphasizing
high and middle range audio
JAZZ
percussive sounds, emphasizing
bass audio
VOCAL the presence of vocals, stressing
middle range audio
FLAT
the whole dynamic range for
music such as classical music
Pulse MEGA BASS.
“MEGA BASS” aparece en el visor.
Para recuperar el sonido normal, vuelva a
pulsar el botón.
Pulse VOL +, –.
To Select the sound characteristic
Press
ROCK
Para potenciar los graves
Pulse uno de los botones SOUND MODE
para seleccionar el énfasis de audio que
desee.
(En el mando a distancia, pulse
repetidamente SOUND.)
Pulse
ROCK
Para obtener
un sonido claro y potente que
destaque los tonos graves y agudos
POP
un sonido diáfano y brillante que
enfatice los tonos agudos y medios
JAZZ
sonidos de percusión que enfaticen
los sonidos graves
VOCAL presencia de sonidos vocales,
haciendo énfasis en los sonidos
medios
FLAT
toda la gama dinámica para música
clásica
Para obtener el efecto MEGA Xpand
Pulse MEGA Xpand.
“MEGA Xpand” aparece en el visor.
Es posible obtener el efecto de expansión del
campo de sonido.
Para recuperar el sonido normal, vuelva a
pulsar el botón.
Press MODE until “REP 1” “REP ALL” “SHUF” “SHUF REP” “PGM” “PGM REP” appears in
the display. Then proceed as follows:
To
repeat a single track
Select
“REP 1”
Then do this
Press the number button for the track you want to
repeat.
repeat all tracks
“REP ALL”
shuffle play
repeat tracks
in random order
“SHUF”
“SHUF REP”
Press u.
Press u.
programme play
“PGM”
repeat programmed tracks
“PGM REP”
Press u.
Press the number buttons for the tracks you want
to programme in the order you want up to 20
tracks (see fig. F). Then press u.
Press the number buttons for the tracks you want
to programme in the order you want up to 20
tracks. Then Press u.
To cancel selected play mode
Hold down TUNE + or – until the frequency digits begin to change in the
display.
The player automatically scans the radio frequencies and stops when it finds a
clear station.
If you can't tune in a station, press the button repeatedly to change the frequency
step by step.
u
Press the button again to resume play after pause.
Z PUSH OPEN/CLOSE
a number button of the track.
Press RADIO BAND•AUTO PRESET until the band you want appears in the
display (direct power-on).
Each time you press the button, the indication changes as follows:
CFD-S400: “FM” t “AM”
CFD-S400L: “FM” t “MW” t “LW”.
Tip
If the FM broadcast is noisy, press MODE until "Mono" appears in the display and the radio will play in
monaural.
Changing the AM/MW tuning interval
The AM/MW tuning interval is preset as follows at the factory:
Argentine model: 10 kHz
Other models: 9 kHz
If you need to change the AM/MW tuning interval, do the following:
1 While keeping the RADIO BAND•AUTO PRESET button and x button pressed,
disconnect the mains lead from the mains.
2 While keeping the RADIO BAND•AUTO PRESET button and x button pressed,
reconnect the mains lead to the mains. The tuning interval is changed and “AM 9”
“MW 9” or “AM 10” “MW 10” appears in the display for 2 seconds.
After changing the tuning interval, you need to reset your preset radio stations.
Presetting radio stations
You can store radio stations into the player’s memory. You can preset up to 30 radio stations
(CFD-S400), 20 for FM and 10 for AM in any order, or 40 radio stations (CFD-S400L), 20 for
FM and 10 for MW and LW in any order.
1
2
3
Press RADIO BAND•AUTO PRESET to select the band.
Hold down RADIO BAND•AUTO PRESET for 2 seconds until “AUTO” flashes
in the display.
Press DISPLAY•ENT•MEMORY.
The stations are stored in memory from the lower frequencies to the higher ones.
If a station cannot be preset automatically
You need to preset a station with a weak signal manually.
1 Press RADIO BAND•AUTO PRESET to select the band.
2 Tune in a station you want.
3 Hold down the number buttons that you want to preset the new station on for about 2 seconds.
To select the preset number over 10, press >10 first, then the corresponding number buttons.
You need to hold down the last number button to enter for about 2 seconds.
(Example: To select 12, press >10 and 1 first, then hold down 2 for about 2 seconds.)
Playing preset radio stations
1
2
Playing a tape
Reproducción de discos compactos
1
2
Press TAPE (direct power-on).
3
Press n.
Press xZ to open the tape compartment and insert a recorded tape. Close the
compartment. Use TYPE I (normal) tape only.
To
stop playback
fast-forward or rewind the tape
Press
xZ
pause playback
m or M
X
Press the button again to resume play after pause.
eject the cassette
xZ
2
Press xZ to open the tape compartment and insert a blank tape. Use TYPE I
(normal) tape only.
Select the program source you want to record.
To record from the CD player
Press CD and insert a CD (See “Playing a CD”).
To record from the radio
Press RADIO BAND•AUTO PRESET and tune in the station you want (See
“Listening to the radio”).
3
Press z to start recording.
(n is depressed automatically.)
To
stop recording
pause recording
Press
xZ
X
Press the button again to resume recording.
Tips
• Adjusting the volume or the audio emphasis will not affect the recording level.
• If the AM or MW/LW program makes a whistling sound after you've pressed z in step 3, press
MODE to select the position of ISS (Interference Suppress Switch) that most decreases the noise.
• For the best results, use the AC power as a power source for recording.
• To erase a recording, proceed as follows:
1 Insert a tape with the recording you want to erase.
2 Press TAPE.
3 Press z.
Falling asleep to music
1
2
3
Cargue un CD en el compartimiento de CD.
Pulse Z PUSH OPEN/CLOSE para cerrar el compartimiento de CD.
Pulse u.
El reproductor reproduce todas las pistas una vez.
Para
detener la reproducción
introducir pausas durante la
reproducción
Pulse
x
pasar a la pista siguiente
>
.
Z PUSH OPEN/CLOSE
el botón numérico de la pista.
localizar una pista específica
directamente*
localizar un punto mientras
escucha el sonido
localizar un punto mientras o
bserva el visor
> (avance) o . (retroceso) durante la reproducción
hasta que lo encuentre.
> (avance) o . (retroceso) durante la pausa hasta
que lo encuentre.
* No será posible localizar pistas específicas si “SHUF” o “PGM” está iluminado en el visor. Desactive
la indicación pulsando x.
Sugerencia
Para localizar una pista de número superior a 10, pulse >10 primero y, a continuación, los botones
numéricos correspondientes.
Ejemplo: Para reproducir la pista número 23, pulse >10 primero y, a continuación, 2 y 3.
Pulse DISPLAY•ENT•MEMORY en el modo de parada (consulte la ilustración E).
Para comprobar el tiempo restante
Pulse DISPLAY•ENT•MEMORY varias veces mientras se reproduce el CD. La indicación
cambia de la siguiente forma:
t número de la pista actual y tiempo de reproducción
r
número y tiempo restante de la pista actual*
r
número de pistas restantes y tiempo restante del CD
Pulse MODE hasta que “REP 1” “REP ALL” “SHUF” “SHUF REP” “PGM” “PGM REP”
aparezca en el visor. A continuación, realice lo siguiente:
To tune in a preset station over 10, press >10 first, then corresponding number
buttons.
(Example: To tune in a preset station 12, press >10 and 1 first, and then press 2.)
Note
When you are playing a tape using this function:
If the tape length of one side is longer than the set time, the player will not go off until the tape reaches
the end.
Para
repetir una pista
Seleccione
“REP 1”
Después realice esta operación
Pulse el botón numérico de la pista que desee
repetir.
repetir todas las pistas
realizar la reproducción
aleatoria
“REP ALL”
“SHUF”
Pulse u.
Pulse u.
repetir pistas en orden
aleatorio
realizar la reproducción
de programa
“SHUF REP”
Pulse u.
“PGM”
repetir pistas programadas
“PGM REP”
Pulse los botones numéricos de las pistas que
desee programar en el orden deseado (máximo de
20 pistas) (consulte la ilustración F). Después
pulse u.
Pulse los botones numéricos de las pistas que
desee programar en el orden deseado (máximo de
20 pistas). Después pulse u.
To check the order of tracks before play, press DISPLAY•ENT•MEMORY.
Every time you press the button, the track number appears in the programmed order.
To change the current programme
Press x once if the CD is stopped and twice if the CD is playing. The current programme will be
erased. Then create a new programme following the programming procedure.
Tip
You can record your own programme. After you’ve created the programme, insert a blank tape and
press z to start recording.
Si la emisión de FM se oye con ruido, pulse MODE hasta que “Mono” aparezca en el visor. La radio se
oirá en monofónico.
Cambio del intervalo de sintonización de AM/MW
El intervalo de sintonización de AM/MW se presintoniza en fábrica de la siguiente forma:
Modelo para Argentina: 10 kHz
Otros modelos: 9 kHz
Si es preciso cambiar el intervalo de sintonización de AM/MW, realice lo siguiente:
1 Mientras mantiene pulsados los botones RADIO BAND•AUTO PRESET y x, desconecte
el cable de corriente de la toma de alimentación.
2 Mientras mantiene pulsados los botones RADIO BAND•AUTO PRESET y x, vuelva a
conectar el cable de corriente a la toma de alimentación. El intervalo de sintonización
cambia y “AM 9” “MW 9” o “AM 10” “MW 10” aparece en el visor durante 2 segundos.
Tras cambiar el intervalo de sintonización, deberá reajustar las emisoras de radio
memorizadas.
Es posible almacenar emisoras de radio en la memoria del reproductor. Puede memorizar hasta
30 emisoras de radio (CFD-S400), 20 para FM y 10 para AM en cualquier orden, o 40 emisoras
(CFD-S400L), 20 para FM y 10 para MW y LW en el orden que prefiera.
1
2
Pulse RADIO BAND•AUTO PRESET para seleccionar la banda.
3
Pulse DISPLAY•ENT•MEMORY.
Las emisoras se almacenan en la memoria desde las frecuencias inferiores hasta
las superiores.
Mantenga pulsado RADIO BAND•AUTO PRESET durante 2 segundos hasta
que “AUTO” parpadee en el visor.
Si no es posible memorizar una emisora automáticamente
* Para las pistas cuyos números sean superiores a 20, el tiempo restante aparece como “- -:- -” en el
visor.
Press SLEEP to select the minutes until the player goes off automatically.
Each time you press the button, the indication changes as follows: “60” t
“90” t “120” t “OFF” t “10” t “20” t “30”.
Press OPERATE (POWER) to turn off the power.
El reproductor explora las frecuencias de radio y se detiene automáticamente
cuando encuentra una emisora de señal nítida.
Si no puede sintonizar alguna emisora, pulse el botón varias veces para que la
frecuencia cambie intervalo a intervalo.
Memorización de emisoras de radio
Para comprobar el número total de pistas y el tiempo de reproducción
Selección del modo de reproducción
Press the number buttons to tune in the stored station.
Mantenga pulsado TUNE + o – hasta que los dígitos de frecuencia comiencen a
cambiar en el visor.
Reproducción de cintas
1
2
Pulse TAPE (activación directa).
3
Pulse n.
Para cancelar el modo de reproducción seleccionado
Pulse MODE hasta que el modo seleccionado desaparezca del visor.
Para comprobar las pistas programadas y el orden de reproducción mediante el
visor
Pulse DISPLAY•ENT•MEMORY para comprobar el orden de las pistas antes de la reproducción.
Cada vez que pulse el botón, el número de la pista aparecerá en el orden programado.
Para cambiar el programa actual
Pulse x una vez si el CD está parado y dos si está reproduciéndose. El programa actual se borrará.
A continuación, cree un programa nuevo. Para ello, realice el procedimiento de programación.
Sugerencia
Es posible grabar su propio programa. Tras crear el programa, inserte una cinta virgen y pulse z para
iniciar la grabación.
Deberá memorizar manualmente la emisora de señal débil.
1 Pulse RADIO BAND•AUTO PRESET para seleccionar la banda.
2 Sintonice la emisora que desee.
3 Mantenga pulsados durante unos 2 segundos los botones numéricos en los que desee
memorizar la nueva emisora.
Para seleccionar un número de memorización superior a 10, pulse >10 primero y, a
continuación, los botones numéricos correspondientes.
Es preciso mantener pulsado durante unos 2 segundos el botón del último número.
(Ejemplo: Para seleccionar 12, pulse >10 y 1 primero y, a continuación, mantenga pulsado 2
durante unos 2 segundos.)
Sintonización de emisoras memorizadas
1
2
Pulse xZ para abrir el compartimiento de cintas e inserte una cinta grabada.
Cierre el compartimiento. Utilice solamente cintas TYPE I (normales).
Para
detener la reproducción
avanzar rápidamente la cinta
o rebobinarla
Pulse
xZ
introducir pausas durante la
reproducción
X
Vuelva a pulsar el botón para reanudar la reproducción tras
la pausa.
xZ
expulsar el casete
moM
Grabación
1
Pulse xZ para abrir el compartimiento de cintas e inserte una cinta virgen.
Utilice solamente cintas TYPE I (normales).
2
Seleccione la fuente de programa que desee grabar.
Para grabar del reproductor de CD
Pulse CD e inserte un CD (consulte “Reproducción de discos compactos”).
Para grabar de la radio
Pulse RADIO BAND•AUTO PRESET y sintonice la emisora que desee
(consulte “Recepción de la radio”).
3
Uso del visor
Press SLEEP to display “SLEEP.”
To cancel the sleep function
Pulse RADIO BAND•AUTO PRESET hasta que el visor muestre la banda que
desee (activación directa).
Cada vez que pulse el botón, la indicación cambiará de la siguiente forma:
CFD-S400: “FM” t “AM”
CFD-S400L: “FM” t “MW” t “LW”.
Sugerencia
Play the music source you want.
Press RADIO BAND•AUTO PRESET to select the band.
2
u
Vuelva a pulsar el botón para reanudar la reproducción tras
la pausa.
Press MODE until the selected mode disappears from the display.
To check the programmed track and playing order in the display
1
Pulse CD (activación directa).
retroceder a la pista anterior
extraer el CD
Recording
1
1
2
3
4
Recepción de la radio
Pulse z para iniciar la grabación.
(n se pulsa de forma automática.)
Para
detener la grabación
Pulse
xZ
introducir pausas durante la grabación
X
Vuelva a pulsar el botón para reanudar la grabación.
Sugerencias
• El ajuste del volumen o del énfasis de sonido no afectará al nivel de grabación.
• Si el programa de AM o MW/LW emite un sonido silbante después de pulsar z en el paso 3, pulse
MODE para seleccionar la posición de ISS (interruptor de supresión de interferencias) que más
reduzca el ruido.
• Para obtener resultados óptimos, utilice CA como fuente de alimentación para grabar.
• Para borrar grabaciones, realice lo siguiente:
1 Inserte la cinta cuya grabación desee borrar.
2 Pulse TAPE.
3 Pulse z.
Desactivación automática del sistema
1
2
3
Reproduzca la fuente de música que desee.
Pulse SLEEP para que aparezca “SLEEP”.
Pulse SLEEP para seleccionar los minutos tras los cuales el reproductor se
apagará automáticamente.
Cada vez que pulse el botón, la indicación cambiará de la siguiente forma: “60”
t “90” t “120” t “OFF” t “10” t “20” t “30”.
Para cancelar la función de desactivación
Pulse RADIO BAND•AUTO PRESET para seleccionar la banda.
Pulse OPERATE (POWER) para desactivar la alimentación.
Pulse los botones numéricos para sintonizar la emisora almacenada.
Nota
Para sintonizar una emisora memorizada de número superior a 10, pulse >10
primero y, a continuación, los botones numéricos correspondientes.
(Ejemplo: Para sintonizar la emisora memorizada con el número 12, pulse >10 y
1 primero y, a continuación, pulse 2.)
Cuando reproduzca una cinta utilizando esta función:
Si la longitud de una cara de la cinta es superior al tiempo ajustado, el reproductor no se apagará hasta
que la cinta llegue al final.